
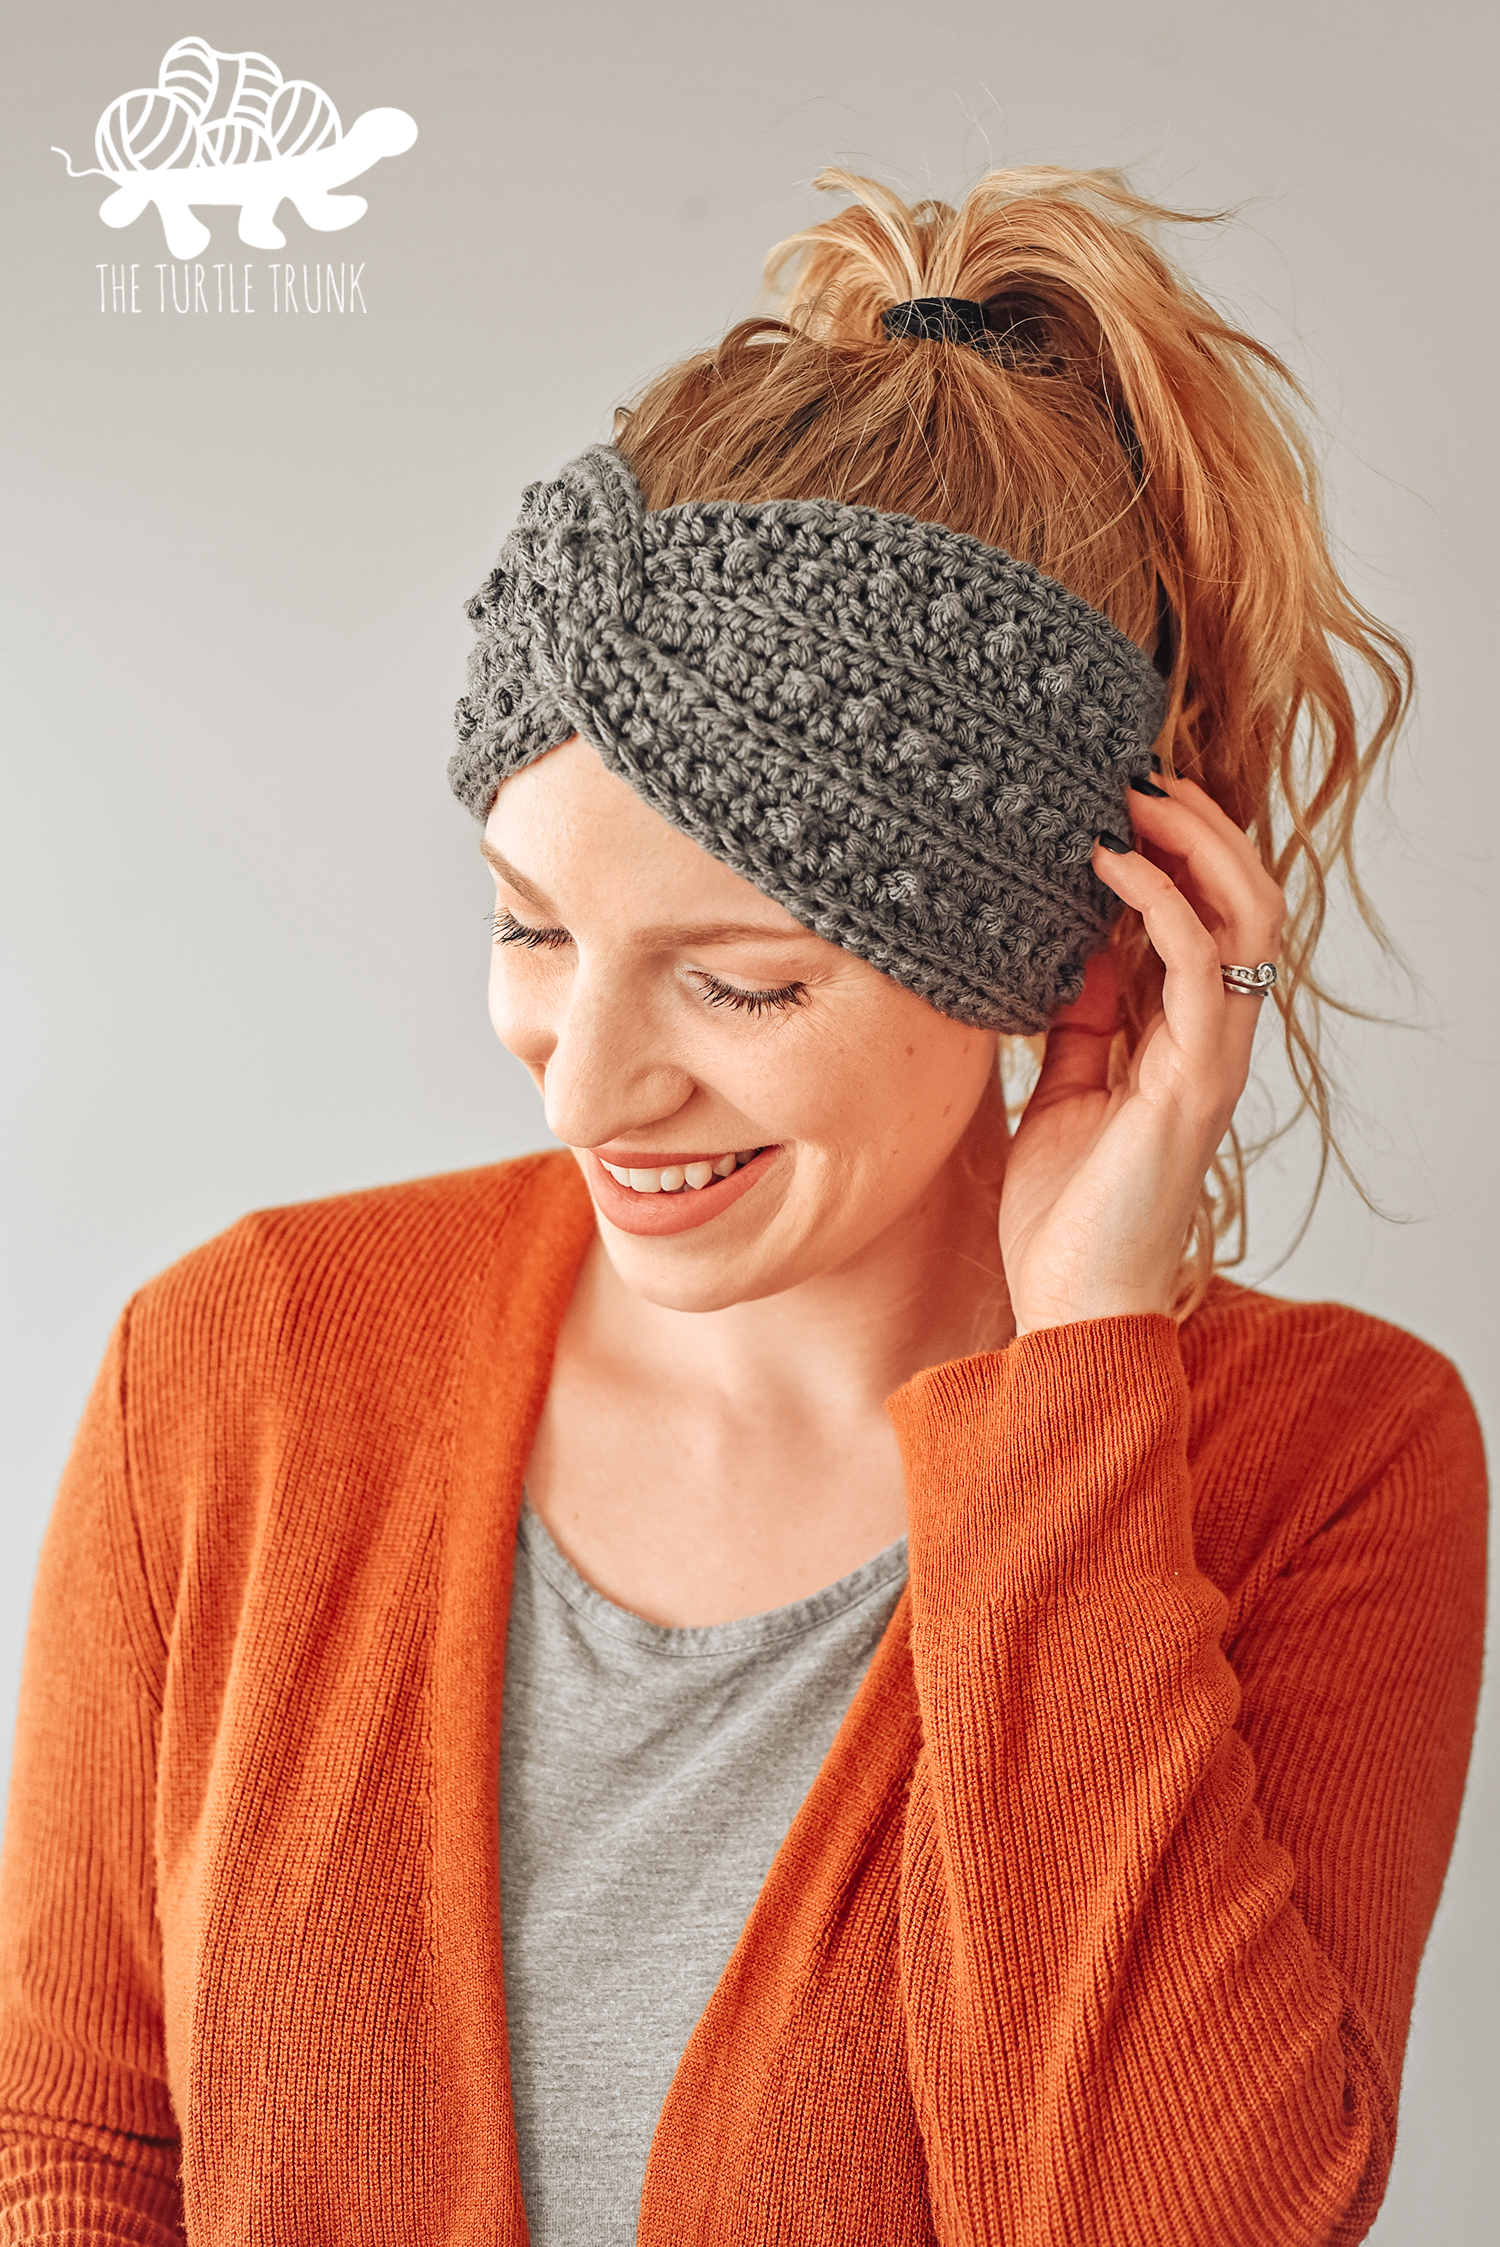
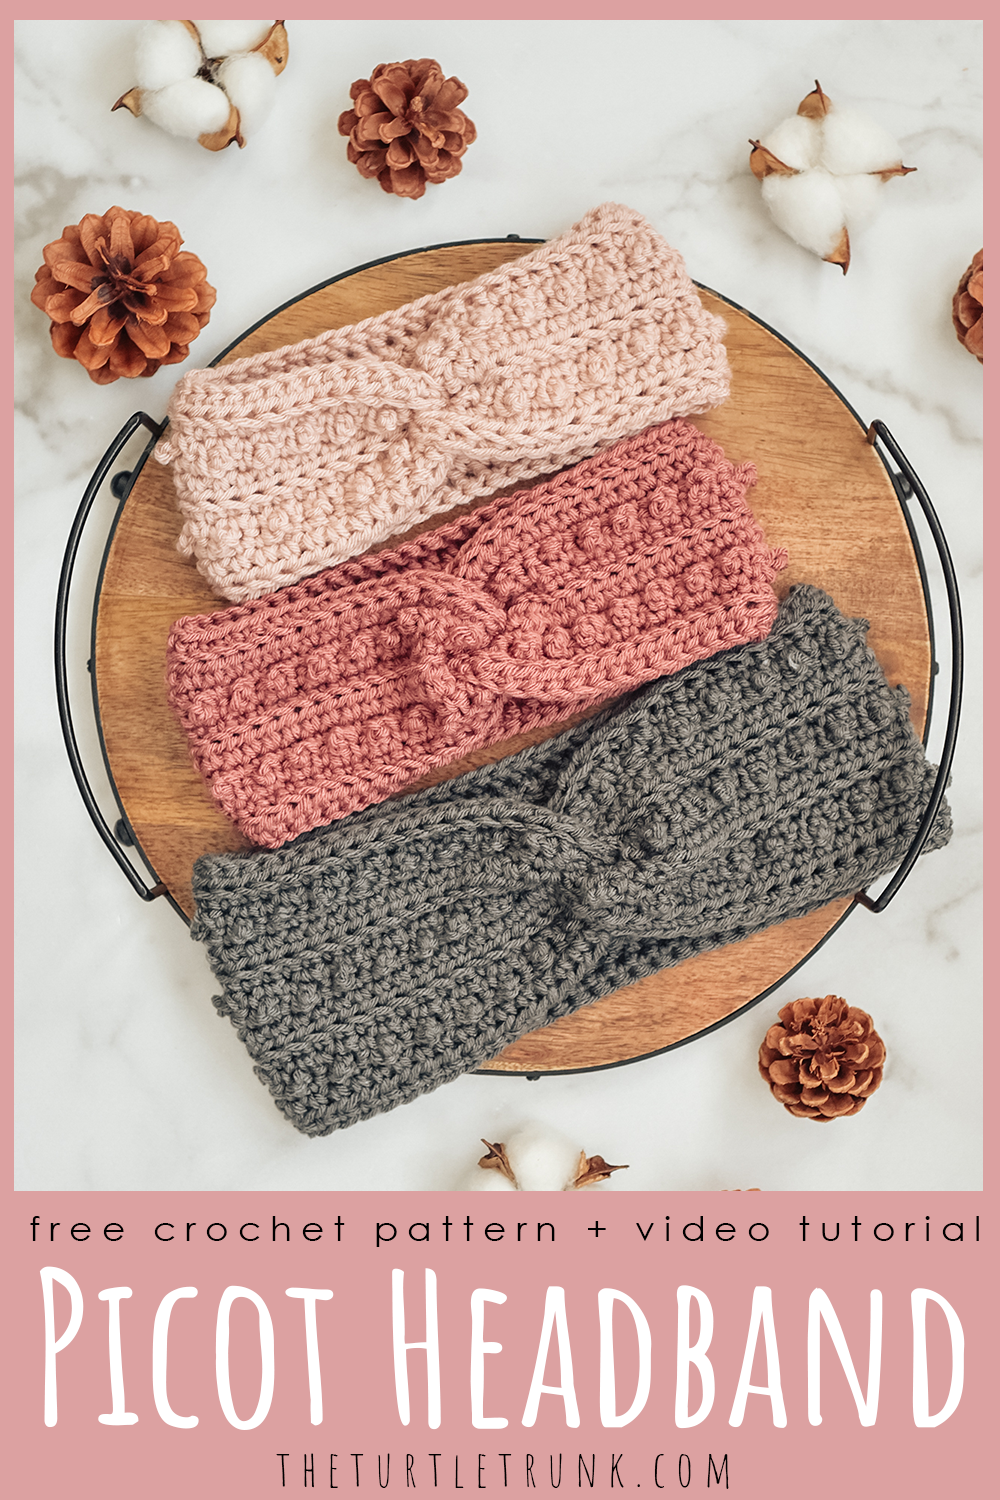
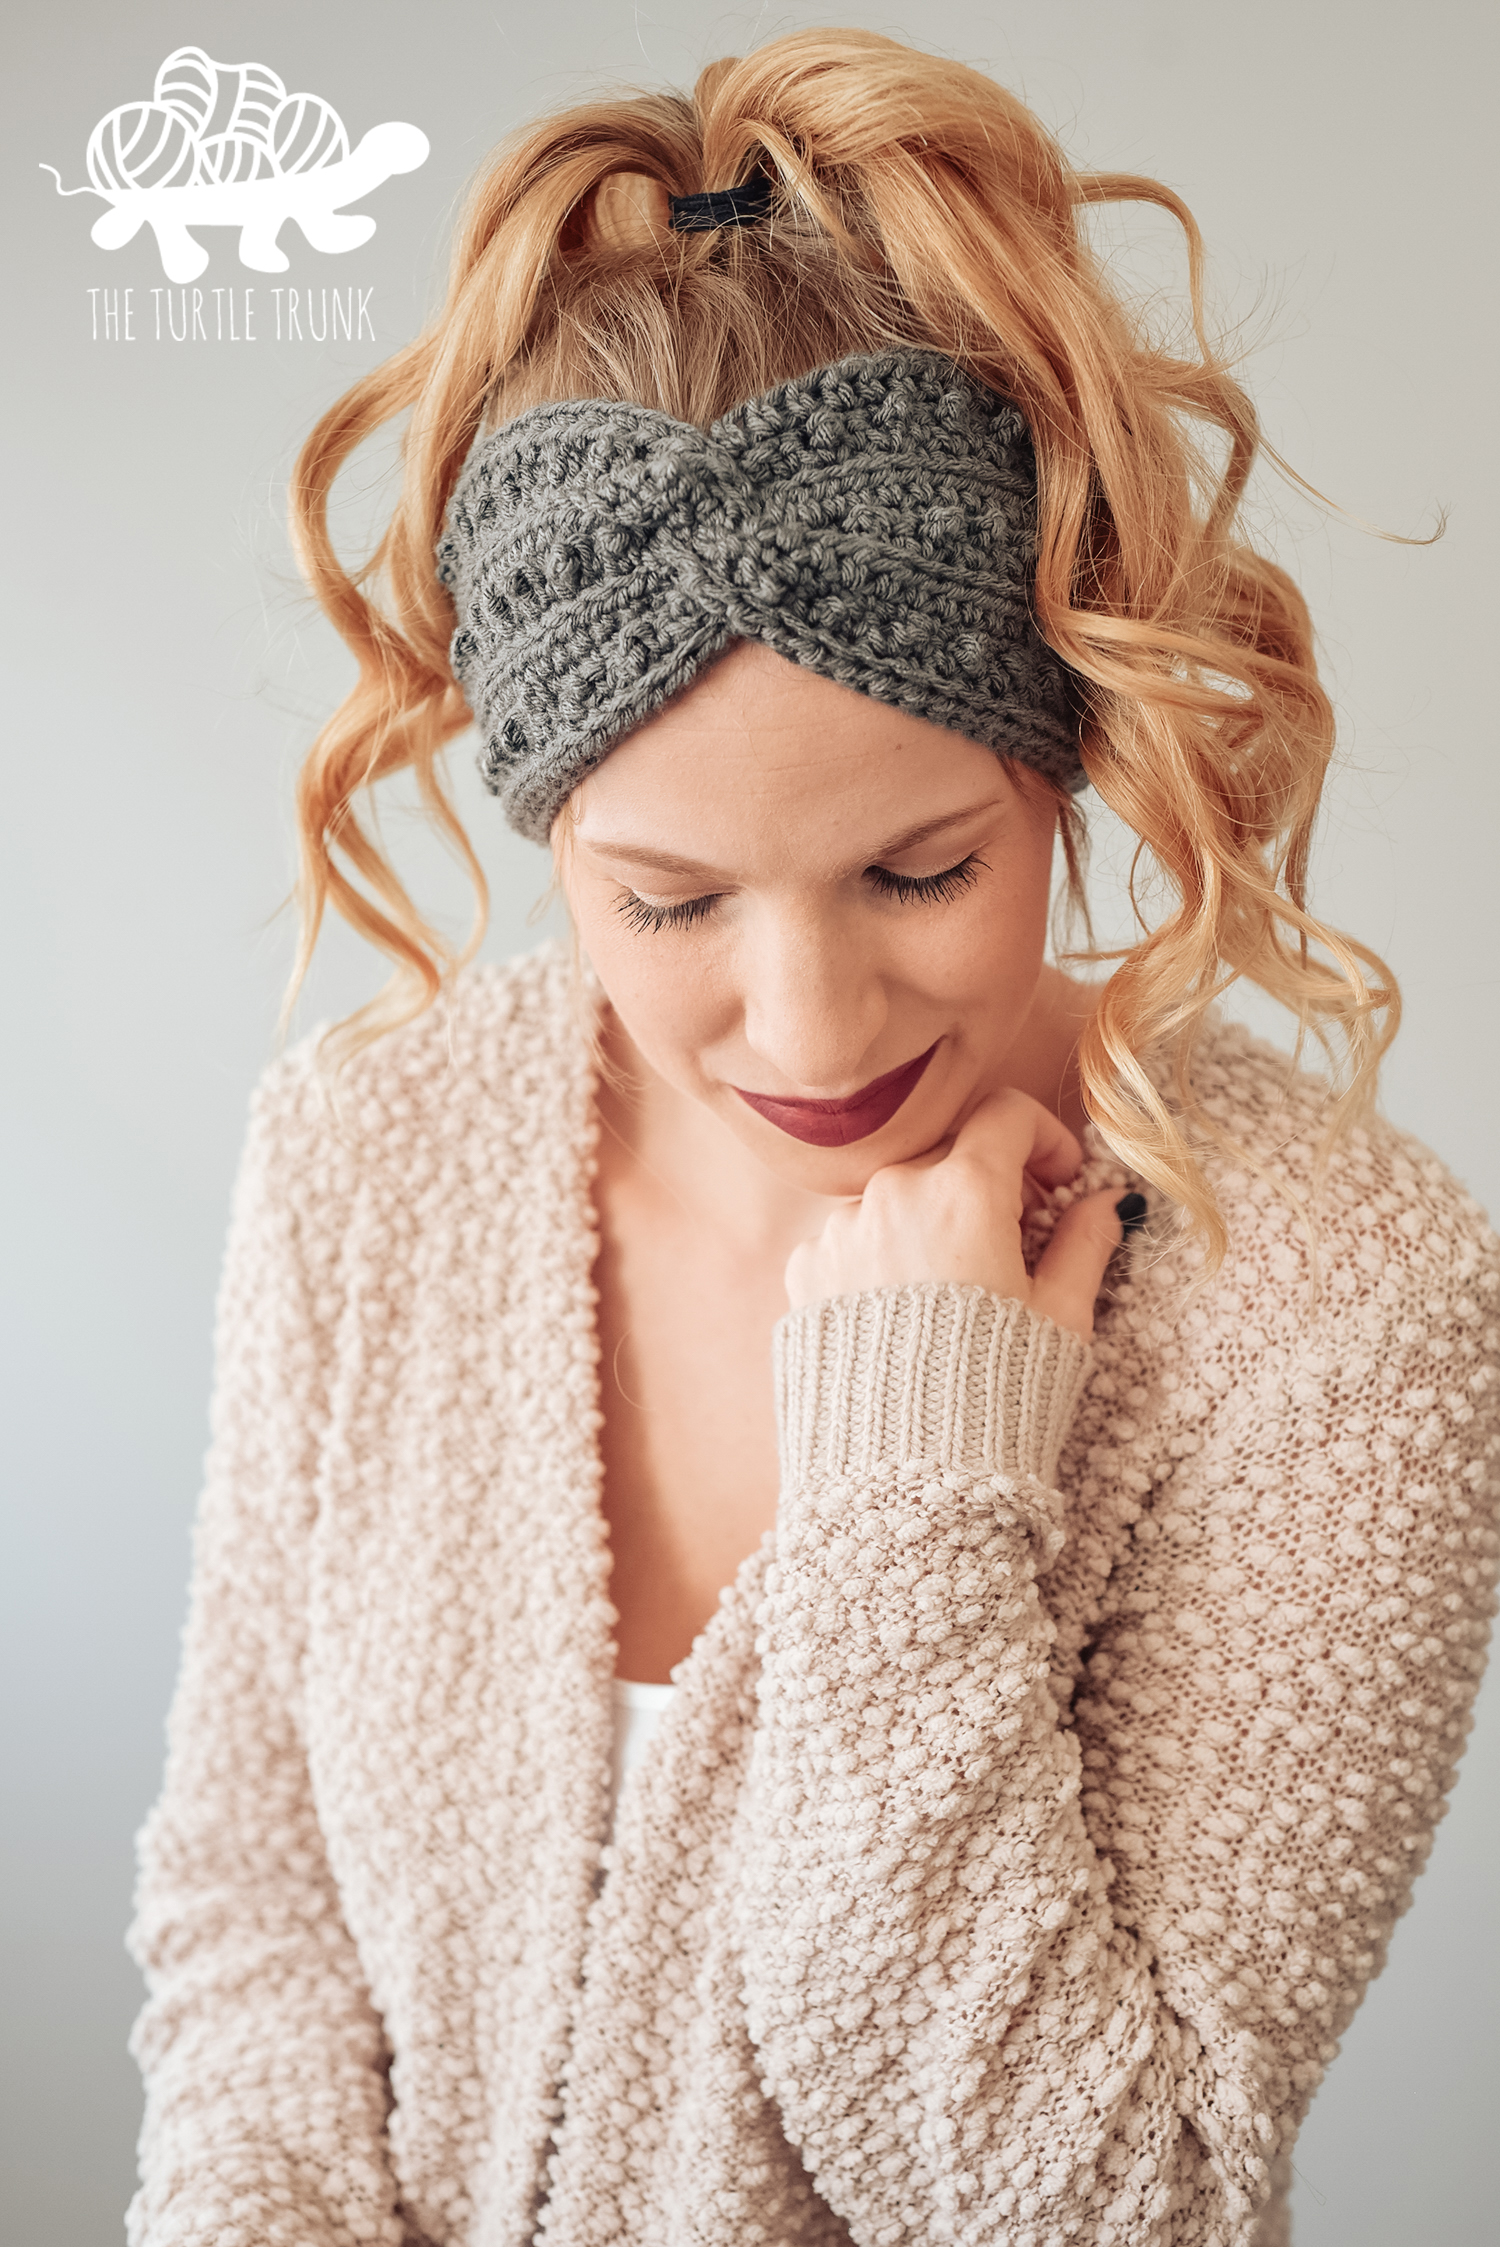
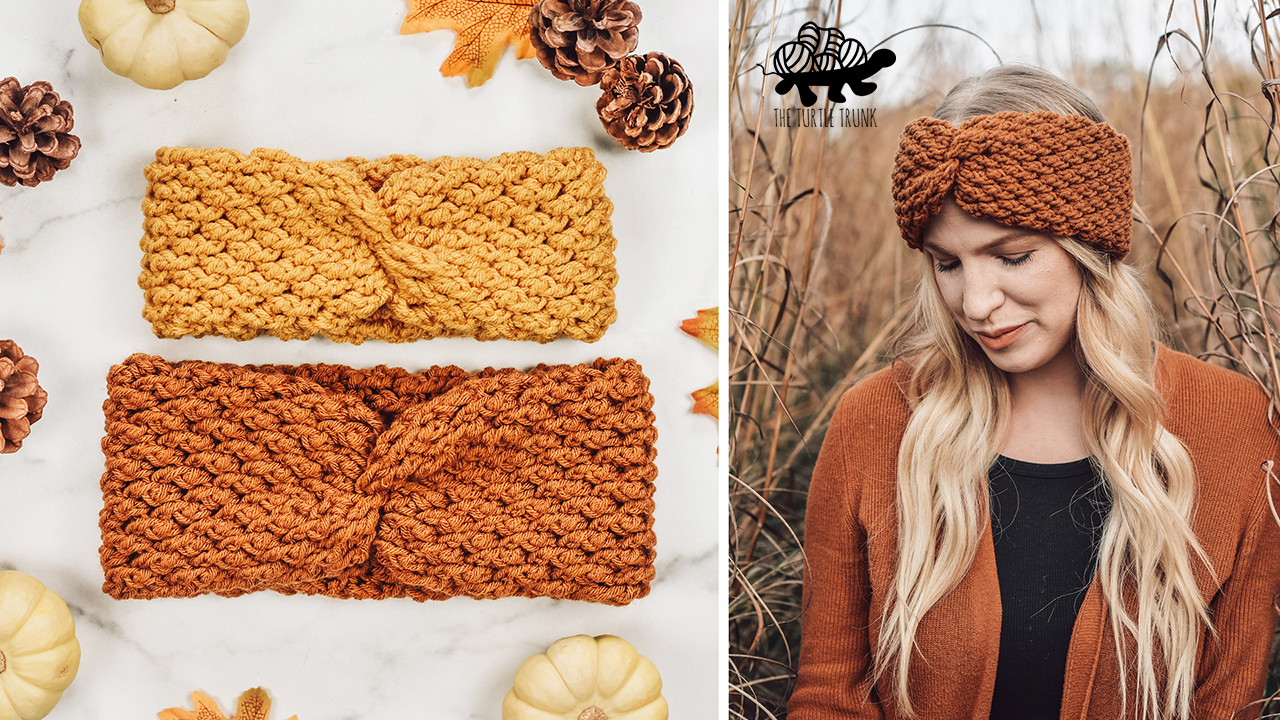
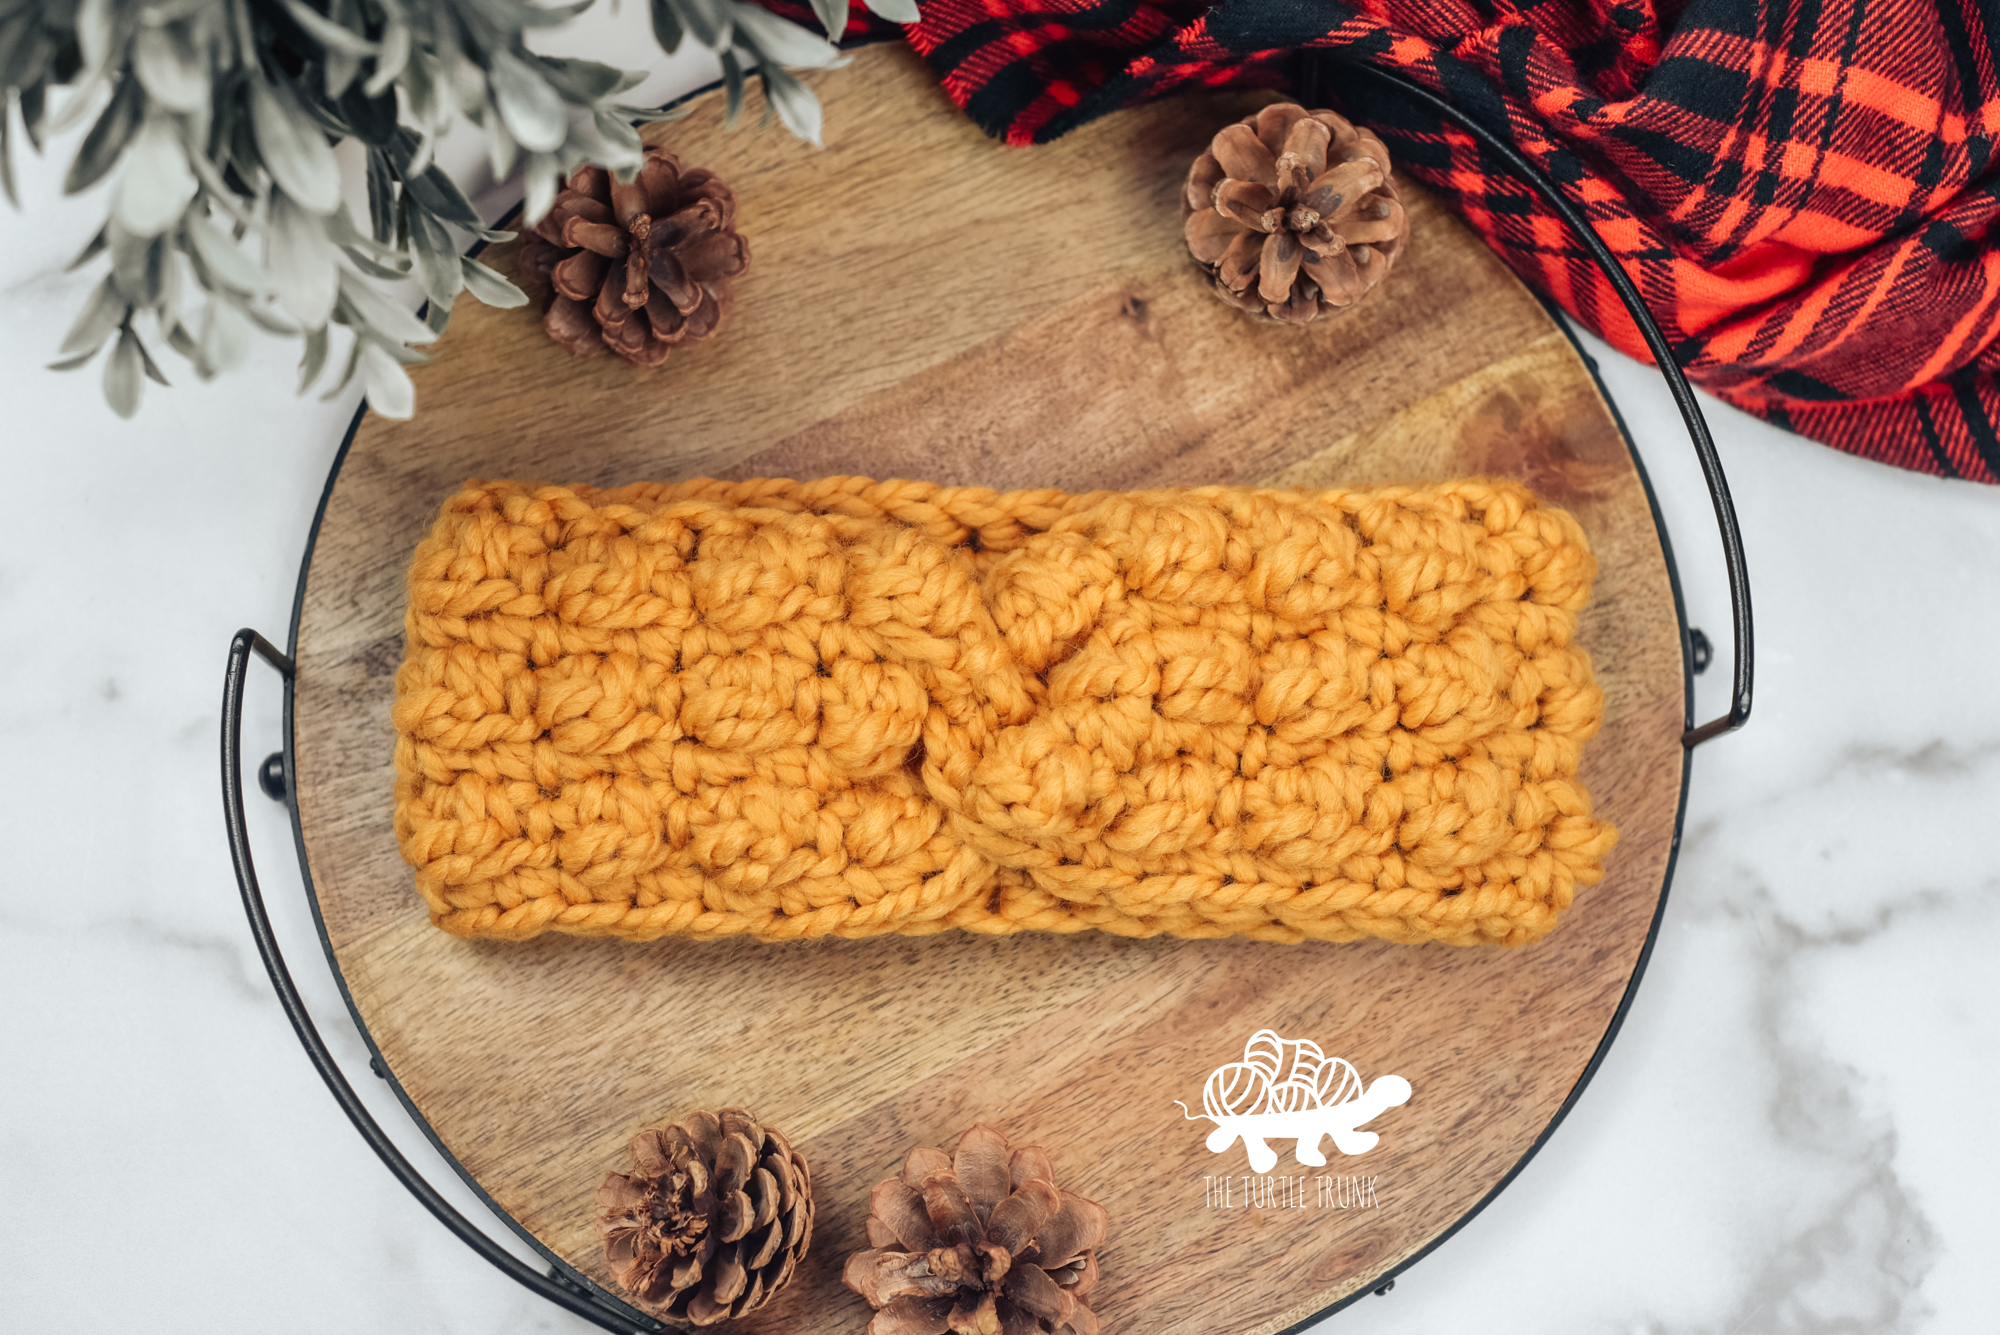
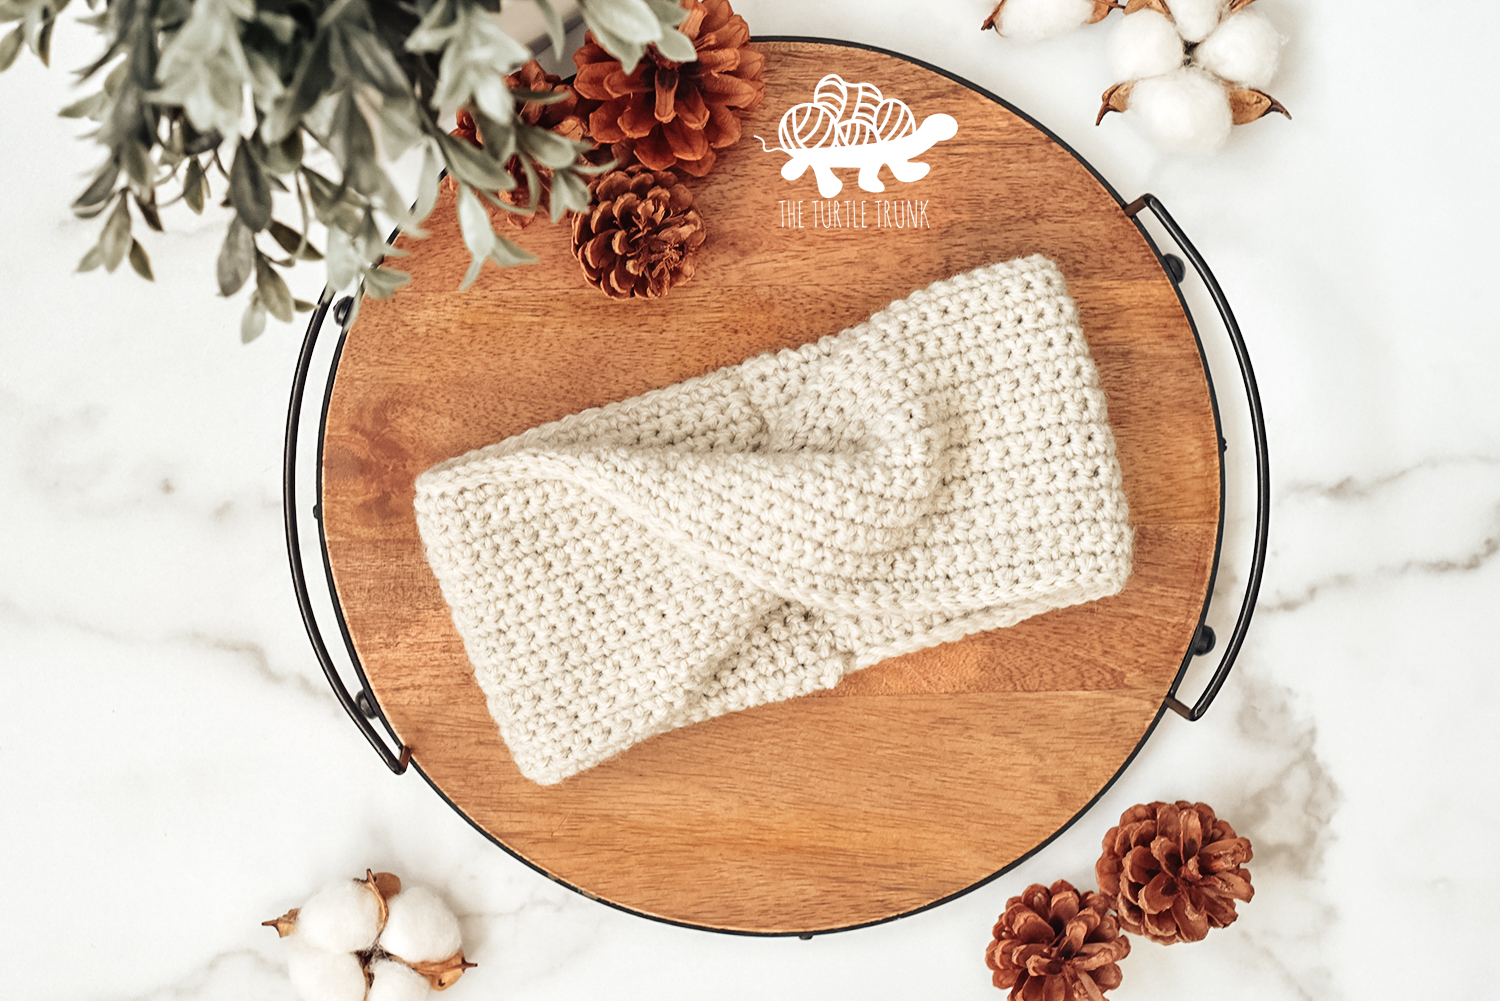
Picot Headband Crochet Pattern
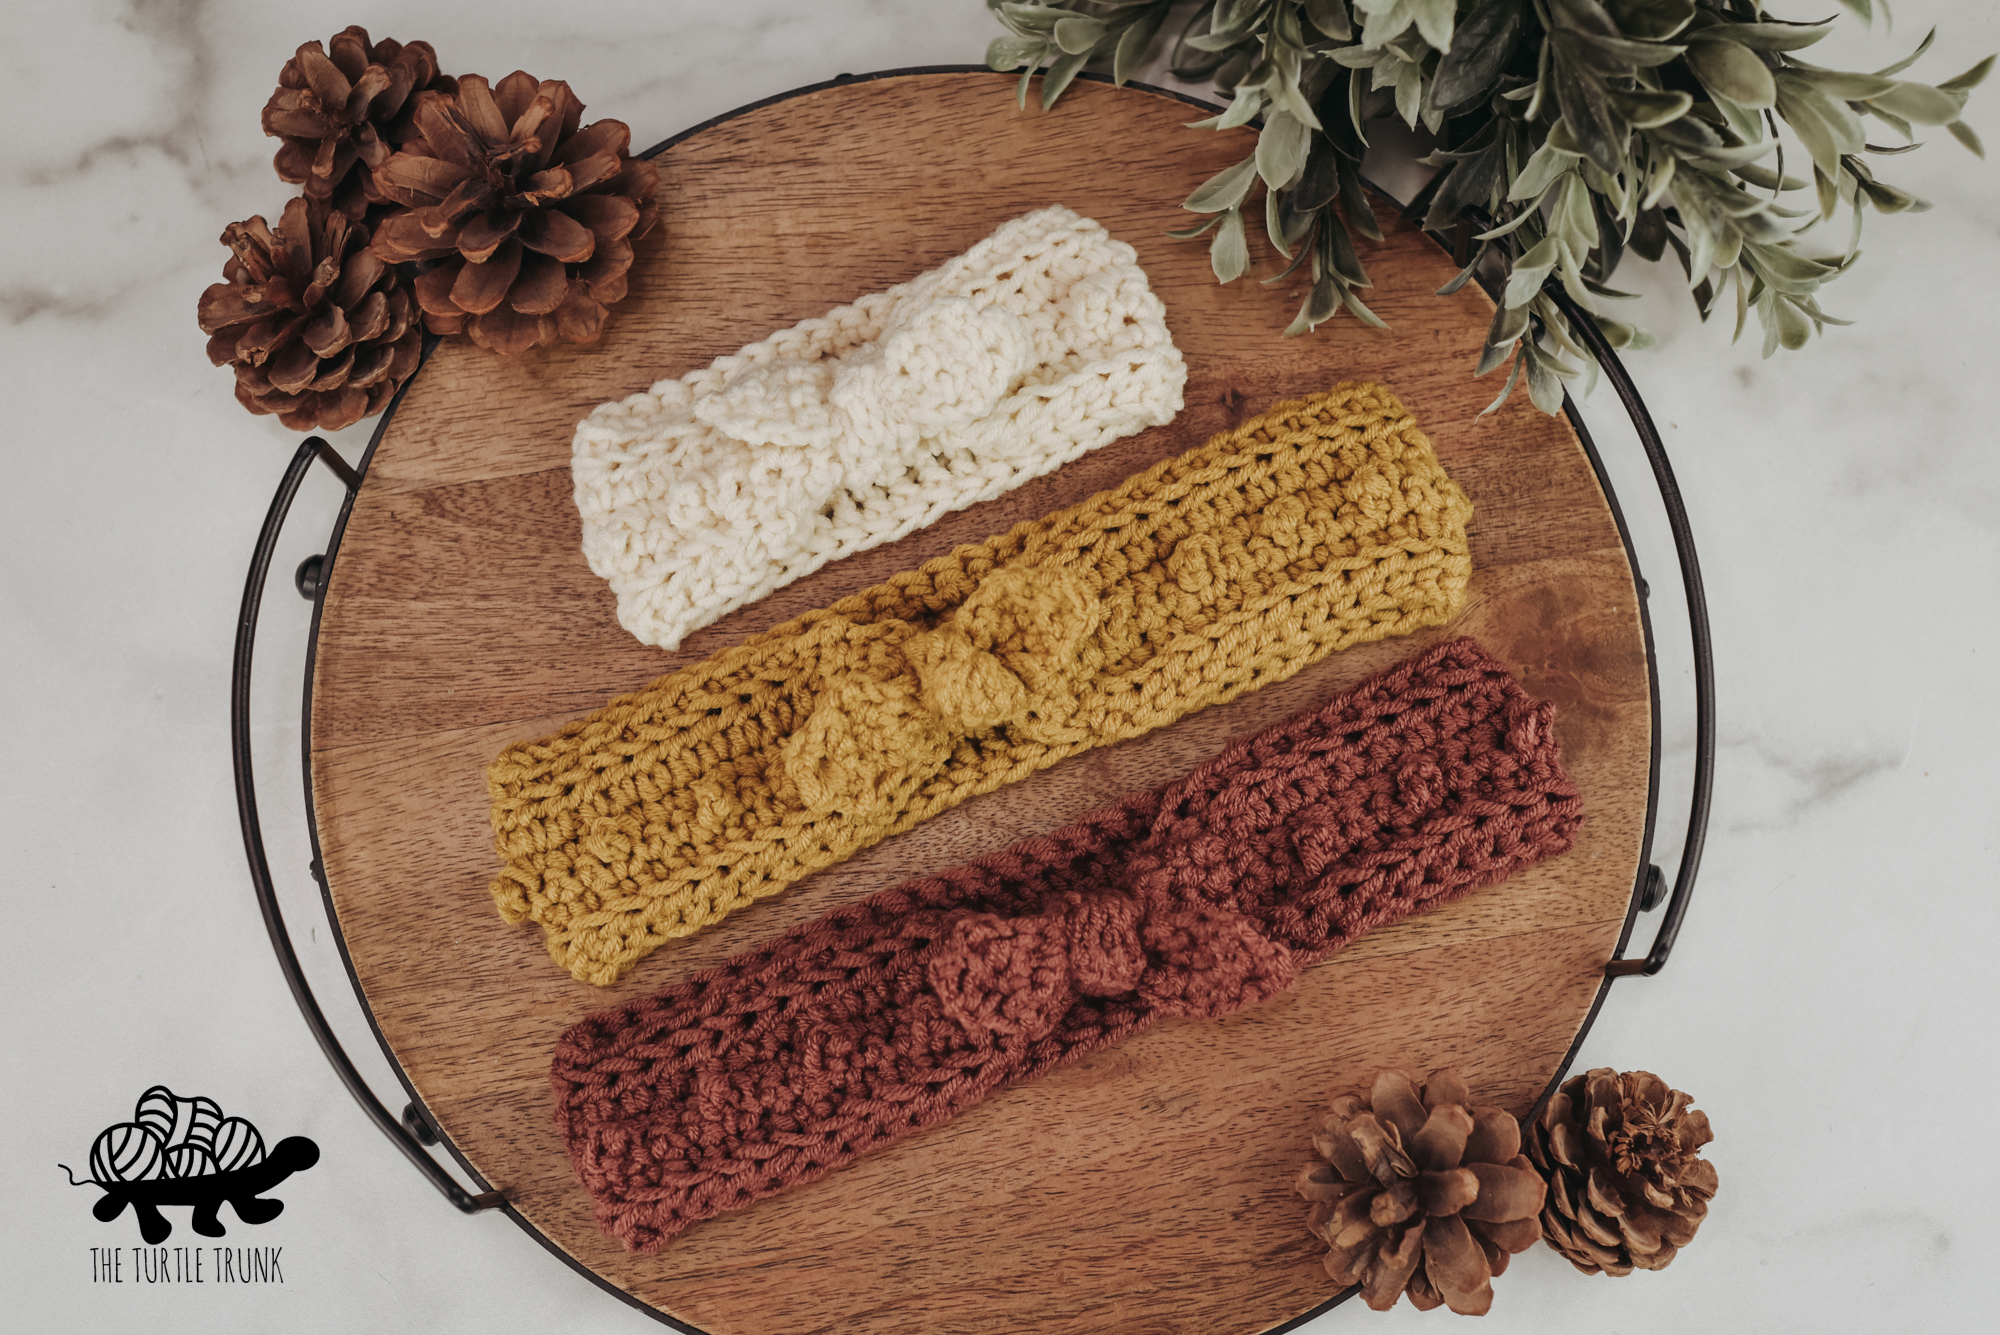
The Picot Headband is a quick and easy crochet headband that features mini bobble stitches and as well as a twisted front. This crochet headband pattern includes 8 sizes which range from baby to adult so you can make one for anyone! The Picot Headband is perfect for keeping your eyes warm in the cold weather but still looking stylish!
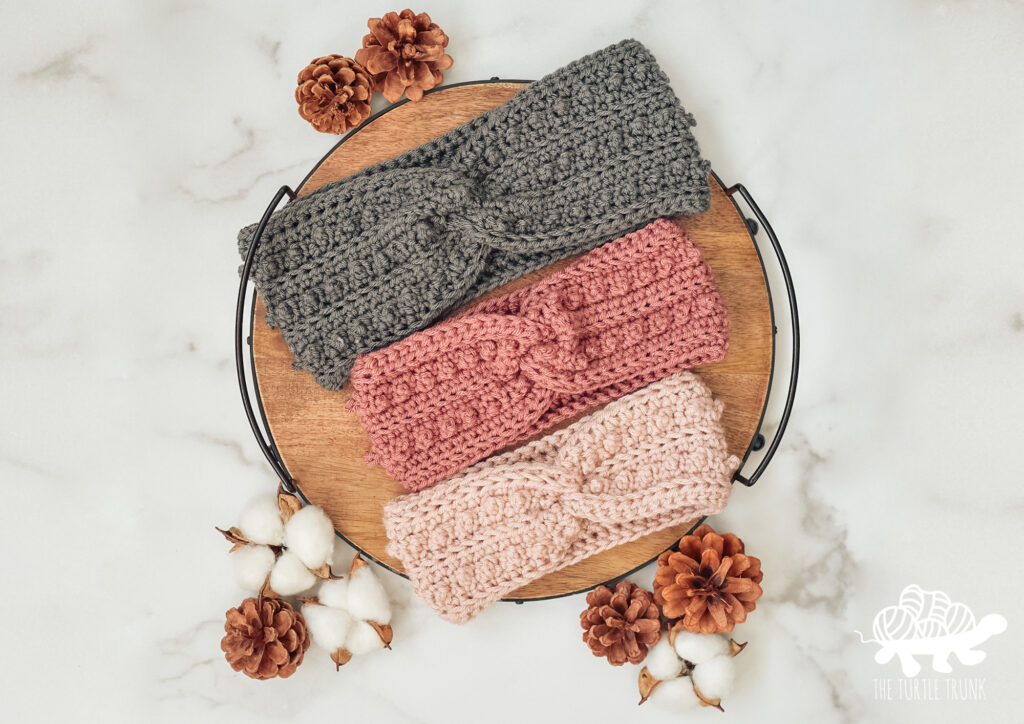
The Picot Headband pattern is my MOST popular pattern, and for good reason! There are so many reasons why I love this design and why I think you’re going to love it too! This pattern works up quickly and uses little yarn, making it a great stash buster or last minute gift! The instructions are easy to follow a long with as you just repeat the same 4 rows until your desired width is reached. This design does use some special stitches that some may not be familiar with, so I have included explanations for each of those below or you can follow along with the video tutorial!
I know have a narrower version of this pattern, the Skinny Picot Headband, which is more suited for warmer weather and for keeping your hair back! If you enjoy the original Picot Headband be sure to check out the Skinny Picot Headband too!
Continue reading below to hear my inspiration for this pattern and to learn more about the yarn I used, then scroll down for the written pattern!
FOLLOW ALONG WITH THE AD FREE & PRINTABLE PDF PATTERN FROM
ETSY AND RAVELRY!
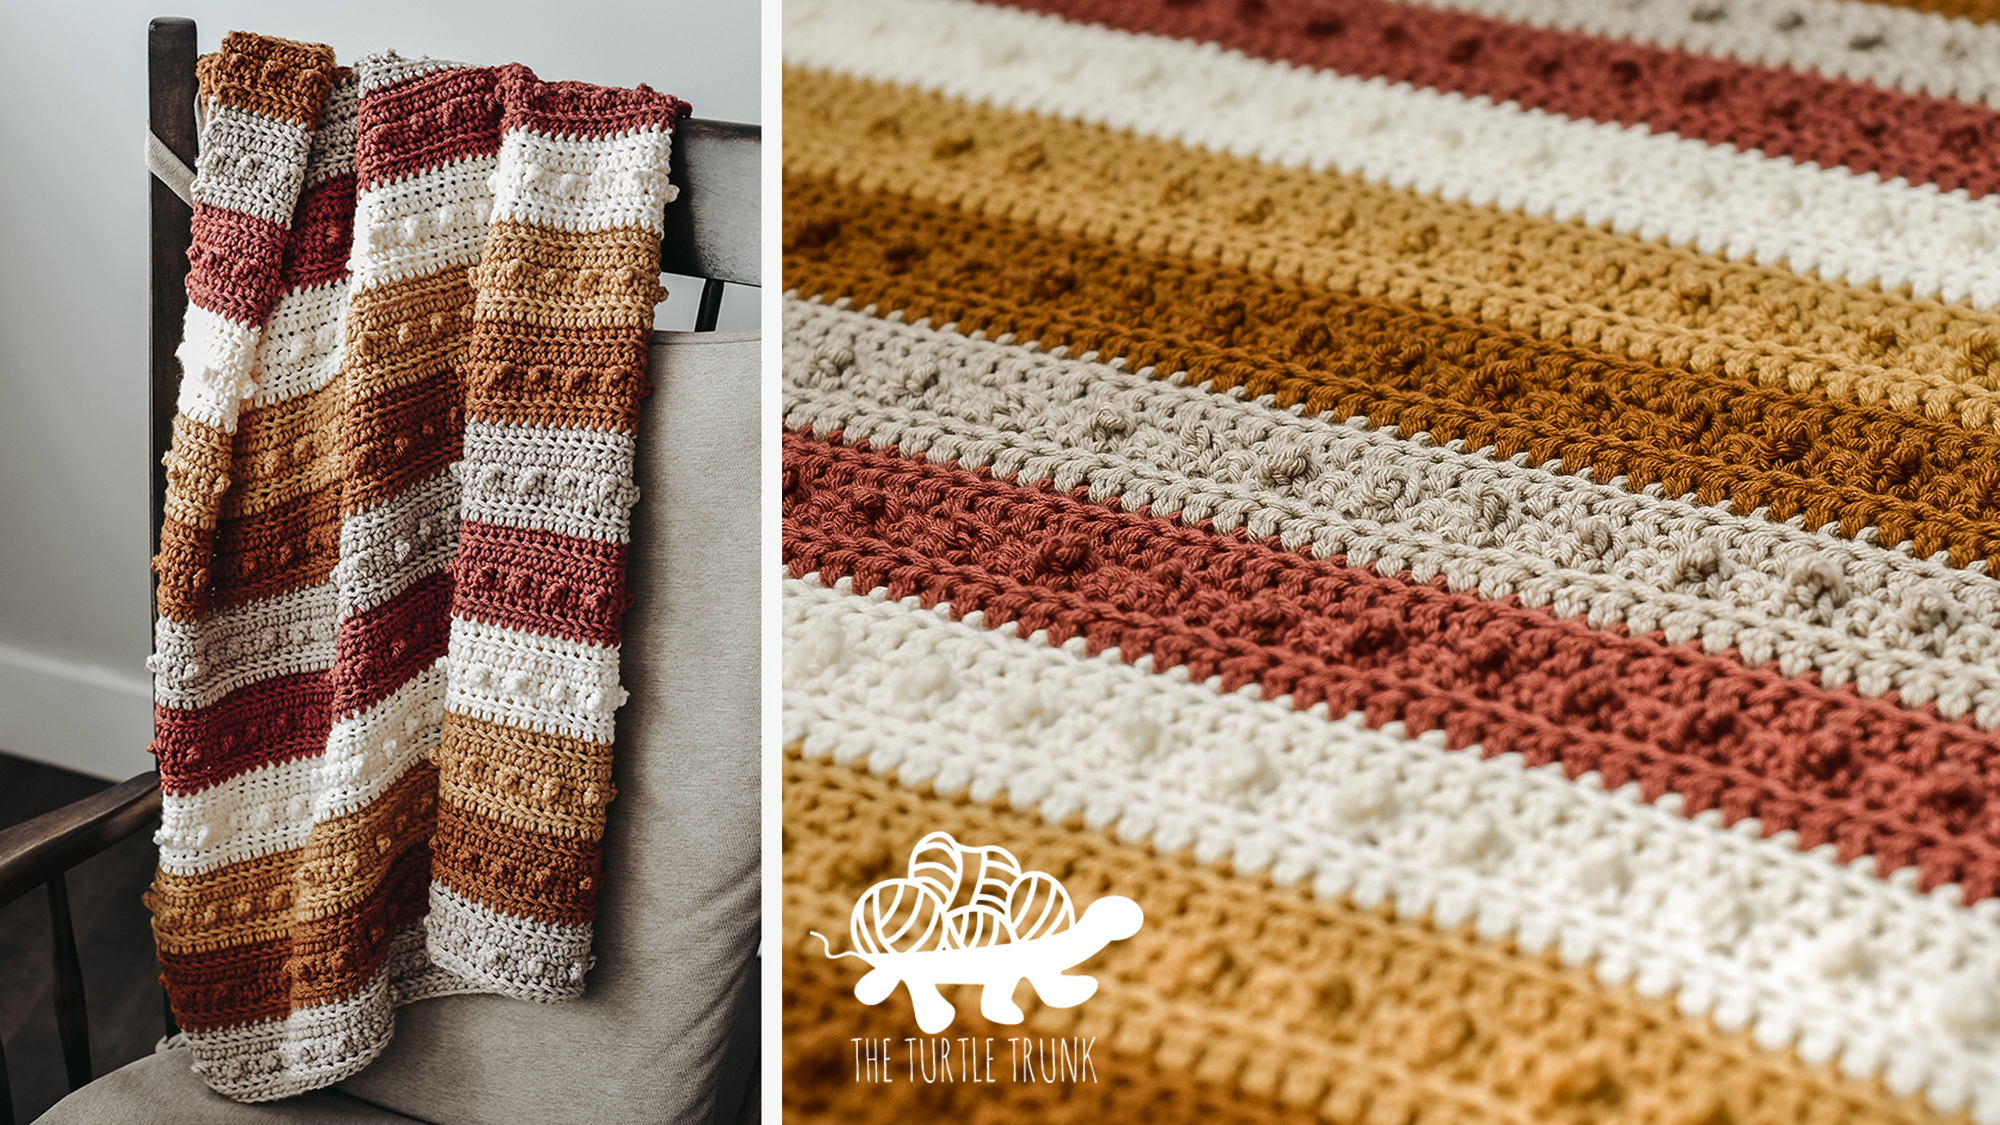
If you enjoy this pattern, then check out these other picot patterns: Skinny Picot Headband, Picot Scarf & Cowl, Picot Beanie, and Picot Blanket.
Inspiration
This pattern uses the picot single crochet stitch, which if you’ve been here a while, you know is one of my favorite crochet stitches! I use this stitch in a lot of my patterns (like the Picot Pillow, Picot Beverage Holder, Dotty Dishcloth to name a few). If you enjoy this stitch as much as I do, just search “picot” on my blog and you’ll come up with lots more fun patterns!
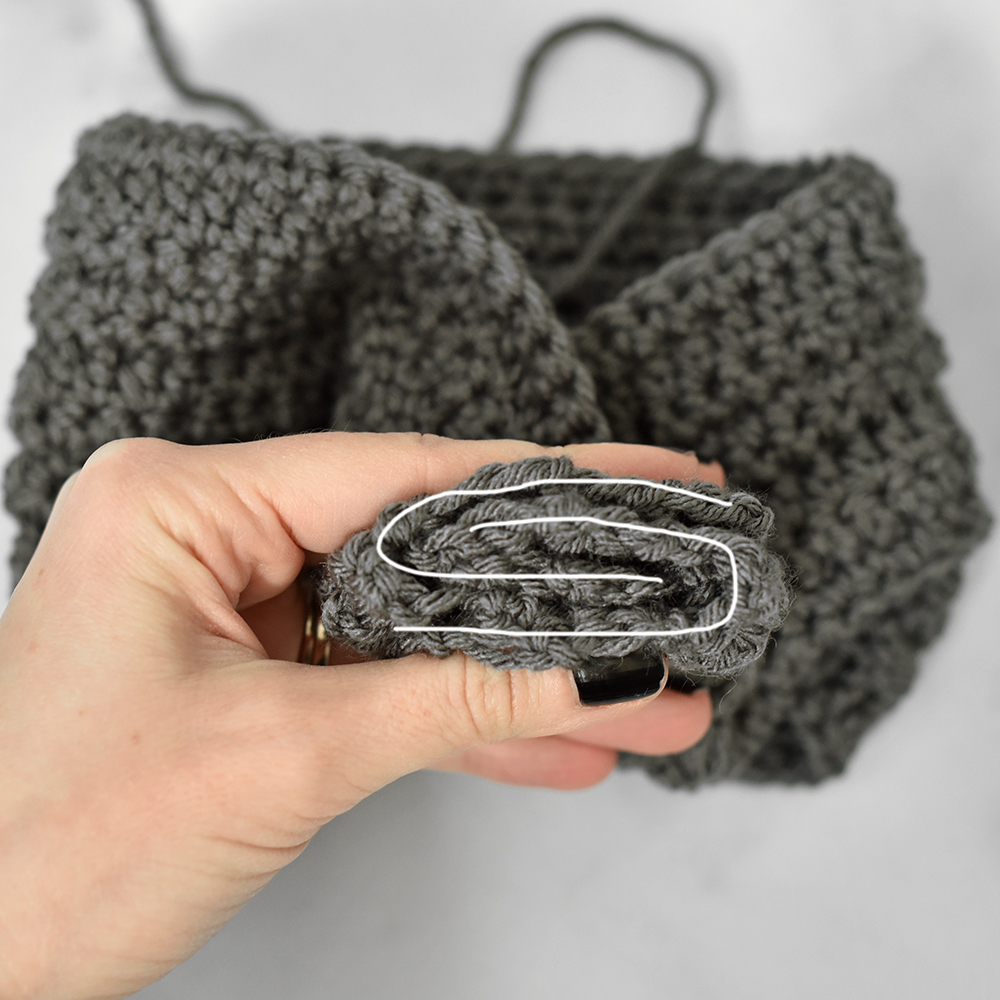
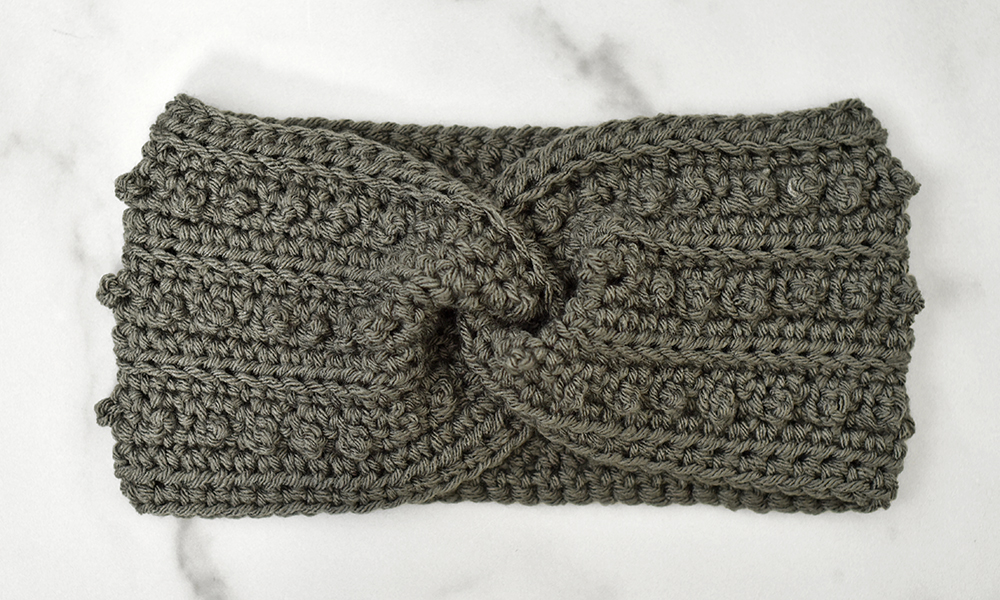
The Picot Headband features a lot of texture and a knot like front which makes it both fun and modern. The headband is worked in back and forth rows then sewn up at the end in a particular way to create the knot like look! If you’d rather not have the knot, then you can simply, sew the ends together straight and it will just be a regular headband!
Sizes
Instructions for the Picot Headband include 8 sizes! Ranging from newborn to adult large, you’ll be able to make this headband for anyone! You can also easily adjust the sizing by working more or less stitches or more or less rows! To adjust the length, add more or less foundation half double crochet stitches to row 1. Be sure to work an odd number of stitches though! To adjust the width, repeat rows 3-6 as many times as necessary to reach your desired width.
| Sizes | Head Circumference | Headband Circumference | Headband Width |
| Baby Small (0-3 Months) | 13”-14” | 12.5” | 3” |
| Baby Medium (3-6 Months) | 14”-16” | 13.5” | 3” |
| Baby Large (6-12 Months) | 16”-18” | 15.5” | 3” |
| Child Small (1-3 Years) | 18”-19” | 17.5” | 3” |
| Child Large (3-10 Years) | 19”-21” | 18.5” | 3” |
| Teen/Adult Small | 21”-22” | 20.5” | 4” |
| Adult Medium | 22”-23” | 21.5” | 4” |
| Adult Large | 23”-24” | 22.5” | 4” |
Not ready to make just yet?! Pin this pattern for later!
Follow along with the video tutorial on YouTube!
Difficulty
Easy
Gauge
6.5 STs x 7 Rows = 2” x 2” (Rows 1-7)
Adjust hook size up or down to meet gauge
Notes
- Pattern is split up between baby, child, and adult sizes. Instructions are for size small first, followed by the next size up in parenthesis.
- The number in parenthesis at the end of each row represents the total number of stitches to be worked in each row.
- Beginning chains do not count as stitches throughout the whole pattern. At the end of each row, chain 1 and turn, work the first stitch into the last stitch from the previous row.
- Stitches between ** are to be repeated until the end of the row or until otherwise stated.
- Adjust the length of your headband to any size by simply adding or subtracting the number of stitches you work for the FHDC. Be sure to always work an odd number of stitches. Adjust the width of the headband by repeating rows 3-6 as many times as desired, each repeat is approximately 1” tall.
- The right side of your work will show the texture from the PSC and BLO stitches. The wrong side will be flat.
Supplies
- Medium (4) Weight Yarn
- Baby: approx. 47 yards / 1 oz
- Child: approx. 70 yards / 1.5 oz
- Adult: approx. 93 yards / 2 oz
- 5.50mm (I) Hook
- Yarn Needle
- Scissors
Abbreviations (US Terms)
ST(s) – Stitch(es)
CH – Chain
FHDC – Foundation Half Double Crochet
SC – Single Crochet
SC BLO – Single Crochet Back Loop Only
HDC – Half Double Crochet
PSC – Picot Single Crochet
Special Stitches
Check out the video tutorial if extra assistance is needed for the special stitches.
FHDC – Foundation Half Double Crochet
A FHDC is working your foundation chain and first row of HDC’s together in one.
CH 2, yarn over and insert hook into 2nd CH from hook. Yarn over, pull up a loop, yarn over and pull through the 1st loop on the hook (that is the CH you will work into for the next stitch), yarn over and pull through all 3 loops on your hook. That is the first FHDC. Now working into the CH you created at the bottom of the ST, work your next FHDC. *Yarn over, insert hook into the bottom CH, pull up a loop, yarn over and pull through 1st loop on the hook, yarn over and pull through all 3 loops on your hook.* Repeat ** until you reach the specified length.
If needed, try using a stitch marker to mark where your first stich was made and/or where you created the CH to help know to work your next stitch.
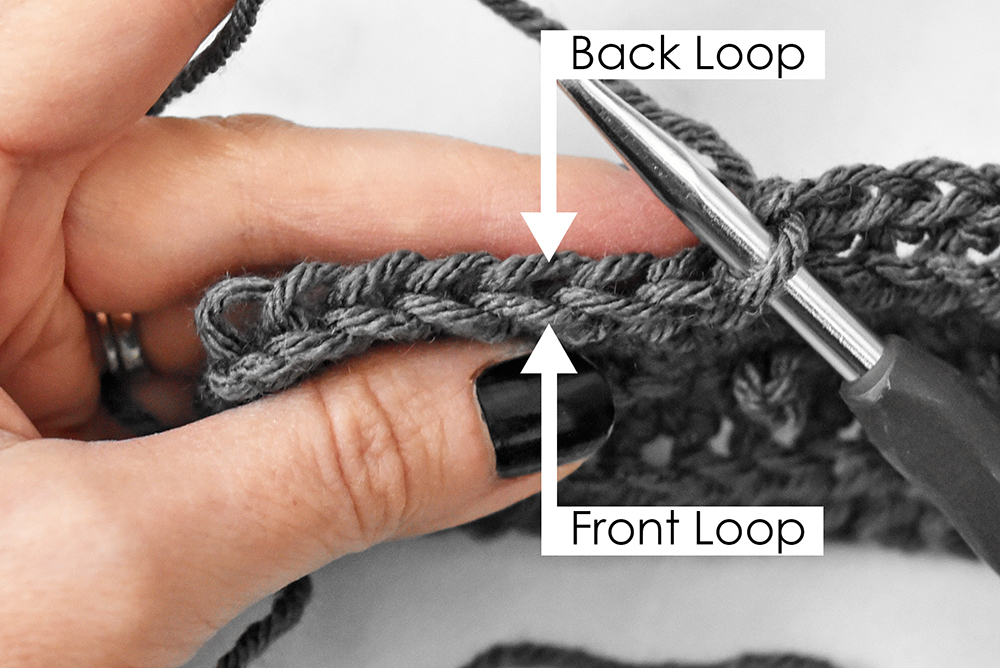
SC BLO – Single Crochet Back Loop Only
When looking at the top of a stitch you will see 2 loops. The one closest to you is the front loop and the one furthest away from you is the back loop. For a SC BLO, work a single crochet as normal but only work in the back loop of the stitch.
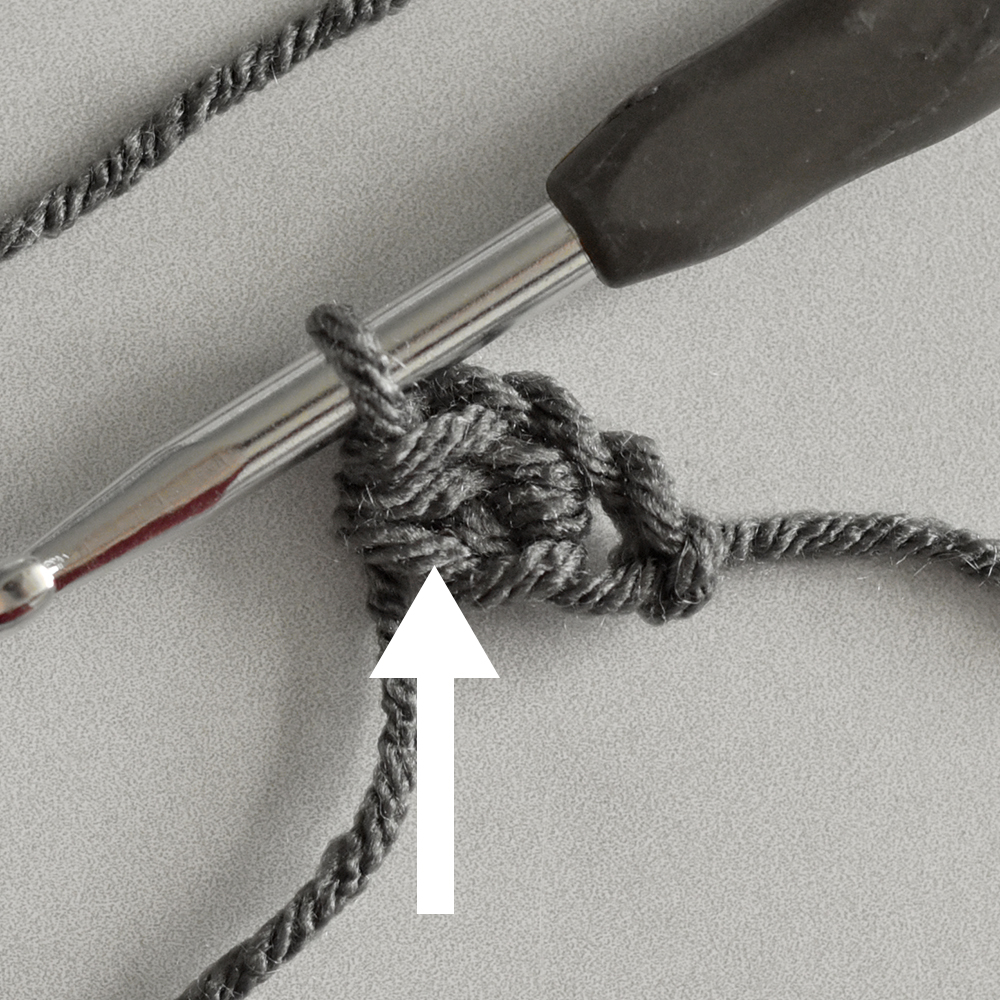
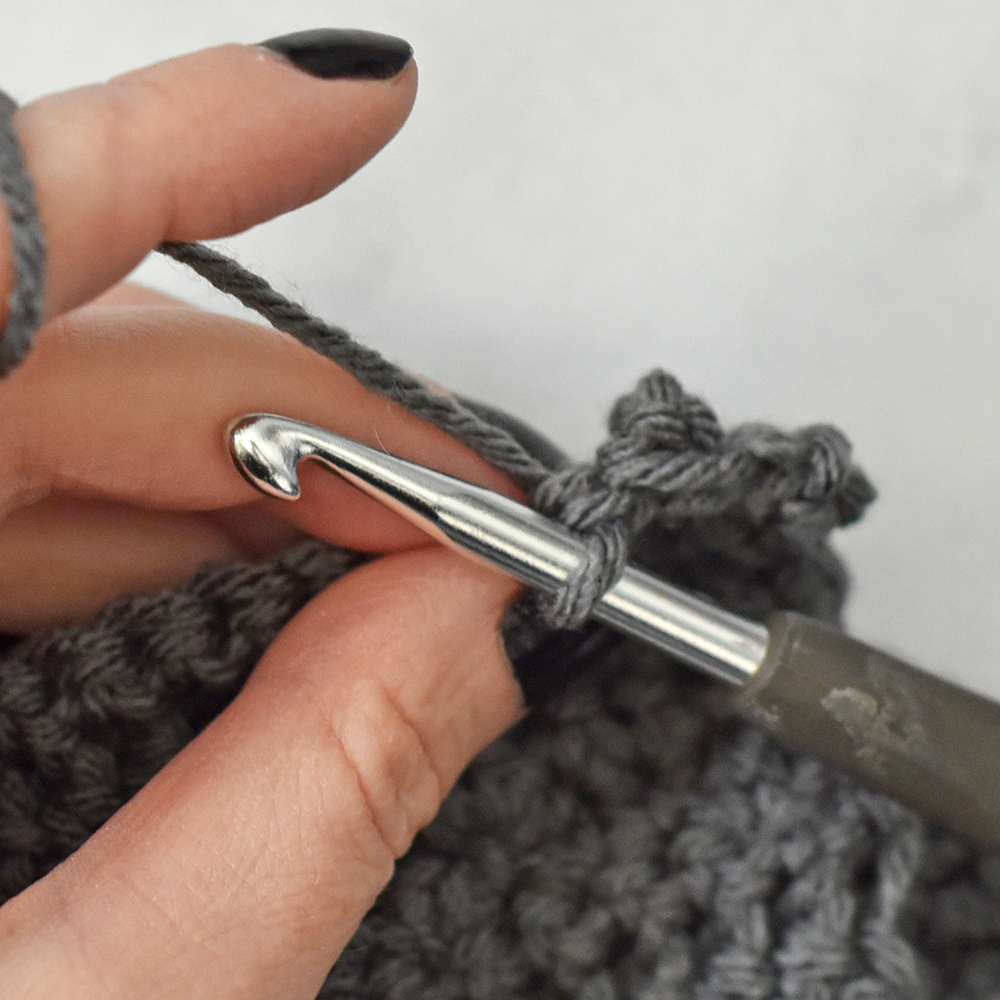
PSC – Picot Single Crochet
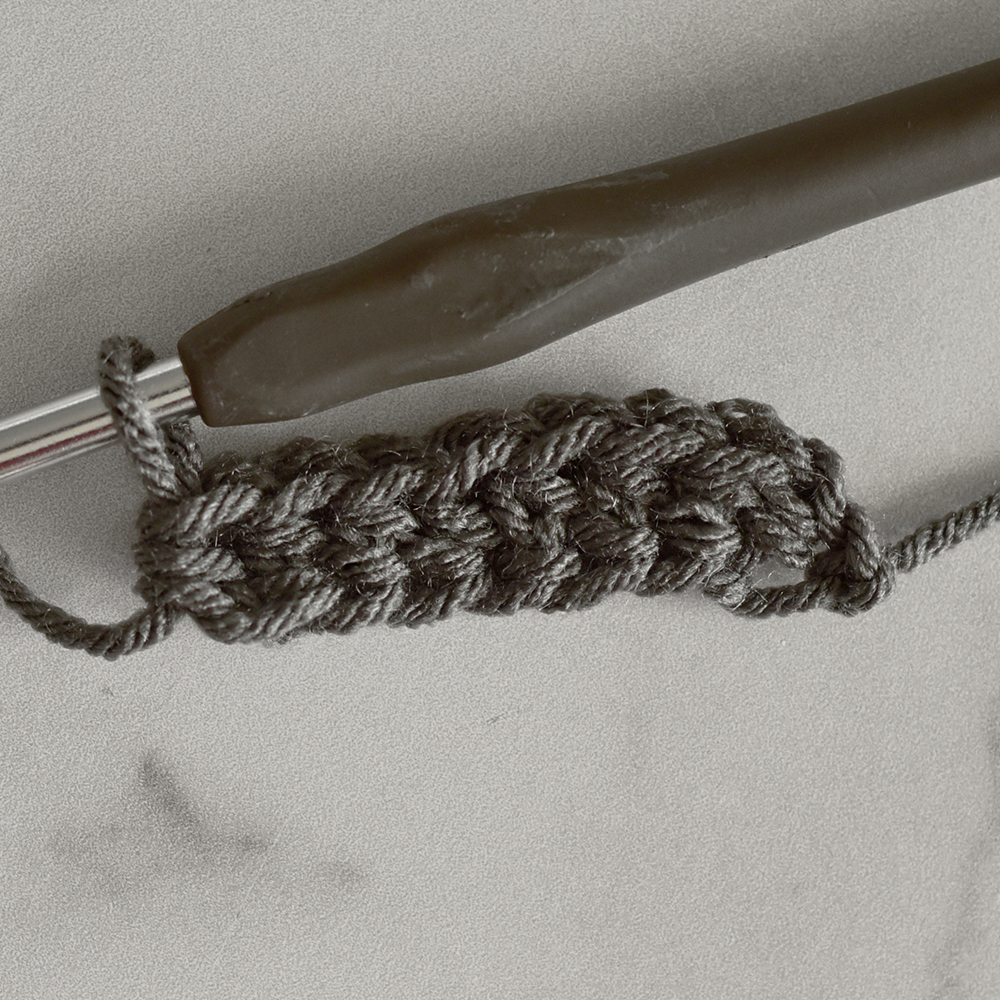
Insert your hook into the designated stitch. Pull up a loop, yarn over, and pull through the 1st loop on your hook. Yarn over and pull through the 1st loop again. Yarn over and pull through the 1st loop once more. Yarn over and pull through both loops on your hook. Push the CH 3 you just created behind so that it bumps out on the right side of your work and work the next ST.
Picot Headband Pattern
Baby
Row 1: FHDC (41, 45, 51). CH 1 and turn. (41, 45, 51)
Row 2: SC BLO in each ST across. CH 1 and turn. (41, 45, 51)
Row 3: SC in 1st ST, *PSC, SC*. CH 1 & turn. (41, 45, 51)
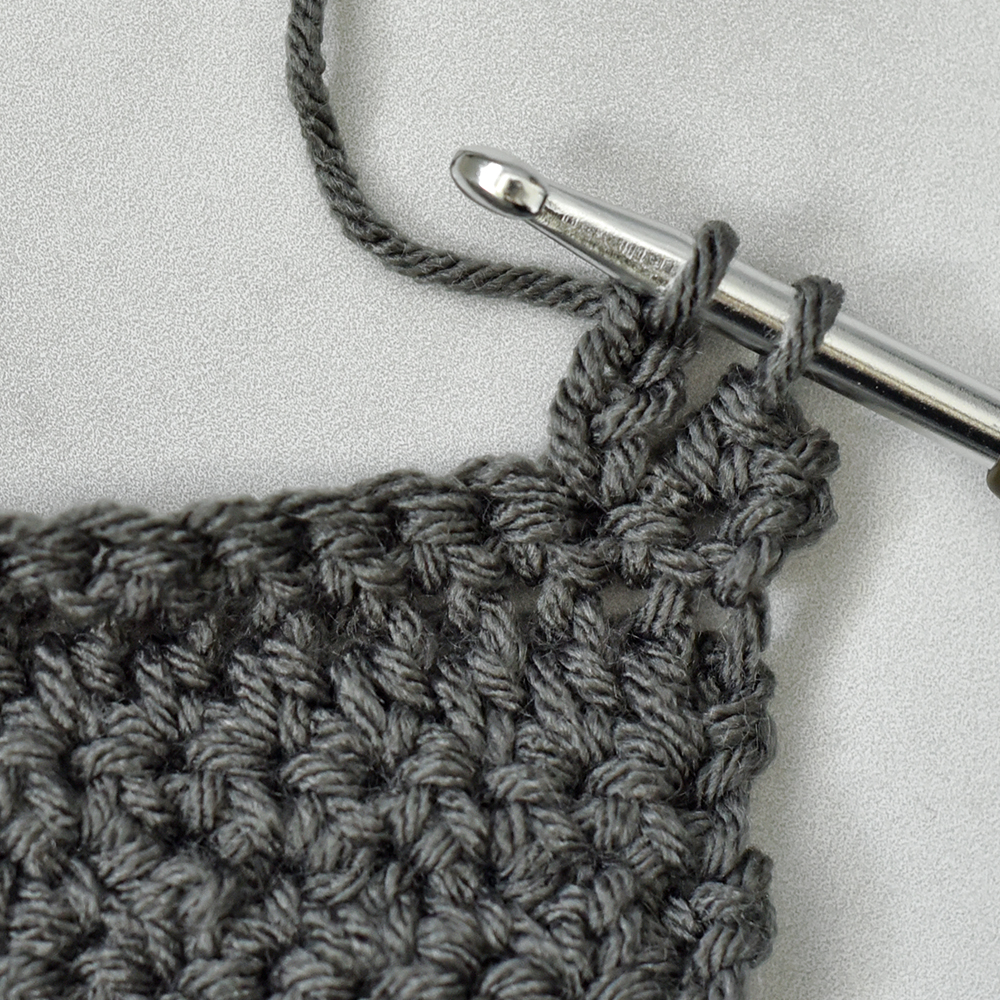
Row 4: SC in each ST across. CH 1 & turn. (41, 45, 51)
Row 5: HDC in each ST across. CH 1 & turn, (41, 45, 51)
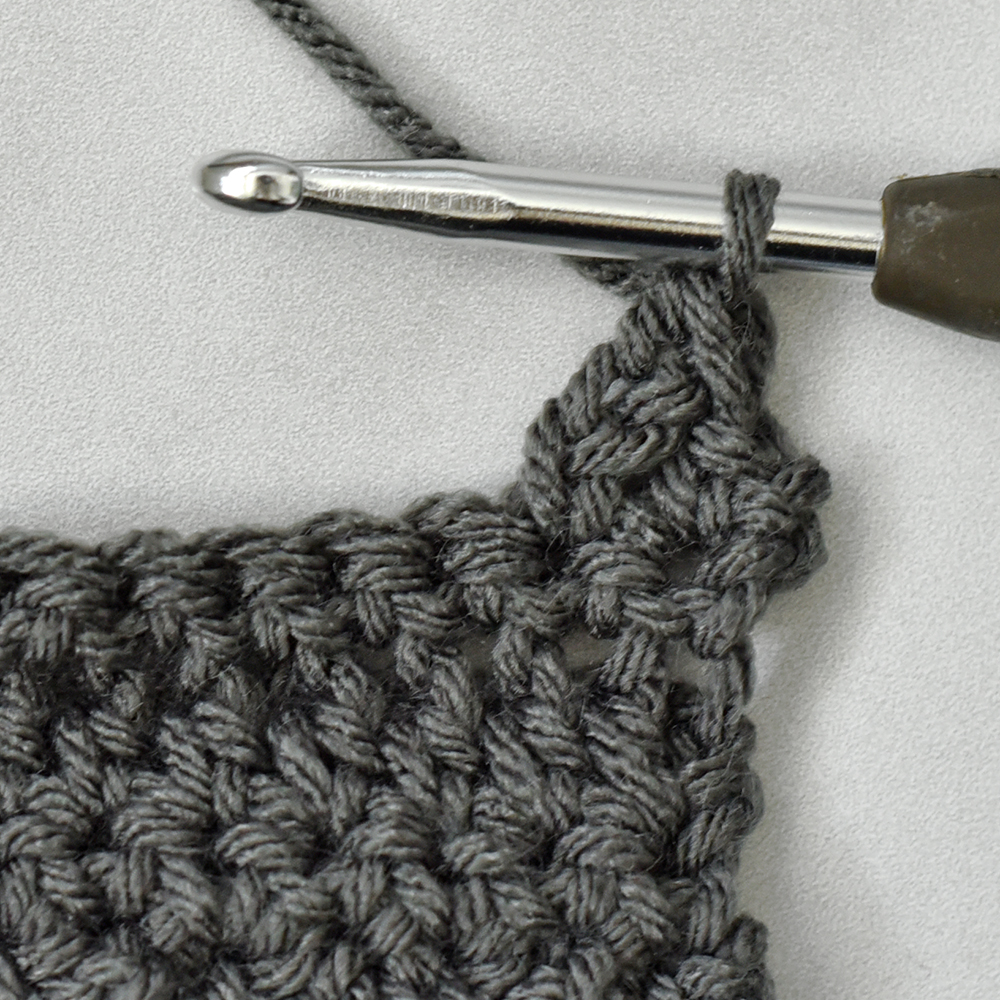
Row 6: SC BLO in each ST across. CH 1 & turn. (41, 45, 51)
Rows 7-10: Repeat Rows 3-6
Move onto closing and finishing.
Child
Row 1: FHDC (57, 61). CH 1 and turn. (57, 61)
Row 2: SC BLO in each ST across. CH 1 and turn. (57, 61)
Row 3: SC in 1st ST, *PSC, SC*. CH 1 & turn. (57, 61)
Row 4: SC in each ST across. CH 1 & turn. (57, 61)
Row 5: HDC in each ST across. CH 1 & turn, (57, 61)
Row 6: SC BLO in each ST across. CH 1 & turn. (57, 61)
Rows 7-10: Repeat Rows 3-6
Move onto closing and finishing.
Adult
Row 1: FHDC (67, 71, 73). CH 1 and turn. (67, 71, 73)
Row 2: SC BLO in each ST across. CH 1 and turn. (67, 71, 73)
Row 3: SC in 1st ST, *PSC, SC*. CH 1 & turn. (67, 71, 73)
Row 4: SC in each ST across. CH 1 & turn. (67, 71, 73)
Row 5: HDC in each ST across. CH 1 & turn, (67, 71, 73)
Row 6: SC BLO in each ST across. CH 1 & turn. (67, 71, 73)
Rows 7-14: Repeat Rows 3-6
Move onto closing and finishing.
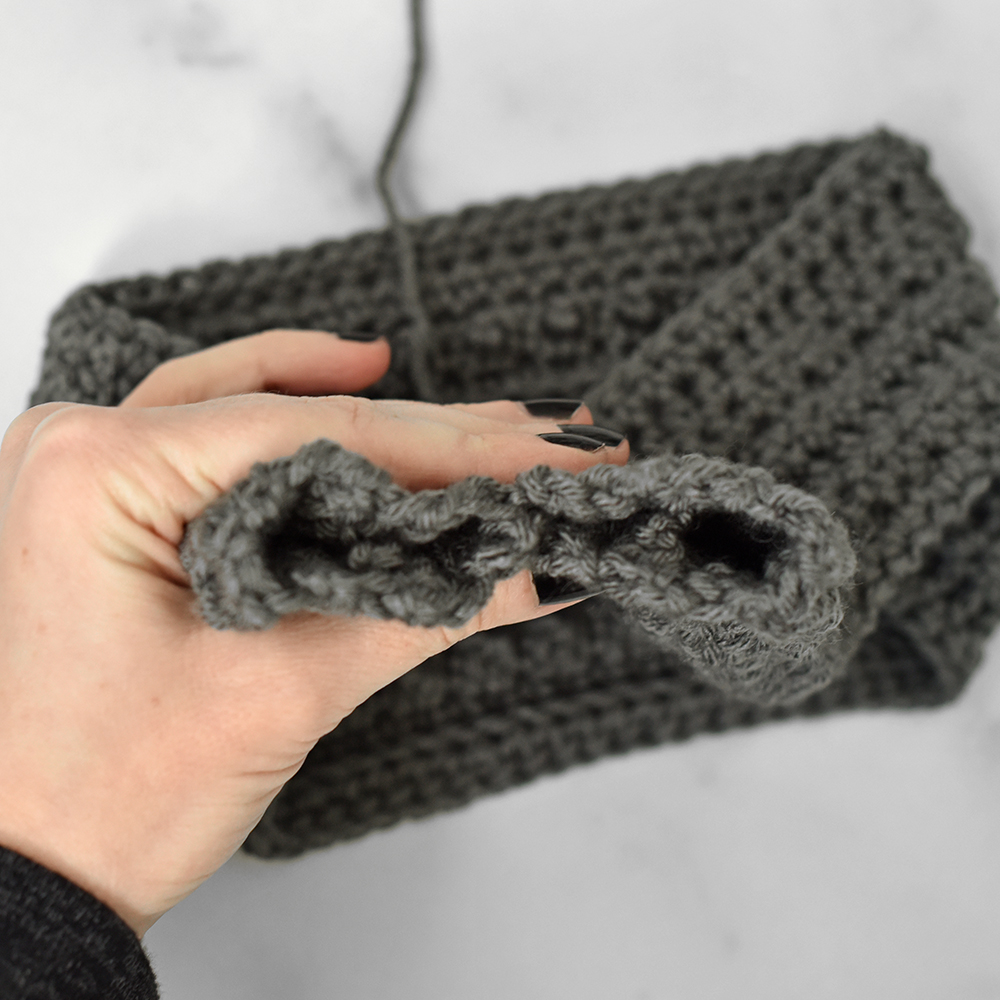
Closing and Finishing
CH 1 and cut off yarn, leaving a 12” long tail. Lay out headband with the right side facing up. Pinch the top and the bottom of both the short ends to themselves and place them interlocking with each other. Using a yarn needle, sew the tail end with a whip stitch, in an S shape around the edges. Sewing the top two edges together first, then the third to the second, and then the fourth to the third. Tie off with a few secure knots and weave in ends. Flip headband right side out.
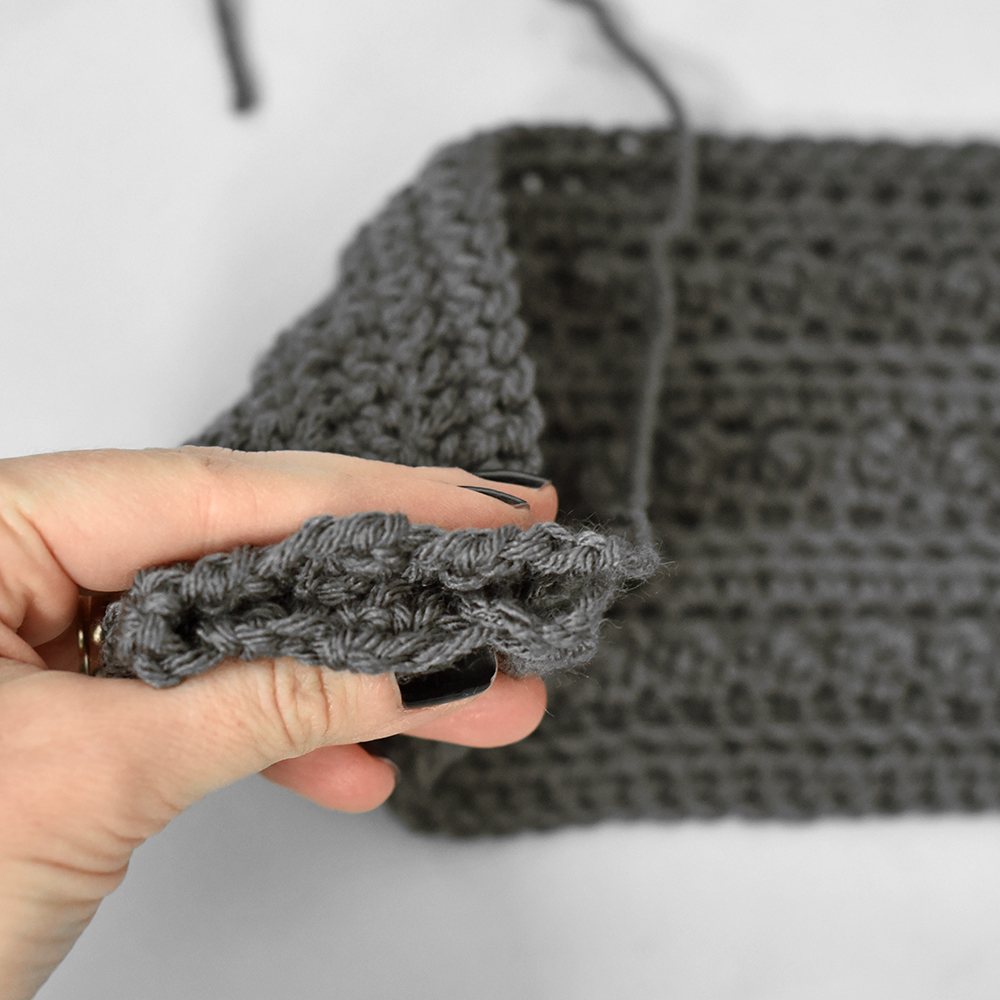
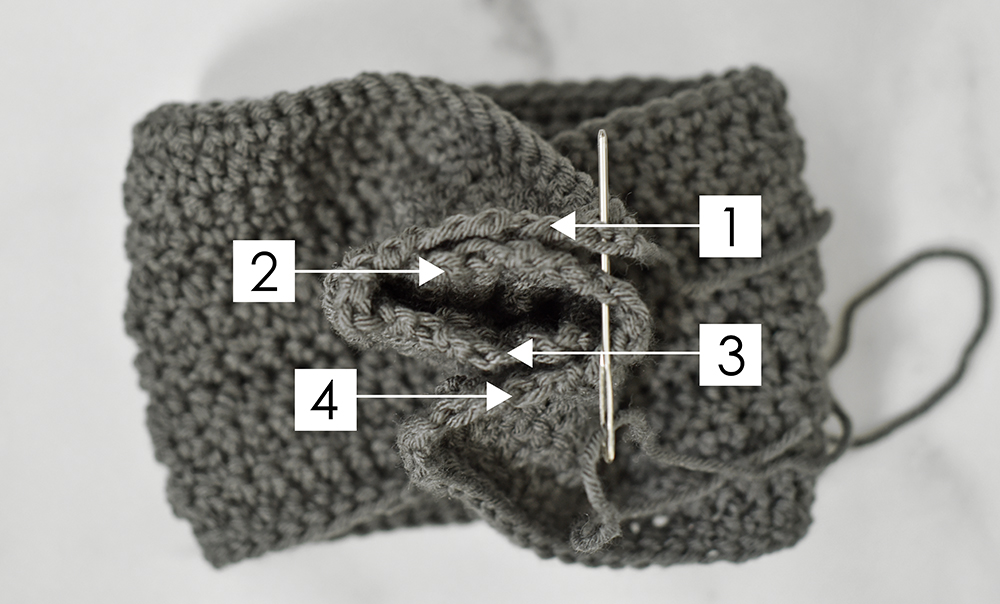
Wrong Side View
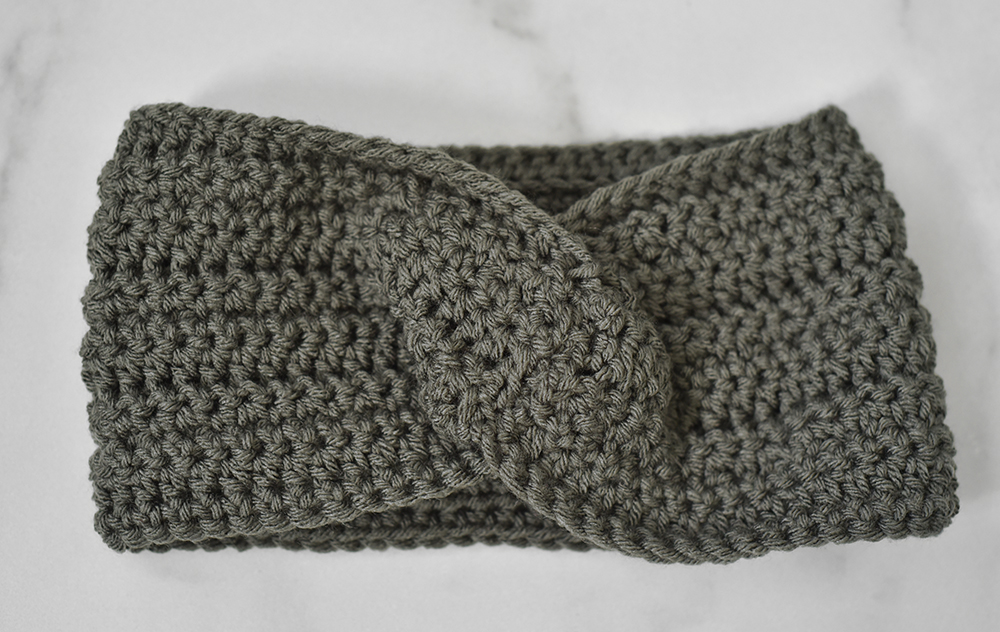
Right Side View
And you’re all done! I hope you enjoyed the Picot Headband pattern! I can’t wait to see your finished creations, so be sure to tag @theturtletrunk on Instagram!
Check out these other crochet headband and ear warmer patterns: Skinny Picot Headband, Country Cottage Headband, Cloud Nine Headband, Toasty & Twisted Ear Warmer.
You are free to sell the items you make with this pattern, and I’d love if you could please link back to this page. You do not have permission to republish or distribute this pattern in any way or claim it as your own. Do not use my photos in your sale listings or for any other purposes. Thank you.
This page includes affiliate links. If you make a purchase from these links, I may make a small commission at no cost to you! Thank you for your support!

merci beau coup pour le tuto !!!
Thank you!
Ali
I love this! Can you share what yarn you used? I love the rose and pink color in this pattern! Thank you so much!
Hi Laura! Yes, I love this yarn too! It is Hobby Lobby’s Yarn Bee Soft & Sleek in the colors Blush and Mauve.
I made this a day ago..so pretty!!
So happy you enjoyed it! Thank you!
Ali
Hi Ali- I’m a novice crocheter and just made this Teen small adult headband! It’s soooo cute! Great directions and the YouTube tutorial really helped me! I’d like to use a wine colored yarn but it is a bulky 6 and I’m not sure what my hook size should be and stitch count with this chunky yarn. Can you help me with the hook size and stitch count adjustments??? – Erin
Hi Erin! Check the gauge to see what hook will work best, you’ll need to go down 1-2 hook sizes or do 1-2 sizes down. Making a gauge swatch will help you figure out the proper sizing!
Thank you for teaching us this pattern!! I made it and it came out perfectly ❤❤
So happy you enjoyed it Maria!
Am I reading the pattern incorrectly? Photos show 3 rows of picot stitches and the pattern has 2 rows. ?
Hi Laurie! Adult sizes have 3 rows of the picot stitches and child and baby sizes only have 2 rows. Hope that answers your question!
Yes it does! Thank you.