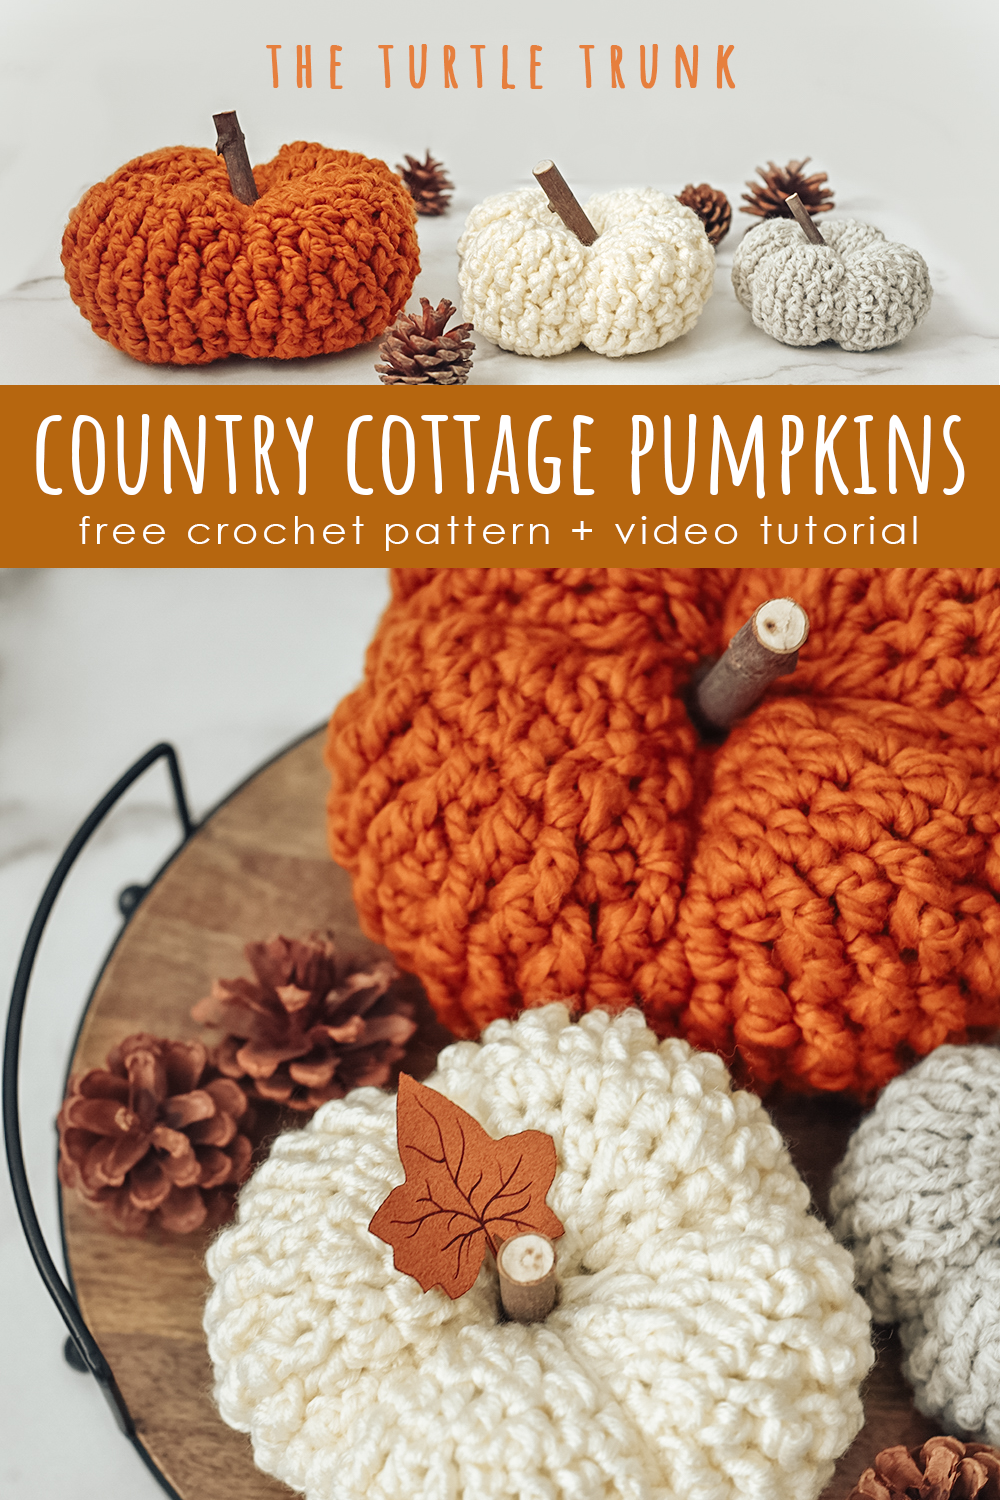
Country Cottage Pumpkin Crochet Pattern
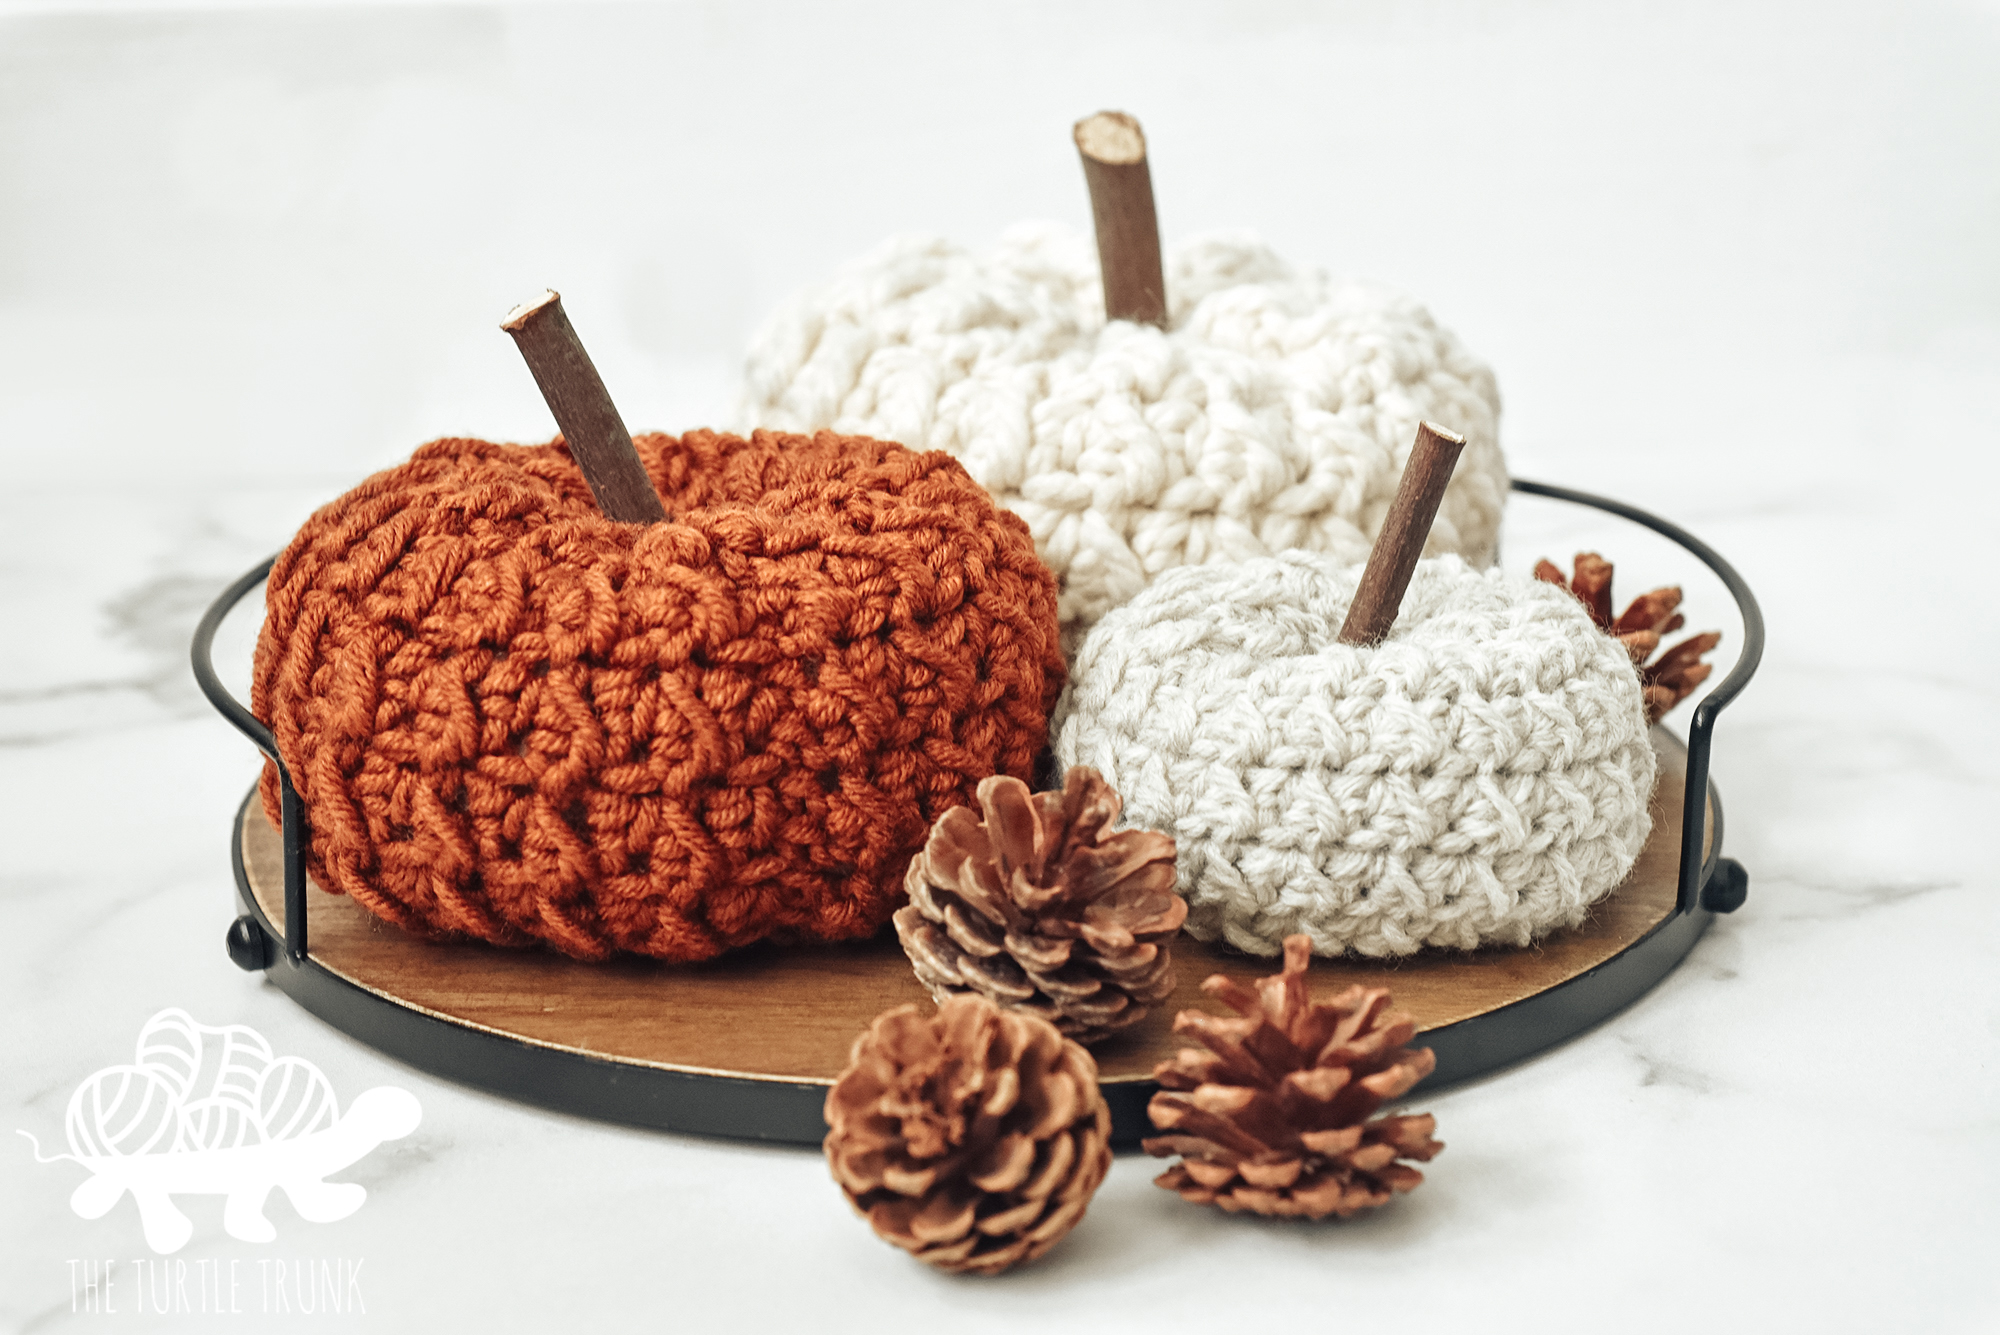
The Country Cottage Pumpkin features a fun texture that’s unique and beautiful! This crochet pumpkin is worked in the round using only 3 simple stitches! You can use any yarn weight to create small, medium, or large pumpkins. These are perfect for decorating for Fall, selling at markets, or giving as gifts!
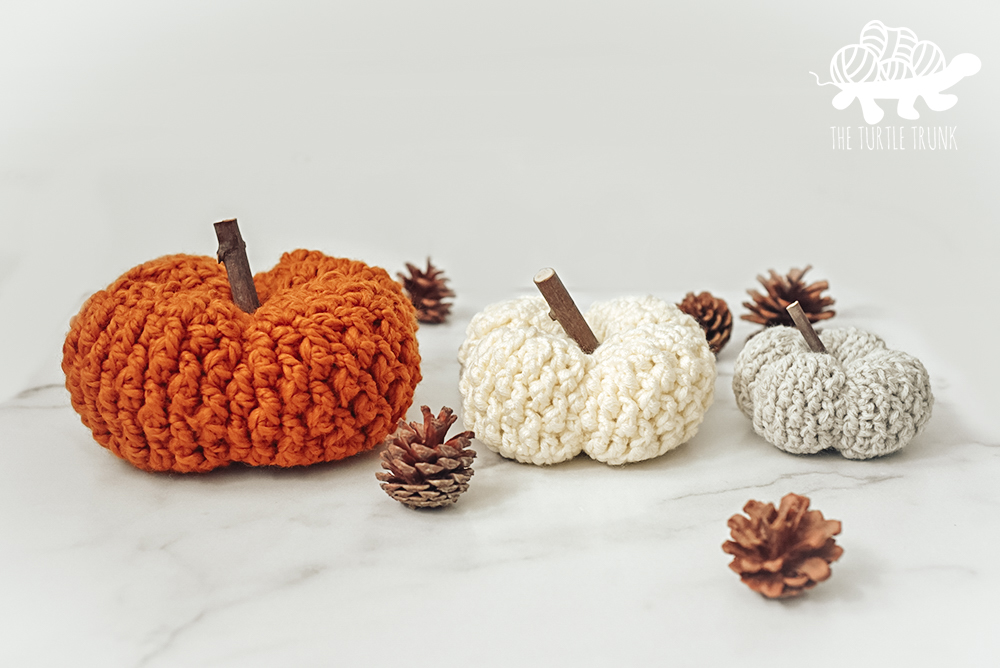
The Country Cottage Pumpkin is a unique and fun crochet pumpkin pattern that’s perfect for Fall decor! The texture of this pumpkin is easy to create and it only uses 3 simple crochet stitches! The Country Cottage Pumpkin is worked in joined rounds so there is no sewing necessary.
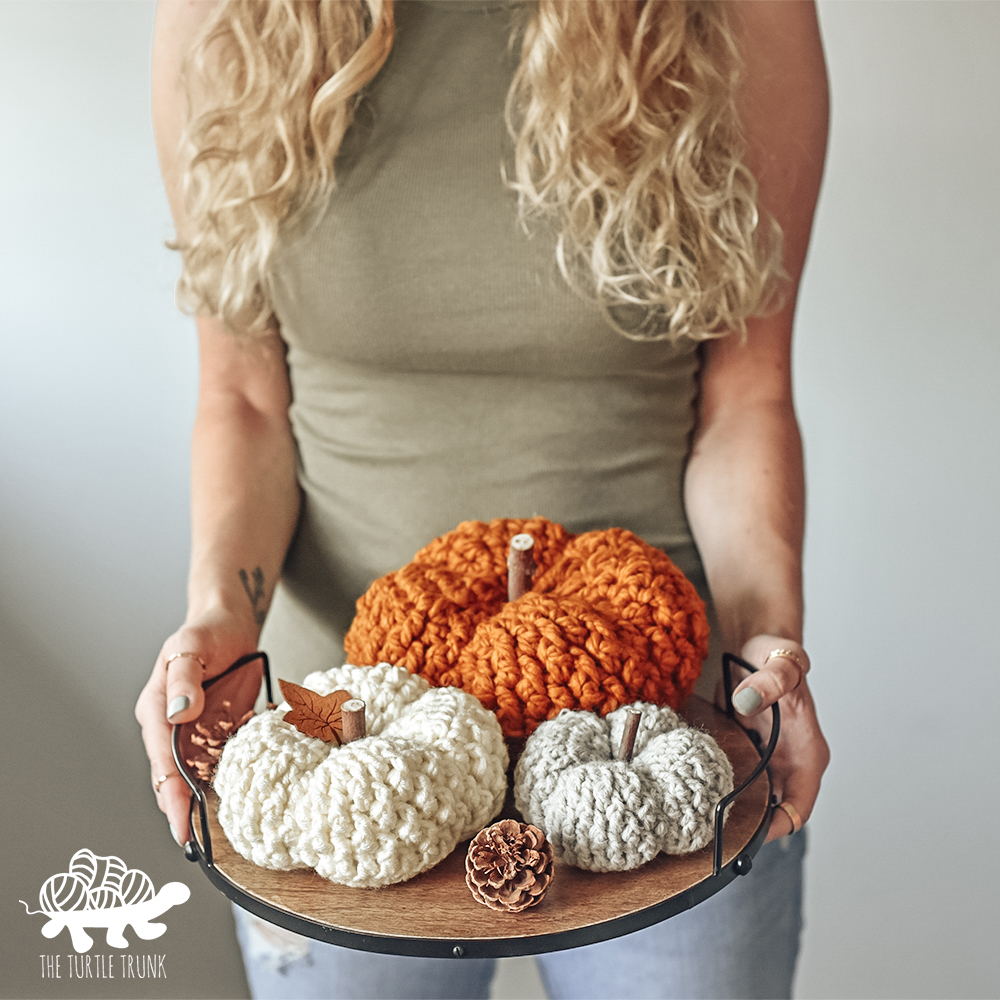
This pumpkin can be made with either a medium, bulky, or super bulky weight yarn to create a small, medium, or large sized pumpkin! But don’t worry, if you only want to use one size yarn but make different sized pumpkins, this pattern can be easily adjusted to create any size you desire!
Continue reading below to hear my inspiration for this pattern and to learn more about the yarn I used, then scroll down for the free written crochet pattern!
FOLLOW ALONG WITH THE AD-FREE AND PRINTABLE PDF FROM
ETSY AND RAVELRY!
If you’re looking for more crochet pumpkin patterns, then check out the Basic Pumpkin, Farm Fresh Pumpkin, Picot Pumpkin, and BOO Pumpkins!

NOT READY TO MAKE JUST YET?! PIN THIS PATTERN FOR LATER!
Follow along with the video tutorial on YouTube!
Inspiration
Pumpkins are one of the most iconic Fall symbols and they make for great home decor pieces! Crochet or handmade pumpkins are even better for home decor as they won’t spoil and can be used year after year! In 2020 I wanted to design a handful of crochet pumpkin patterns that each had their own unique texture and offered different construction techniques so that everyone was able to find a style and design that they liked!
After designing other patterns for my Country Cottage Collection, I knew I wanted to design a Country Cottage Pumpkin with the same amazing texture! It a great addition to the collection and this fun and unique fabric makes for an eye catching pumpkin and decor piece!
Yarn
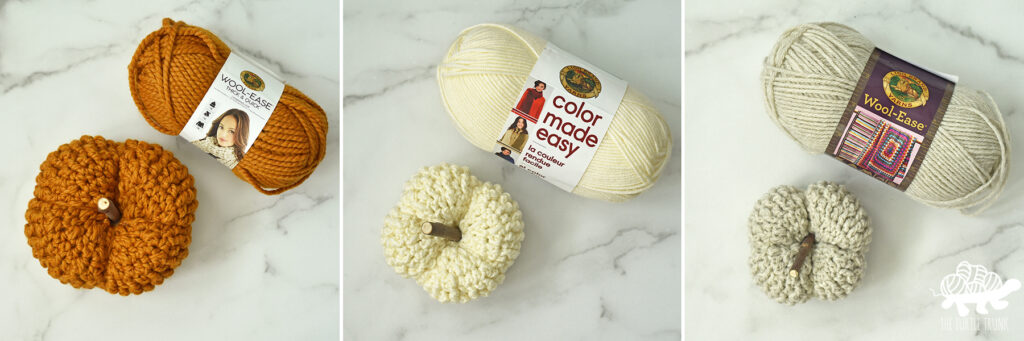
I used Lion Brand Yarn for each of my pumpkins and I absolutely love how each of them turned out! There is such a variety of colors to choose from for each and I like how even though these yarns are completely different weight and fibers, they still look amazing together!
For the large pumpkin I used Wool-Ease Thick and Quick, which is a super bulky (6) weight yarn. Wool-Ease Thick and Quick makes for a super soft and squishy pumpkin! This yarn comes in a large variety of colors so you can make your pumpkins in neutrals, brights, or classic pumpkin colors!
For the medium sized pumpkin I used Color Made Easy, which is sadly now discontinued. Have no fear though, Lion Brand Yarn now has a new bulky (5) weight yarn option, Hue + Me, which I absolutely adore! It’s an acrylic/wool blend that has an amazing color palette. I have used Hue + Me for a number of other projects like my Brecken Basket and Brecken Bag and highly recommend it.
Lastly for the small pumpkin I used Wool-Ease, which is just the cutest little pumpkin there has ever been! Wool-Ease is a medium (4) weight yarn and an acrylic/wool blend. Another medium (4) weight yarn I would recommend is Color Theory! I have been using Color Theory a lot lately and am really loving the soft feel and the amazing color palette.
Sizes
I used different weights of yarn and different sized crochet hooks to achieve different sized pumpkins, but if you want to use one specific yarn and make multiple sizes from it, you can do that too!
To adjust the width do less increase rounds to the base (for a smaller pumpkin) or more increase rounds to the base (for a larger pumpkin). To adjust the height, repeat Rounds 7 & 8 as many times until desired height is reached.
Below is the size chart to achieve the same pumpkin sizes that I did. The instructions for all are the same, just the yarn weight and hook size makes the size difference between them all.
| Size | Yarn | Hook | Yardage | Gauge – Diameter of base Rounds 1-5 |
| Small 2.5” x 4” | Medium (4) | 4.00mm (G) | 53 yards | 4” |
| Medium 3” x 5.5” | Bulky (5) | 6.00mm (J) | 60 yards | 5.5” |
| Large 4” x 7.5” | Super Bulky (6) | 7.00mm | 75 yards | 6.5” |
Difficulty
Easy
Gauge
Gauge is not important, but you can measure the base of your pumpkin (Rounds 1-5) and compare to the chart below for exact sizing. Adjust your hook size up or down if need be.
Notes
- This pattern is worked in the round. At the end of each round, join to the top of the 1st ST from the previous round with a SL ST. The chain at the beginning of each round does not count as a stitch.
- Repeat stitches between the ** until the end of the round or until otherwise stated.
- The number is parentheses at the end of each round represents the number of stitches to be worked in that round.
Supplies
- Medium (4), Bulky (5), or Super Bulky (6) weight yarn
- 4.00mm (G), 6.00mm (J), or 7.00mm crochet hook
- Fiber Fill
- Yarn Needle
- Scissors
- Tape Measure
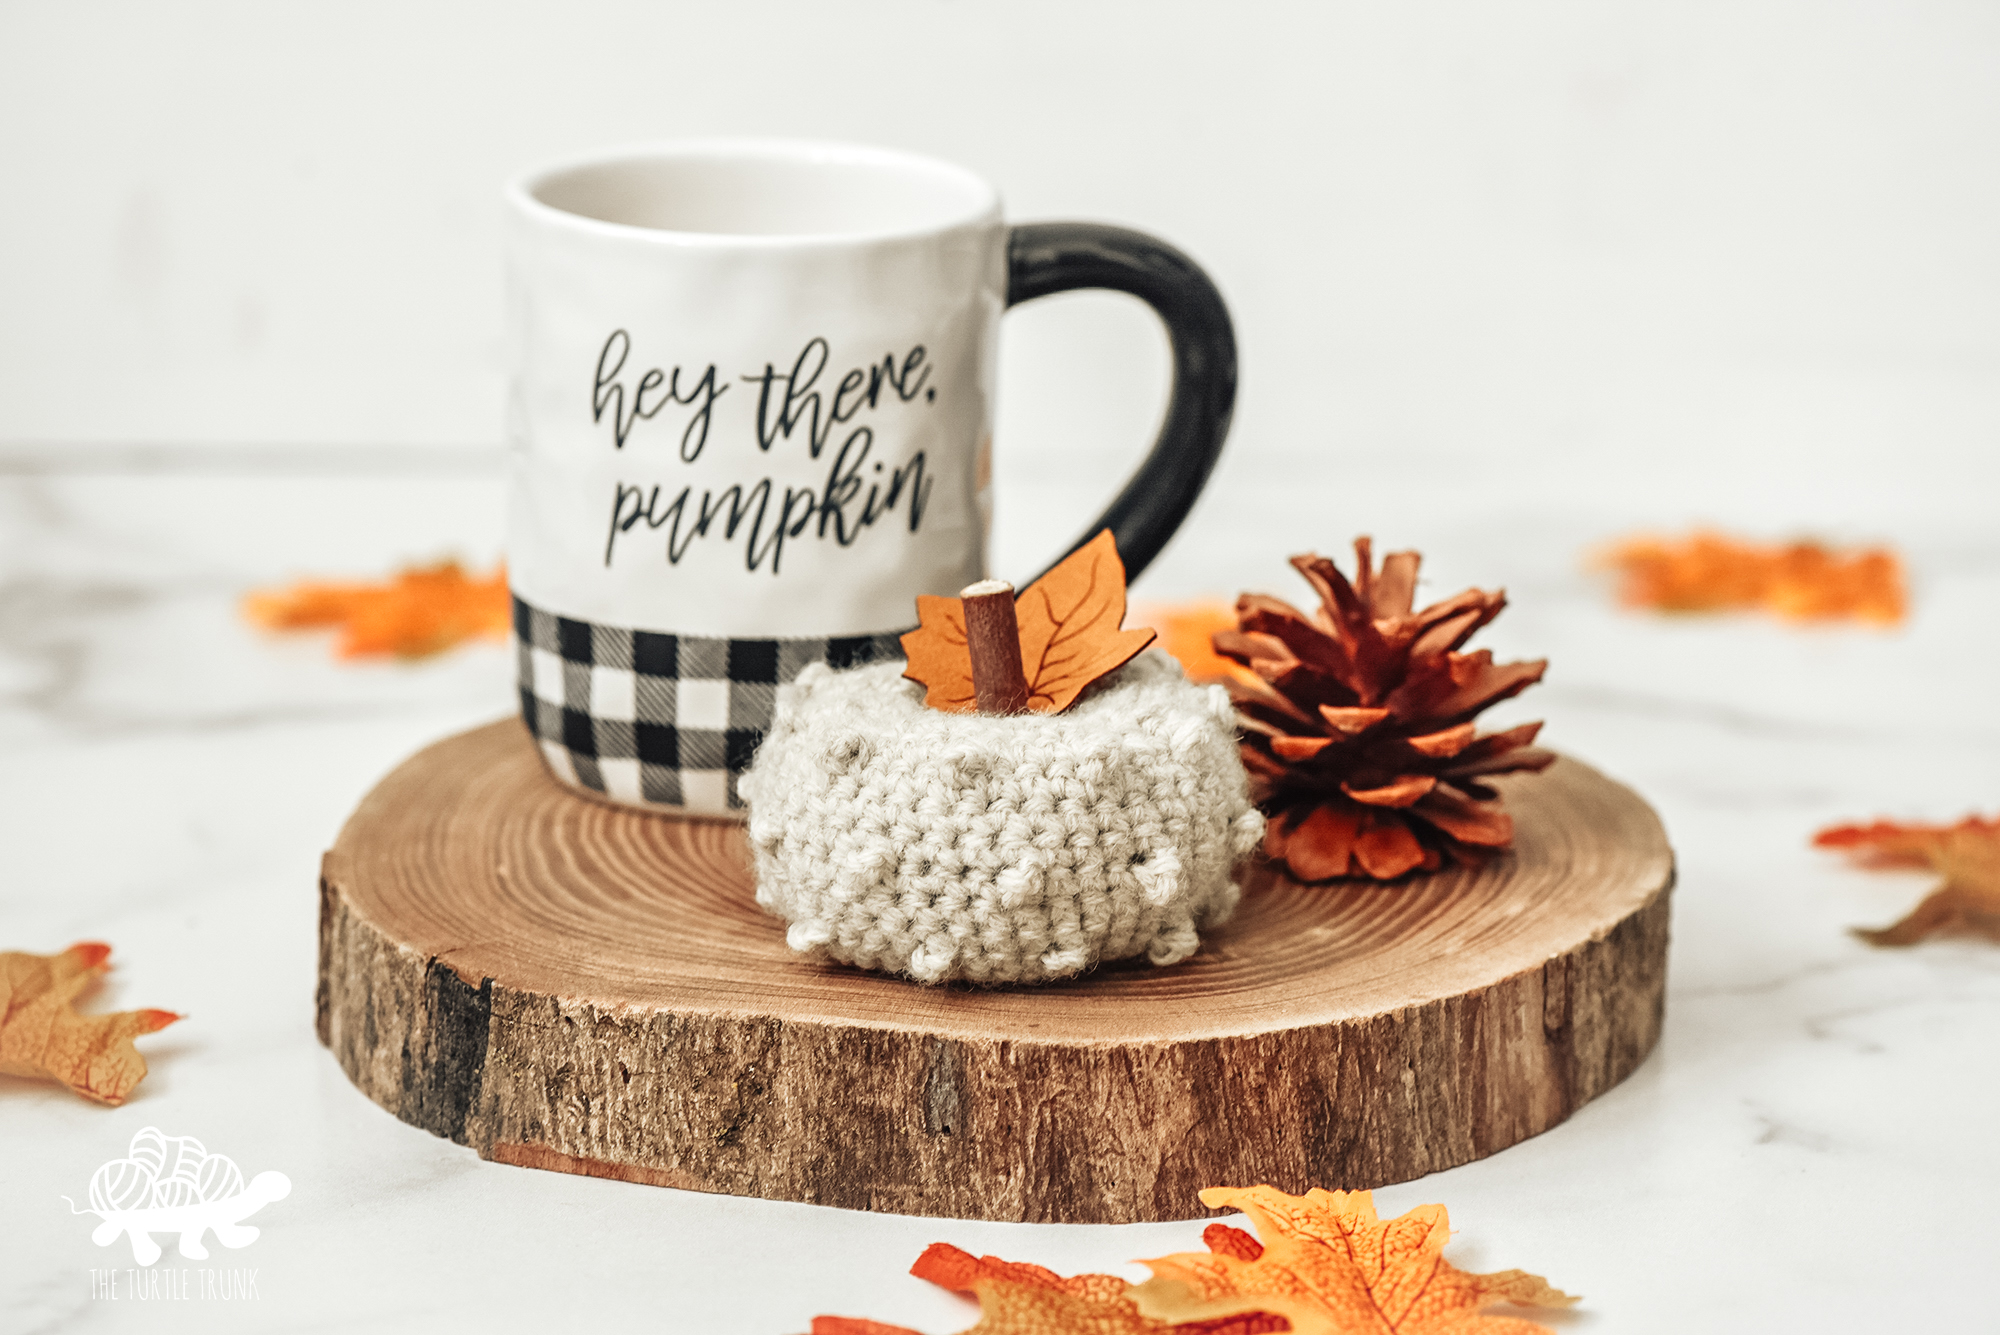
- 2-3” Pumpkin Stem (stick from fallen tree branch, cinnamon stick, scrap leather or satin lace, ect.)
Abbreviations (US Terms)
ST(s) – Stitch(es)
CH – Chain
SL ST – Slip Stitch
HDC – Half Double Crochet
HDC2TOG – Half Double Crochet Two Together
DC – Double Crochet
FPDC – Front Post Double Crochet
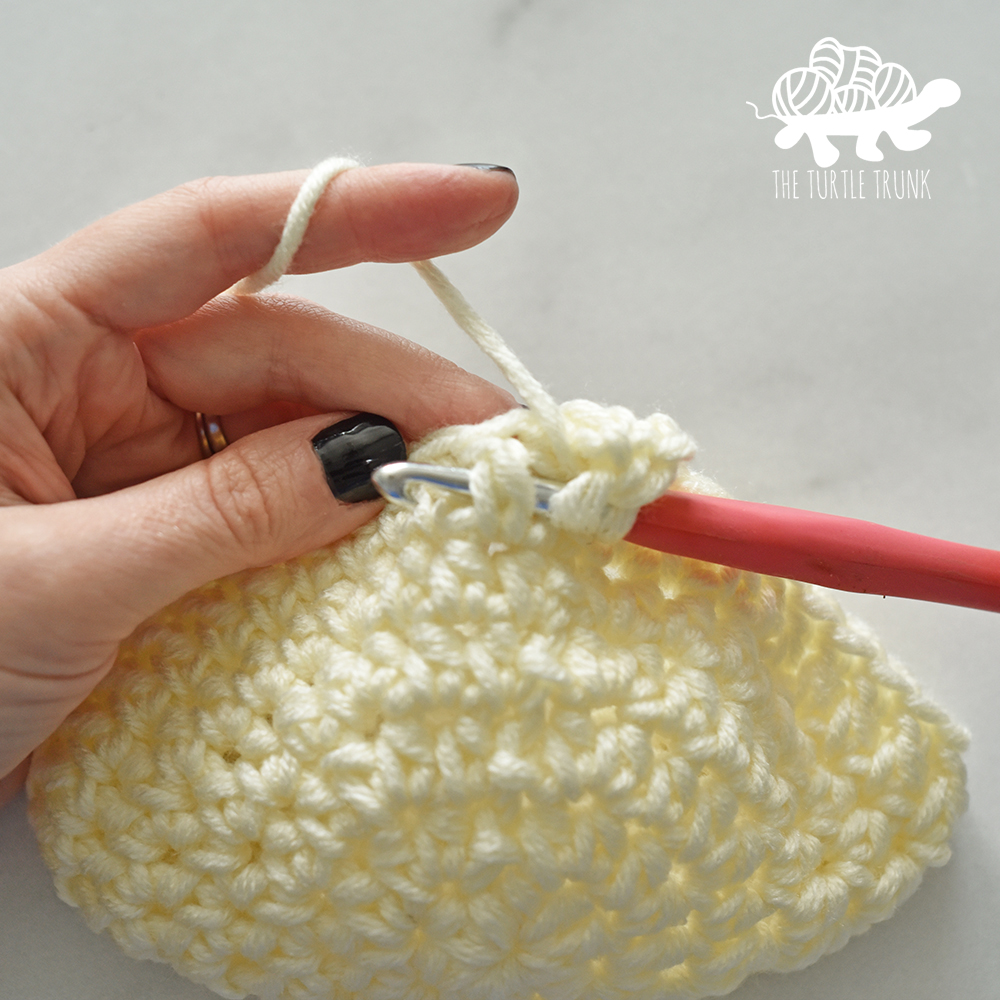
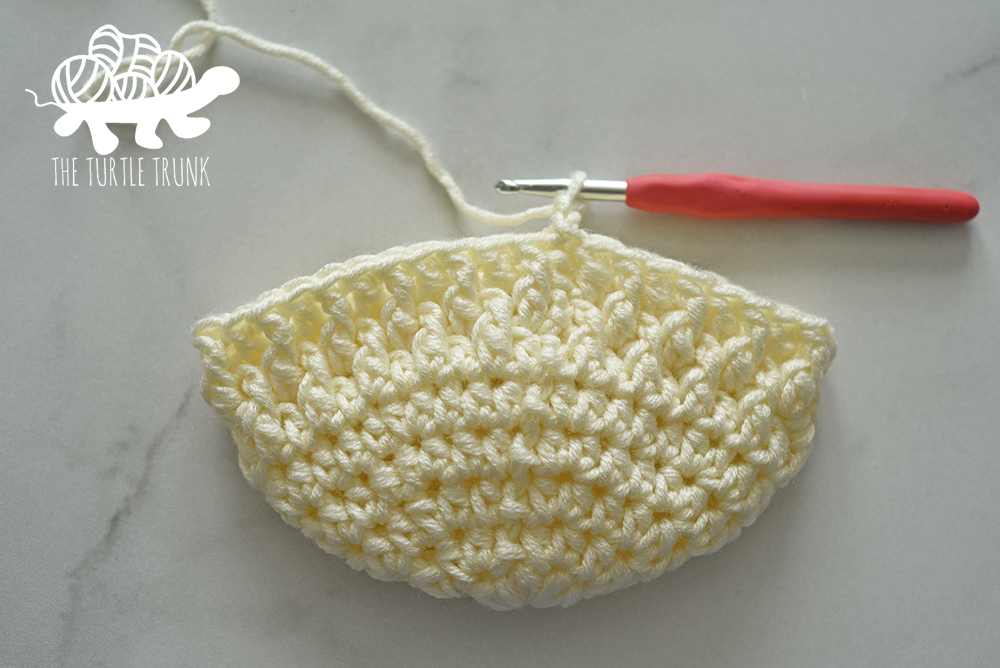
The amazing texture of this pumpkin is created by using a combination the Double Crochet and Front Post Double Crochet. If you’re unfamiliar with a Front Post Double Crochet (FPDC), it is essentially a Double Crochet that is worked around the post of the stitch rather than through the top of the stitch. To work a FPDP: Yarn over, insert hook around the post of the next stitch, going in from front to back then around to the front again. Yarn over, pull up a loop, yarn over, pull through 2 loops, yarn over, pull through 2 loops.
Country Cottage Pumpkin Pattern
Magic Circle, CH 1
Round 1: HDC x 8 inside the circle. Join & CH 1 (8)
Round 2: 2 HDC in each ST around. Join & CH 1 (16)
Round 3: *HDC, 2 HDC*. Join & CH 1 (24)
Round 4: *HDC x 2, 2 HDC* Join & CH 1 (32)
Round 5: *HDC x 3, 2 HDC* Join & CH 1 (40)
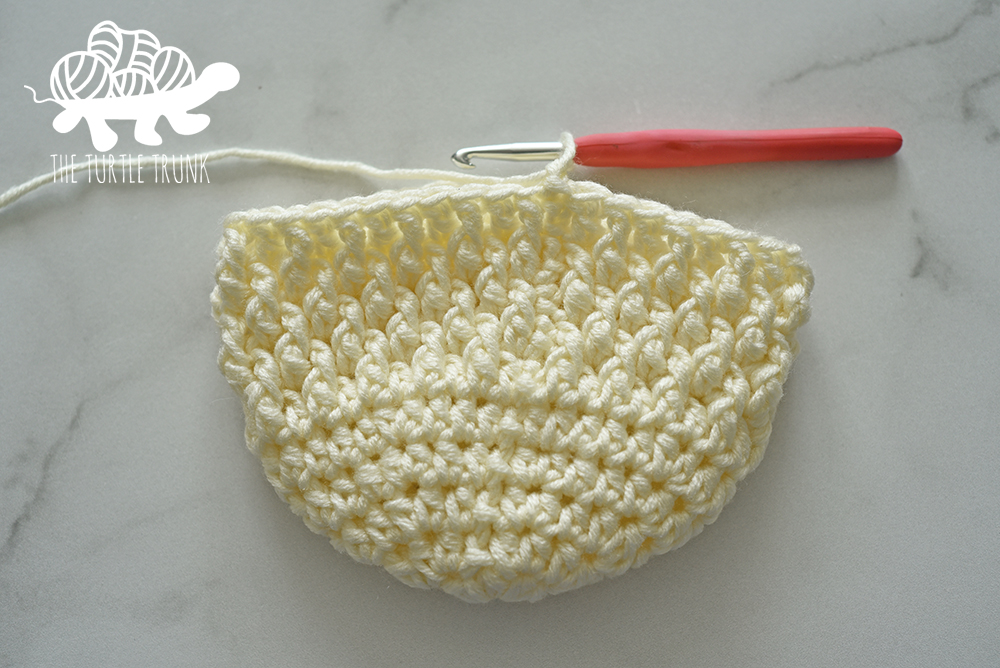
Round 6: DC in each ST around. Join & CH 2 (40)
Round 7: *DC, FPDC* Join & CH 2 (40)
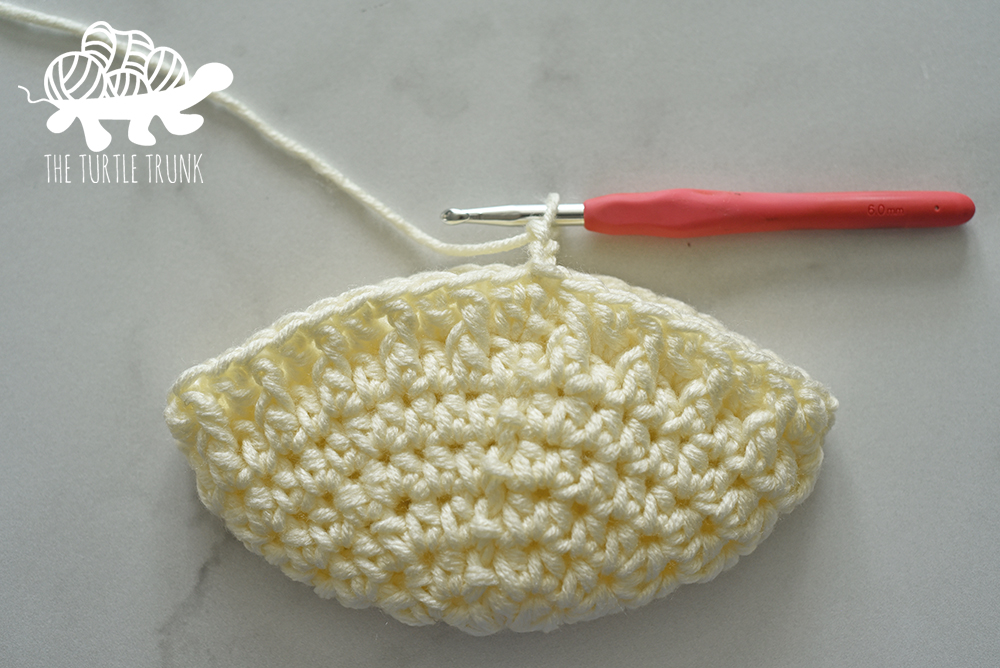
Round 8: *FPDC, DC* Join & CH 2 (40)
Rounds 9 & 10: Repeat Rounds 7 & 8 (40)
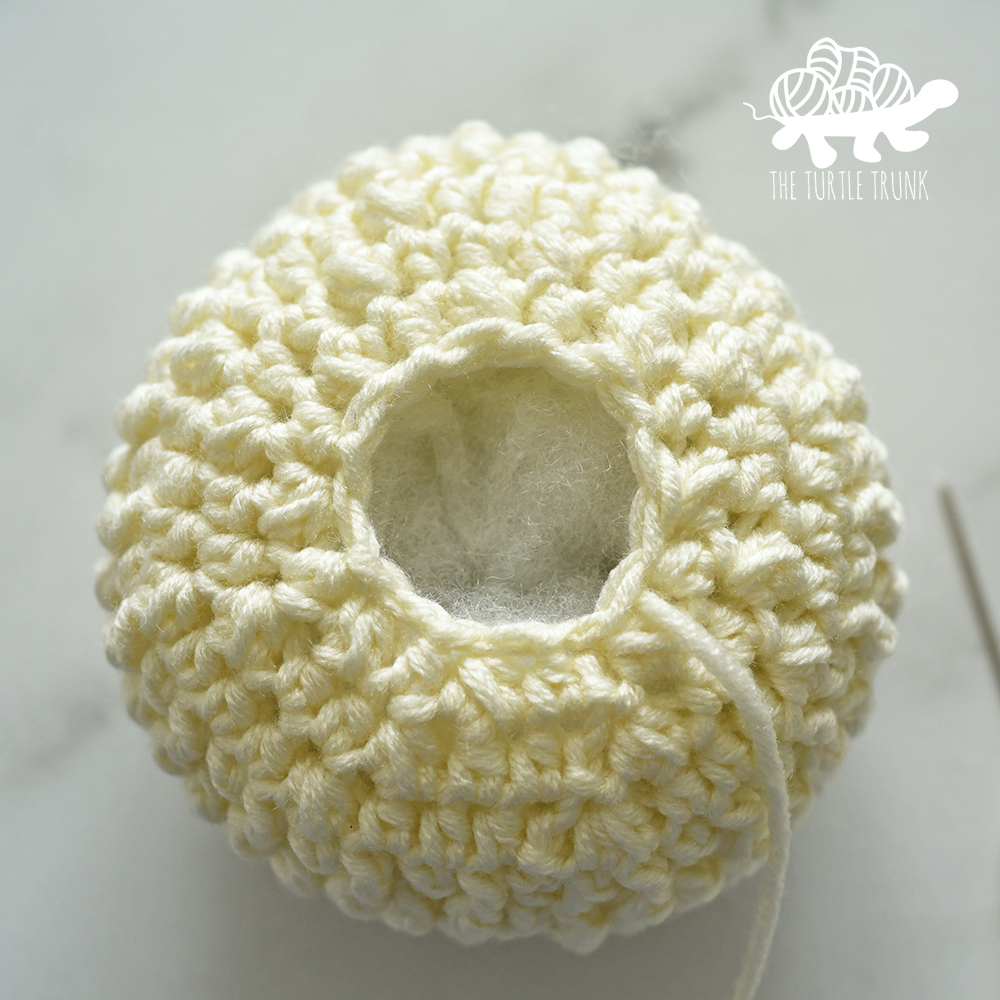
Round 11: *HDC x3, HDC2TOG* Join & CH 1 (32)
Round 12: *HDC x 2, HDC2TOG* Join & CH 1 (24)
Round 13: *HDC, HDC2TOG* (16)
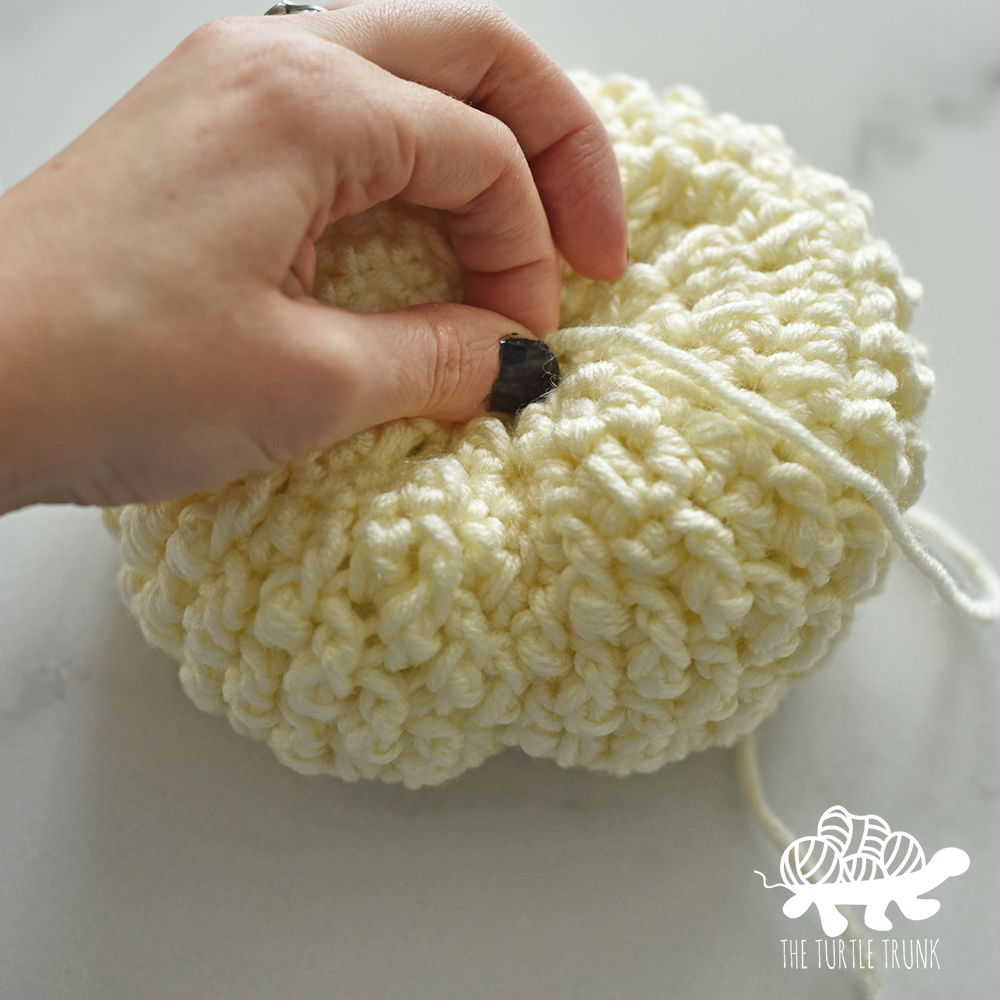
Join to next ST and tie off, leaving a 24” long tail. Stuff pumpkin with Fiber Fill. Using a yarn needle, weave tail end through last 16 STs and pull tight to cinch the top hole closed. Leave hole large enough for your pumpkin stem to fit inside.

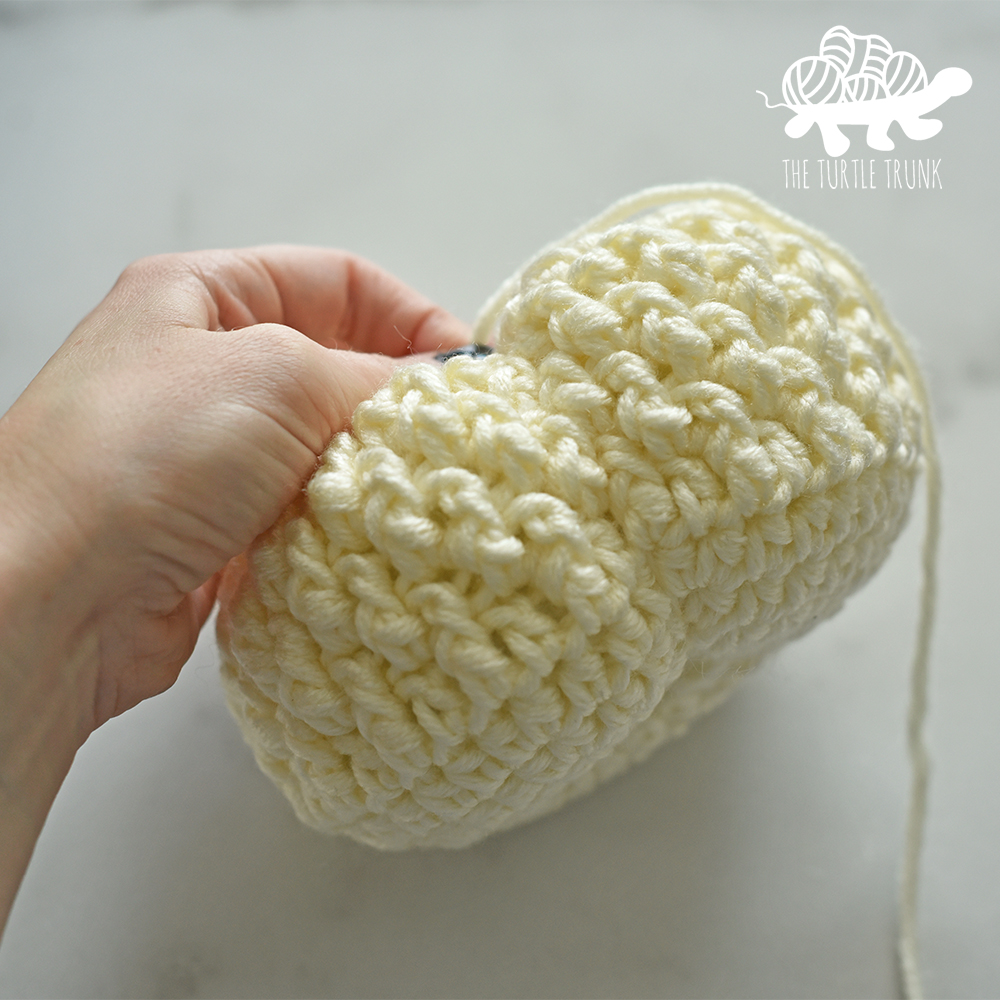
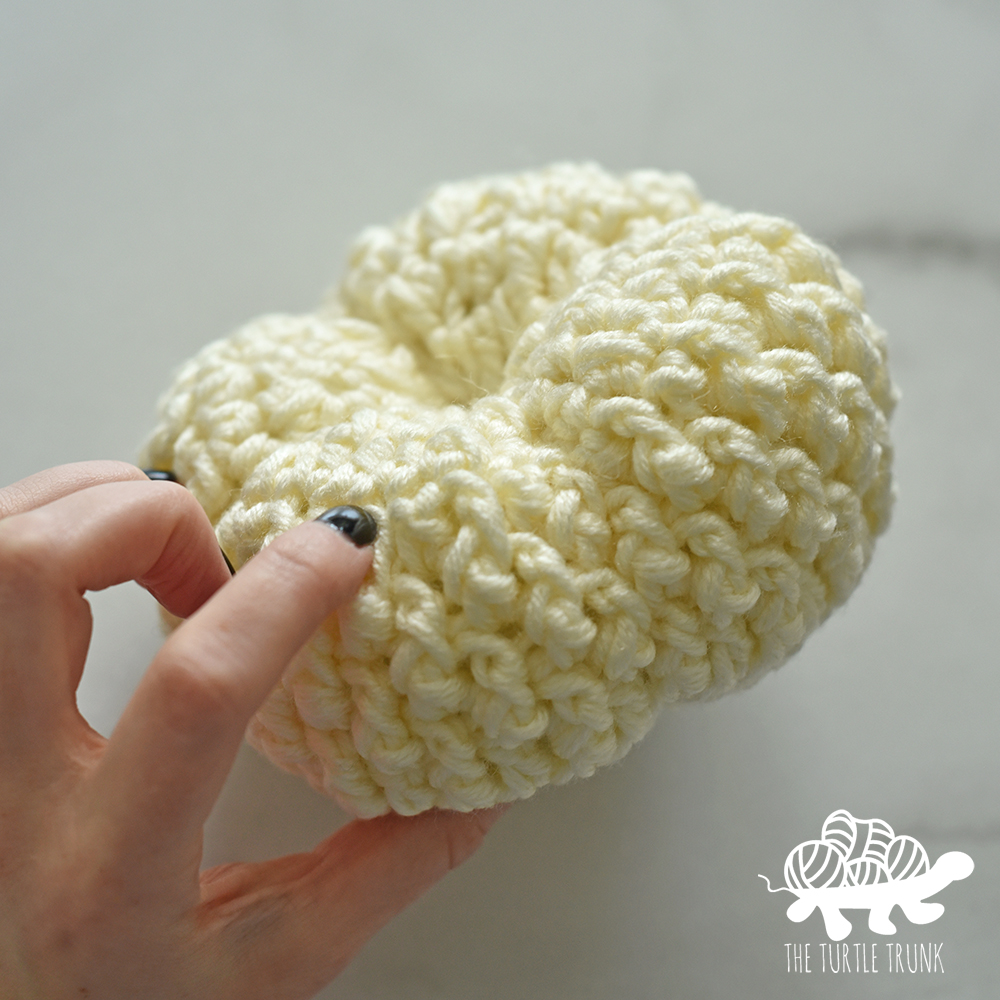
Pull tail end through the top center hole, down to the bottom center hole. Wrap yarn around the outside of the pumpkin and back to the top center hole. Continue to wrap your tail end down through the center hole, out the bottom, and around the outside to create the pumpkin segments. This can be done as many or few times as you’d like. Be sure you keep your yarn pulled tight as you work around. When you’re done, tie your tail end off on the bottom with a few knots. Weave in ends.
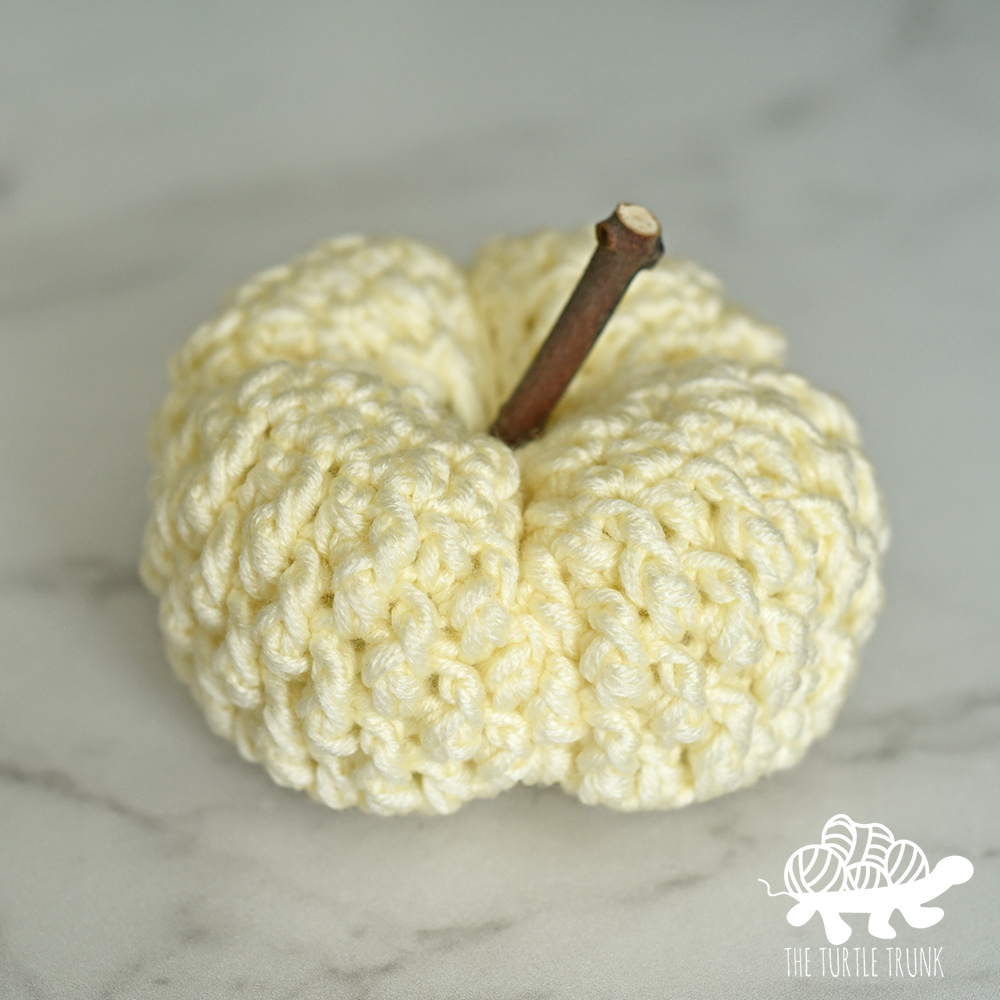
Finish your pumpkin off with a stem. There are endless possibilities for pumpkin stems: twigs and sticks from fallen branches in your yard, cinnamon sticks from your local market, or satin lace from the craft store! Simply stick stem through the center hole and voila! You can even use a dab of hot glue or fabric glue to keep the stem extra secure.
For extra pizazz add twine or fake leaves and berries!
And you’re all done!
I hope you enjoyed the Country Cottage Pumpkin pattern! I can’t wait to see your finished pumpkins, so be sure to tag @theturtletrunk on Instagram!
You are free to sell the items you make with this crochet pattern, and I’d love if you could please credit The Turtle Trunk as the pattern designer. You do not have permission to republish or distribute this pattern in any way or claim it as your own. Do not use my photos in your sale listings or for any other purposes. Thank you.
This page includes affiliate links. If you make a purchase from these links, I may make a small commission at no cost to you! Thank you for your support!