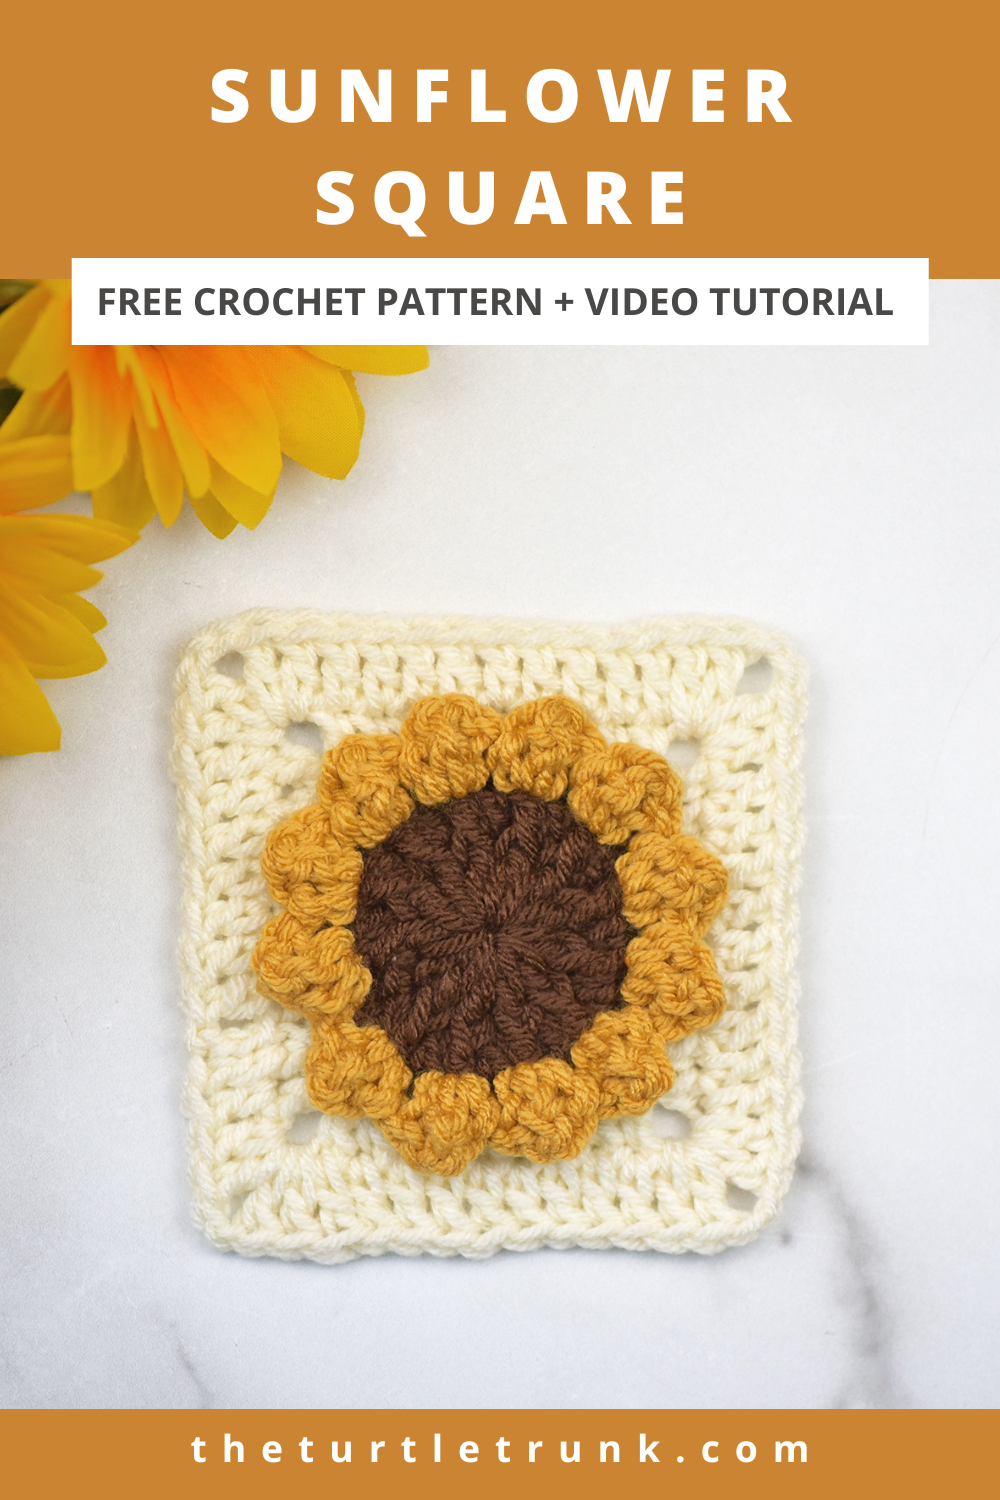
Sunflower Square Crochet Pattern
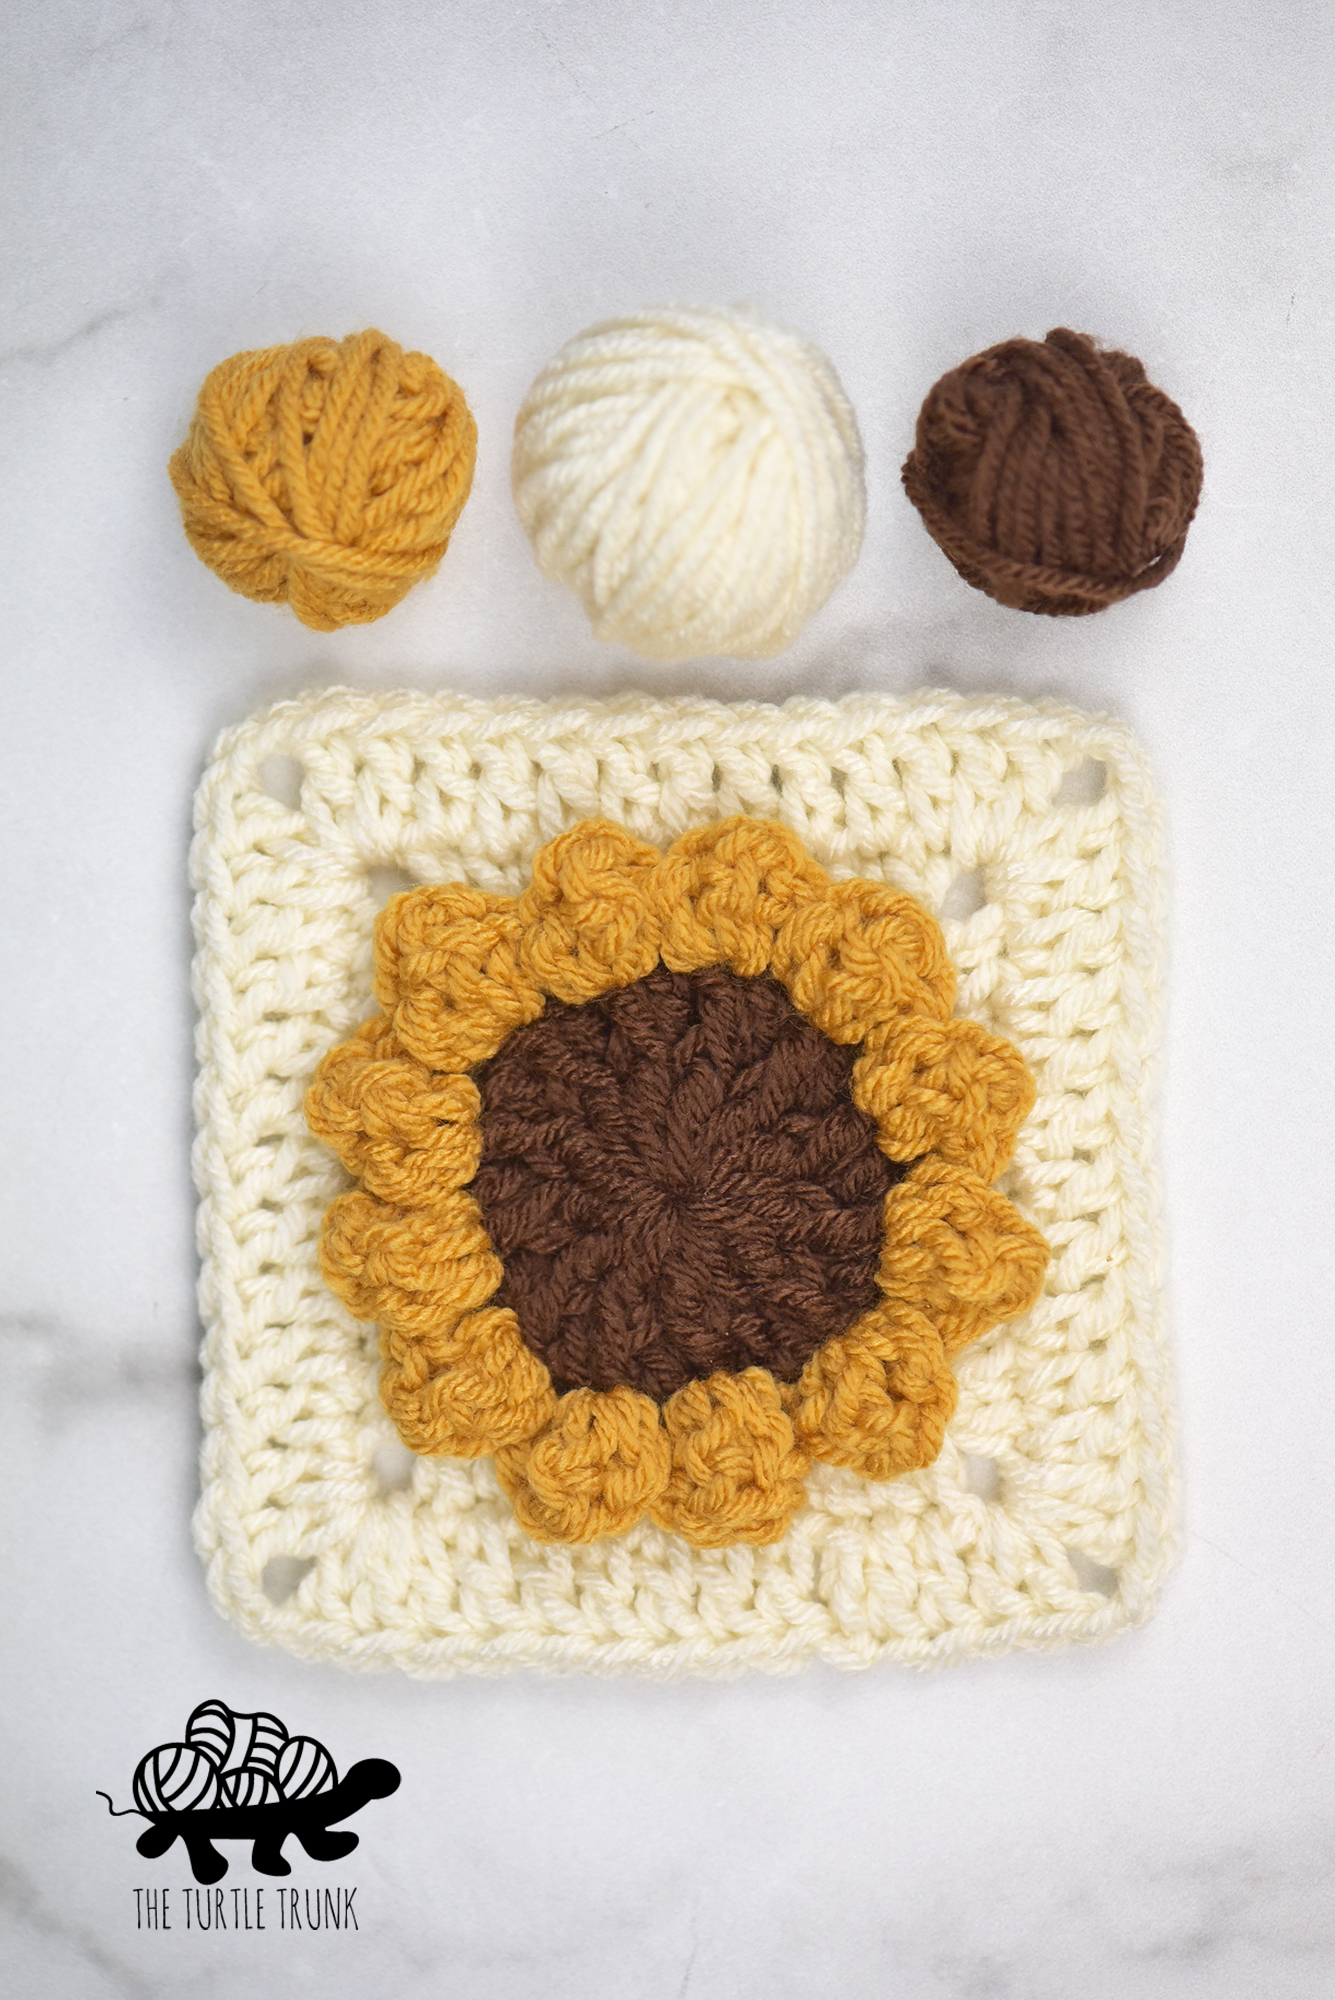
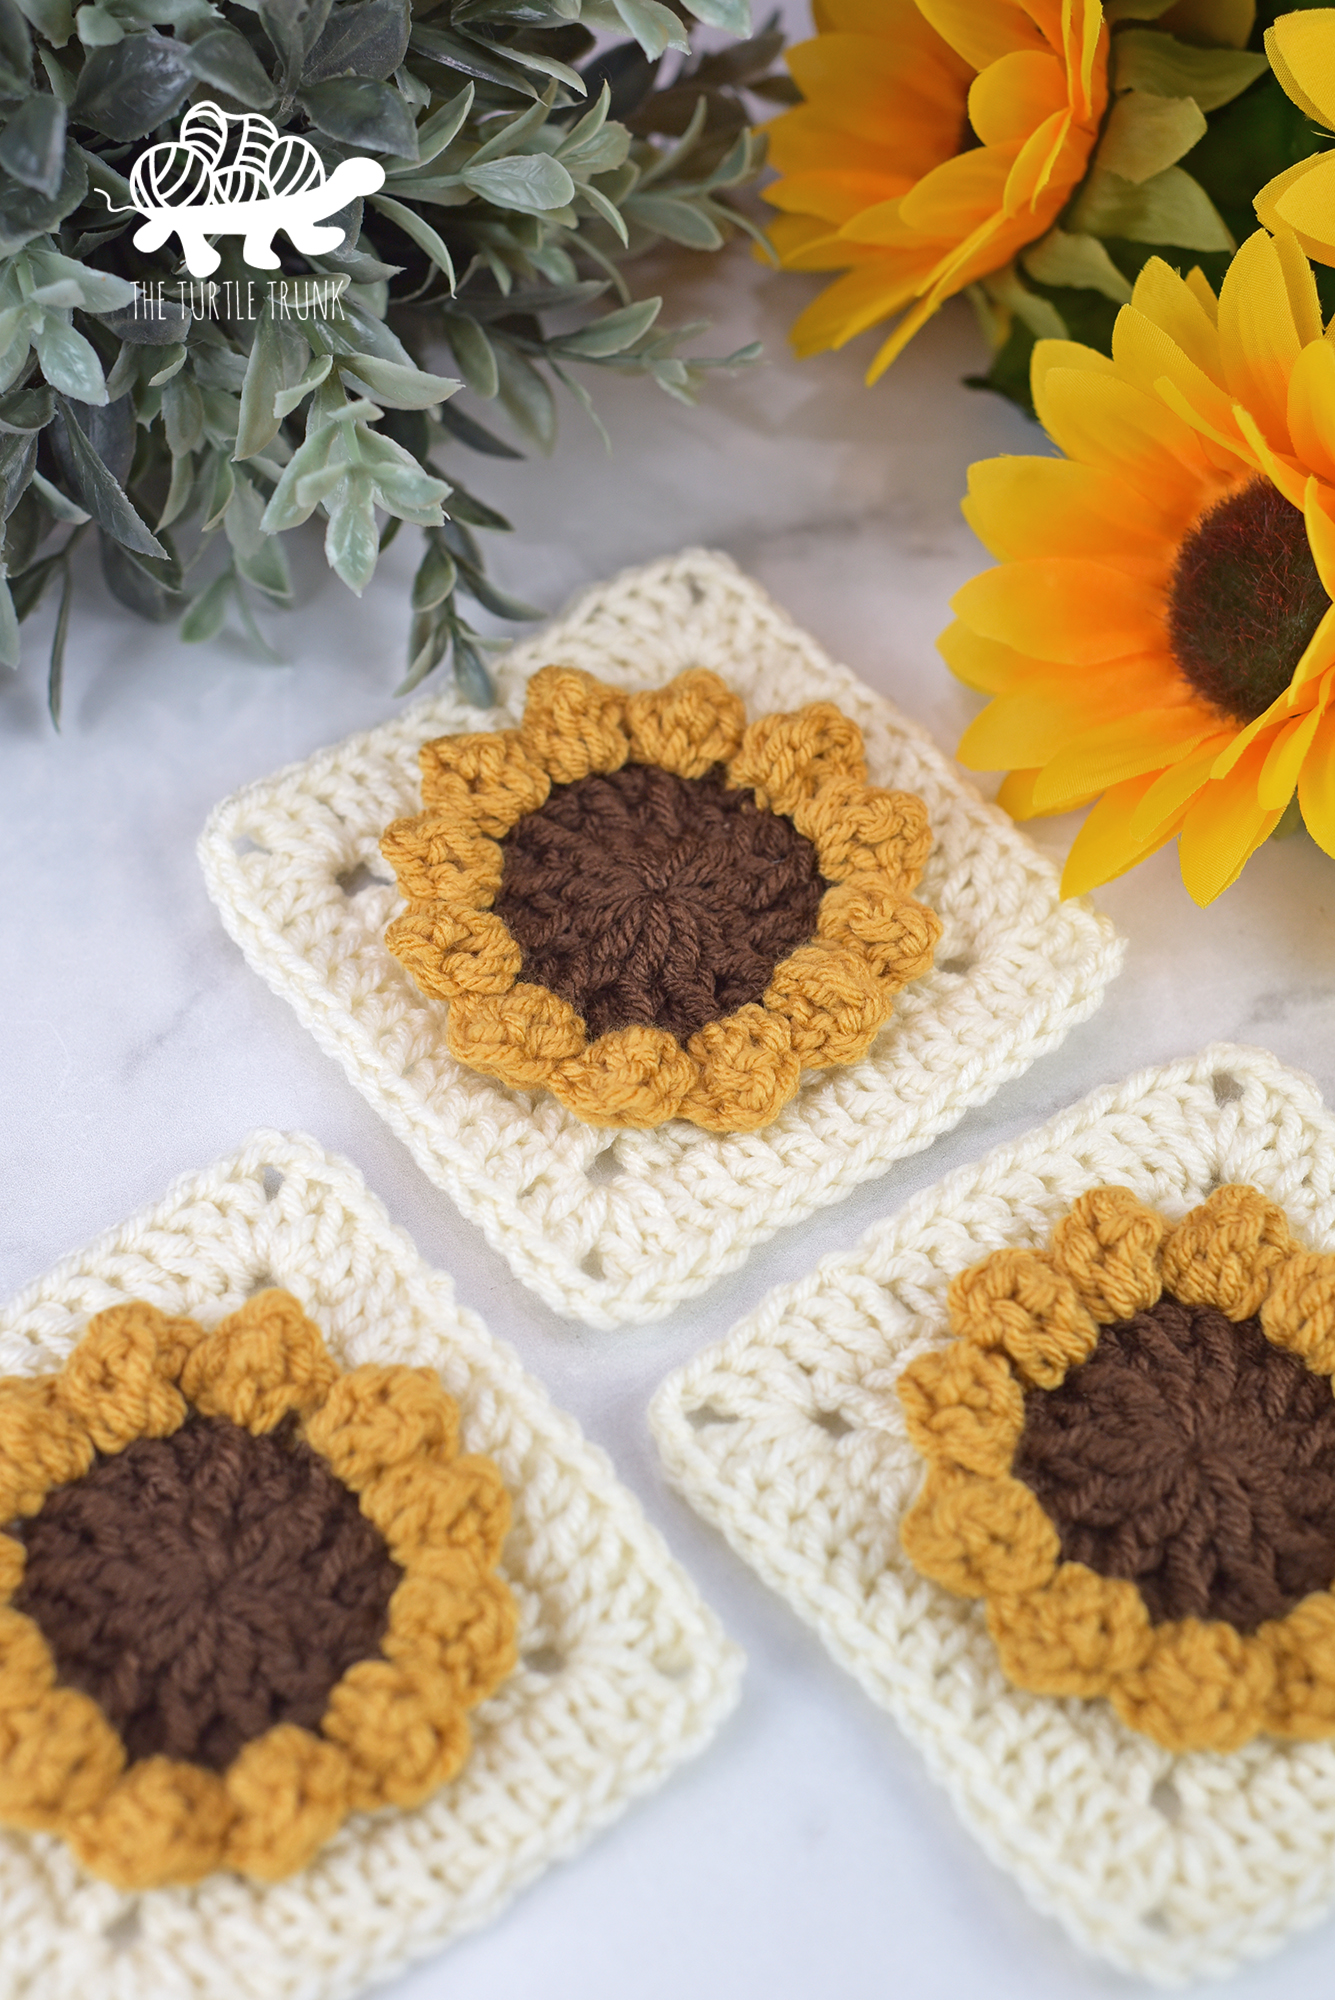
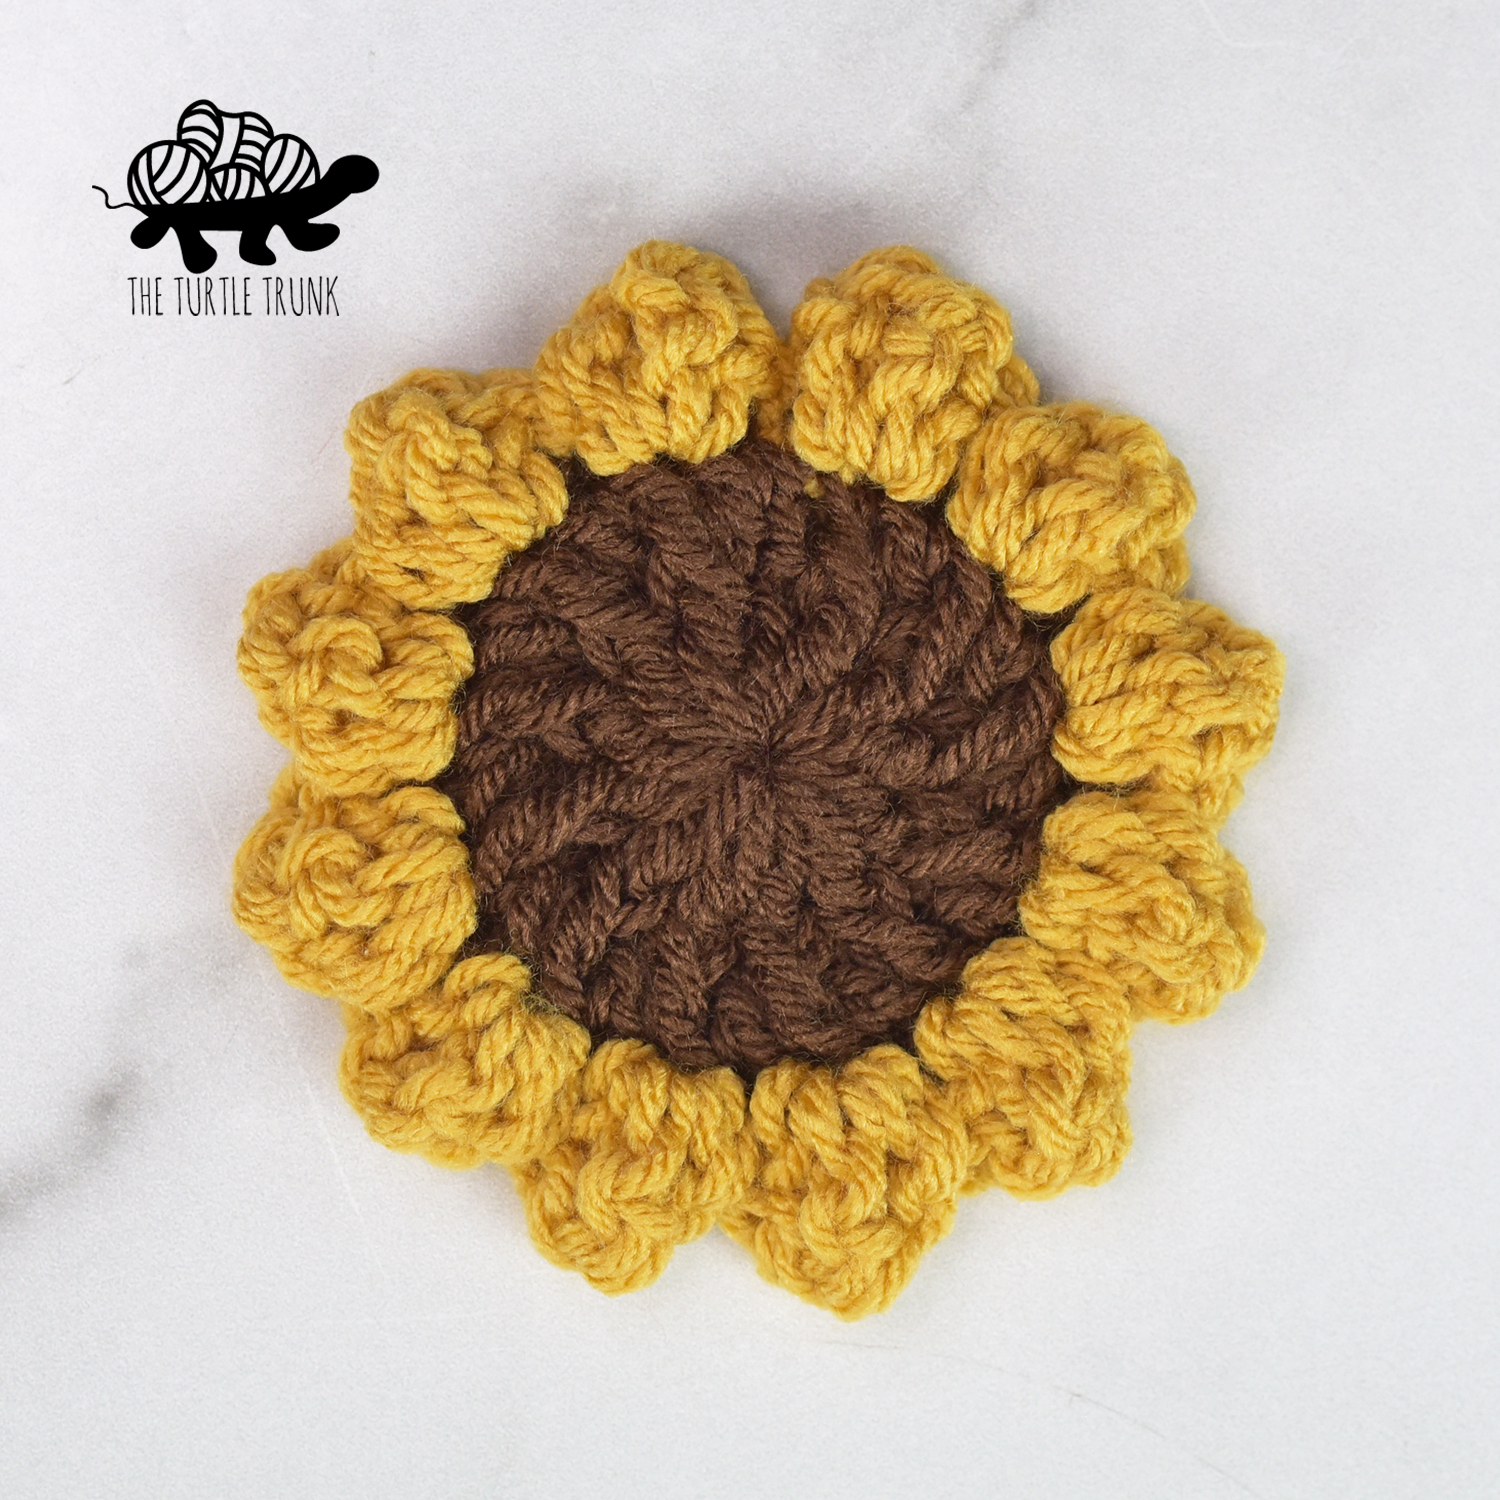
The Sunflower Square is a quick and easy crochet square that features a 3D sunflower and simple square border! This crochet sunflower square can be used for so many projects, e.g. blankets, pillows, bags, and sweaters! You can use any yarn weight and any color to make your sunflower square perfect for your project!
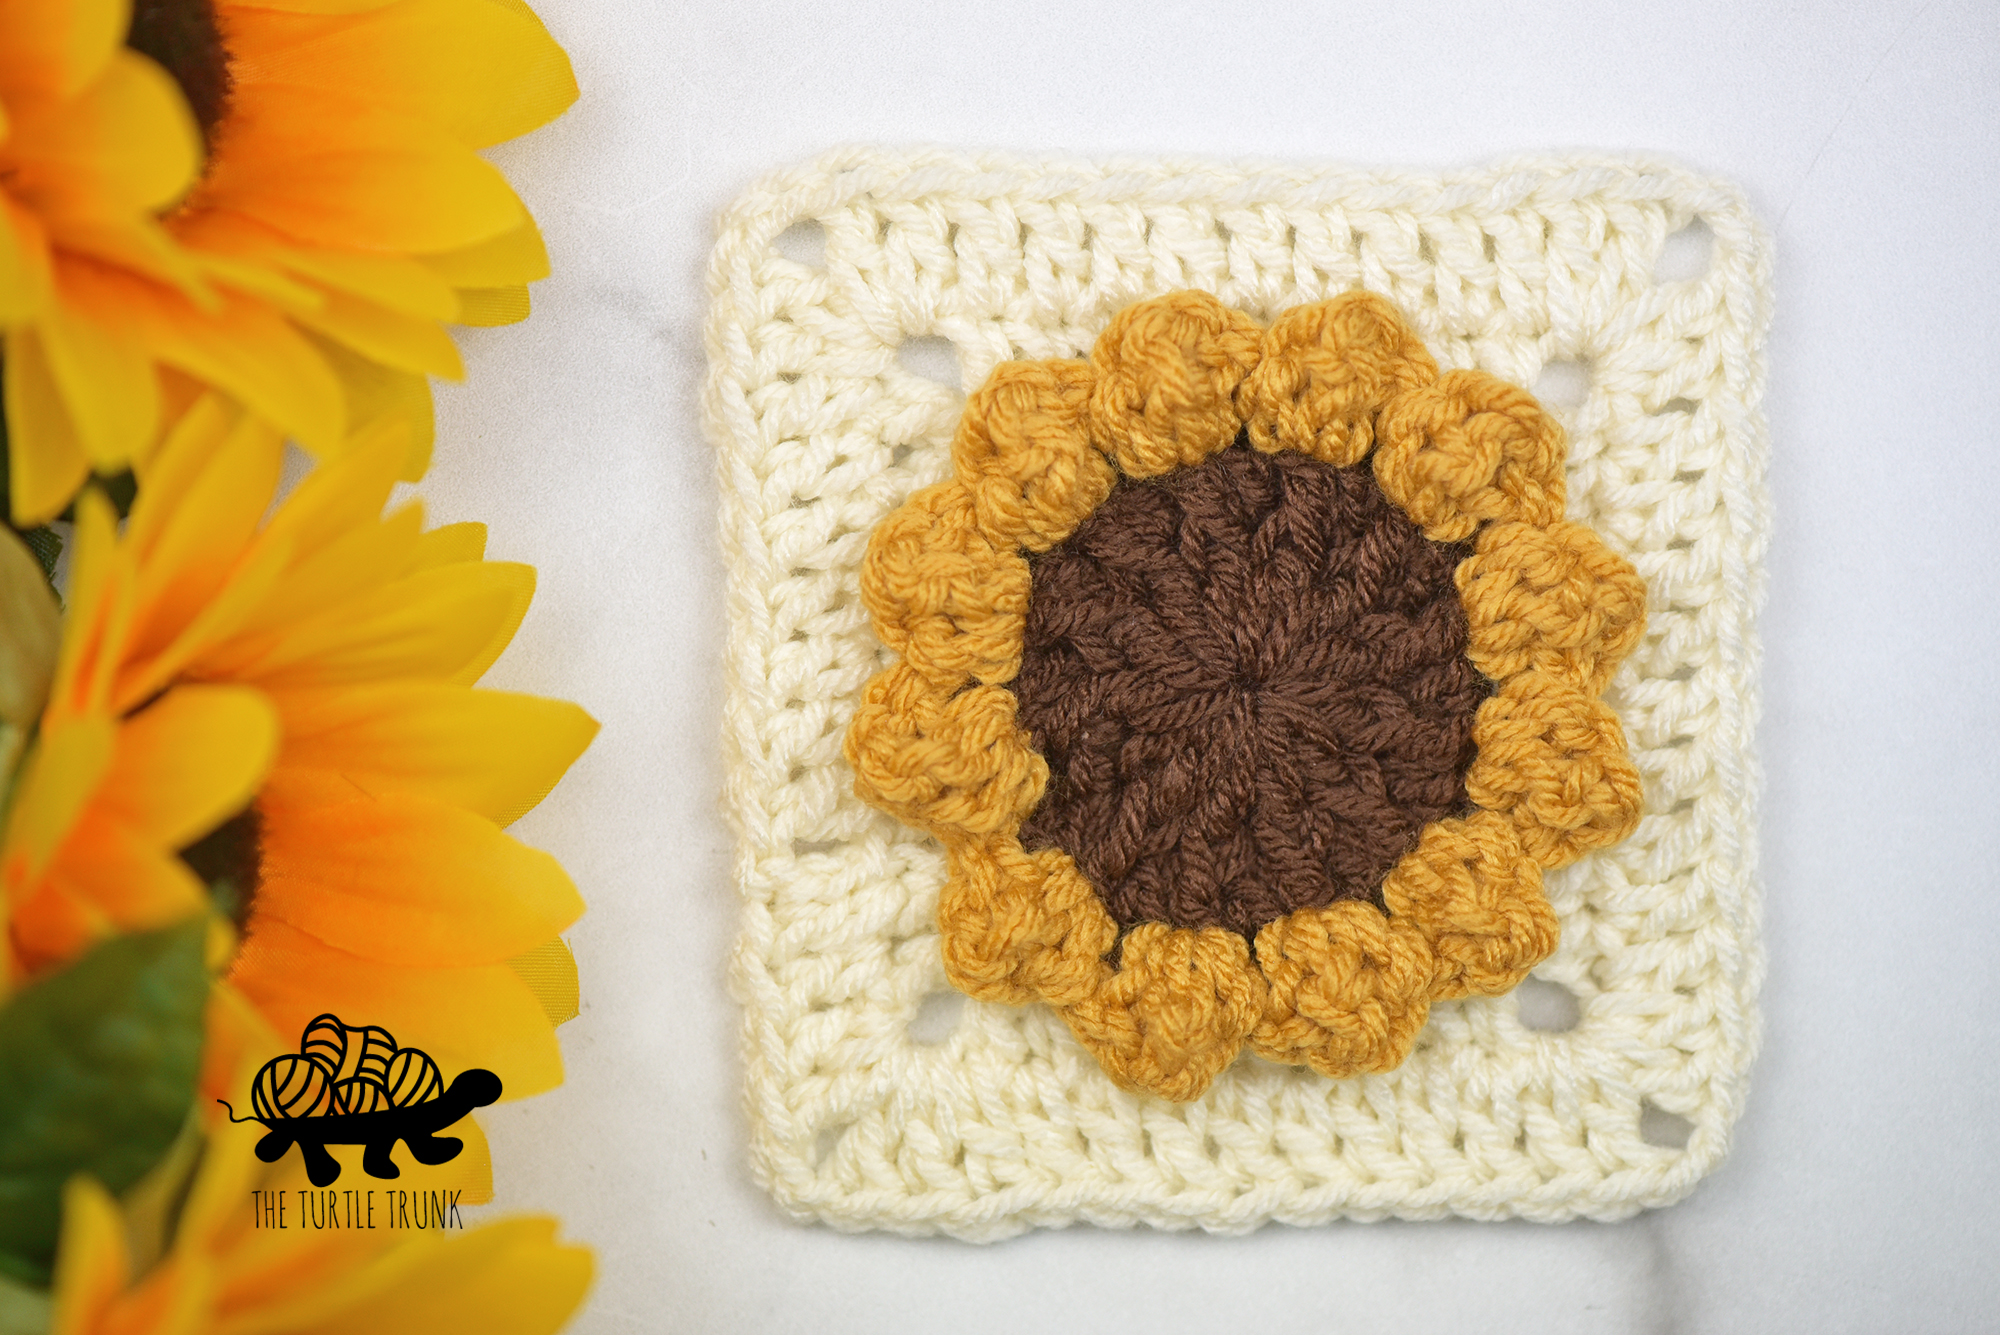
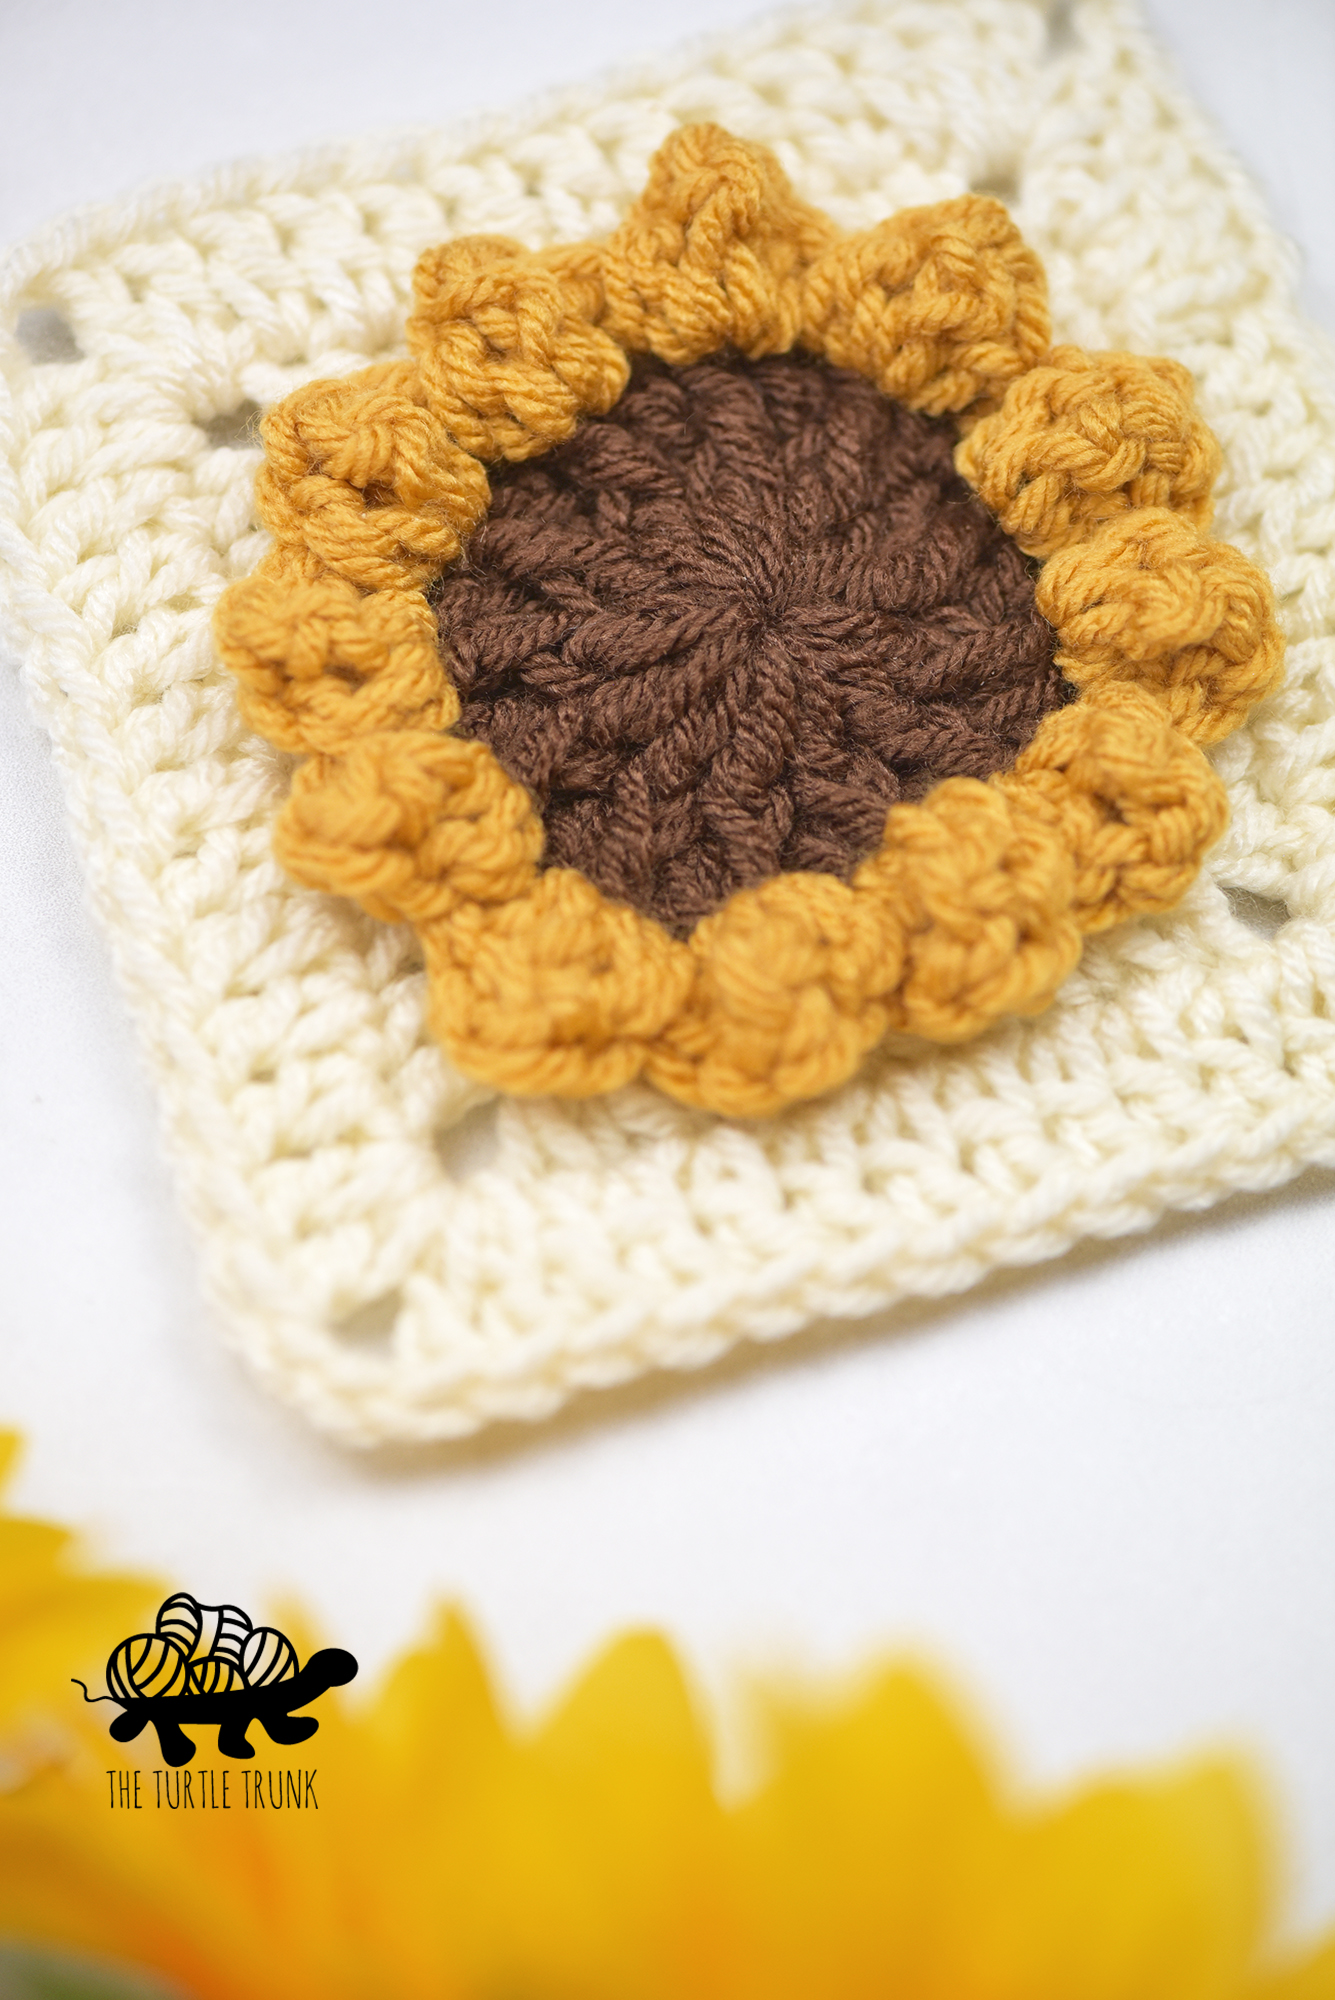
Oh how I love simple but beautiful designs! The Sunflower Square works up quick and easy, but it also has so much texture! This crochet square features a 3D sunflower, where the petals bump out adding dimension and fun! Firstly, the sunflower is created. It can even be used on it’s own as an appliqué or anything else you’d like! Secondly, two border rows are added to create the square, but feel free to add more border rows to make your square larger.
This crochet Sunflower Square has so much potential! You can use a thinner or thicker yarn weight to make squares more appropriate for the seasons and you can use any color combinations you’d like! Use this square to create numerous projects such as accessories, home decor, and garments! I can’t wait to see what you use this Sunflower Square for! I will be designing a few patterns using this Sunflower Square so be sure to check back at this post where I’ll share those patterns.
Continue reading below to hear my inspiration for this pattern and to learn more about the yarn I used, then scroll down for the written pattern!
FOLLOW ALONG WITH THE AD FREE & PRINTABLE PDF PATTERN FROM ETSY AND RAVELRY!
Check out these other sunny crochet patterns: Hello Sunshine Coaster and Hello Sunshine Placemat.
Inspiration
I was gifted some mustard yellow, brown, and white yarn recently and this color palette instantly said sunflower to me! Since 90’s fashion and granny squares coming back into style, I knew using a sunflower square would be the perfect starting point for a new summer design.
I had not planned to release this square by itself. I was going to use it to design a wearable, summer pattern and release them together, but it’s taken me longer than expected to finish the pattern I had planned to use the square for! So I asked on Instagram if I should just release the square pattern now and it was an overwhelming YES!
So here is the Sunflower Square pattern by itself and soon I’ll be sharing a summery design you can use it for! I plan to release a few patterns overtime using this square but in the meantime feel free to ue it for any project you’d like! I’ll be sure to share any patterns I design using this Sunflower Square in this post if you’re interested!
Yarn
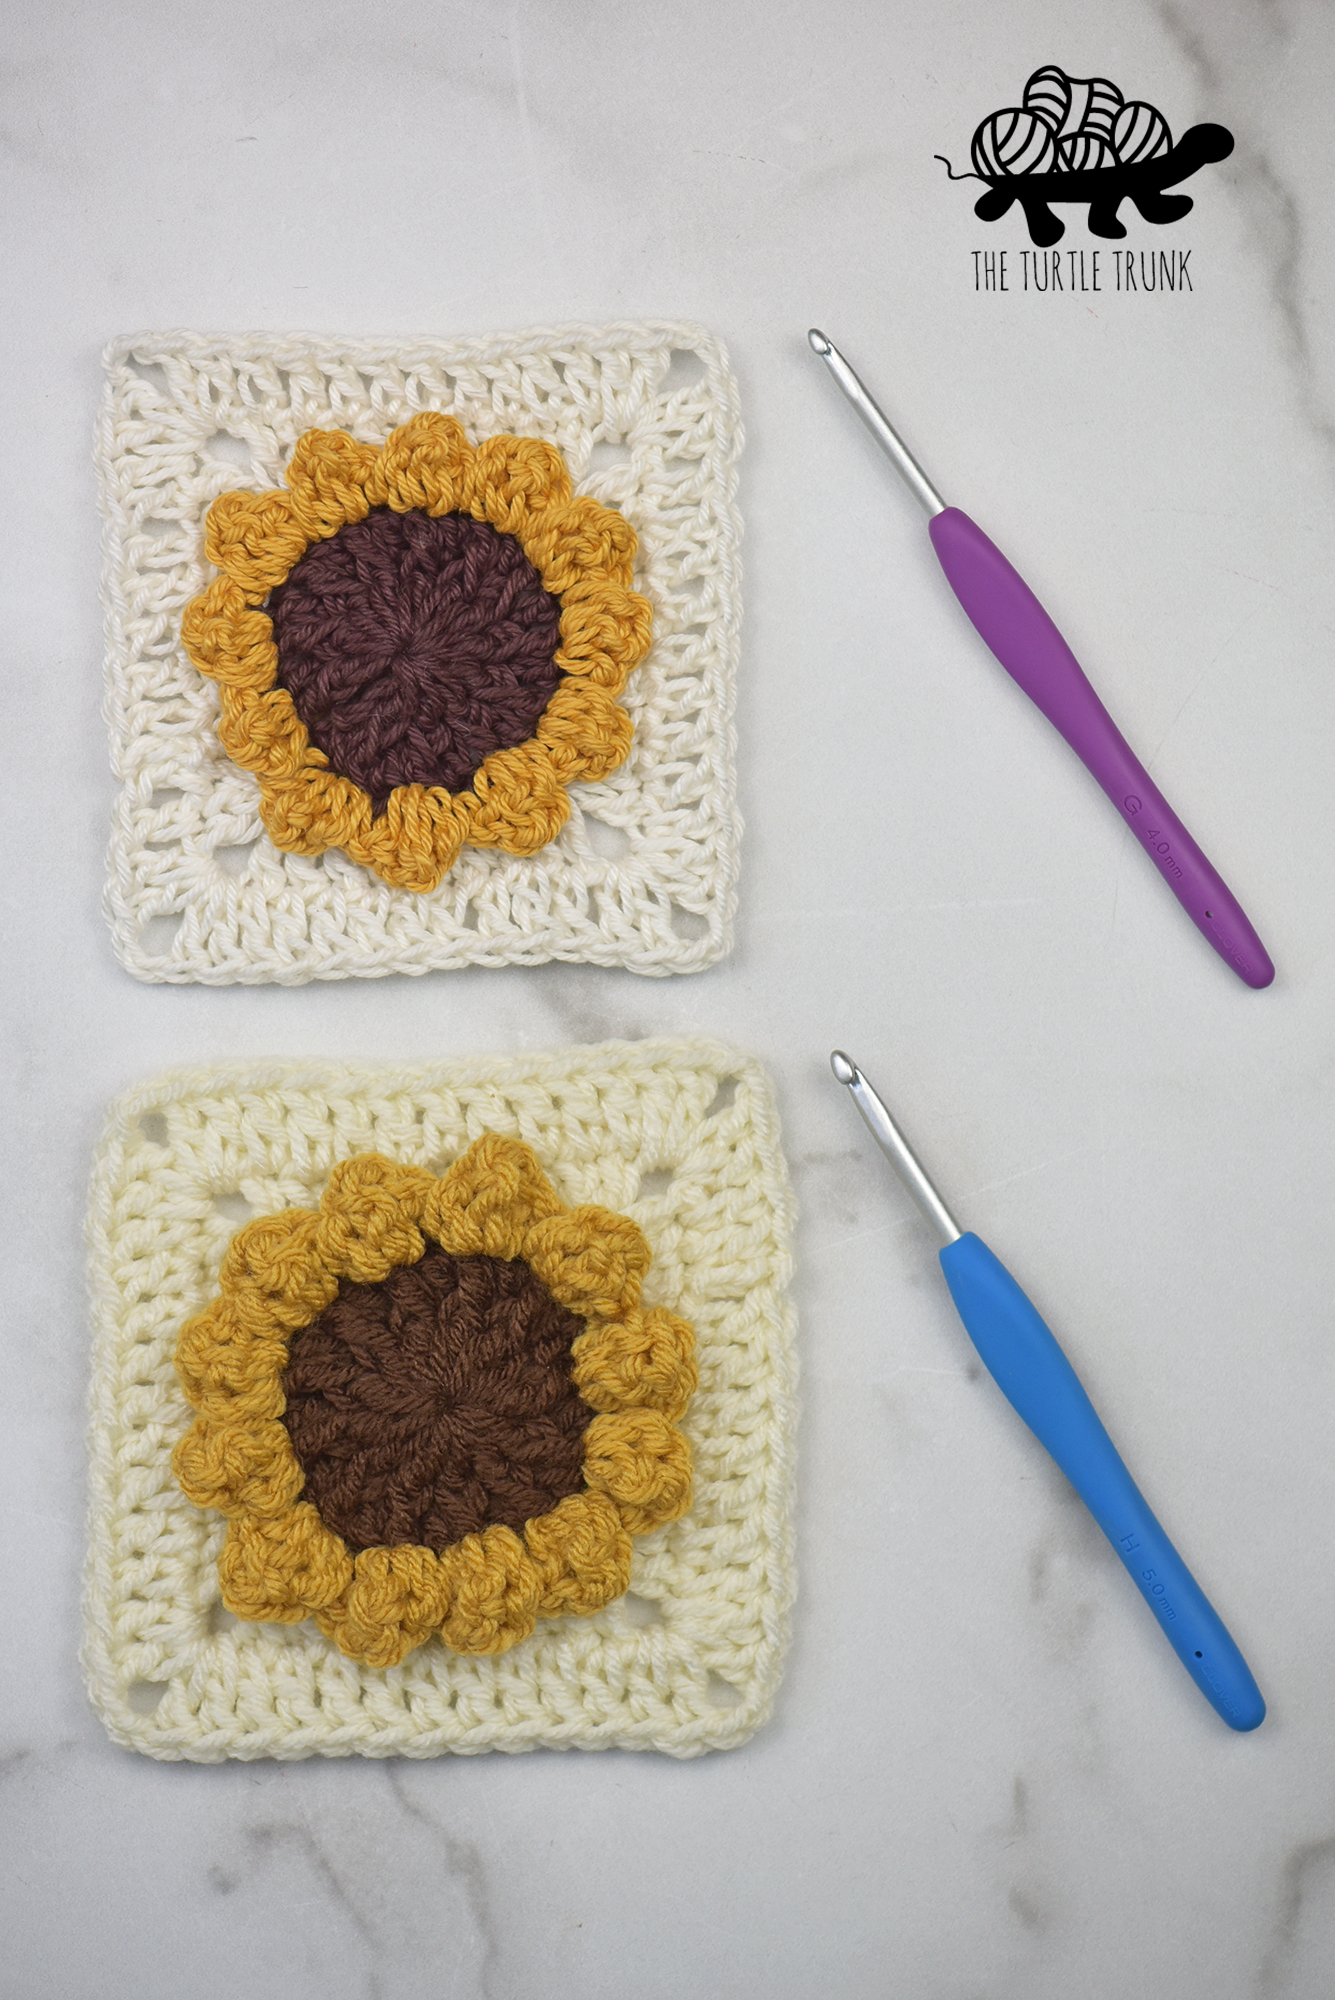
I originally designed this Sunflower Square pattern using a light (3) weight yarn. It created a 4.5″, lightweight square that would be perfect for warm weather wearables! But after playing around with the pattern a bit more I decided to try it using a medium (4) weight yarn and loved the outcome! I realized this Sunflower Square could be made with any yarn weight which makes it so versatile in what you can create with it! I think using a lighter weight yarn will make for great Spring and Summer projects, like bags, tanks, and tops, whereas using a medium or bulky weight yarn will be perfect for Fall and Winter and for items such as cardigans, sweaters, blankets, and scarves!
The pattern shows a medium weight square that uses medium (4) weight yarn and 5.00mm (H) hook that create a 5″ square, but feel free to use any yarn weight you’d like! If using a different yarn weight you’ll need to adjust your hook size according and your square measurements will also be a bit different. For example, for my light weight square, I used a light (3) weight yarn, 4.00mm (G) hook, which created a 4.5″ square. Lighter weight yarn will create a square that’s not as heavy and with larger gaps between the stitches, whereas a heavier yarn will make for a thicker and denser square.
Colors
This square mimics a sunflower not only because of the design elements, such as a large center and large number of petals, but more obviously the colors! When designing this Sunflower Square I started with the color palette and new it be perfect for a sunflower design. But this is where you have the freedom to be as creative as you’d like! This pattern calls for 3 different colors and you can use ANY colors you want! Even if you still want it to look like a sunflower with a brown center and yellow petals, you can change the square color! It you’re making lot’s of squares for a project you can even mix and match and make your squares different colors! The possibilities are endless!
Blocking
Ever wonder how people can get their crochet squares PERFECTLY square? The trick is to block your squares when you’re done! Basically, blocking is when you pin down your project on a mat, wet it, and let it dry. This relaxes the stitches and your project will stay the shape you blocked it in. There are 2 common methods for blocking your crochet items. Wet Blocking and Steam Blocking.
Wet blocking is when you take your finished square (or project) and wet it, by either washing it, soaking it, or spritzing it with water. Then take your square and pin it into shape on a blocking mat or a blocking board. You want to stretch your square so that the stitches are even and the sides are perfectly straight. Using a blocking mat or a blocking board that are specifically for knitting and crochet are helpful as they have guidelines on them. Allow your square to dry fully before removing, then you will have perfectly equal and even squares!
Steam blocking is similar but you will take a dry square and place it on your blocking mat or a blocking board, then use a handheld steamer to steam the square. Be sure not to get your project too hot if using acrylic yarn as it can melt from high heat. Again, allow to dry before removing your square and it should be a perfectly equal and even square!
When making multiple squares for a project, blocking can really help fix any tension dissimilarities, uneven stitches or edges, give your square sharper corners, and ensure all your squares are the exact same size.
Pin now make later!
Follow along with the video tutorial for the Sunflower Square on YouTube!
DIFFICULTY
Advanced Beginner
FINISHED SIZE
5″ x 5″
GAUGE
10 STs x 4 Rows in DC = 3” x 3”
Adjust hook size up or down to meet gauge
Notes
- This pattern is worked in the round. At the end of each round, join with a slip stitch to the top of the first stitch from the round then chain 2. Work your first stitch into the same stitch as the chain.
- Beginning chains do not count as stitches throughout the whole pattern.
- The number in parenthesis at the end of each round represents the total number of stitches to be worked in each round.
- Stitches between *asterisk’s* are to be repeated until the end of the round or until otherwise stated.
- Stitches between [brackets] are to be worked into the same stitch.
- The petals of the flower are created in Round 3. This round will be worked in the opposite direction so that the petals bump out on the right side of the square. At the end of Round 2, join, CH 2, and turn your work so that the wrong side is facing you. For Round 4, turn your work back so that the right side if facing you.
- The right side of the square will show the texture from Round 2 & 3, the wrong side will be flat.
Supplies
- Medium (4) Weight Yarn in 3 Colors
- Color A – Brown – approx. 5 yards
- Color B – Yellow – approx. 6 yards
- Color C – White – approx. 20 yards
- 5.00mm (H) crochet hook
- Yarn Needle
- Scissors
ABBREVIATIONS (US TERMS)
ST(s) – Stitch(es)
SL ST – Slip Stitch
CH – Chain
DC – Double Crochet
FPDC – Front Post Double Crochet
TR – Triple Crochet
SPECIAL STITCHES
Front Post Double Crochet (FPDC): Yarn over, then insert your hook from the front, around the back, and to the front again, around the post of the stitch. Yarn over, pull up a loop, yarn over, and then pull through 2 loops. Yarn over and pull through last 2 loops.
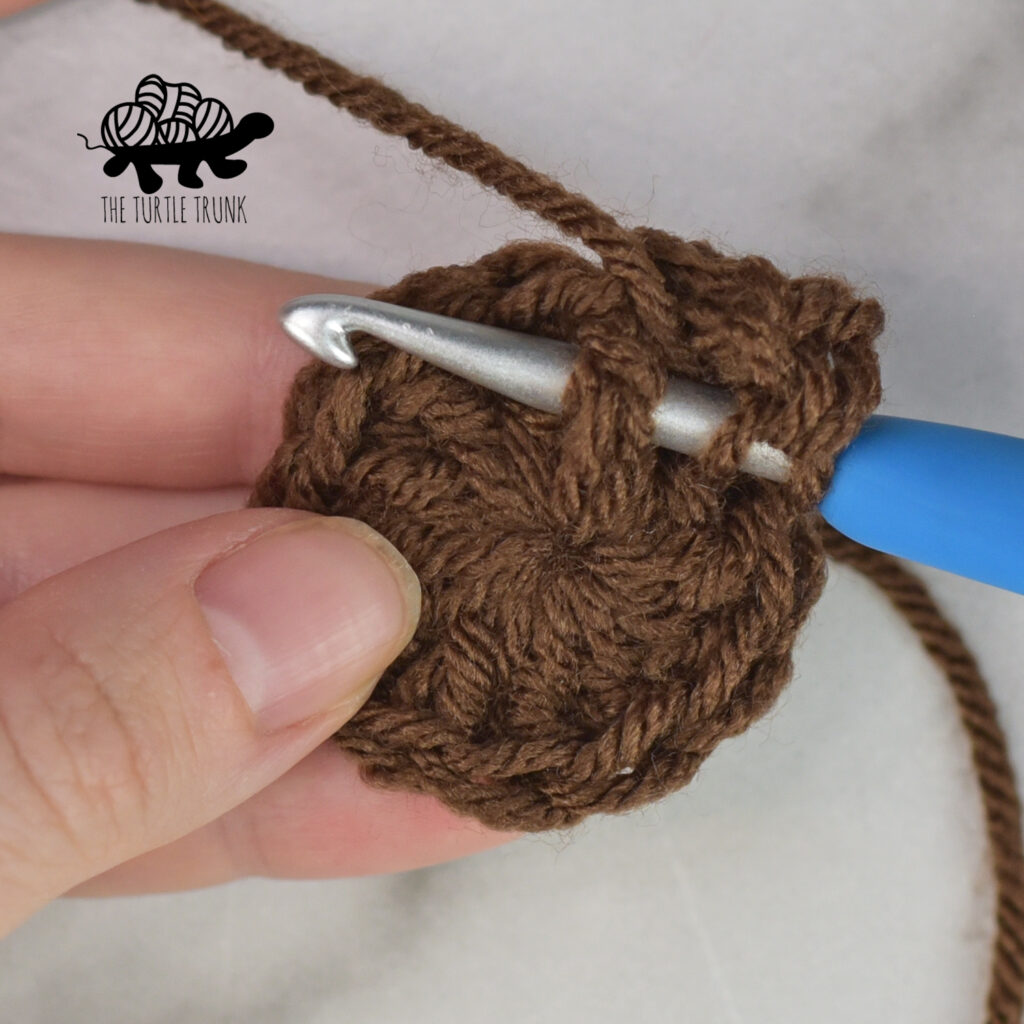
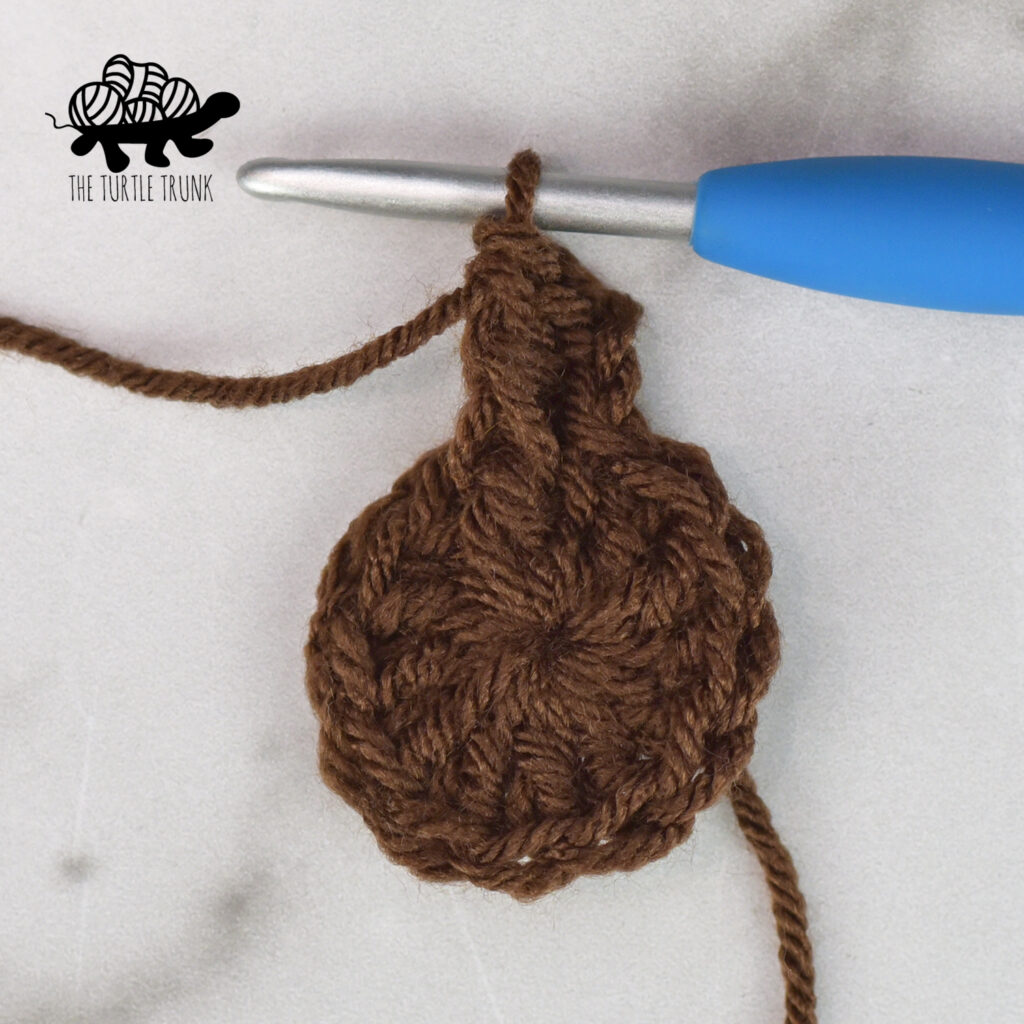
Changing Colors: On the final pull through of the last stitch of the round before the color change, drop your current color and pick up your next color. Pull through with the new color and join to the beginning of the round. Carry on with the new color and cut off the previous color.


Sunflower Square Pattern
Starting with Color A
Magic Circle, CH 2.
Round 1: DC x12 inside the circle. Join & CH 2. (12)
Round 2: [DC, FP] into each ST around. Change to Color B. Join to the front loop of the 1st ST of the round. CH 2 and turn. (24)
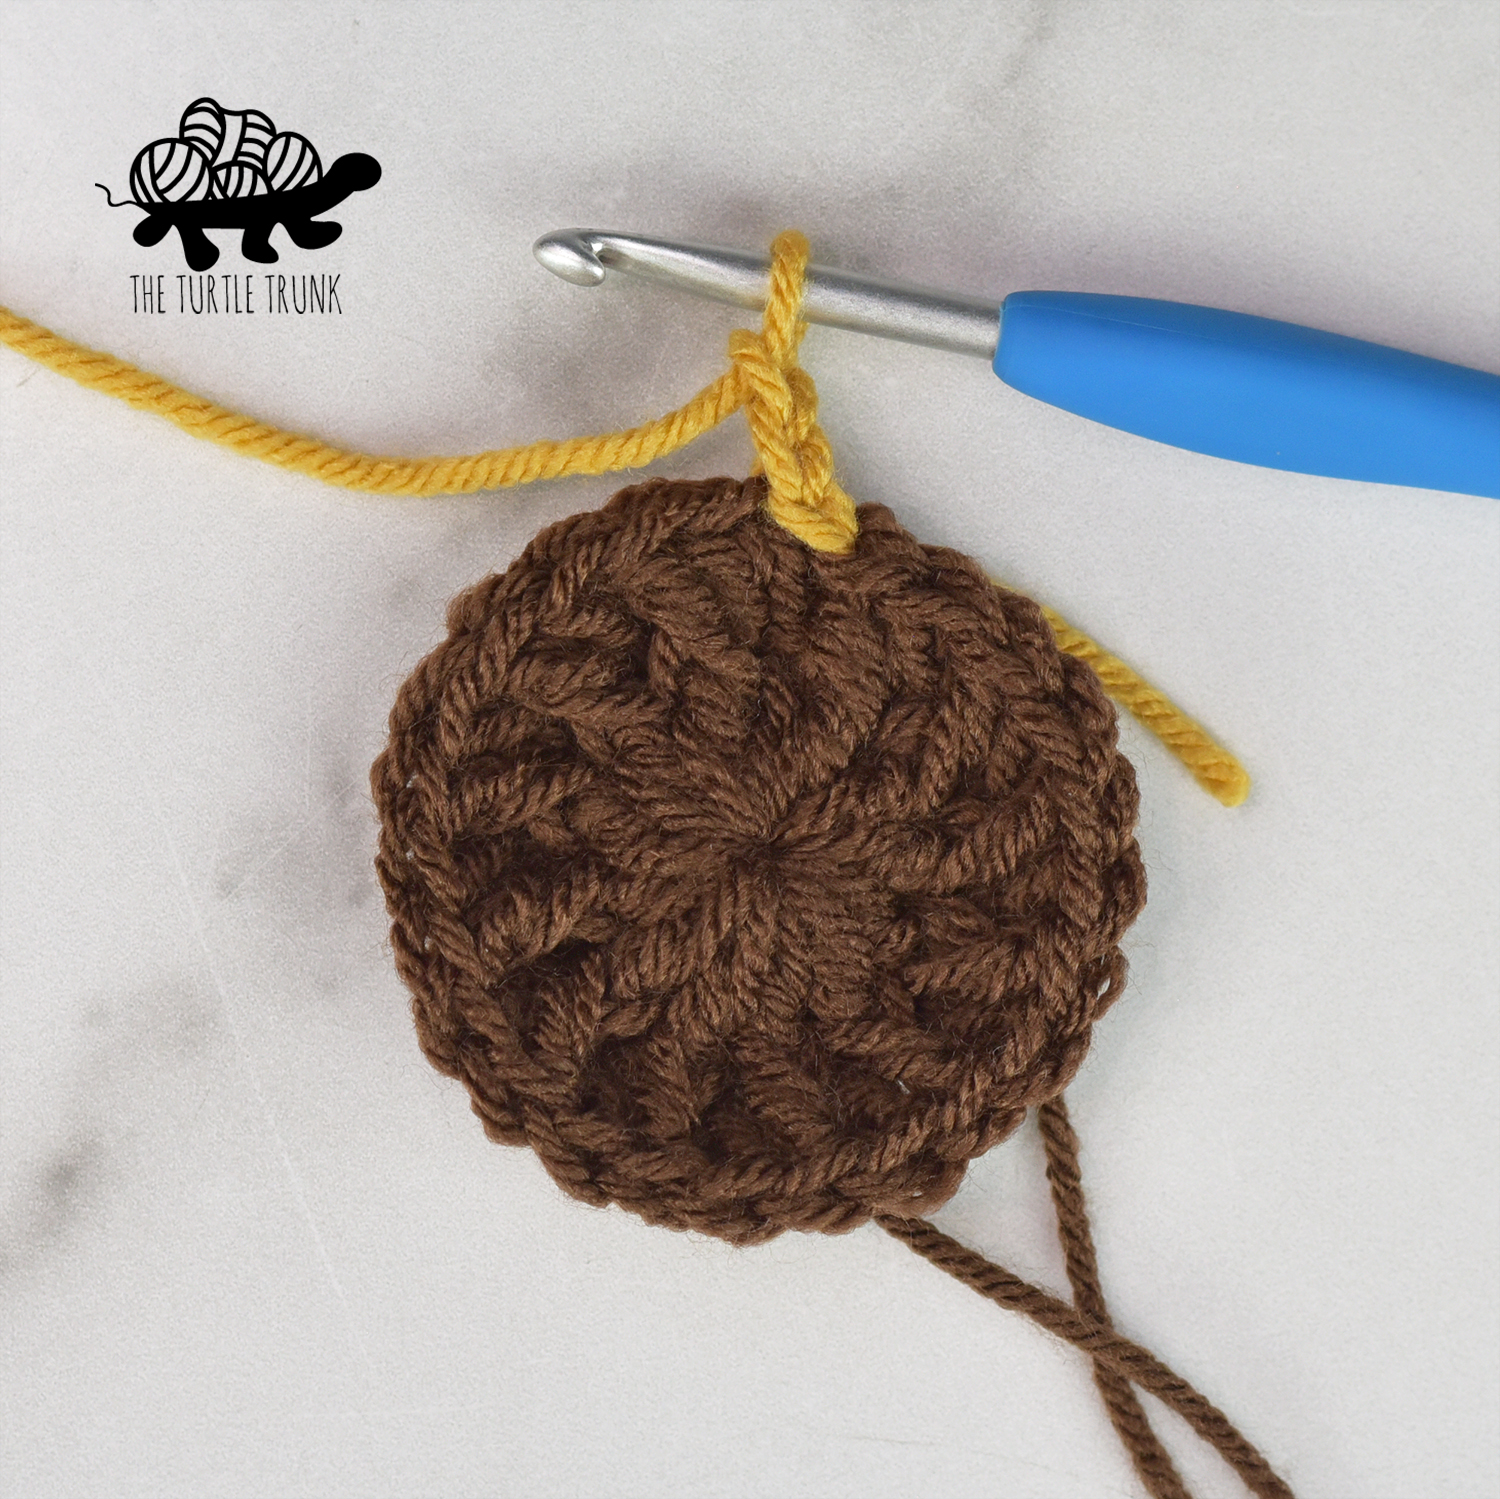
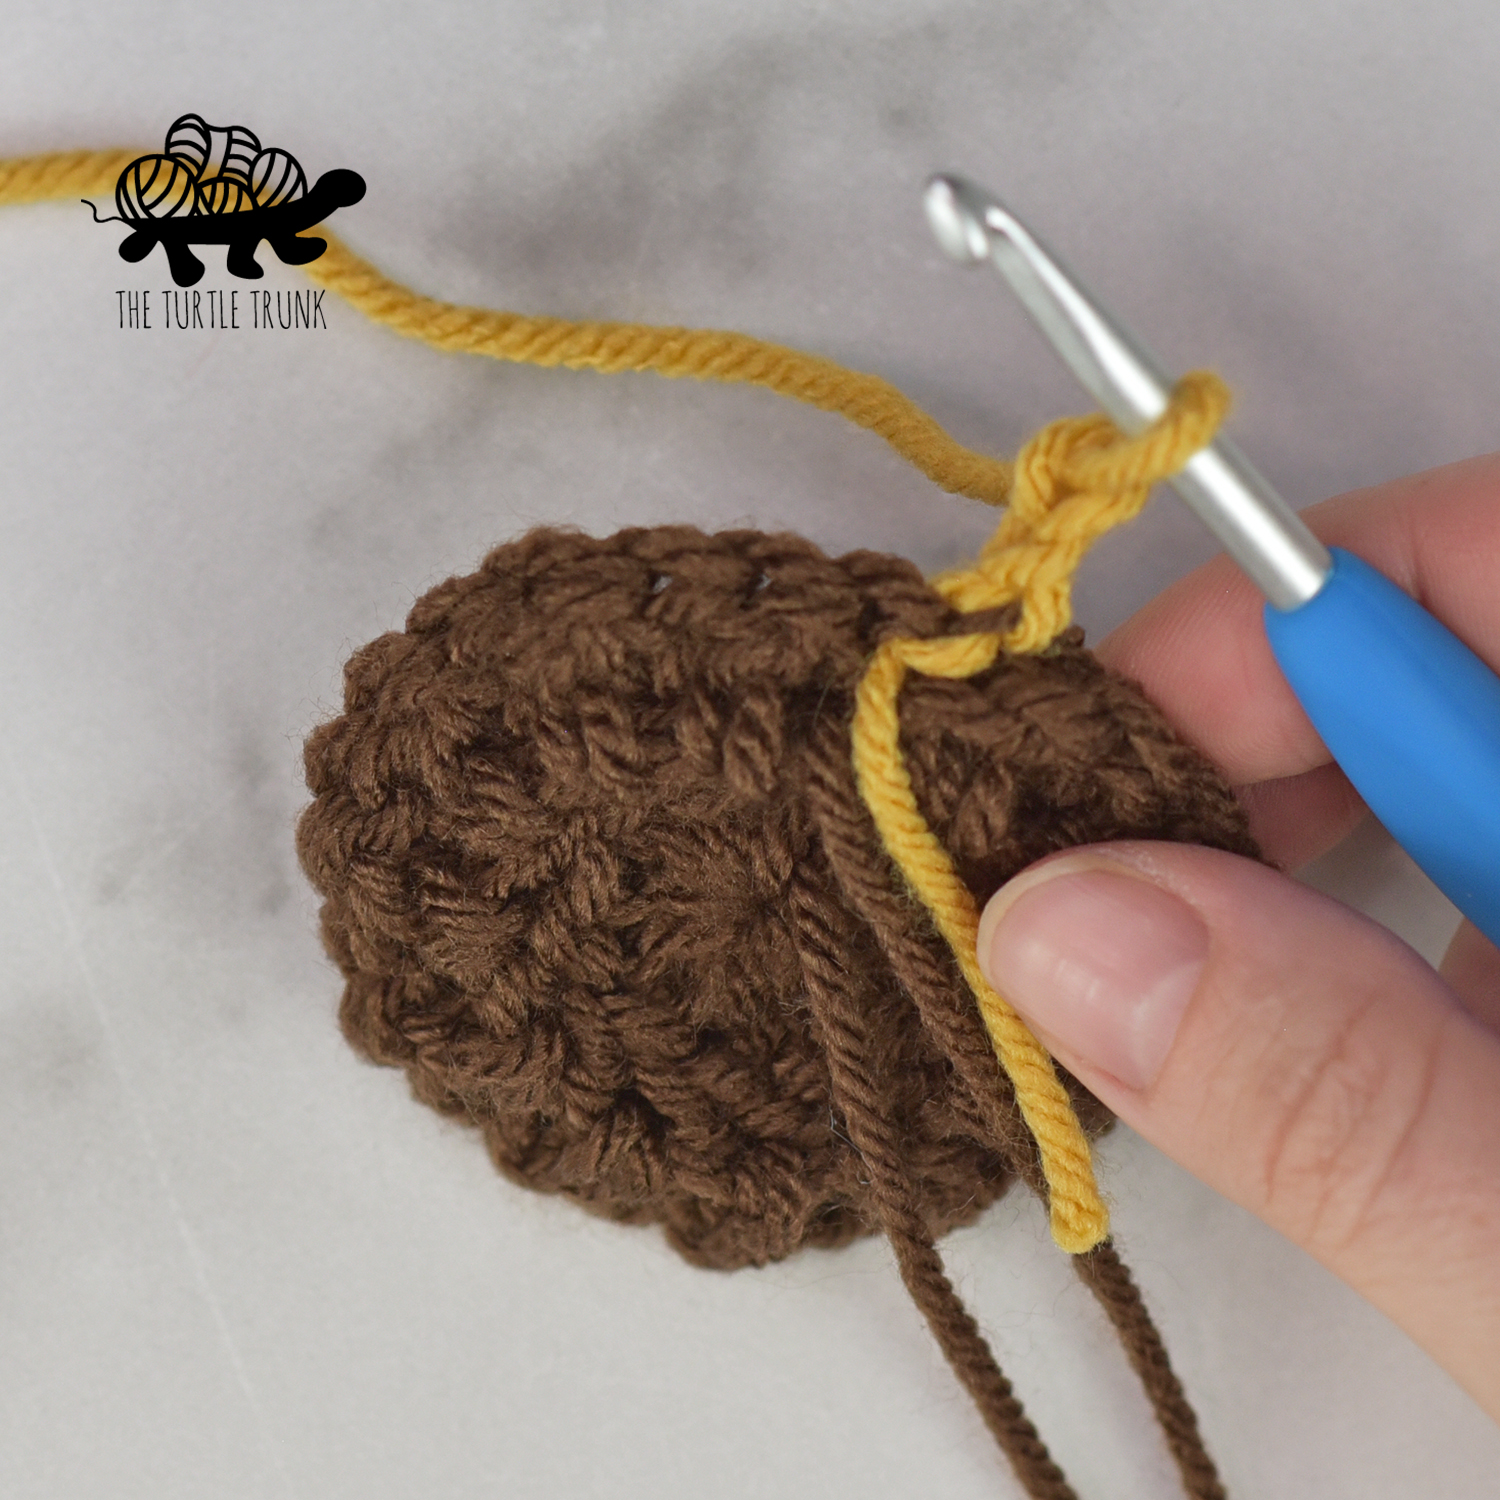
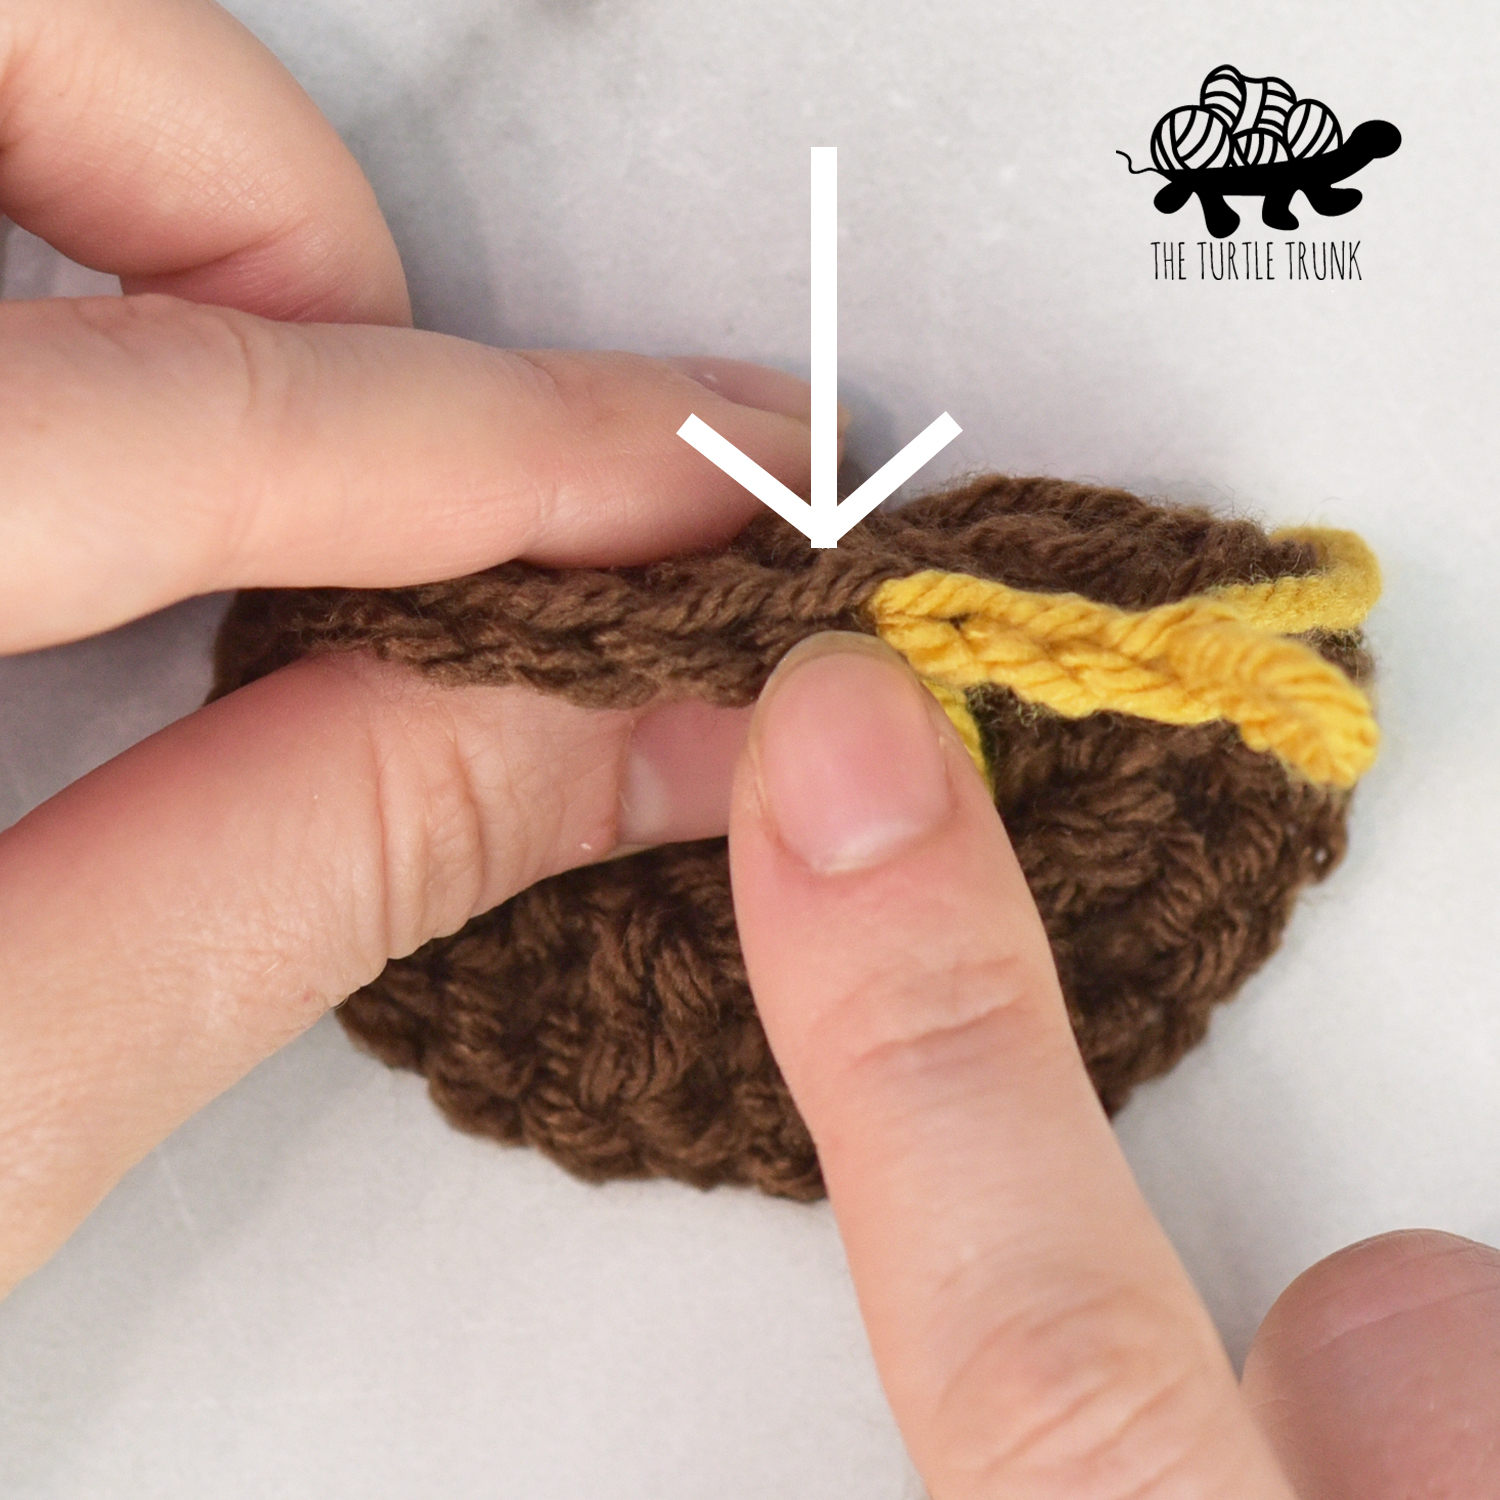
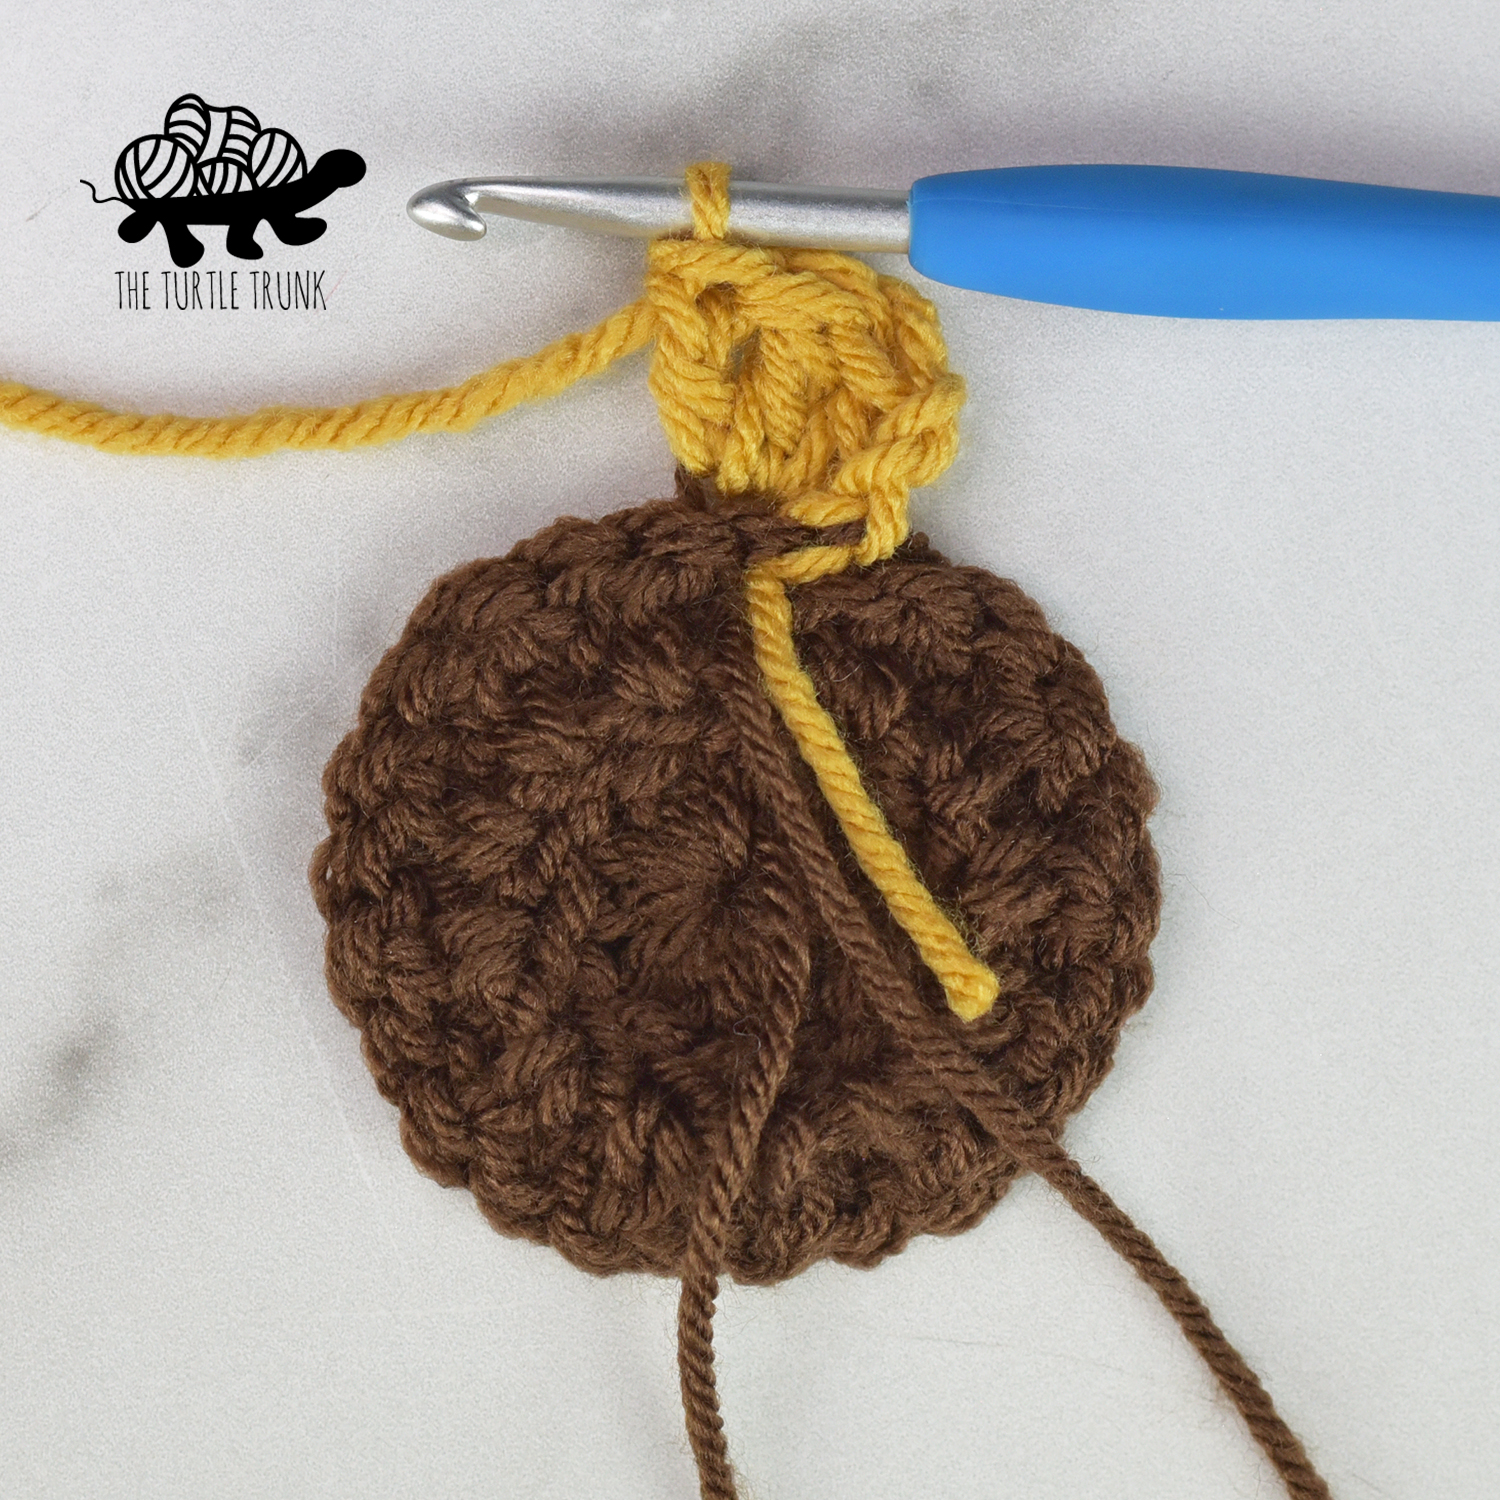
Round 3: (now working with the wrong side facing you and into the back loop only) *[DC, TR, DC] into the 1stST, SL ST into the next* repeat ** around. Work the last SL ST into the same ST as the CH 2 from the beginning of the round. Tie off yarn. (36)
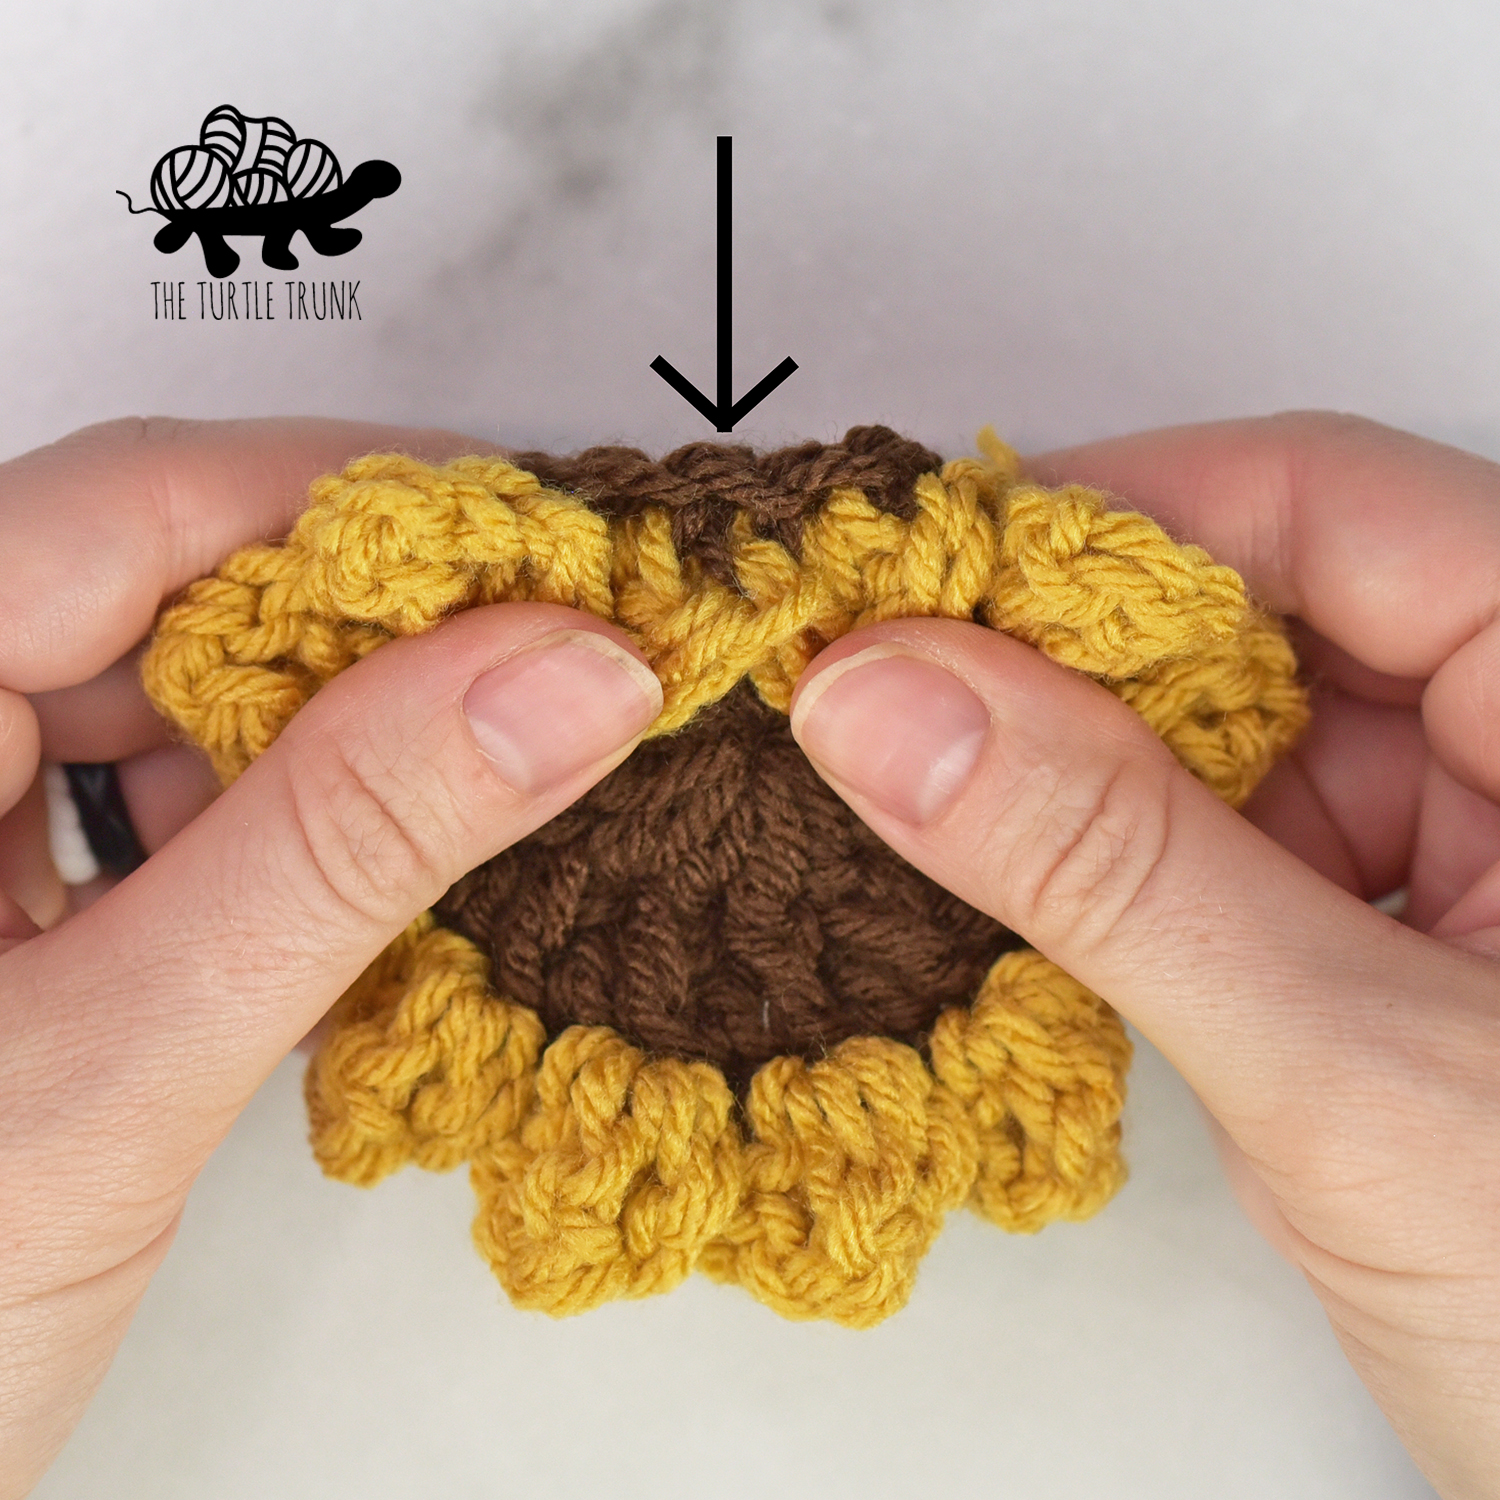
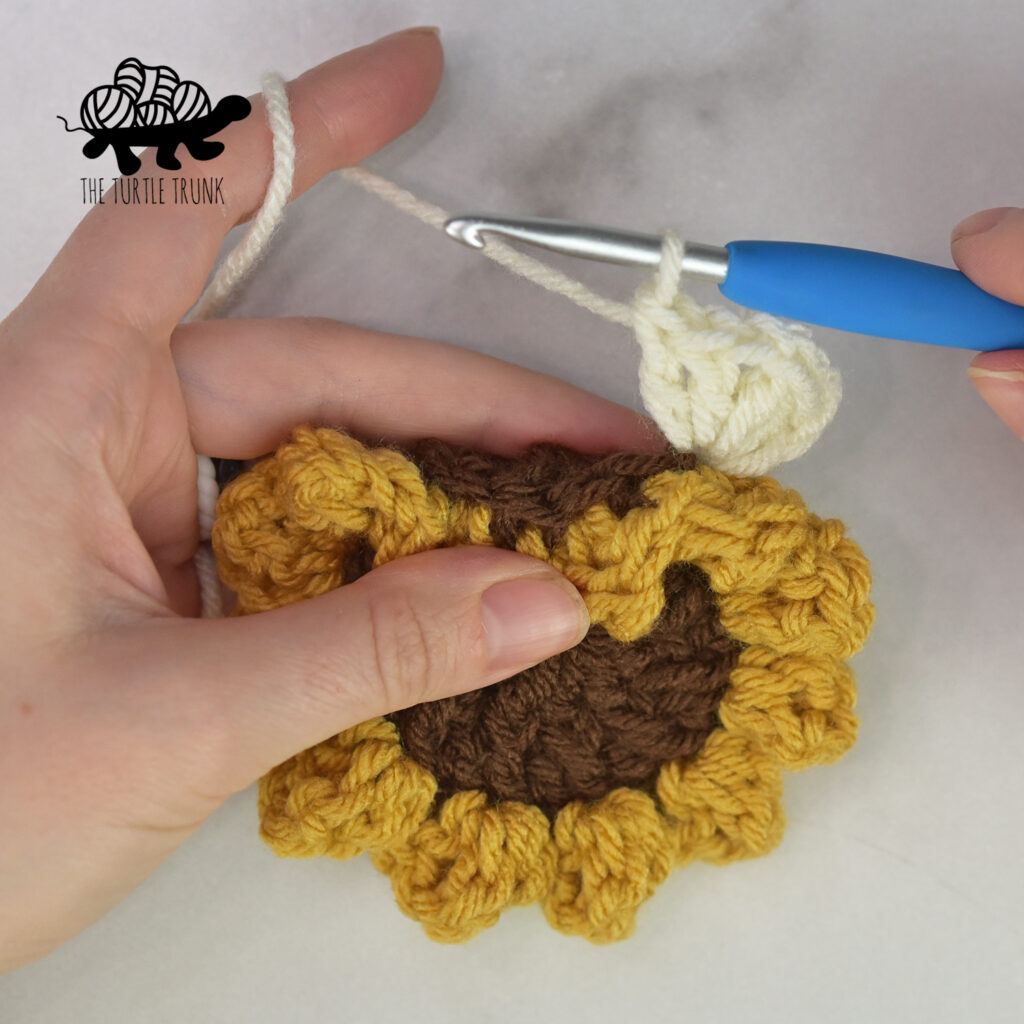
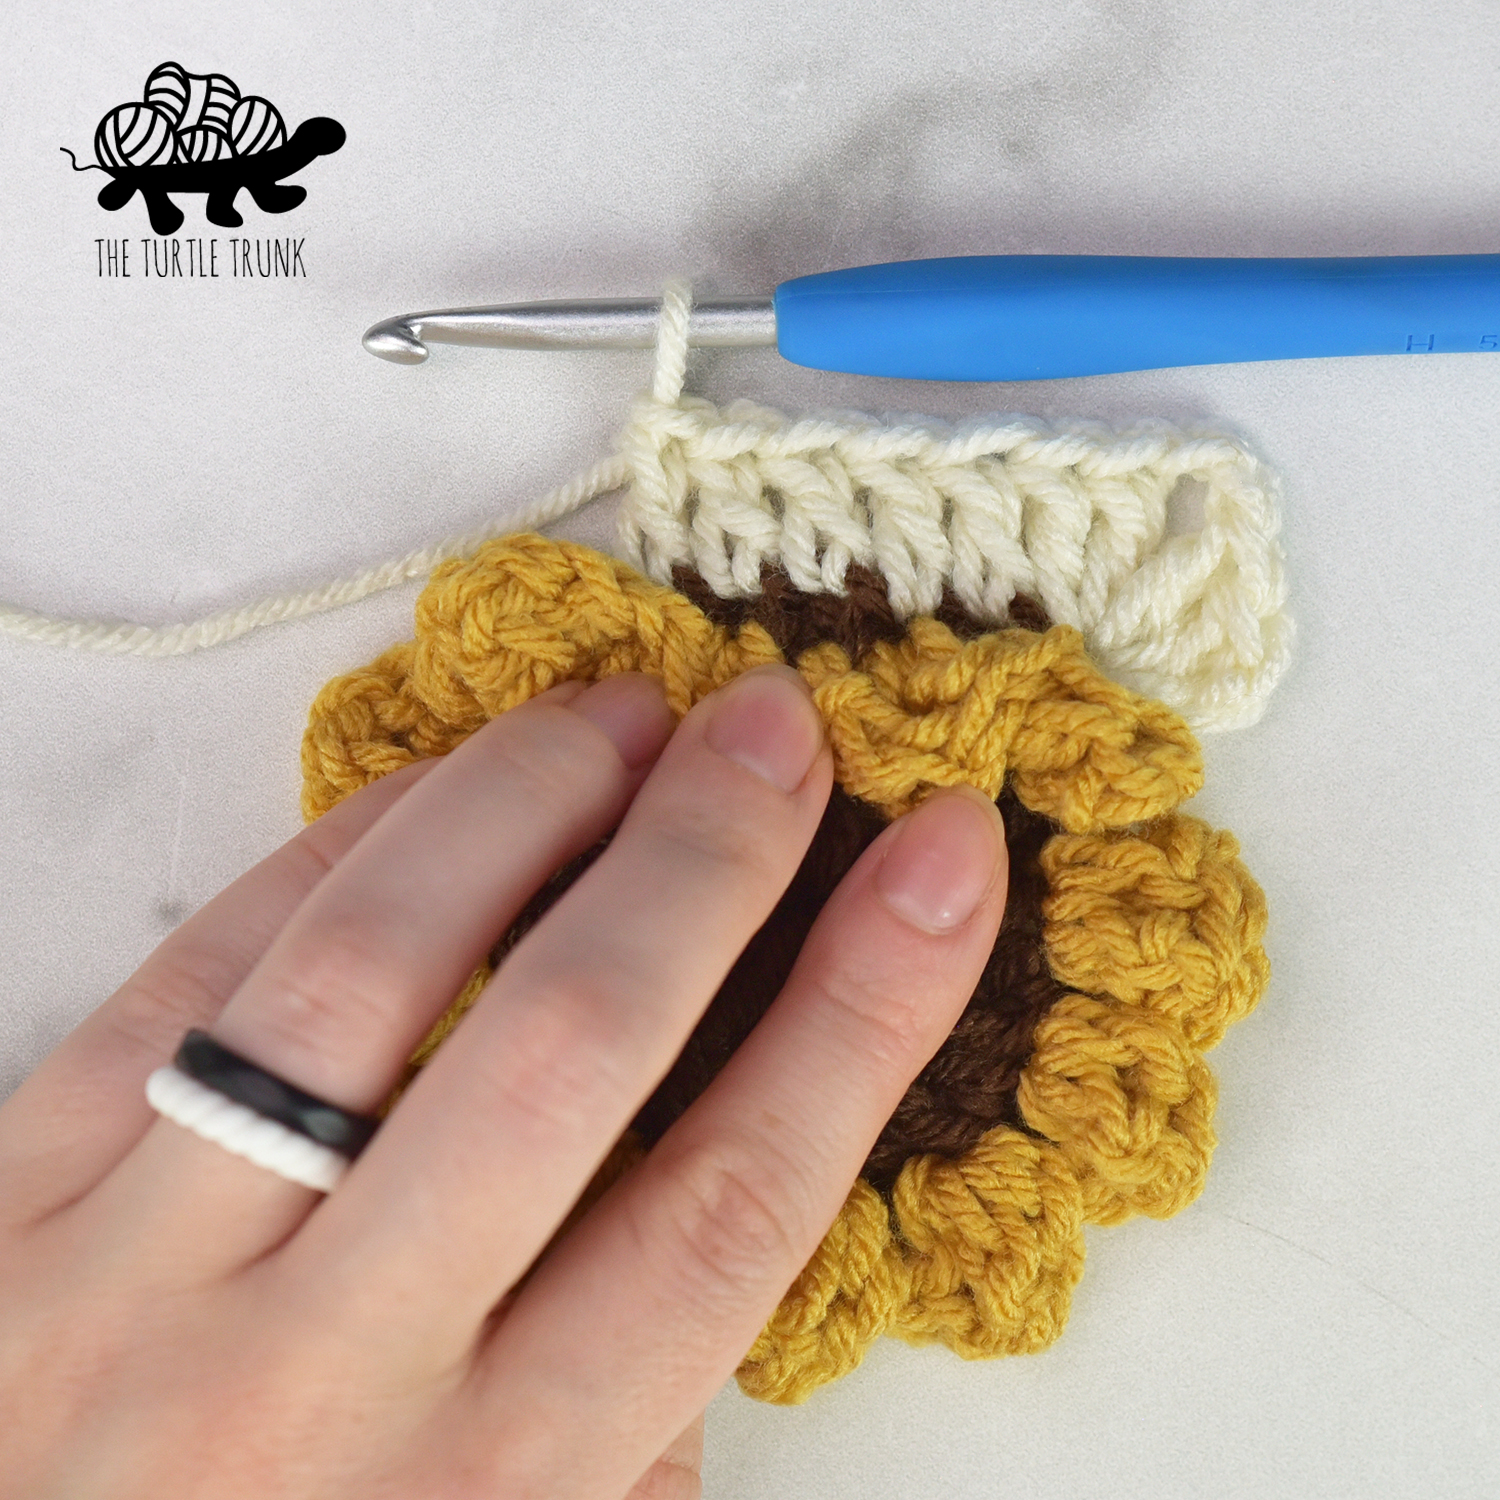
Round 4: With the right side facing you again, join Color C yarn to one of the back loops from round 2. CH 2, [2 DC, CH 2, 2 DC] into the 1st ST, DC into each of the next 5 STs. *[2 DC, CH 2, 2 DC] into the next ST, DC into each of the next 5 STs* repeat ** around. Join & CH 2. (44)
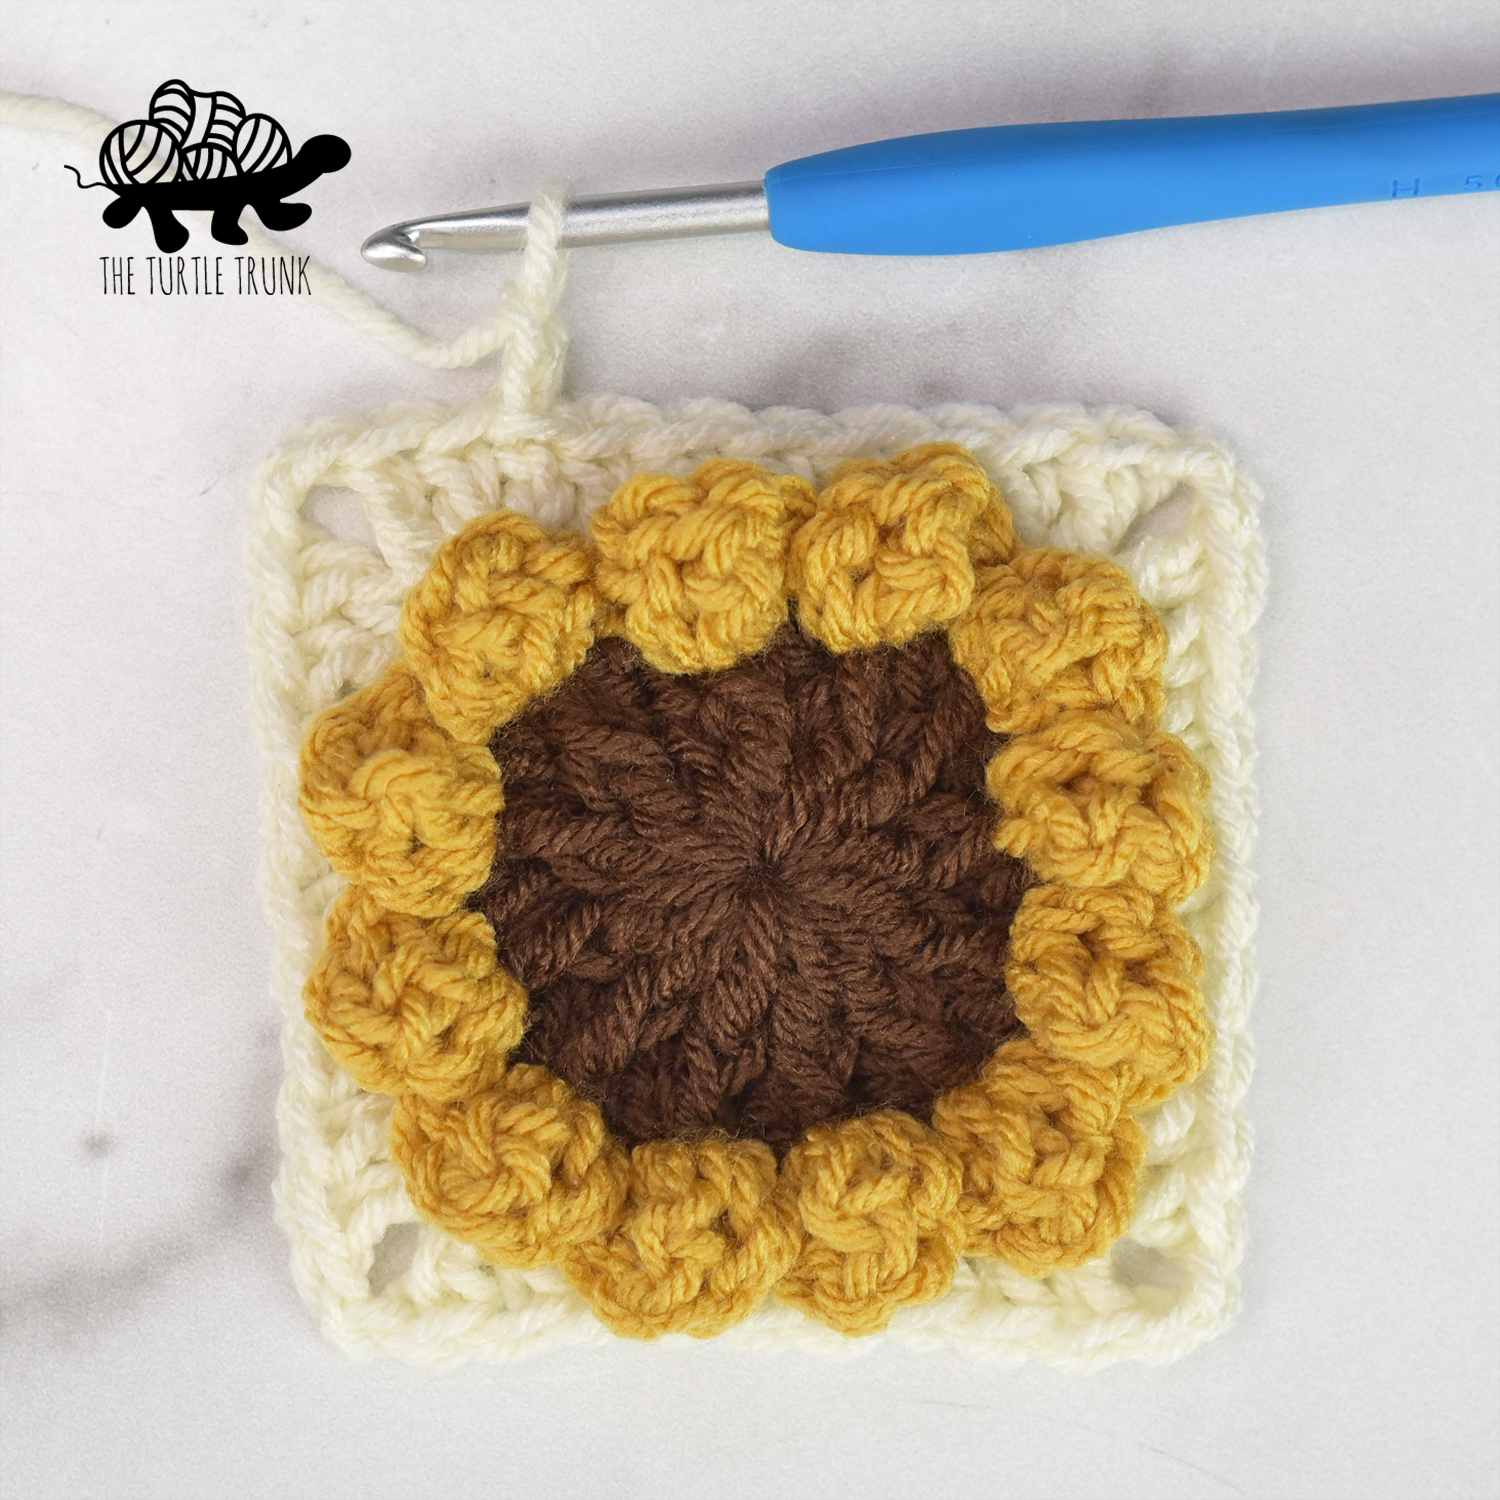
Round 5: DC in the 1st 2 STs, [2 DC, CH 2, 2 DC] in the CH 2 space, *DC in the next 9 STs, [2 DC, CH 2, 2 DC] in the CH 2 space* repeat ** until 7 STs remain. DC in each of the last 7 STs. Join & tie off yarn. (60)
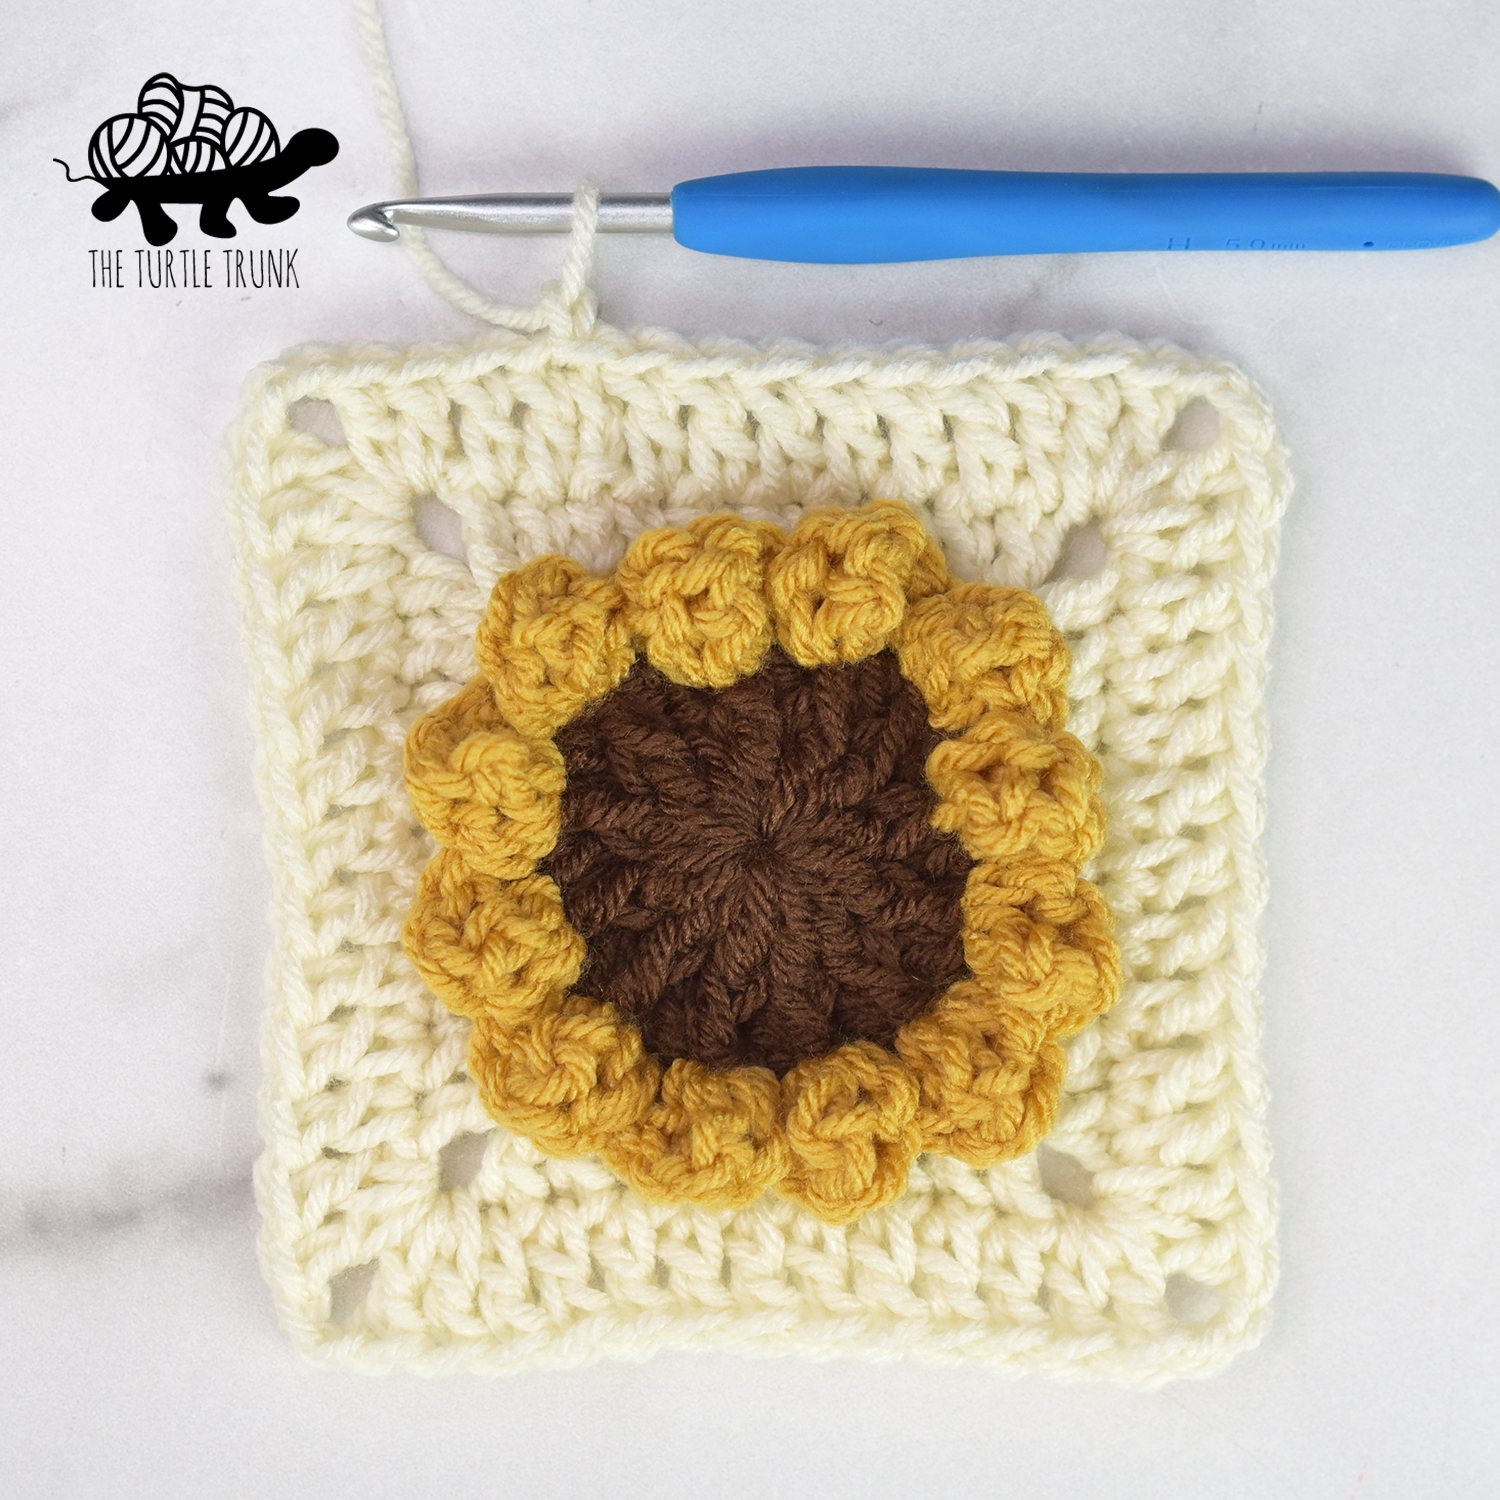
Weave in all your ends & you’re all done!
Feel free to wet or steam block your square to make it perfectly even and square! It will also help if you’re making lots of squares and want to ensure they’re all the exact same size.
I hope you enjoyed the Sunflower Square crochet pattern! I can’t wait to see your finished creations, so be sure to tag @theturtletrunk on Instagram!
Looking for something summery to make? Then check out these free crochet patterns: Sweet Tea Tank, Summer Daze Cardigan, Crossroads Vest.
You are free to sell the items you make with this crochet pattern, and I’d love if you could please link back to this page. You do not have permission to republish or distribute this pattern in any way or claim it as your own. Do not use my photos in your sale listings or for any other purposes. Thank you.
This page includes affiliate links. If you make a purchase from these links, I may make a small commission at no cost to you! Thank you for your support!


