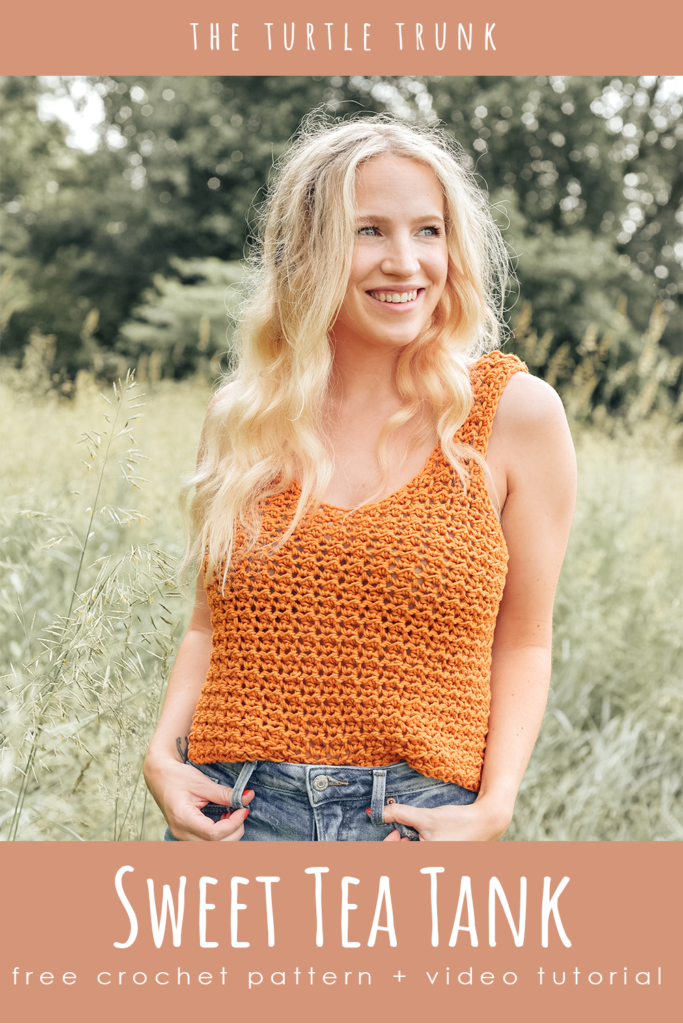
Sweet Tea Tank Crochet Pattern
The Sweet Tea Tank is an easy crochet tank top pattern that features a beautiful texture and it can be made long as well as cropped. This crochet tank top is perfect for summer because it’s lightweight and airy! Make with your favorite cotton yarn and a large crochet hook, this pattern works up quickly and it also comes in 9 sizes!
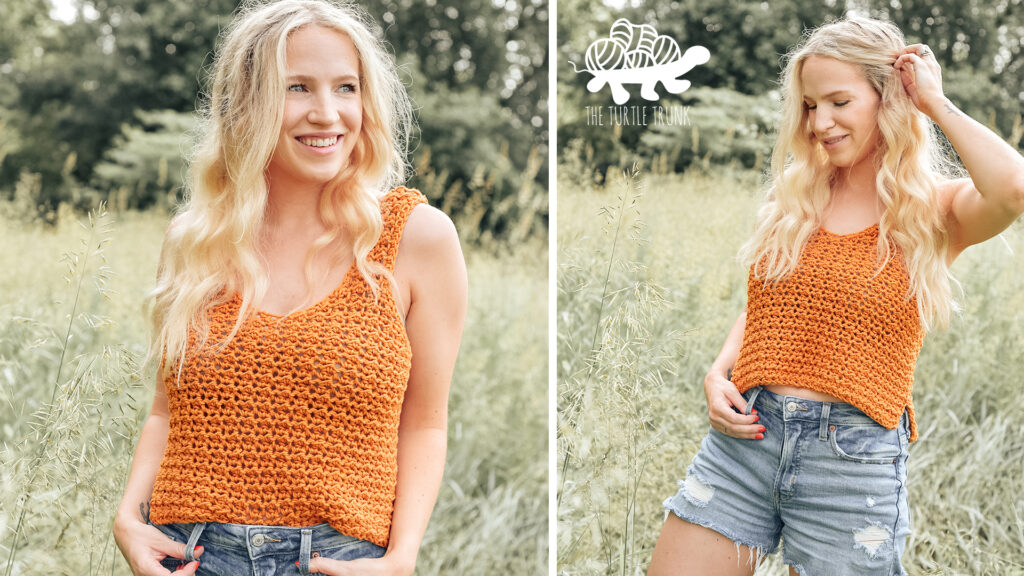
The Sweet Tea Tank is an easy crochet tank top pattern that features a V-neck line and as well as a beautifully textured fabric. You can make your tank top cropped, full length, or anywhere in between! This pattern uses medium/worsted weight cotton yarn and a large hook so it works up fast and makes an airy summer top!
The instructions include 9 sizes ranging from XS-5X! The pattern is split up in two versions: Cropped and Full Length. The cropped tank will sit just above the belly button and the full length will sit at the hips. Since every body and torso length is different, where the top sits on you may vary. Below in the important notes sections I’ve explained how to easily add (or subtract) rows to get the perfect length for you!
Continue reading below to hear my inspiration for this pattern and to learn more about the yarn I used, then scroll down for the written pattern!
If you want some more Summer crochet patterns, then check out the Beach Daze Cover-Up, Crossroads Vest, and Summer Daze Cardigan!
YOU CAN FIND THE AD-FREE AND PRINTABLE PDF VERSION OF THIS PATTERN ON ETSY AND ALSO RAVELRY!
Yarn
Cotton yarn is suggested for the Sweet Tea Tank, as it’s heavier weight is going to help provide some drape and give the top some length! If you opt for a lighter fiber, like acrylic, you may need to add some extra rows to your tank.
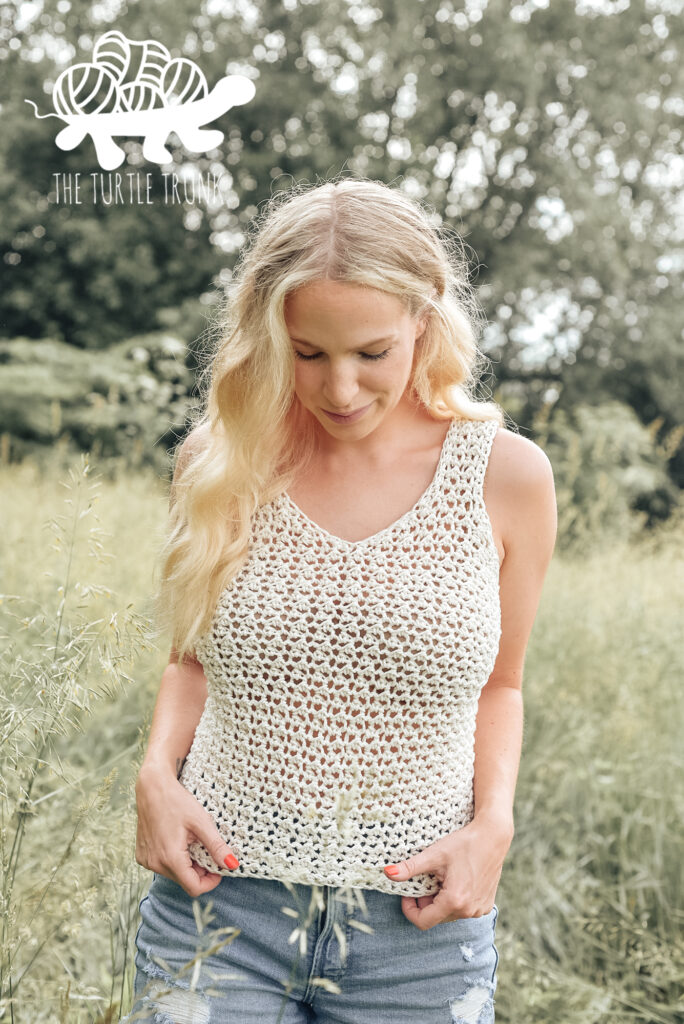
I made myself 3 Sweet Tea Tanks using different brands of yarn!
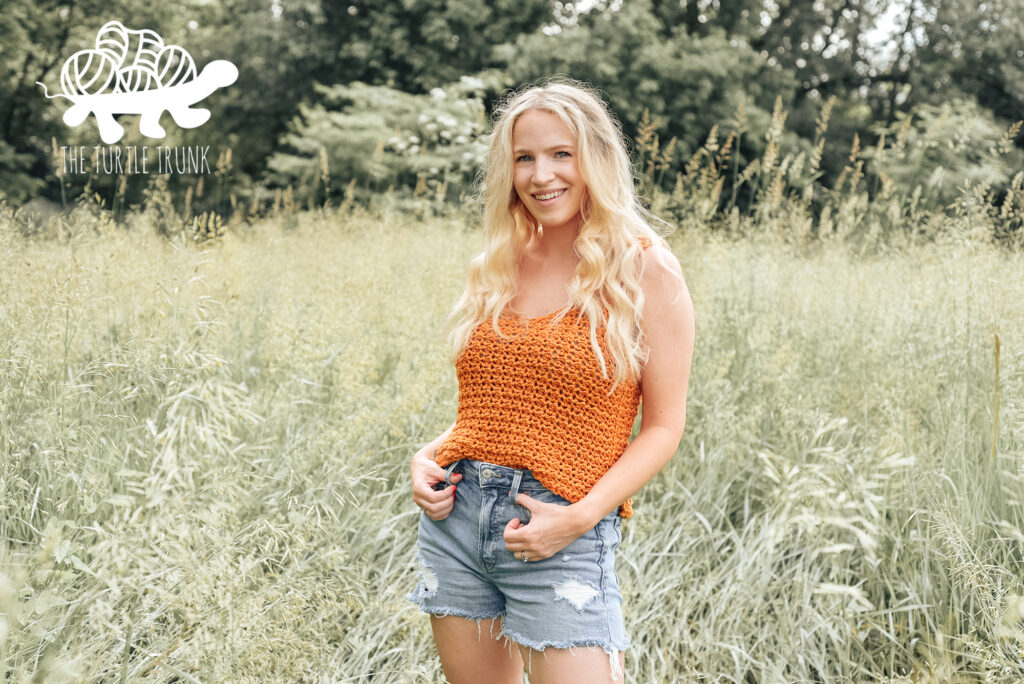
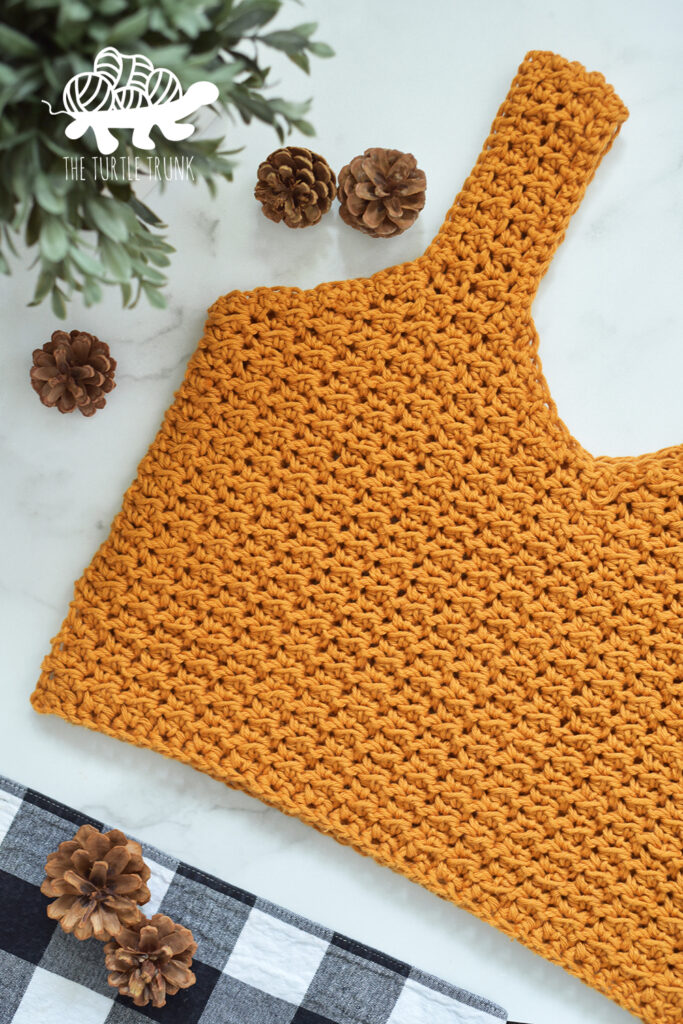
For my orange tank I used Circulo Natural Cotton Maxcolor. This yarn is classified as a light worsted, but I found it to be a true worsted. This yarn is incredibly soft for a 100% cotton yarn and it’s available in many colors.
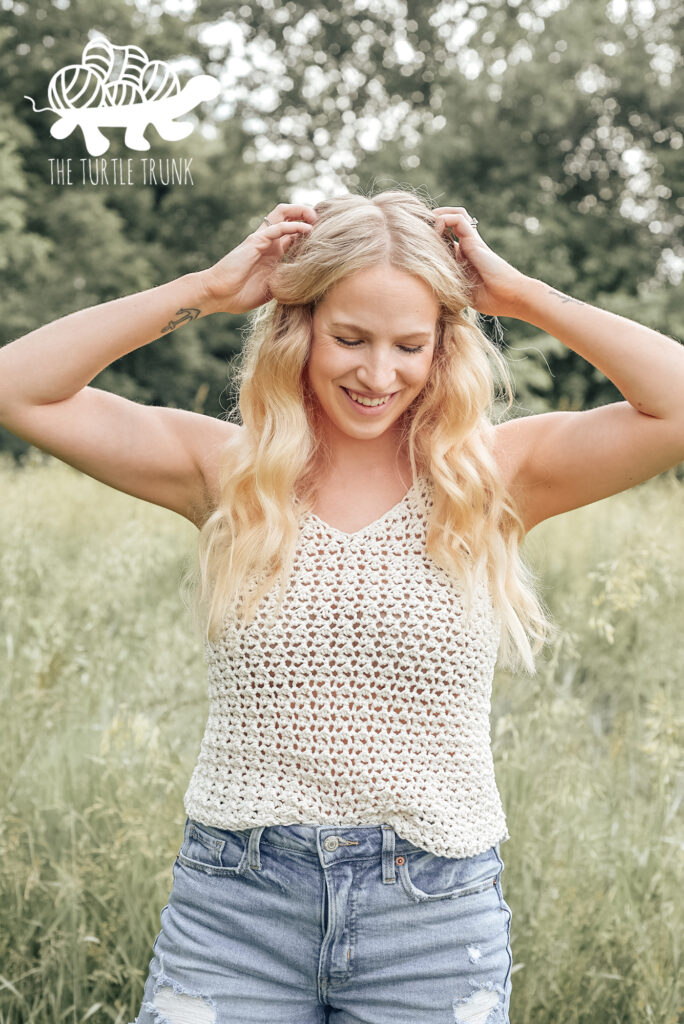
For the white tank I used Lily Sugar n’ Cream. It is classified as a worsted weight and worked great for this pattern. It is not as soft as the 2 other yarns I used, but I know from experience from using this for other projects, that once it is worn, washed, and dried a few times it softens up.
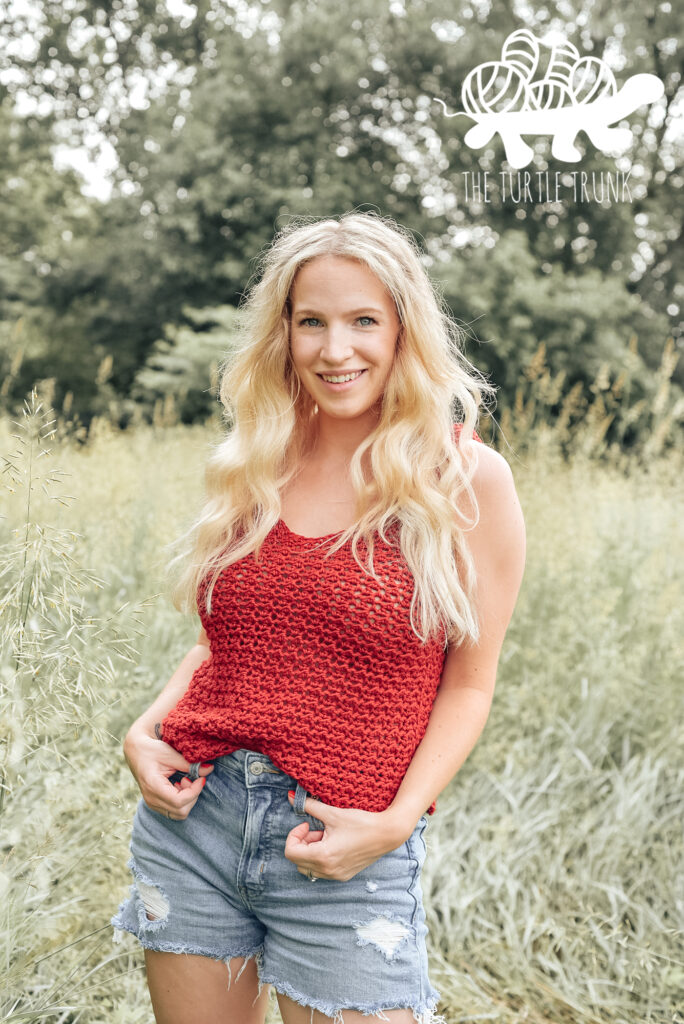
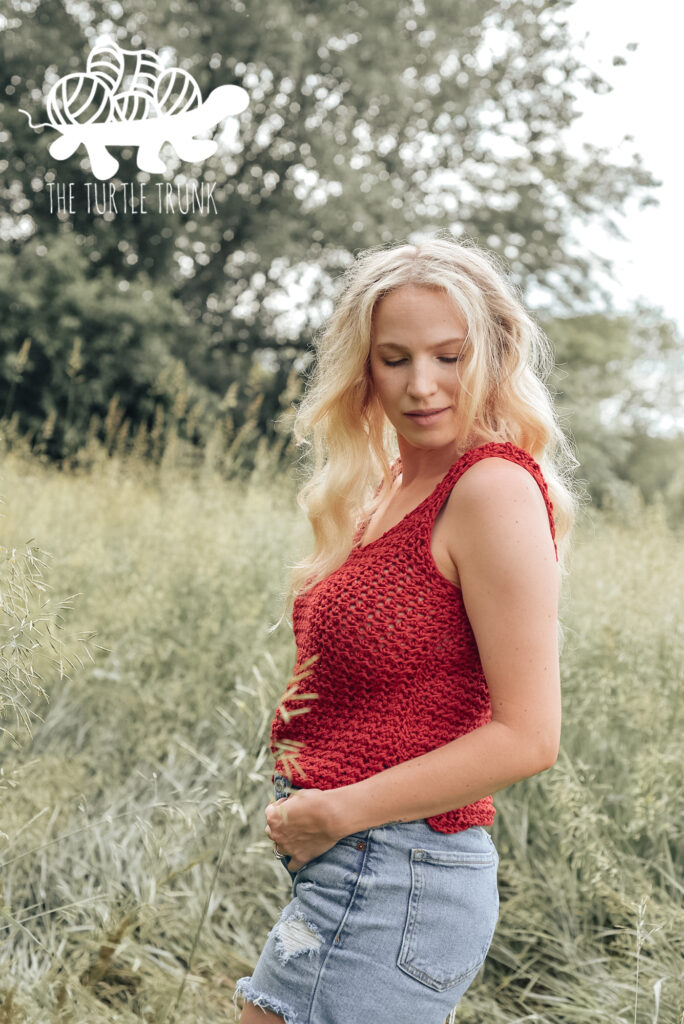
I used Hobby Lobby’s I Love This Cotton for the red tank. This yarn is on the lighter side of a worsted weight, and because of this, my tank had slightly larger gaps between the stitches and fit a bit more snug around the bust. I also had to add a few extra rows to mine since it didn’t have quite enough weight to pull it down. I do love how this tank turned out though. This yarn is very soft and comes in many gorgeous colors.
Some other yarns that my testers used and worked out great are Knit Picks Comfy Worsted and Caron Cotton Cakes.
Sizes
| Sizes (Bust) | Tank Width (circumference) | Tank Length (Crop/Full) | Yardage (approx.) |
| XS (28”-30”) | 12.5” (25”) | 13.5” / 17.5” | 250 / 275 |
| S (32”-34”) | 14” (28”) | 15.5” / 19.5” | 275 / 300 |
| M (36”-38”) | 16” (32”) | 15.5” / 19.5” | 300 / 325 |
| L (40”-42”) | 19” (38”) | 16” / 20” | 325 / 375 |
| XL (44”-46”) | 20.5” (41”) | 16” / 20” | 375 / 425 |
| 2X (48”-50”) | 22” (44”) | 18.5” / 22.5” | 425 / 500 |
| 3X (52”-54”) | 23.5” (47”) | 18.5” / 22.5” | 475 / 550 |
| 4X (56”-58”) | 25.5” (51”) | 18.5” / 22.5” | 525 / 600 |
| 5X (60”-62”) | 27” (54”) | 19” / 23” | 575 / 650 |
Measurements are when the top is unstretched. The top will stretch approx. 4”-6”.
Not ready to make just yet? PIN this pattern for later!
Follow along with the video tutorial on YouTube!
Difficulty: Easy
Gauge
Using the 9.00mm (M) hook
Row 1: FSC 11
Rows 2- 12: CH 1 & turn. SL ST in 1st ST, *HDC, SL ST* across (11)
10 stitches by 12 rows = 4” by 4” square.
Adjust hook size up or down to meet gauge.
Notes
- This tank top is made up of two identical panels that are seamed at the shoulders and sides. There are 2 sets of instructions included: a cropped length tank and a full-length tank.
- You can adjust the length of your top by repeating Row 2 as many times as needed to reach the top of the bust. Be sure to end the row 2 repeat on an even numbered row so that the next row (where you reattach your yarn) is worked on an odd numbered row.
- The CH 1 at the beginning of a row does not count as a stitch.
- The numbers in parenthesis represent the row number (at the beginning of the row) and total stitch count (at the end of the row) for each size. Numbers are in order by size starting with the smallest size. When numbers are not in parentheses, they are the same for all sizes.
- Repeat the instructions between the * * until the end of the row or until otherwise noted.
- The right side of your work will show the odd numbered rows working from right to left and the wrong side will show the even numbered rows working from right to left.
Supplies
- Medium (4) Weight Cotton Yarn
- Hook: 9.00 mm (M) & 6.00mm (J)
- Yarn Needle
- Scissors
Abbreviations (US TERMS)
ST(s) – Stitch(es)
CH – Chain
SL ST – Slip Stitch
SK – Skip
FSC – Foundation Single Crochet
SC – Single Crochet
HDC – Half Double Crochet
Sweet Tea Tank Pattern
Cropped (Make 2)
Using the 9.00mm (M) hook:
Row 1: FSC (31, 35, 39, 47, 51, 55, 59, 63, 67)
Rows 2-(26, 30, 30, 30, 30, 36, 36, 36, 36): CH 1 & turn.SL ST into 1st ST, *HDC, SL ST* across. (31, 35, 39, 47, 51, 55, 59, 63, 67)
Tie off yarn. Turn work so the right side of the panel is facing up. SK 1st 2 STs and reattach yarn to the 3rd ST.
Row (27, 31, 31, 31, 31, 37, 37, 37, 37): CH 1. SL ST into the same ST you’ve attached to then, *HDC, SL ST* across until (16, 18, 20, 24, 26, 28, 30, 32, 34) stitches remain. (13, 15, 17, 21, 23, 25, 27, 29, 31)
Row (28, 32, 32, 32, 32, 38, 38, 38, 38): CH 1 & turn.SL ST in 1st ST, *HDC, SL ST* across until 2 STs remain. SK last 2 STs. (11, 13, 15, 19, 21, 23, 25, 27, 29)
Repeat Row (28, 32, 32, 32, 32, 38, 38, 38, 38) until only (5, 3, 5, 5, 7, 5, 7, 9, 7) STs remain.
Row (32, 38, 38, 40, 40, 48, 48, 48, 50): CH 1 & turn.SL ST into 1st ST, *HDC, SL ST* across. (5, 3, 5, 5, 7, 5, 7, 9, 7)
Repeat Row (32, 38, 38, 40, 40, 48, 48, 48, 50) 8 more times or until desired strap length is reached.
Tie off yarn leaving a 10” tail. Do not weave in ends yet.
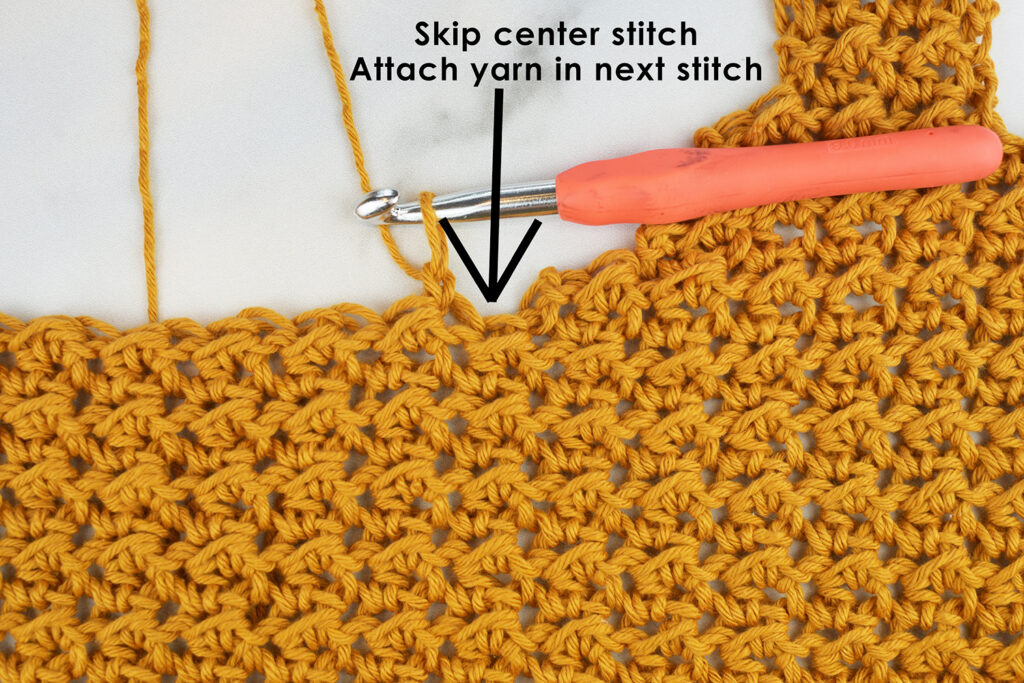
With the Right Side facing you, reattach yarn to the (15th, 17th, 19th, 23rd, 25th, 27th, 29th, 31st, 33rd) ST of Row (26, 30, 30, 30, 30, 36, 36, 36, 36) and CH 1.
Row (27, 31, 31, 31, 31, 37, 37, 37, 37): SL ST into the same ST you’ve attached to then, *HDC, SL ST* across until 2 STs remain. SK last 2 STs. (13, 15, 17, 21, 23, 25, 27, 29, 31)
Repeat Row (27, 31, 31, 31, 31, 37, 37, 37, 37) until only (5, 3, 5, 5, 7, 5, 7, 9, 7) STs remain.
Row (32, 38, 38, 40, 40, 48, 48, 48, 50): CH 1 & turn.SL ST into 1st ST, *HDC, SL ST* across. (5, 3, 5, 5, 7, 5, 7, 9, 7)
Repeat Row (32, 38, 38, 40, 40, 48, 48, 48, 50) 8 more times or until desired strap length is reached.
Tie off yarn leaving a 10” tail. Do not weave in ends yet.
Set aside 1st panel and repeat the instructions to make a second panel. When both panels are done move onto Assembling.
Full Length (Make 2)
Using the 9.00mm (M) hook:
Row 1: FSC (31, 35, 39, 47, 51, 55, 59, 63, 67)
Rows 2-(38, 42, 42, 42, 42, 48, 48, 48, 48): CH 1 & turn.SL ST into 1st ST, *HDC, SL ST* across. (31, 35, 39, 47, 51, 55, 59, 63, 67)
Tie off yarn. Turn work so the right side of the panel is facing up. SK 1st 2 STs and reattach yarn to the 3rd ST.
Row (39, 43, 43, 43, 43, 49, 49, 49, 49): CH 1. SL ST into the same ST you’ve attached to then, *HDC, SL ST* across until (16, 18, 20, 24, 26, 28, 30, 32, 34) stitches remain. (13, 15, 17, 21, 23, 25, 27, 29, 31)
Row (40, 44, 44, 44, 44, 50, 50, 50, 50): CH 1 & turn.SL ST in 1st ST, *HDC, SL ST* across until 2 STs remain. SK last 2 STs. (11, 13, 15, 19, 21, 23, 25, 27, 29)
Repeat Row (40, 44, 44, 44, 44, 50, 50, 50, 50) until only (5, 3, 5, 5, 7, 5, 7, 9, 7) STs remain.
Row (44, 50, 50, 52, 52, 60, 60, 60, 62): CH 1 & turn.SL ST into 1st ST, *HDC, SL ST* across. (5, 3, 5, 5, 7, 5, 7, 9, 7)
Repeat Row (44, 50, 50, 52, 52, 60, 60, 60, 62) 8 more times or until desired strap length is reached.
Tie off yarn leaving a 10” tail. Do not weave in ends yet.

With the Right Side facing you, reattach yarn to the (15th, 17th, 19th, 23rd, 25th, 27th, 29th, 31st, 33rd) ST of Row (38, 42, 42, 42, 42, 48, 48, 48, 48) and CH 1.
Row (39, 43, 43, 43, 43, 49, 49, 49, 49): SL ST into the same ST you’ve attached to then, *HDC, SL ST* across until 2 STs remain. SK last 2 STs. (13, 15, 17, 21, 23, 25, 27, 29, 31)
Repeat Row (39, 43, 43, 43, 43, 49, 49, 49, 49) until only (5, 3, 5, 5, 7, 5, 7, 9, 7) STs remain.
Row (44, 50, 50, 52, 52, 60, 60, 60, 62): CH 1 & turn.SL ST into 1st ST, *HDC, SL ST* across. (5, 3, 5, 5, 7, 5, 7, 9, 7)
Repeat Row (44, 50, 50, 52, 52, 60, 60, 60, 62) 8 more times or until desired strap length is reached.
Tie off yarn leaving a 10” tail. Do not weave in ends yet. Set aside 1st panel and repeat the instructions to make a second panel. When both panels are done, move onto Assembling.
Assembling
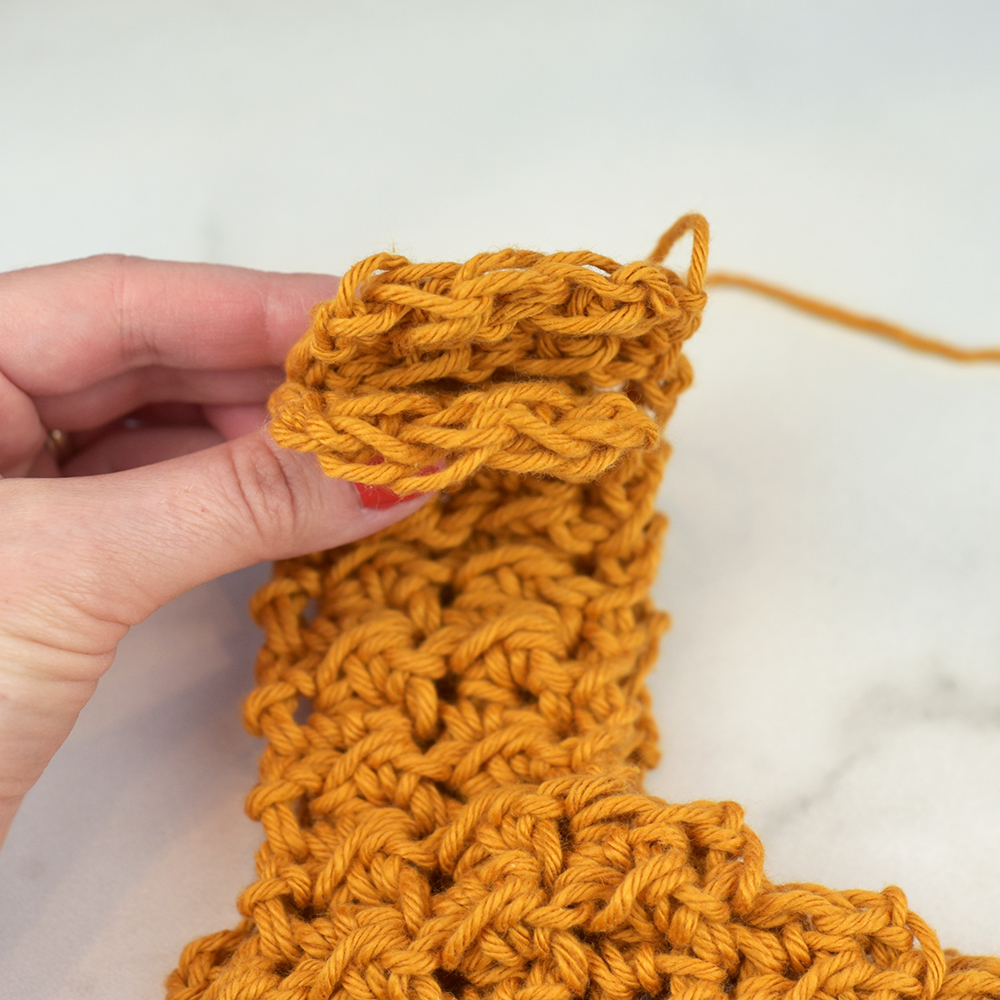
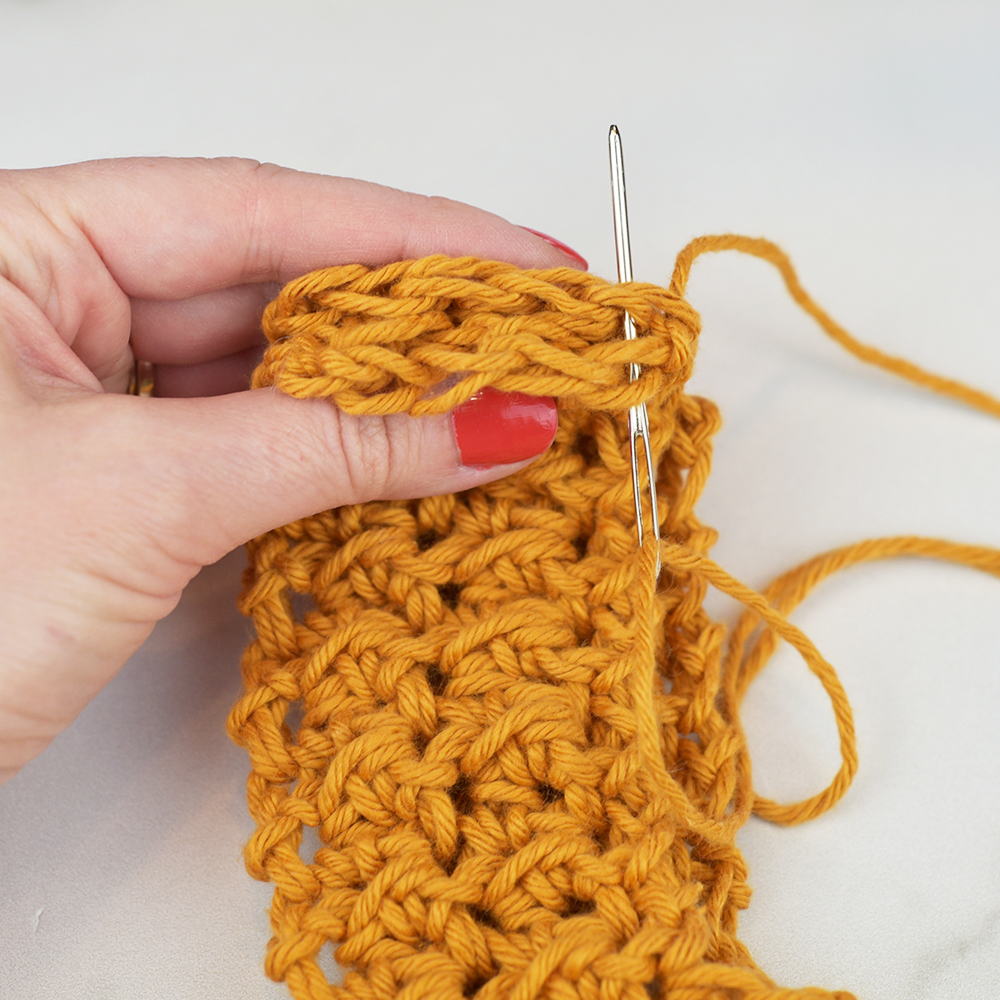
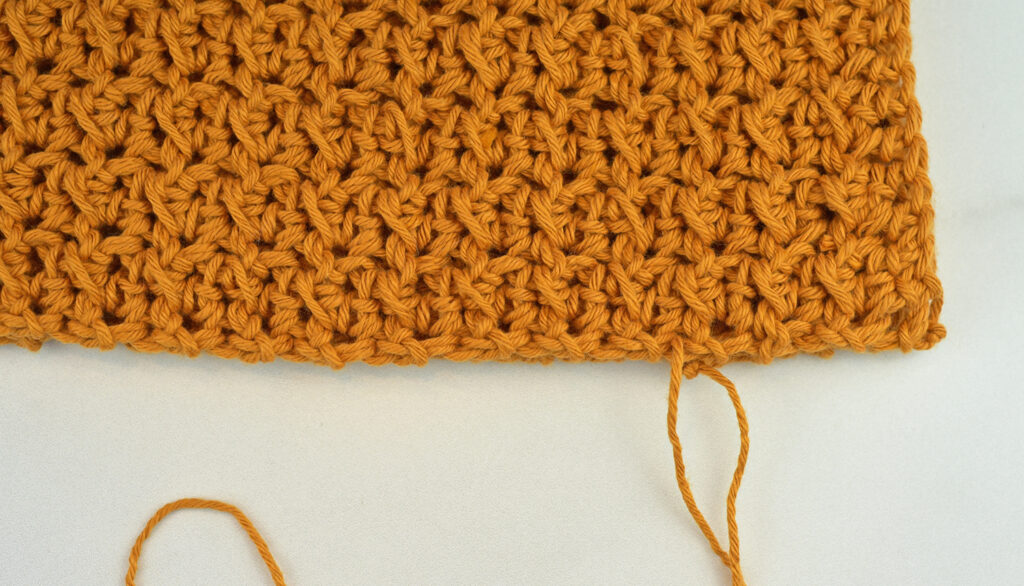
Weave in all the ends on the wrong side, except for the tops of the straps on ONE of the panels. These two strands will be used to attach the straps together.
Lay the panels on top of each other with the right sides facing each other. With your yarn needle, whip stitch the straps from both panels together. Secure with a few knots and weave in the ends on the wrong side.
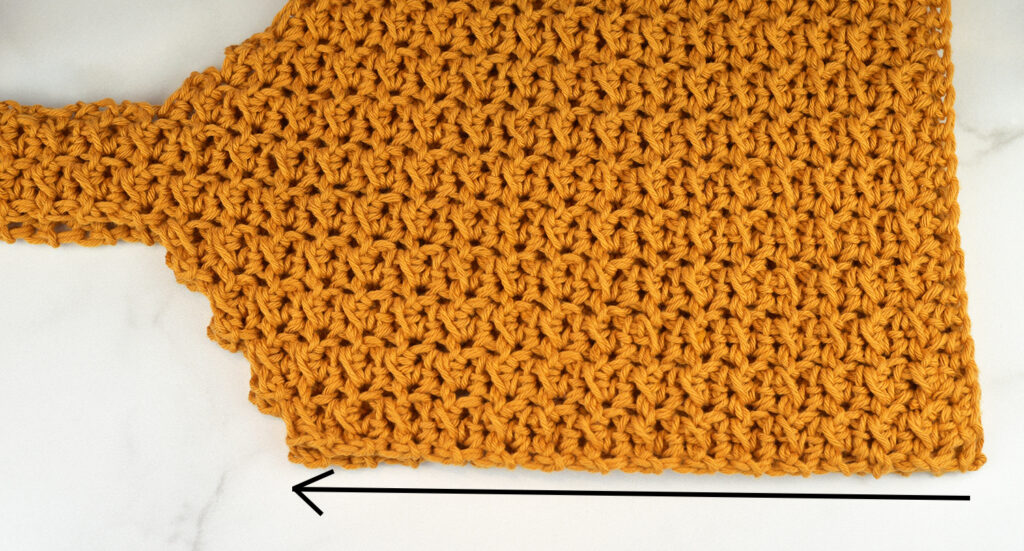
Cut 2 strands of yarn triple the length of your top for the side seams. You can start your side seam at the very bottom of your top or higher up if you want to have a side split. I attached mine 2” from the bottom. Attach your strand of yarn to one of the panels and whip stitch the panels together, working until the last row before the decreasing starts. Secure yarn with a few knots and weave in end on the wrong side. Repeat on the other side.
Border
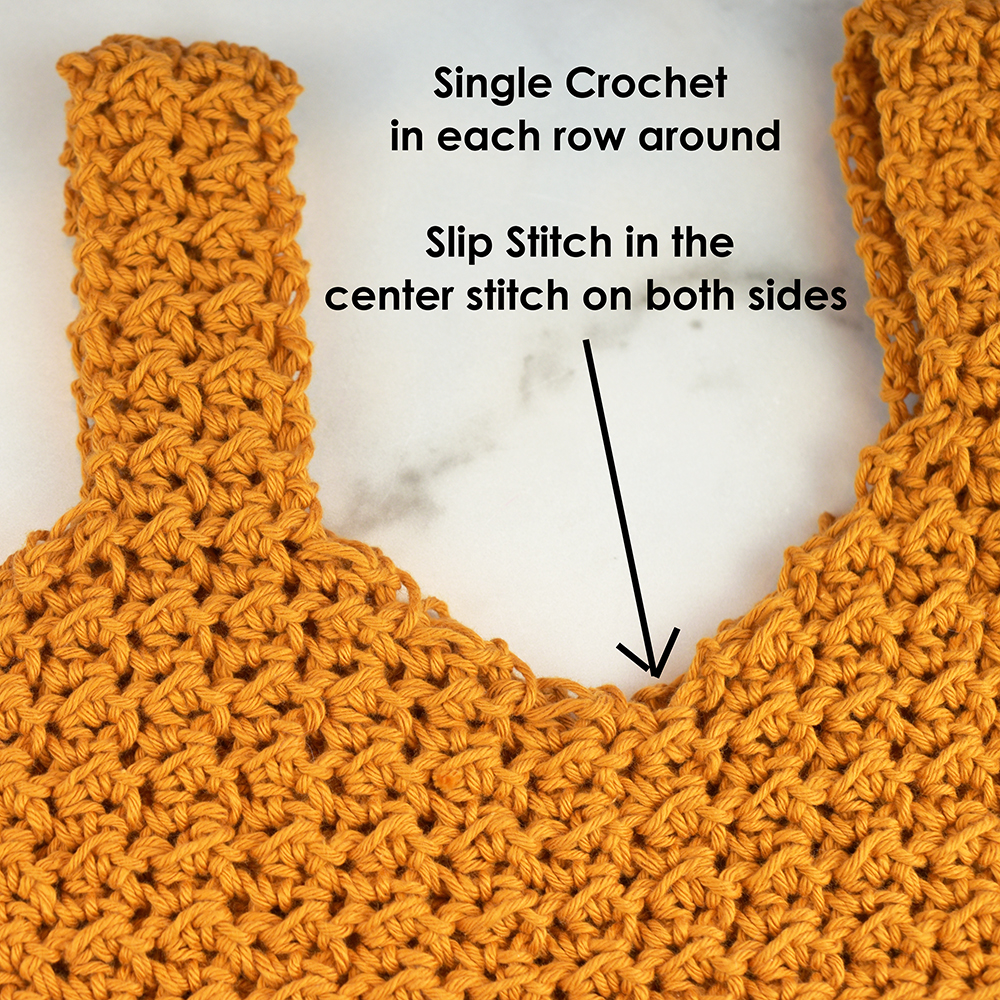
To clean up the edges around the neckline and arm holes you can make a single crochet border. If you like the rough edge look you do not need to make a border.
Using the 6.00mm (J) hook:
Attach yarn anywhere on the neckline, loosely single crochet on the edge of each row all the way around, working one single crochet in each row. When you reach the center of each panel, slip stitch into the center stitch, then continue to single crochet around until you reach where you started. The slip stitch in the center stitches will help keep the V sharp instead of rounded. Work your stitches loosely. When you reach the end, slip stitch to the first single crochet. Tie off and weave in end.
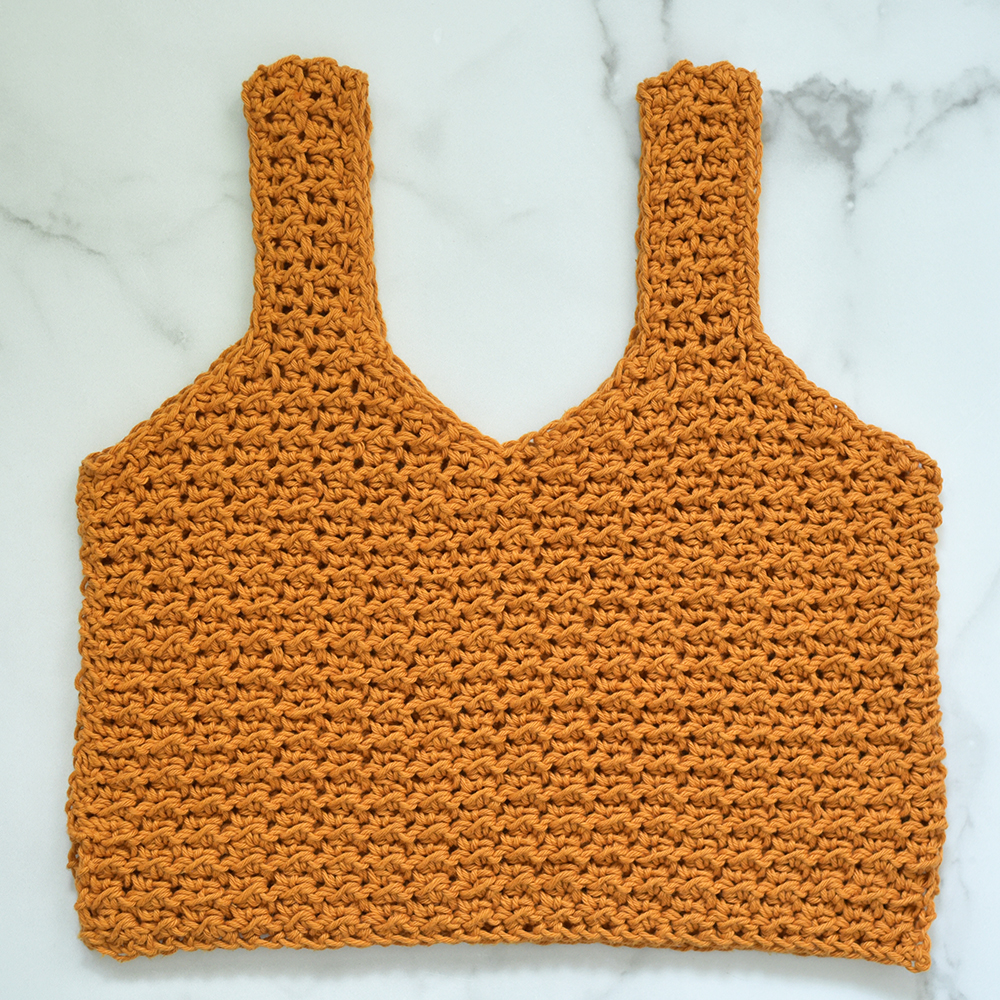
And you’re all done! If needed, you can wet or stream block your tank. It will also stretch as you wear it!
I hope you enjoyed the Sweet Tea Tank crochet pattern! Be sure to tag @theturtletrunk on Instagram so I can see your finished creation!
Love using the Even Moss Stitch? Check out these other free patterns I have that use it!
You are free to sell the items you make with this crochet pattern, and I’d love if you could please link back to this page. You do not have permission to republish or distribute this pattern in any way or claim it as your own. Do not use my photos in your sale listings or for any other purposes. Thank you.
This page includes affiliate links. If you make a purchase from these links, I may make a small commission at no cost to you! Thank you for your support!


