
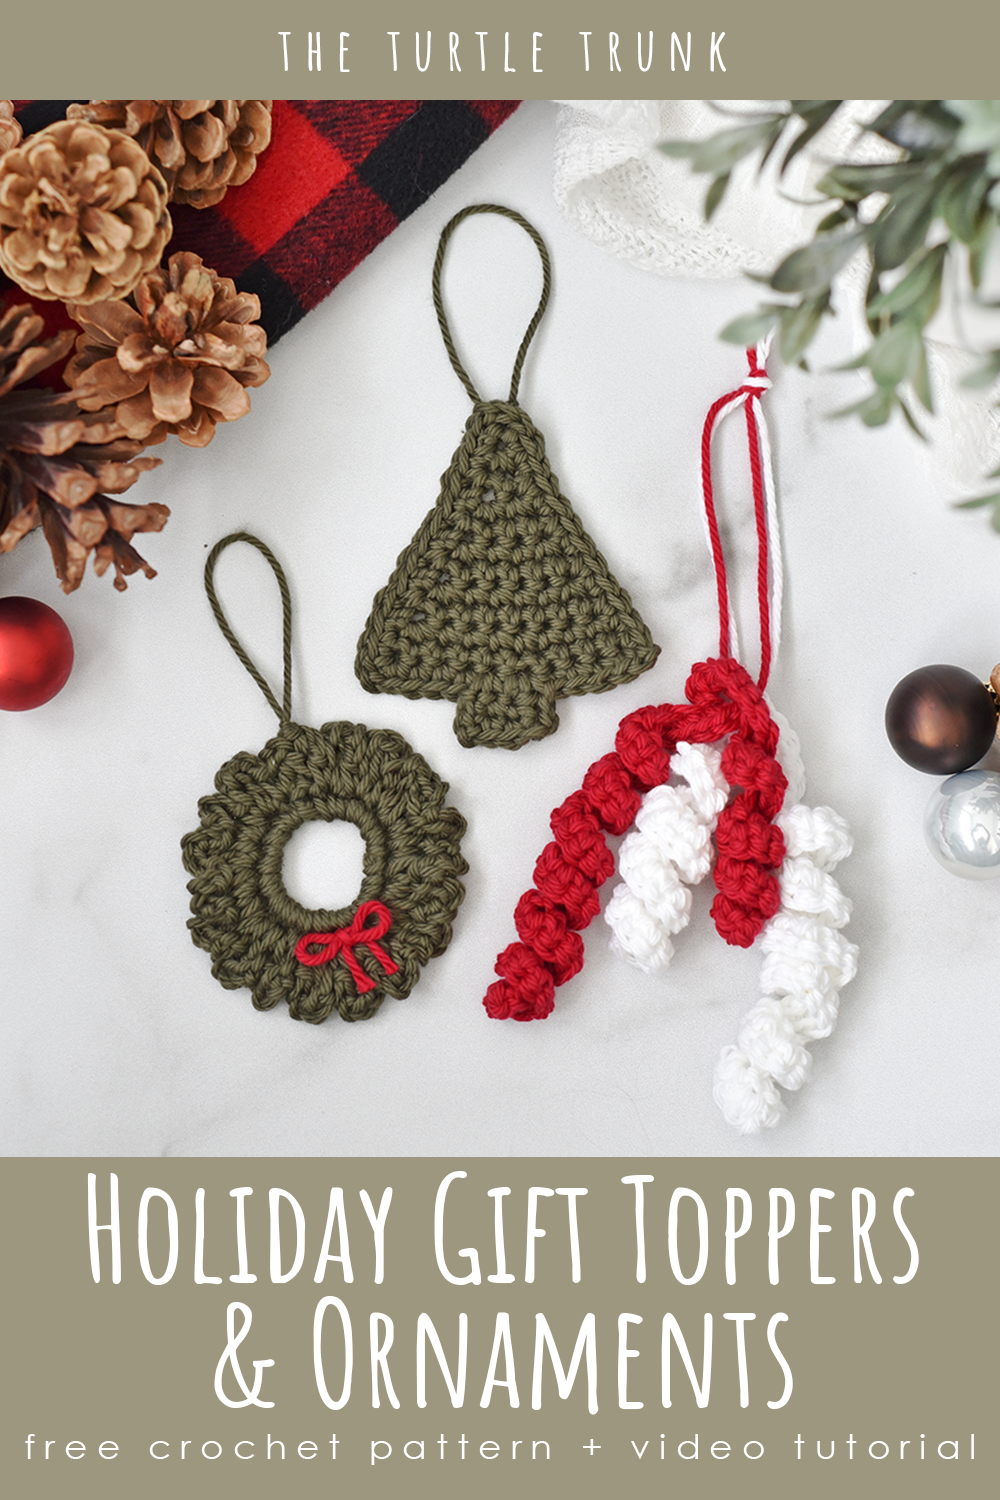
Gift Topper & Ornament Crochet Patterns
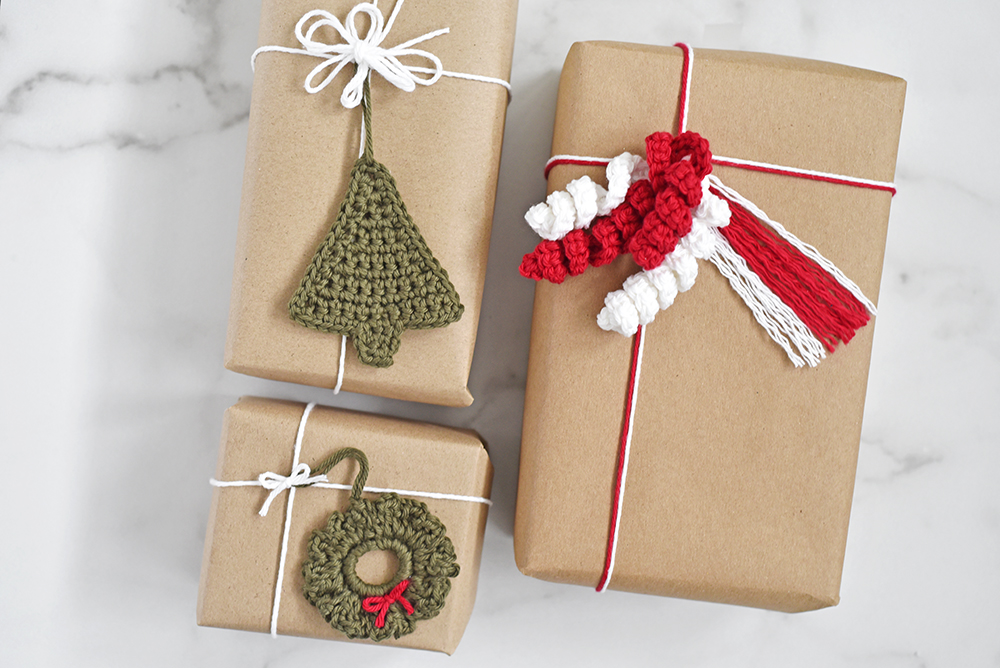
These crochet ornaments and gift toppers are perfect for the holidays! This post includes patterns for a tree, wreath, and spiraled ribbon bundle. Add a hanging loop to make into a tree ornament, tie to wrapped gifts, or even string a bunch together to make a garland!
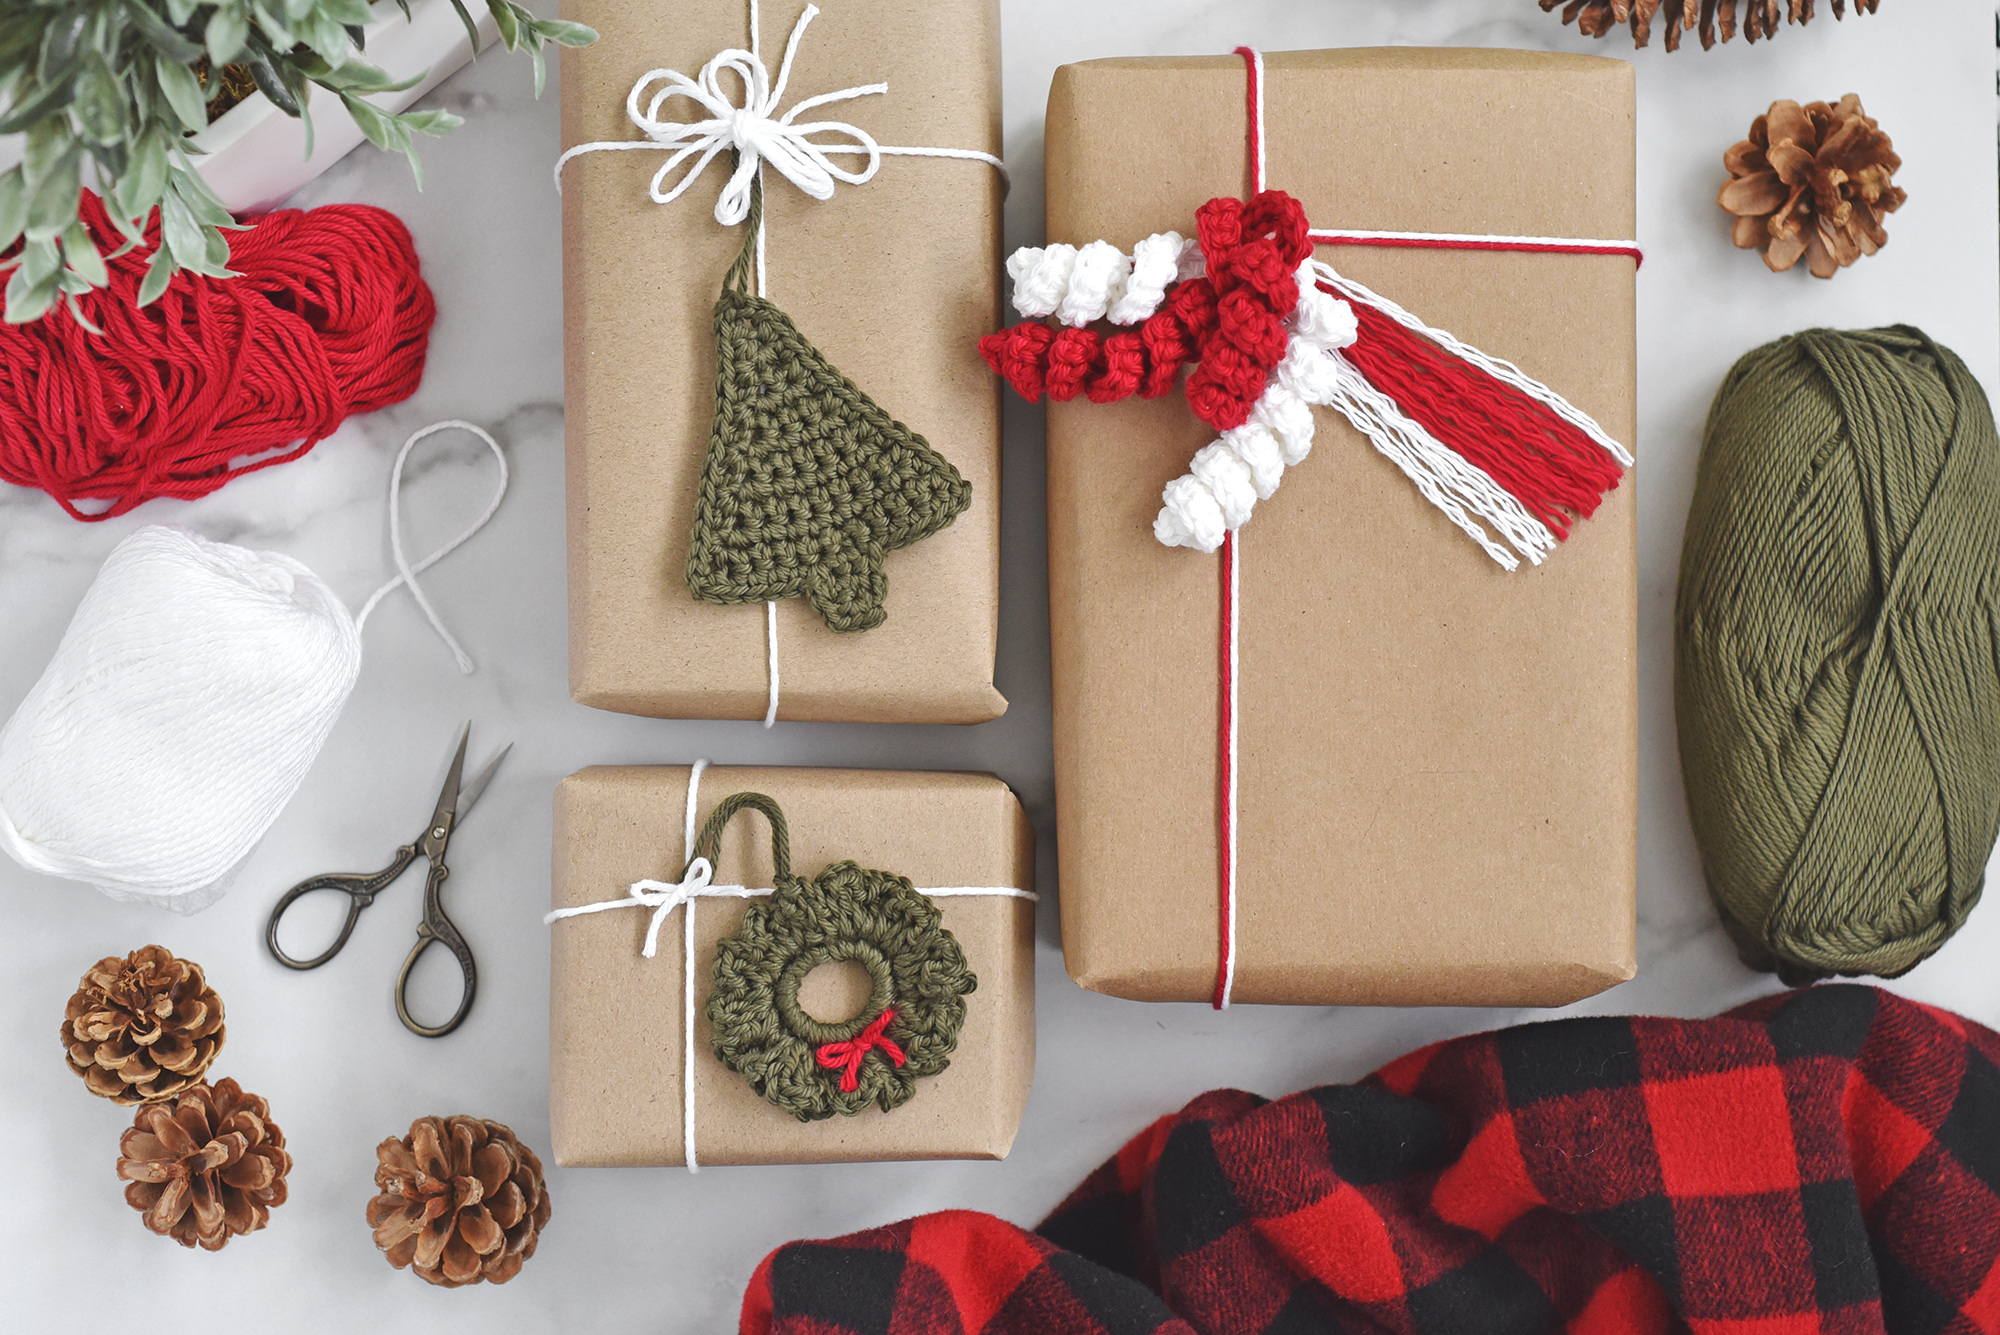
Here’s a great stash busting project for the holidays! Make 1 or all 3 of these tree ornaments and gift toppers! Each of these crochet patterns works up super quick and they use minimal yarn so it’s perfect for using up those left over yarn scraps you may have tucked away! Don’t limit yourself on what these can be used for either, there is so much that can be done with these! Use as crochet appliqués for blankets, sweaters, or bags or string them together to make a holiday garland! The options are endless!
Continue reading for yarn suggestions for this pattern, then scroll down for the written pattern!
YOU CAN FIND THE AD-FREE AND PRINTABLE PDF VERSION OF THIS PATTERN ON ETSY AND ALSO RAVELRY!
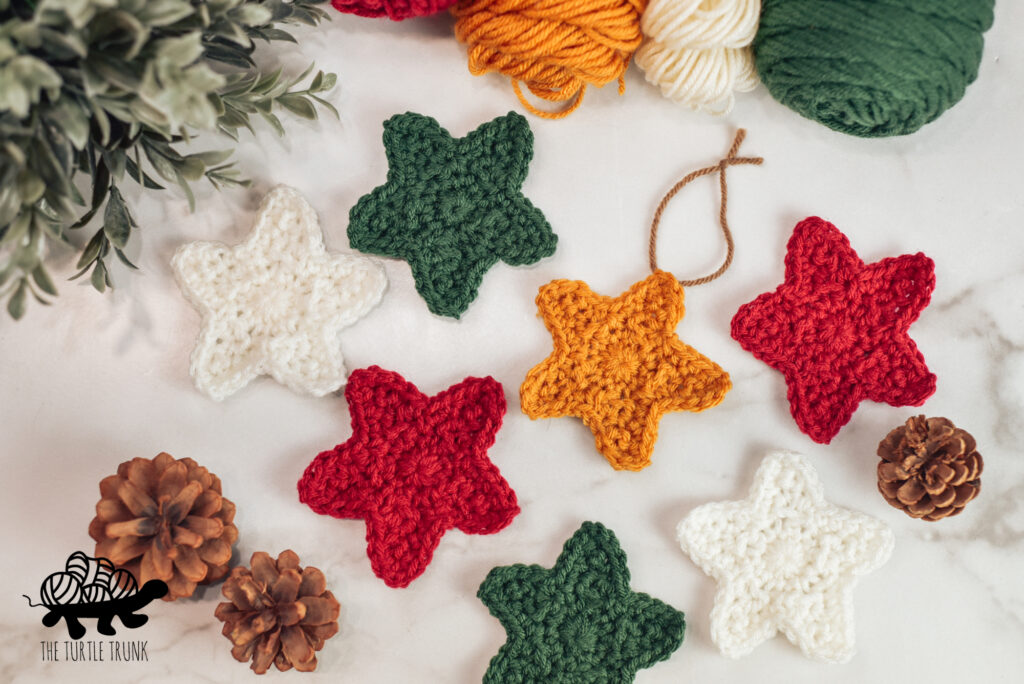
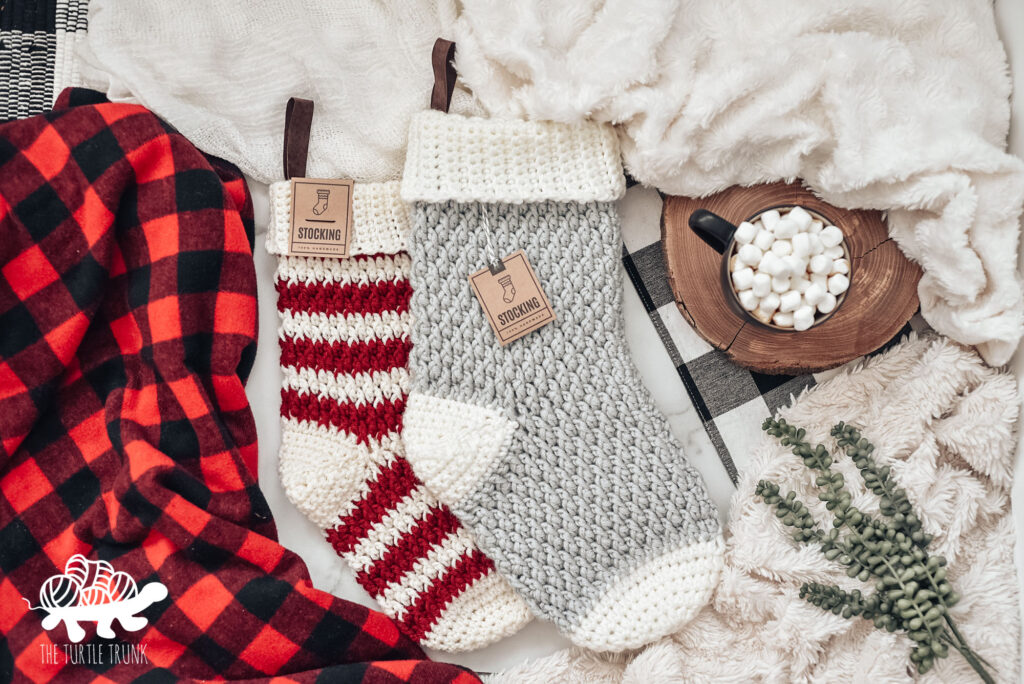
Looking for more tree ornaments and holiday patterns, then check out the: Star crochet pattern, Picot Tree Ornament, Country Cottage Stocking and Christmas Cheer Tree Skirt.
Not ready to make just yet? Save this pin for later!
Yarn
You will need medium (4) weight yarn for these patterns. I used cotton yarn for mine but feel free to use acrylic or wool too! I used I Love This Cotton but some other great options are: Lion Brand Yarn Wool Ease, Lion Brand Yarn Basic Stitch, Red Heart Super Saver, Big Twist Value.
Difficulty
Easy
Finished Sizes + Yardage
Tree – 4” – 12 yards in Green.
Wreath – 3” – 12 yards in Green and 6” in Red.
Ribbon – 3” – 12 yards in White and 12 yards in Red.
Supplies
- Medium (4) Weight Yarn in Green, Red, and White
- 4.00mm (G) Hook
- Scissors
- Yarn Needle
Abbreviations (US Terms)
ST(s) – Stitch(es)
SL ST – Slip Stitch
CH – Chain
SC – Single Crochet
SC2TOG – Single Crochet Two Together
DC – Double Crochet
Tree Notes
- Numbers in (parentheses) at the end of each row represent the number of stitches to be worked in that row.
- Starting chains do not count as stitches, work the 1st ST of each row into the last ST from the previous row.
Wreath Notes
- Numbers in (parentheses) at the end of each round represent the number of stitches to be worked in that round.
- At the end of each round, join with a slip stitch to the 1st ST of the round.
- Starting chains do not count as stitches, work the 1st ST of each round into the last ST from the previous round.
- Instructions between [brackets] are to be worked all into the same stitch.
Ribbon Notes
- Numbers in (parentheses) at the end of each round represent the number of stitches to be worked in that round.
- You can adjust the length of each ribbon by chaining any number to reach your desired length.
FOLLOW ALONG WITH THE tree VIDEO TUTORIAL ON YOUTUBE!
Tree Pattern
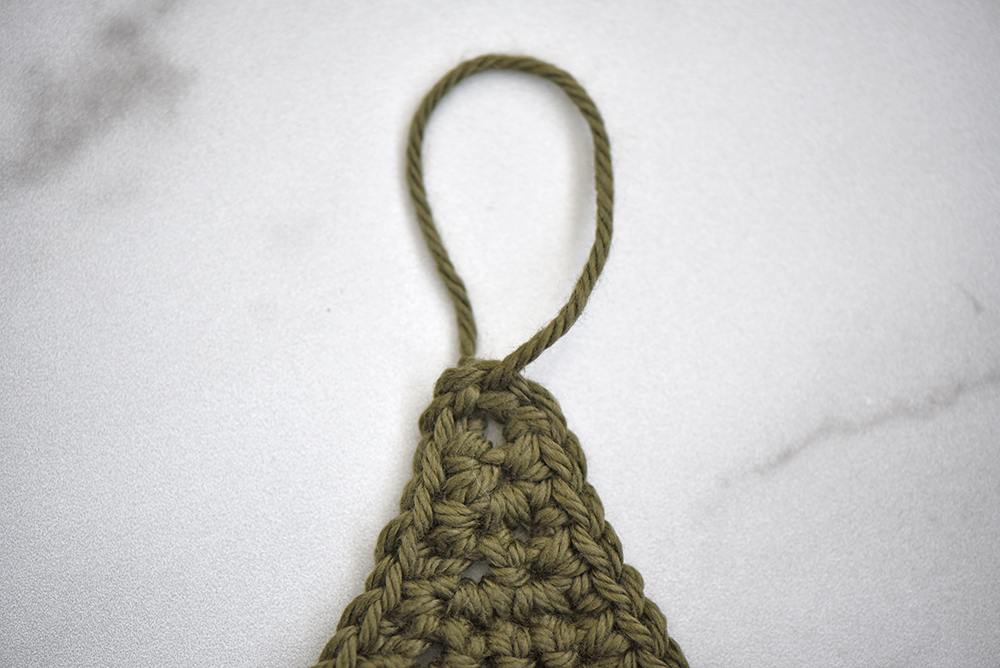
Leave a 6” long tail behind the slip knot for the hanging loop.
CH 2
Row 1: SC in 2nd CH from the hook. CH 1 & turn. (1)
Row 2: 2 SC. CH 1 & turn. (2)
Row 3: SC in each ST across. CH 1 & turn. (2)
Row 4: 2 SC in each ST across. CH 1 & turn. (4)
Row 5: SC in each ST across. CH 1 & turn. (4)
Row 6: 2 SC, SC x 2, 2 SC. CH 1 & turn. (6)
Row 7: SC in each ST across. CH 1 & turn. (6)
Row 8: 2 SC, SC x 4, 2 SC. CH 1 & turn. (8)
Row 9: SC in each ST across. CH 1 & turn. (8)
Row 10: 2 SC, SC x 6, 2 SC. CH 1 & turn. (10)
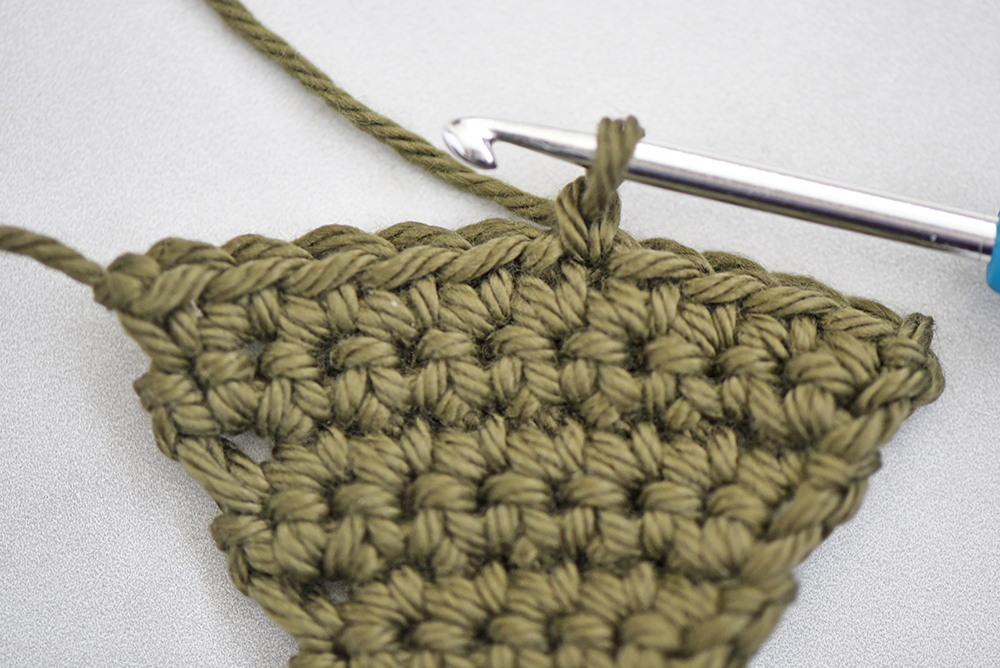
Row 11: SC in each ST across. (10)
Tie off yarn. Attach yarn to the 5th ST of Row 11.
Row 12: SC in same ST you’re attached to. SC in the next ST. CH 1 & turn. (2)
Row 13: SC in each ST across. (2)
Do not tie off. Move onto Border.
Border
SC in each ST and row and work a *SC, CH 2, SC* at each point to help smoothly turn the corners. SL ST into the corners of the trunk.
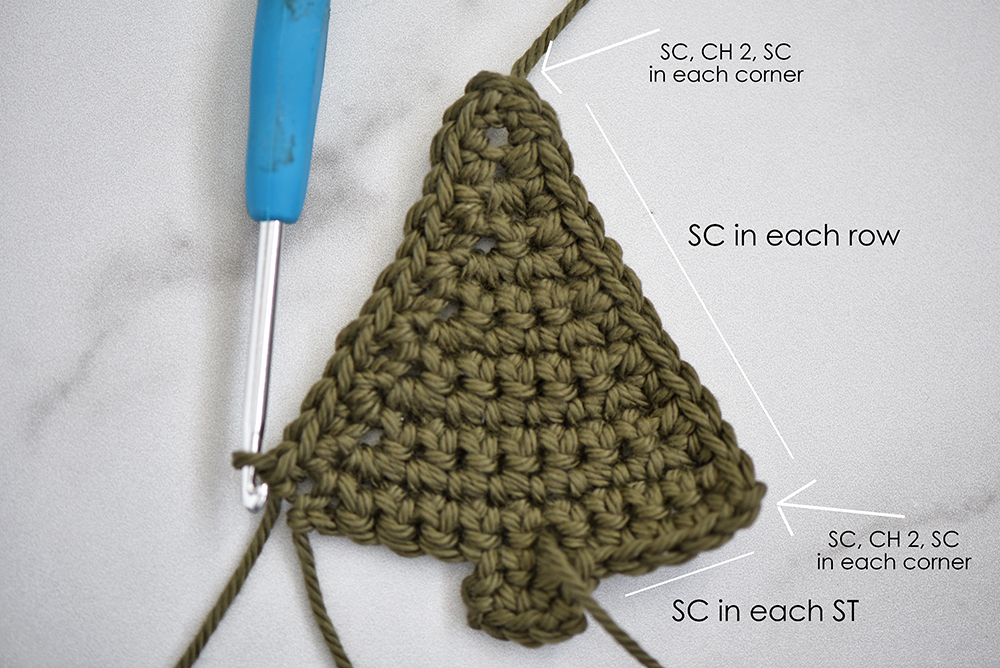
When you reach the end, join to the first ST of the border. Tie off and weave in ends. Tie the top tail into a loop and weave in the loose ends.
Follow along with the Ribbon video tutorial on YouTube!
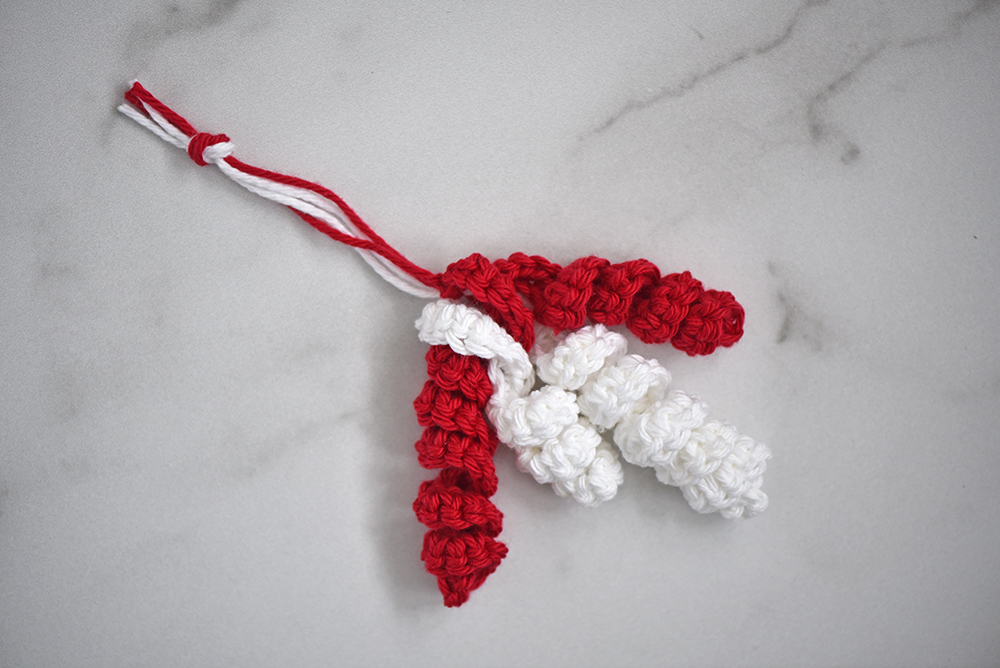
Ribbon Pattern
Instructions show how to make a bundle of 4 ribbons that are all attached together (2 white ribbons and 2 red ribbons). Each bundle has 2- 2” long ribbons and 2- 3” long ribbons.
Leave a 6” long tail behind the slip knot for the hanging loop.
2” Ribbon starting with White
CH 20
Row 1: SC in 2nd CH from the hook. SC in same ST. 2 SC in each CH across. SL ST into the 1st CH. (38) Do not tie off. Continue onto the 3” ribbon.
3” Ribbon
With yarn still attached from the 2” ribbon, CH 30.
Row 1: SC in 2nd CH from the hook. SC in same ST. 2 SC in each CH across. SL ST into the 1st CH. (58)
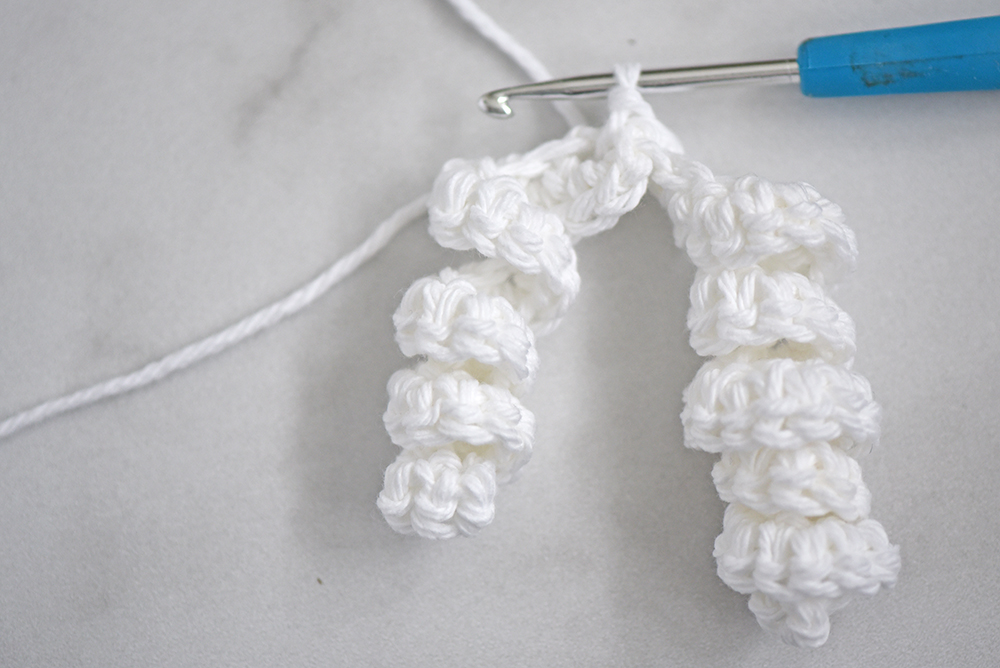
Tie off yarn leave a 6” long tail.
Attach Red yarn to the last SL ST you worked. Repeat the instructions starting from the 2” ribbon to create 2 more ribbons for a bundle of 4. Feel free to continue to repeat the instructions to make a bundle with as many ribbons you’d like.
Secure all the tail ends together with a knot at the top to create a hanging loop.
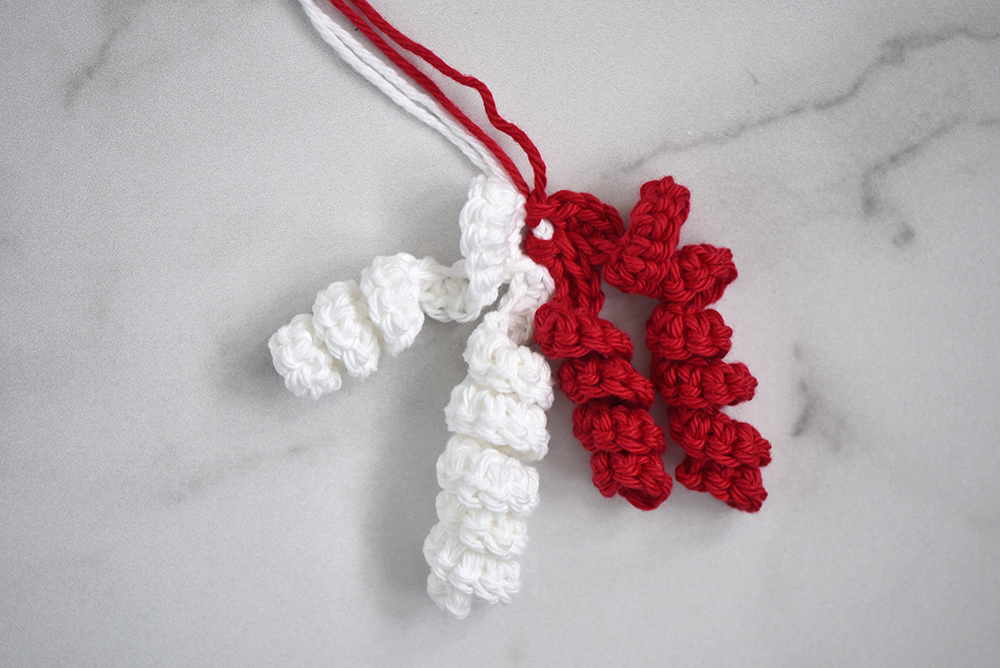
Attach Red to same ST and repeat instructions again to make a bundle of 4 ribbons ( 2 red and 2 white). Add as many more ribbons as you like and change colors as you desire. Adjust length of the ribbons by simply making a longer or shorter CH and working 2 SC in each CH.
To make a hanging loop, tie the tail ends together with a knot at the top.
FOLLOW ALONG WITH THE Wreath VIDEO TUTORIAL ON YOUTUBE!
Wreath Pattern
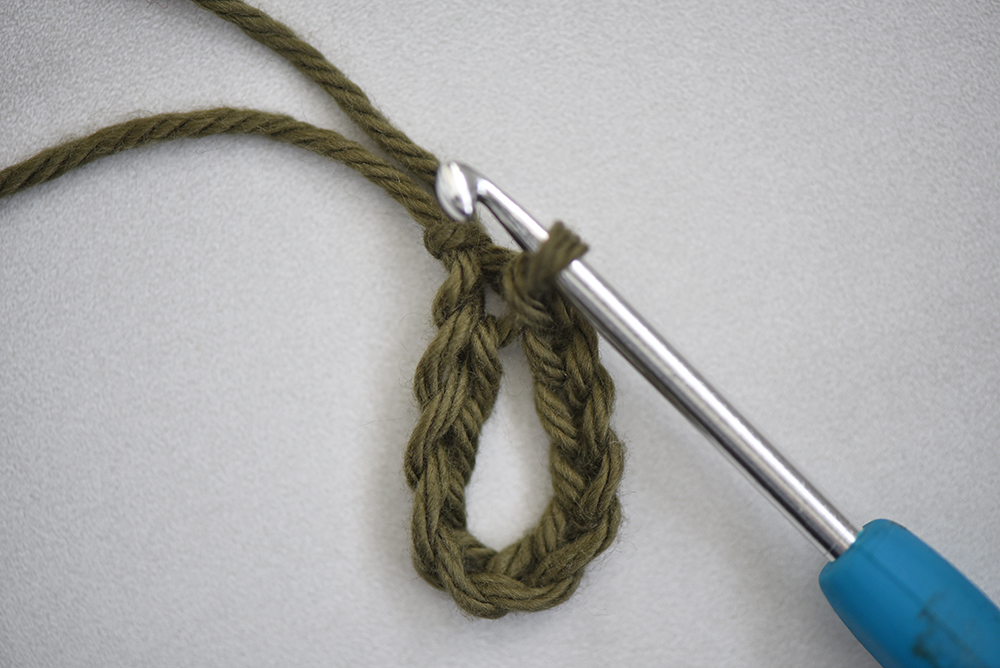
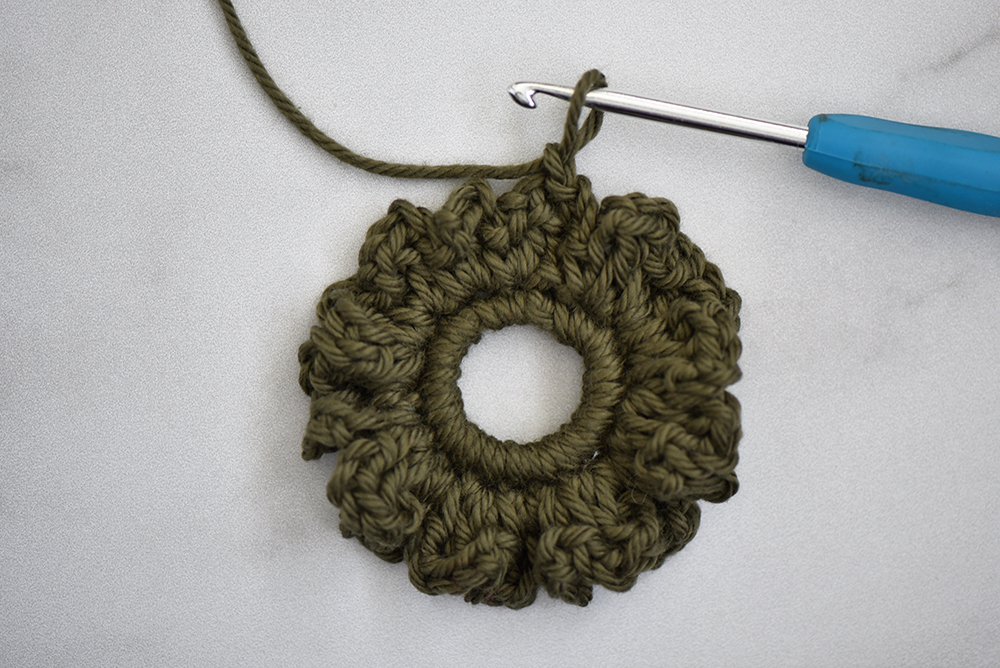
(Starting with Green) CH 10. SL ST into 1st CH to create a loop. CH 1.
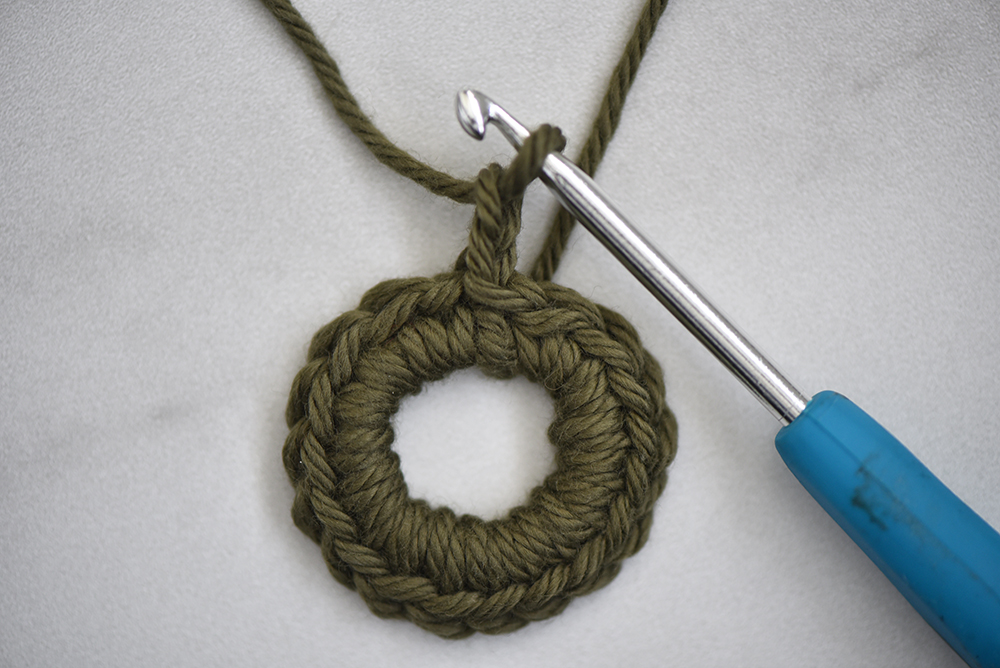
Round 1: SC x18 inside the loop. Join & CH 2. (18)
Note: For thicker yarn (like acrylic) or if you notice your wreath is too bunched up after round 2, SC x14 for round 1 instead of 18.
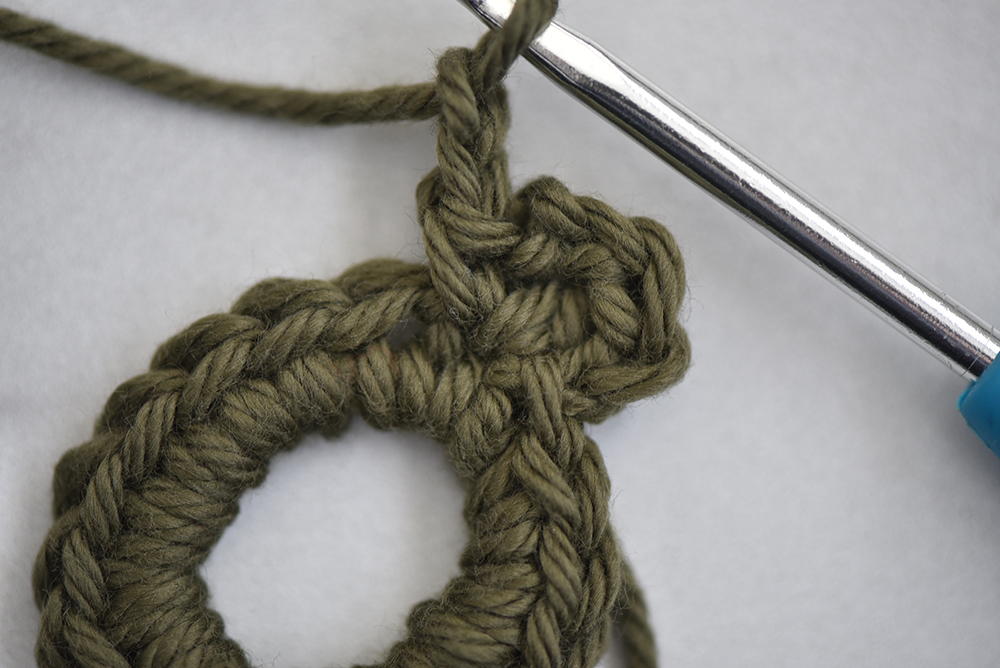
Round 2: [DC, CH 2, SC, CH 2] in each ST around. Join.
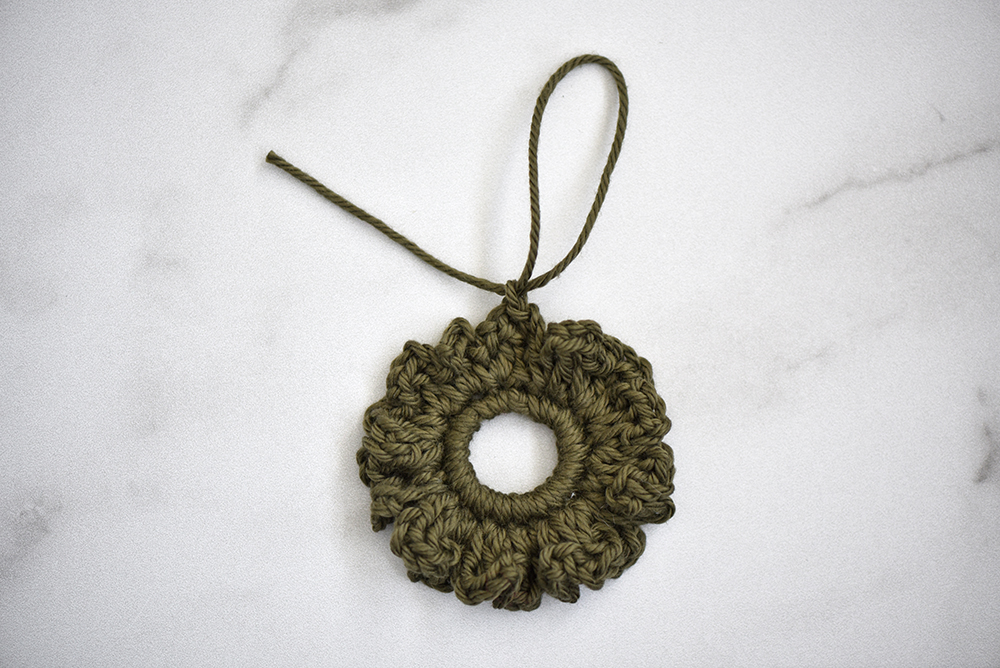
Pull yarn to create a hanging loop and secure at the bottom with a knot. Tie off yarn and weave in end.
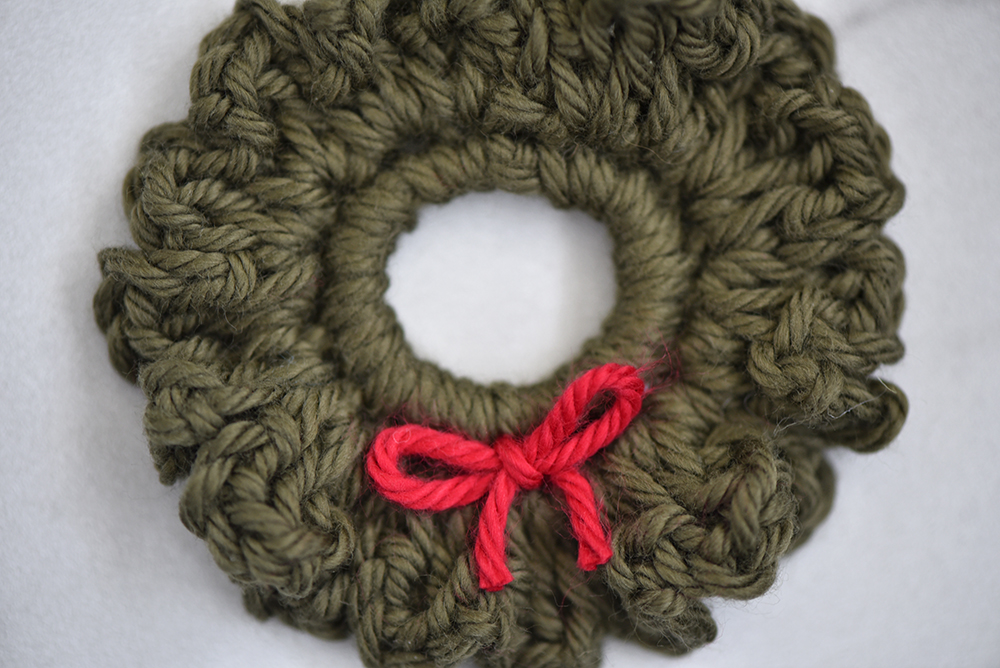
With 6″ strand of red yarn, attach to bottom of wreath between rounds 1 & 2, and tie a small bow. Cut off excess yarn.

And you’re all done! I hope you enjoyed these patterns for gift toppers and tree ornaments!
You are free to sell the items you make with this crochet pattern, and I’d love if you could please credit The Turtle Trunk as the pattern designer. You do not have permission to republish or distribute this pattern in any way or claim it as your own. Do not use my photos in your sale listings or for any other purposes. Thank you.
This page includes affiliate links. If you make a purchase from these links, I may make a small commission at no cost to you! Thank you for your support!

My wreath was sooo ruffled. My heart must be a little different. I couldn’t get the wreath to lie very flat. Wanted to curl up a lot. Any suggestions?
Sorry. I meant my yarn must be a little different.
Hi Catherine! Your yarn may be a little thicker or perhaps you have a looser tension than I. You can try using a smaller crochet hook or work less stitches around. Maybe try Working 14 or 16 SC for round 1 and see if that makes it less ruffled. Hope that helps!
-Ali