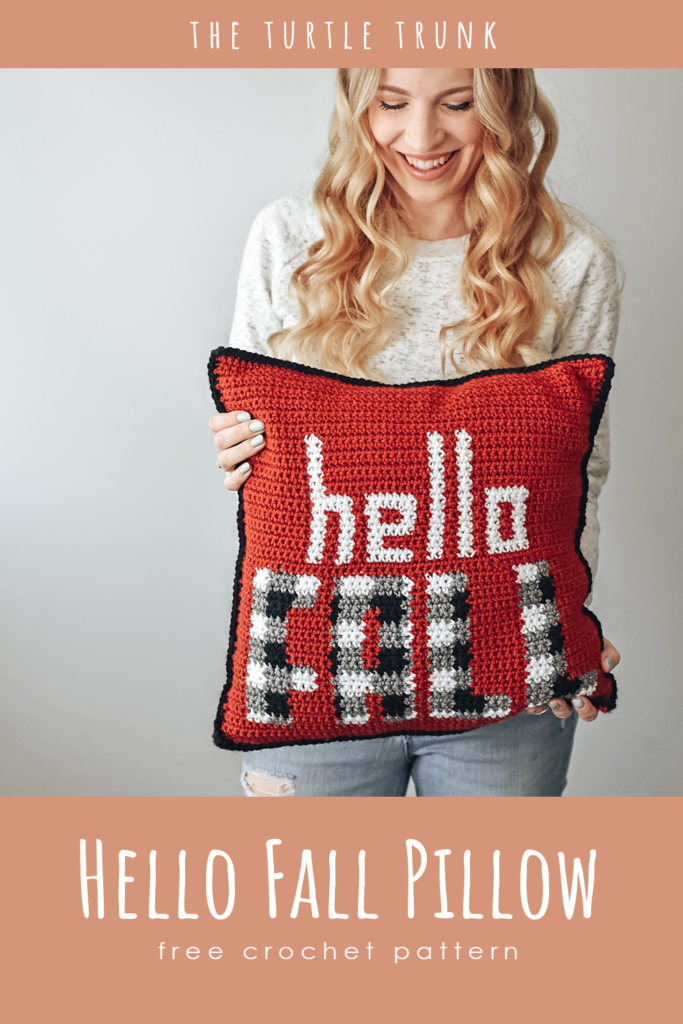
Hello Fall Pillow Crochet Pattern
Design Inspiration
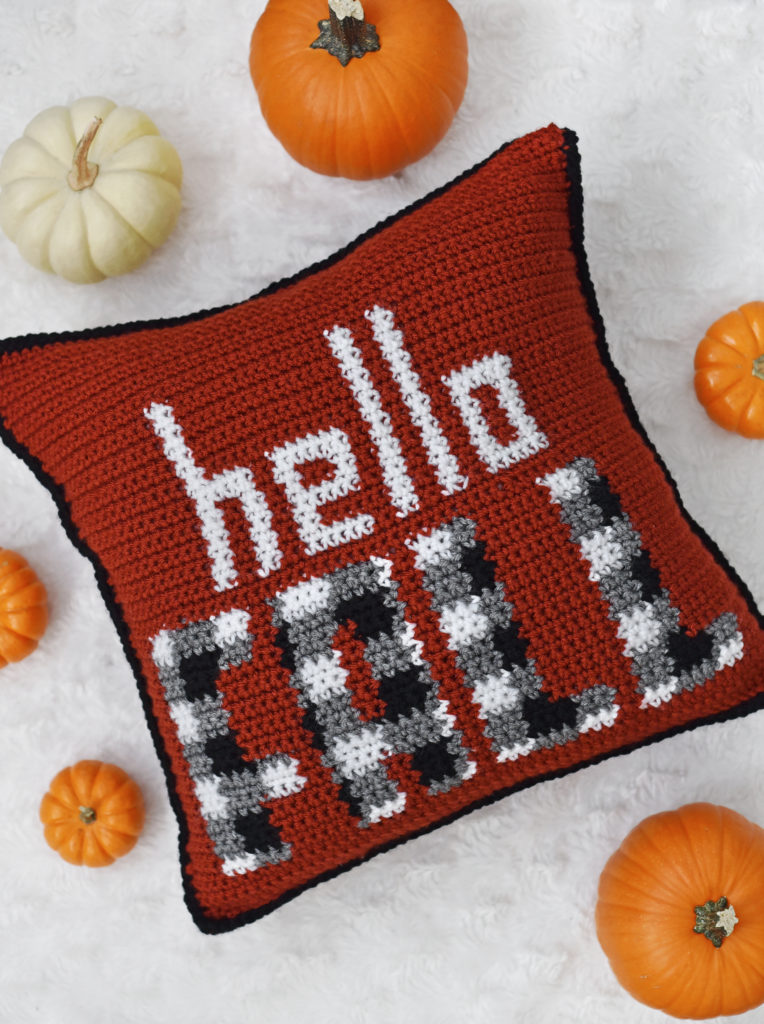
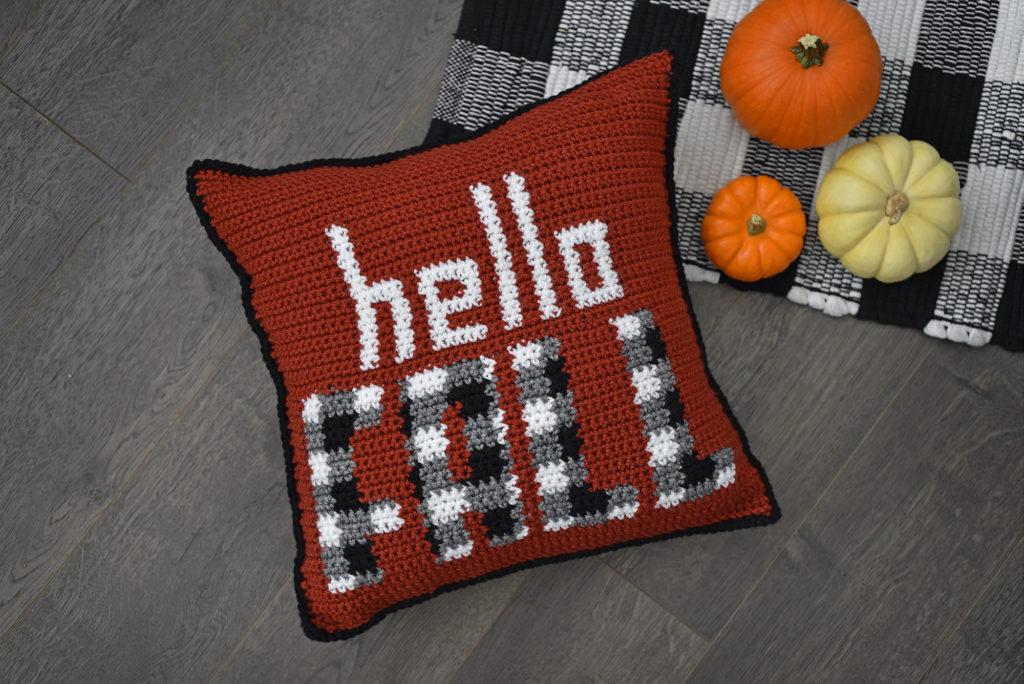
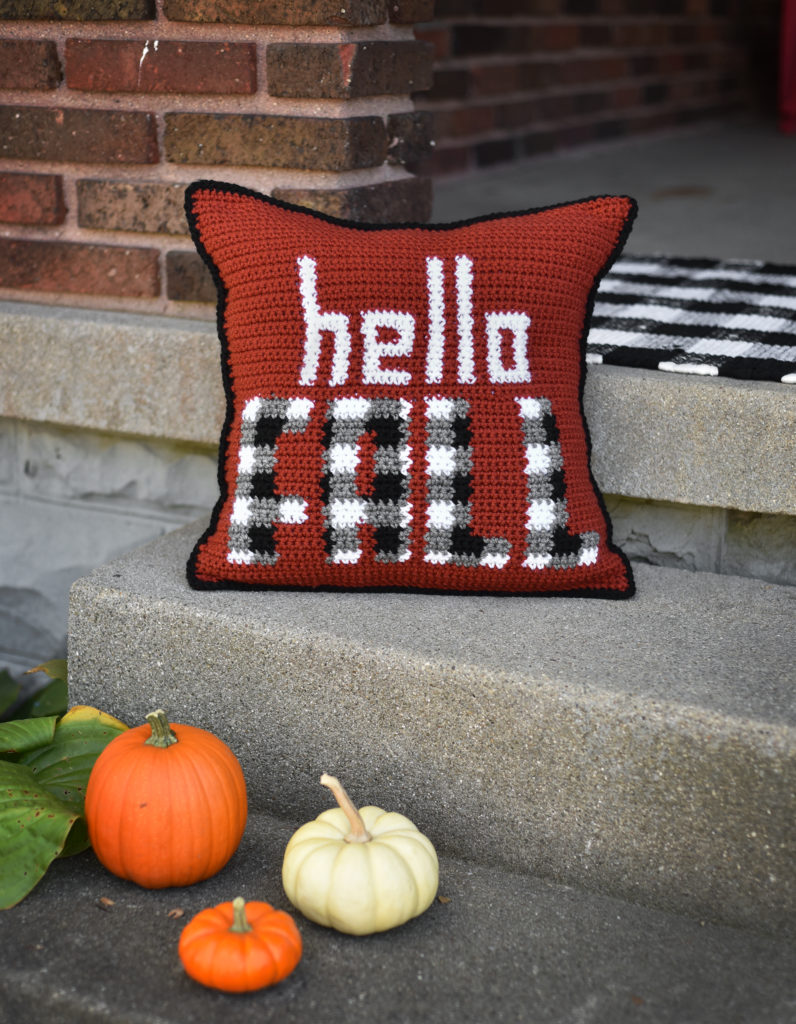
HELLO FALL! Fall is definitely my favorite season and I am so happy it’s finally here! I love the cool air, the changing leaves, and all the cute Fall decor! The Hello Fall Pillow is the perfect addition to any room! Buffalo plaid is very trendy right now and combined with bold colors, this pillow will make a statement in your home!
Follow along with the ad-free and printable pdf from
Etsy and Ravelry!
Not ready to make just yet? Save this pin for later!
Intarsia Crochet
Intarsia crochet is a technique that allows for the changing of colors in each row and will create a finished product that is two sided.
Here are some important things to know about this technique:
● This method creates a picture (or
design) that will be two sided. No yarn is carried behind the other color (fair
isle crochet), instead with intarsia crochet, when you are done with one color
you will drop it and start a new color. The use of bobbins (or small balls of
yarn) come in handy so you can pick up yarn from it instead of constantly
cutting and attaching again. This method will keep your work looking nice on
both sides as well as keeping yarn ends to a minimum.
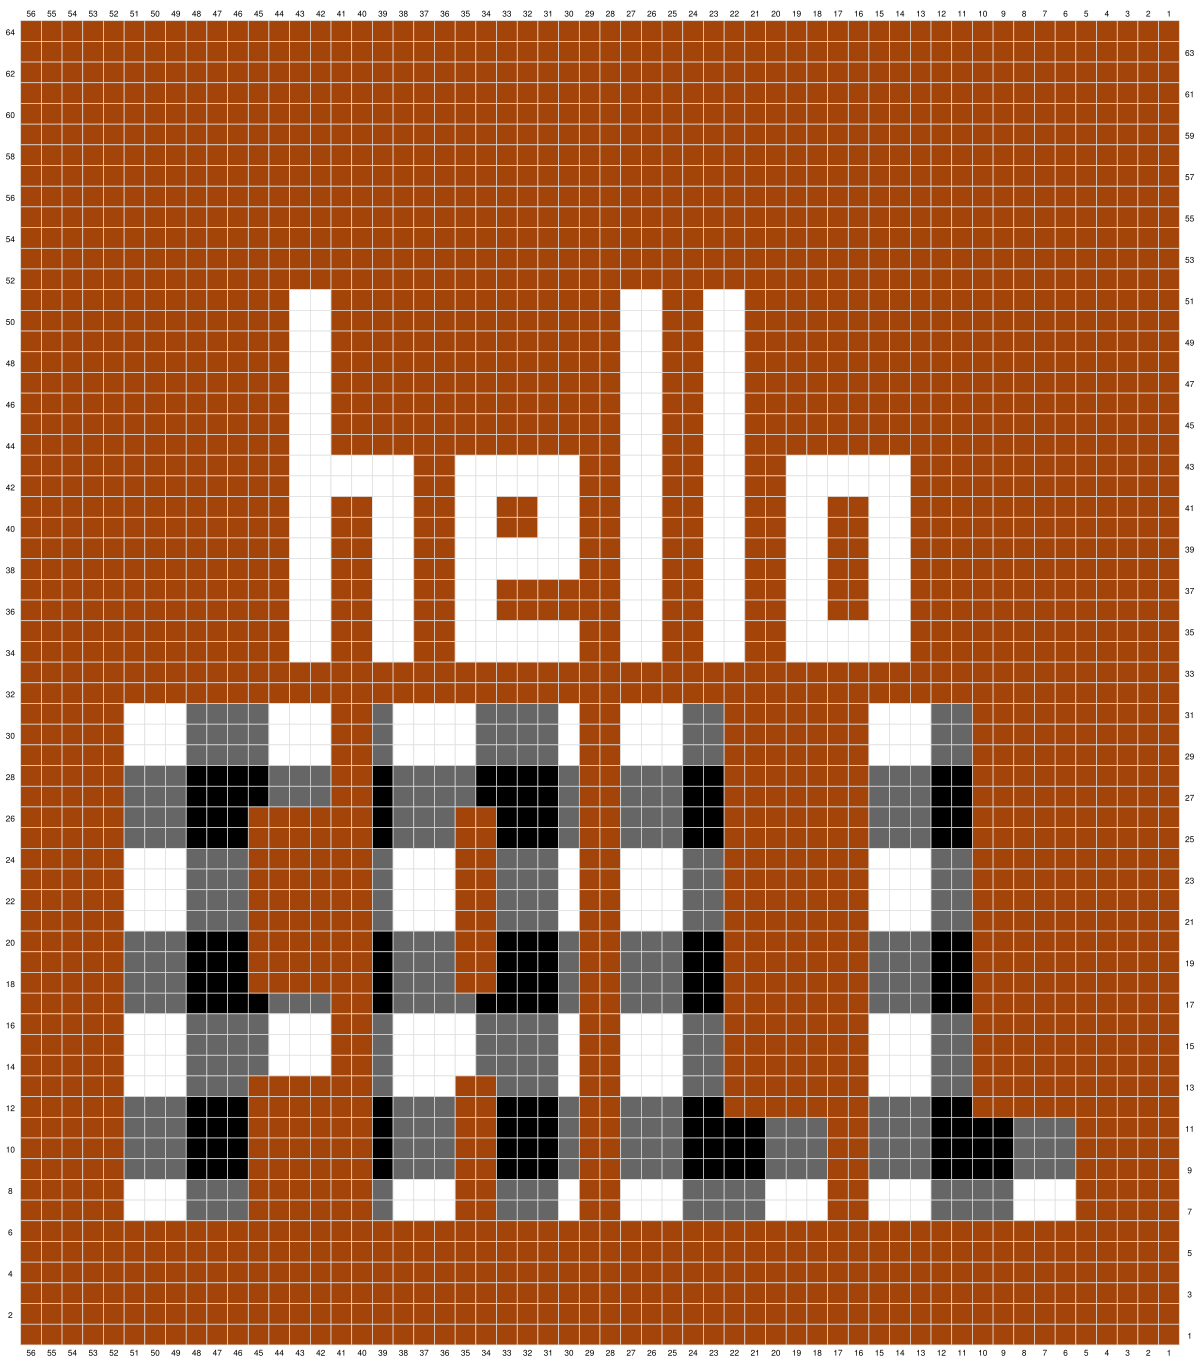
● You will use a graph to follow the pattern
● 1 square on the chart equals 1 single crochet (SC)
● When you are working on the ‘right side’ of your project, you will read the
chart from right to left. When you are working on the ‘wrong side’ of your
project, you will read the chart from left to right. On the chart the row
number is written on the side you will start from.
● All the tail ends of your yarn should be on the ‘wrong side’ of your work.
When dropping one color and starting another, keep all strands on the ‘wrong
side’ of your work. I find this keeps the ‘right side’ neater and makes it
easier to pick up that color when you come back on the next row.
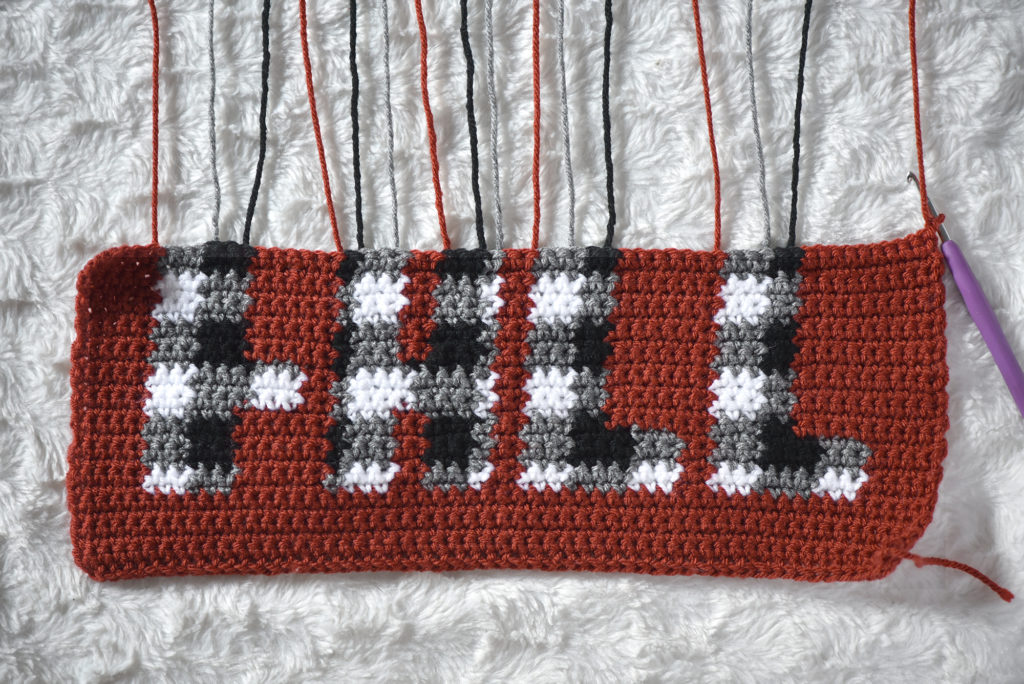
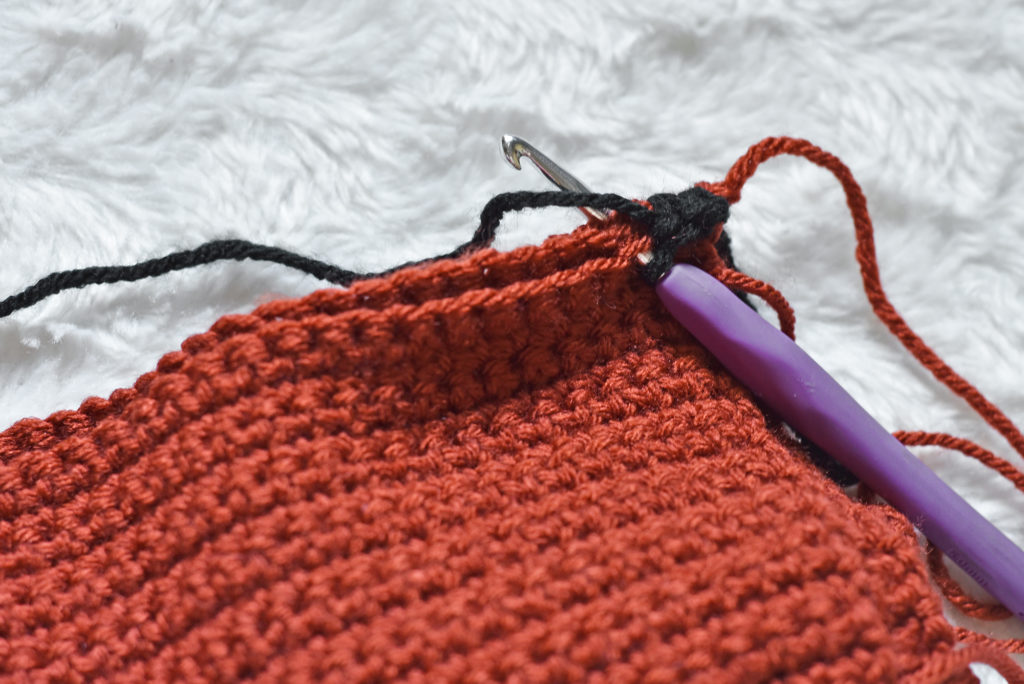
Bobbins:
A bobbin is a small yarn ball that will keep you from having to constantly cut and reattach each color as needed. You will start a new bobbin when the color changes and you do not have a strand of that color within a few stitches. For this pillow I used one bobbin for each of the white and black squares, 1 grey bobbin for each letter, and an orange bobbin between each letter and on each end. For the word hello I used only 1 white bobbin, and an orange bobbin between each letter and on each end. You can make a bobbin with a piece of cardboard. Just wrap your yarn around your bobbin and cut. You can also wrap your yarn in a small ball or buy plastic bobbins to wrap around. You will need to use your best judgment on how much yarn you will need on each bobbin. If your bobbin runs out mid project, simply take from the opposite end of you working yarn skein and attach where needed. Bobbins will get tangled after turning your work, so it’s helpful to reorganize them after each row.
Check out this helpful video from Emily of Two Little Birds Patterns!
She is a master at intarsia crochet and explains the technique so well!
Check out her instagram @tlbpatterns for some amazing intarsia patterns!
Notes
● You will follow along with the graph provided
● Each square on the graph represents one single crochet
● The final size of each panel is 16” x 16”
● Beginning chains do not count as stitches throughout the whole pattern.
● Rows 1 and on will always have a final stitch count of 56
Supplies (us terms)
● Medium (4) Weight Yarn in 4 colors:
Color A – Orange approx. 540 yards
Color B – White approx. 115 yards
Color C – Black approx. 100 yards
Color D – Grey approx. 115 yards
● Hook: 5.00 mm (H)
● 16” x 16” Pillow Insert
● Ruler or tape measure
● Yarn Needle
● Scissors
Abbreviations (US Terms)
ST(s) – Stitch(es)
SL ST – Slip Stitch
CH – Chain
SC – Single Crochet
FSC – Foundation Single Crochet
Gauge
14 stitches by 16 rows in Single Crochet (SC) = 4” x 4” square
Adjust hook size up or down to meet gauge.
Pattern
Back Panel
(With Color A)
Row 1: FSC 56. CH 1 and turn. (56)
Rows 2 – 64: SC in each ST across. CH 1 and turn. Repeat until you reach Row 64 OR until your panel reaches a length of 16” (56)
Tie off and weave in ends to ‘wrong side’. Set back panel aside and move on to the front panel.
Front Panel
(Starting with Color A)
Row 1: FSC 56. CH 1 and turn. (56)
Rows 2 – 6: SC in each ST across. CH 1. Turn. (56)
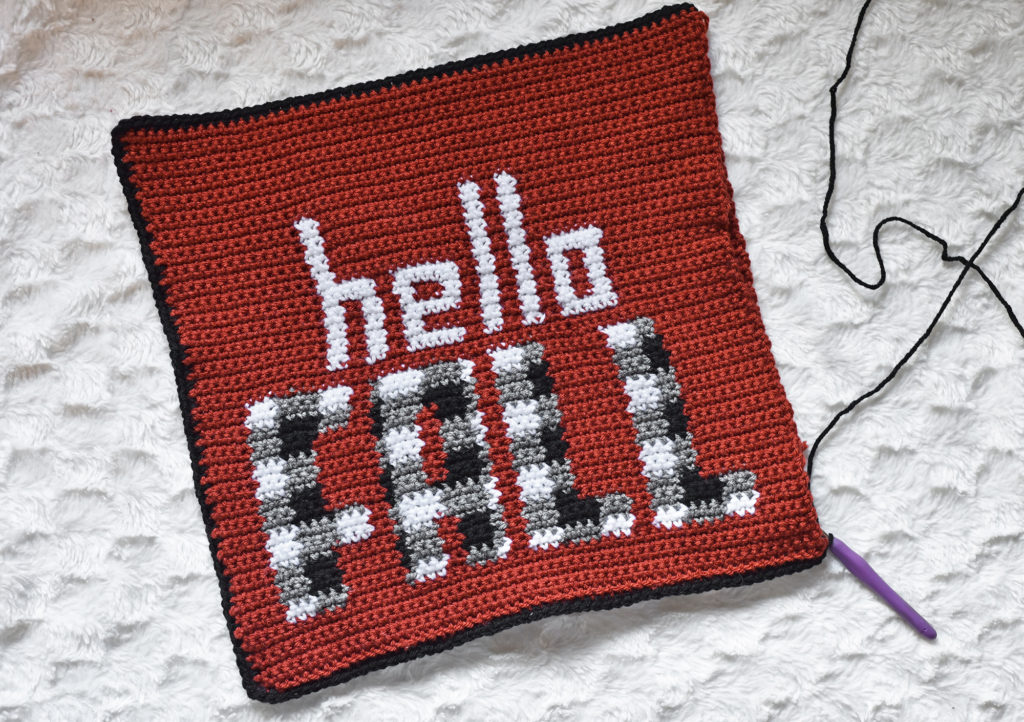
Row 7 you will start the Intarsia Technique. Begin by following the graph and add bobbins when needed. Follow until the end of Row 51, from there continue with only Color A until Row 64 OR until your panel has reached a length of 16”.
Closing and Finishing
Tie off Color A. Place front panel on top of the back panel with both the right sides facing out. Attach Color C (or whatever color you’d like for the boarder) to the top right corner of the front panel. Working into both panels, work 1 SC into each ST/Row and 2 SC into each corner all the way around. Before seaming up the last side, be sure to add your pillow insert. There should be a total of 244 SC worked around. SL ST to the first SC, tie off, and weave in your end.

And you are all done! I hope you enjoyed the pattern for the Hello Fall Crochet Pillow! Be sure to show off your finished creation on Instagram and don’t forget to tag me!
You are free to sell the items you make with this crochet pattern, and I’d love if you could please credit The Turtle Trunk as the pattern designer. You do not have permission to republish or distribute this pattern in any way or claim it as your own. Do not use my photos in your sale listings or for any other purposes. Thank you.
This page includes affiliate links. If you make a purchase from these links, I may make a small commission at no cost to you! Thank you for your support!