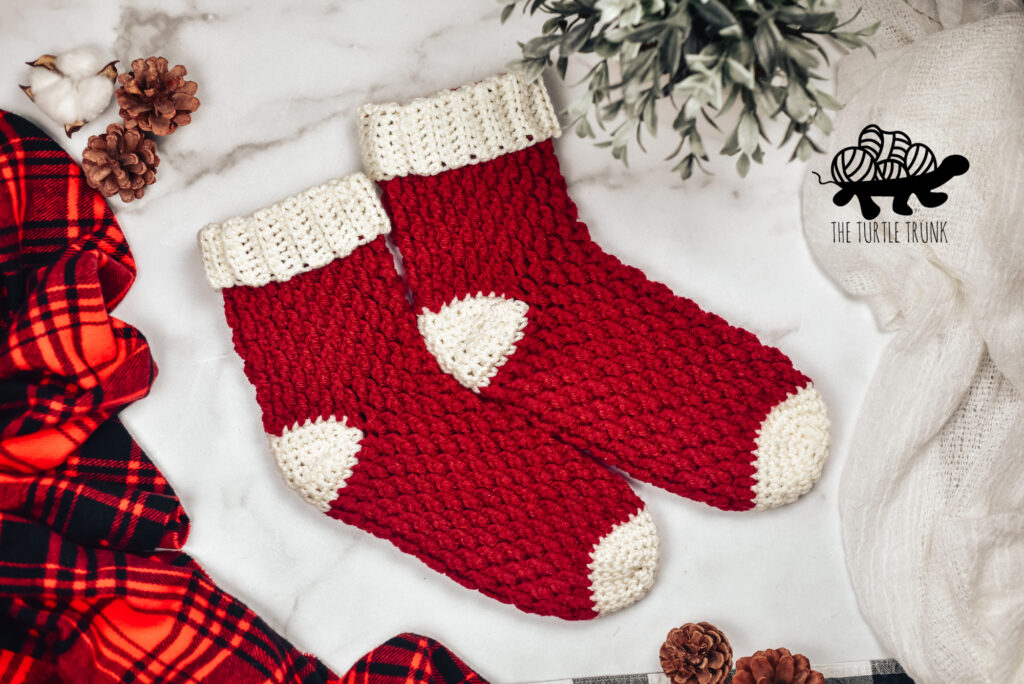
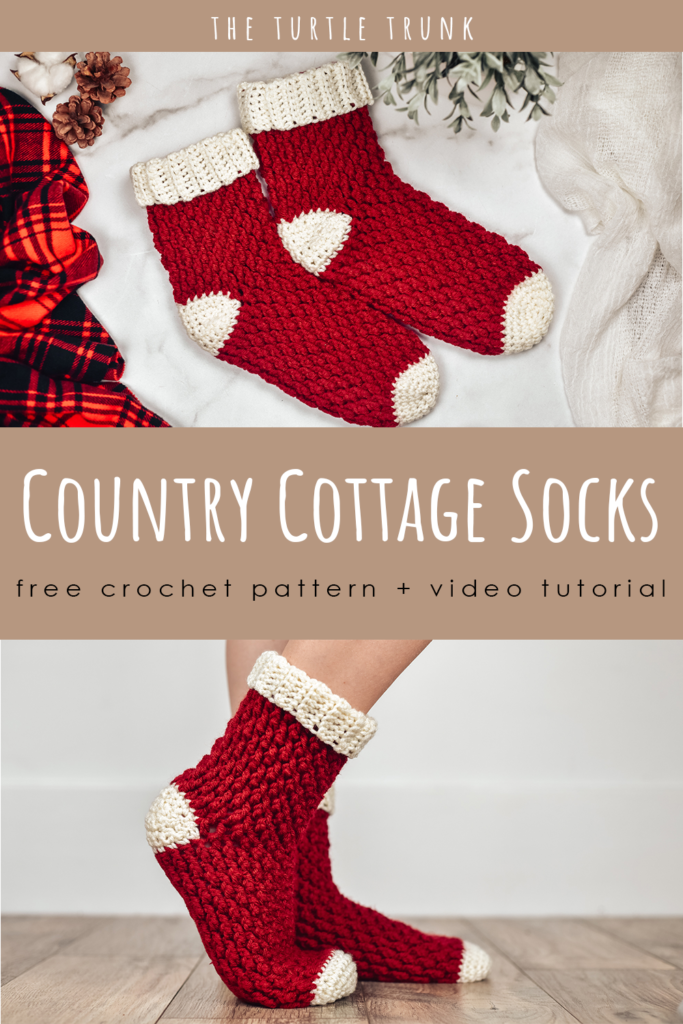
Country Cottage Socks Crochet Pattern
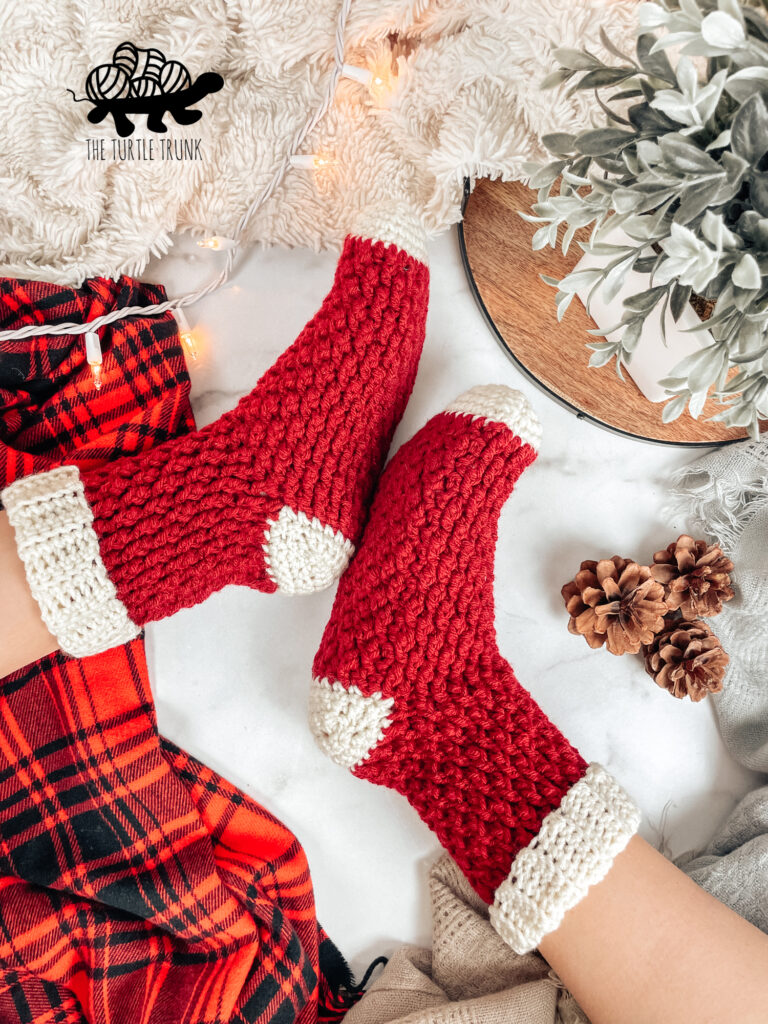
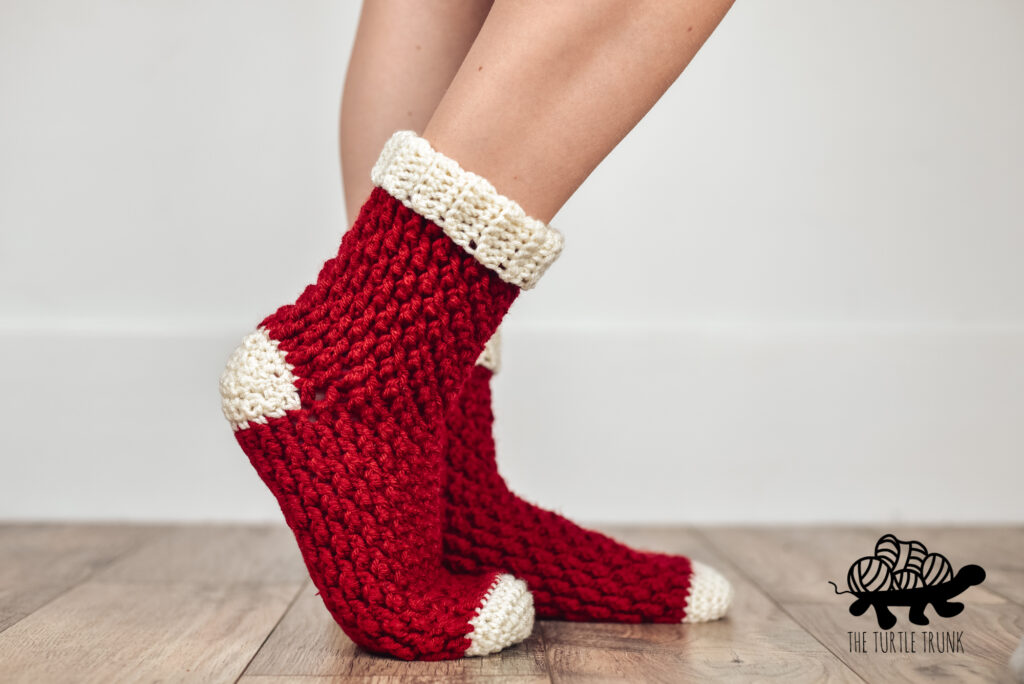
Keep your feet warm and cozy with these Country Cottage Socks! These crochet socks include 8 sizes ranging from newborn to adult large so you can make a pair for anyone and everyone! They feature a beautiful texture and are perfect for lounging around in, like cabin socks!
Here’s another Country Cottage pattern for you all! If you’re familiar with my patterns, you’ll recognize this design as I have over 10 Country Cottage patterns! After making a Country Cottage Stocking, I knew I needed to make a wearable sock version too! So Introducing the Country Cottage Socks!
Country Cottage Socks are perfect for lounging around in the house on cold, winter days. They feature a beautiful texture that’s easy and quick to create. This pattern also includes 8 sizes ranging from newborn to adult large, so you can make a pair for anyone and everyone (hello Christmas gifts!).
Below, I’ll be showing you how to make 2 tone socks, with the toe, heel, and cuff one color, and the rest of the sock another color. You can customize yours socks to be any color combination you want though! Try stripes, one solid color, 2 toned!
Continue reading below to hear my inspiration for this pattern and to learn more about the yarn I used, then scroll down for the written pattern!
FOLLOW ALONG WITH THE AD FREE & PRINTABLE PDF PATTERN FROM
ETSY AND RAVELRY!
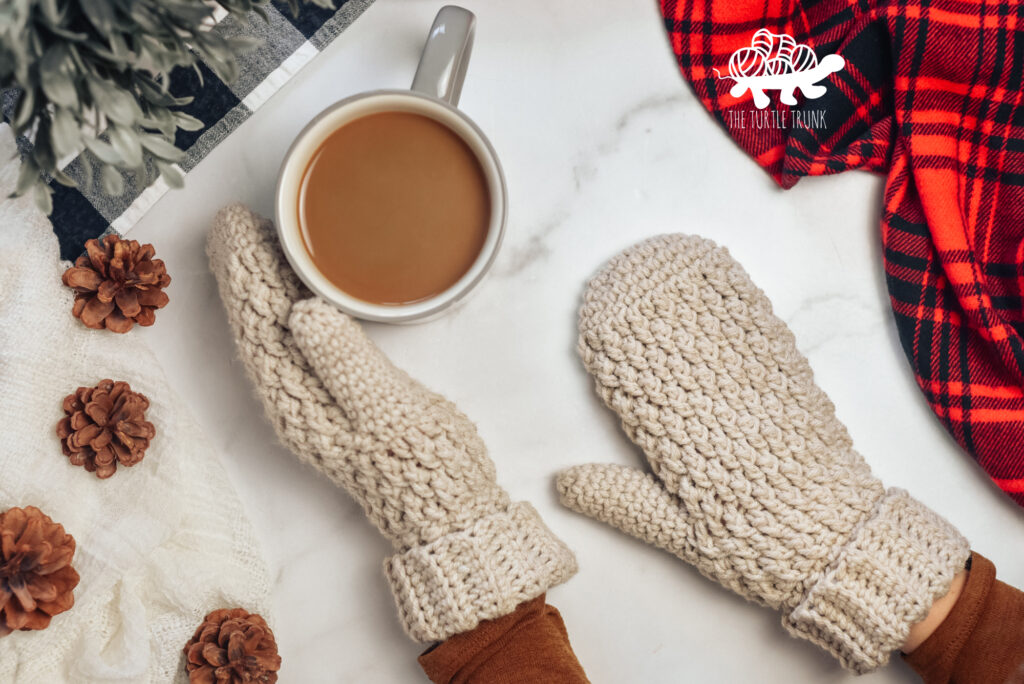
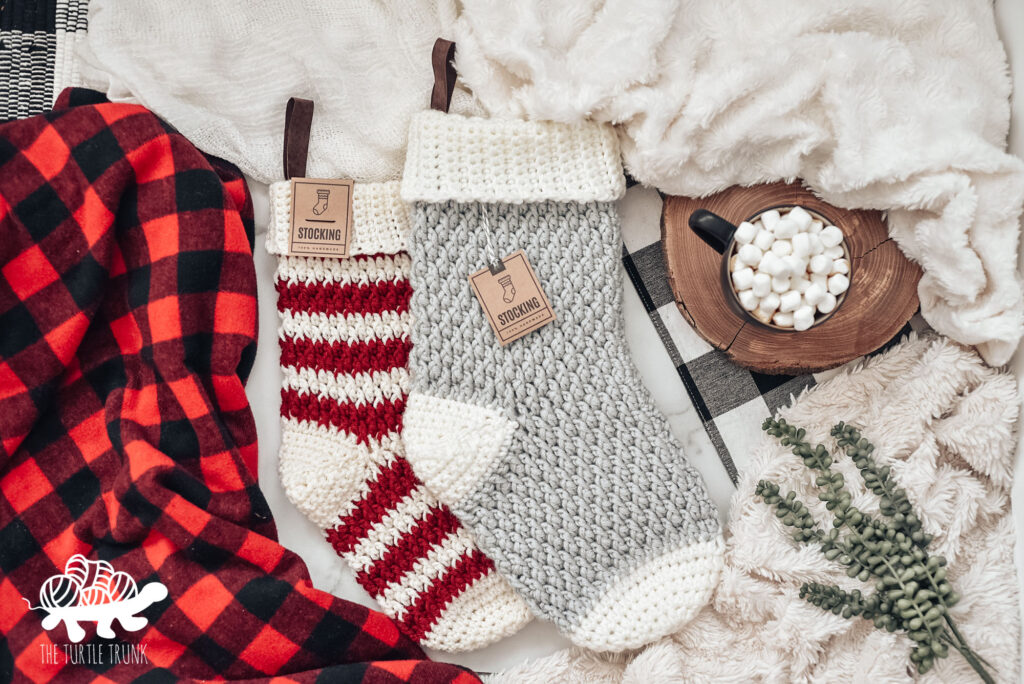
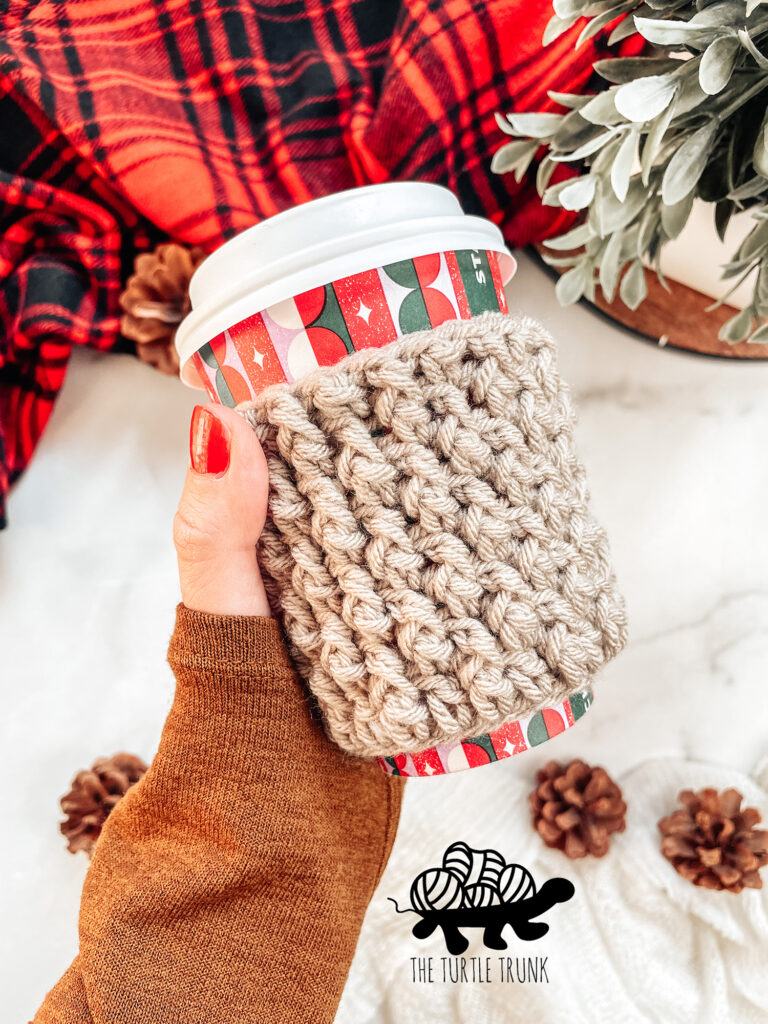
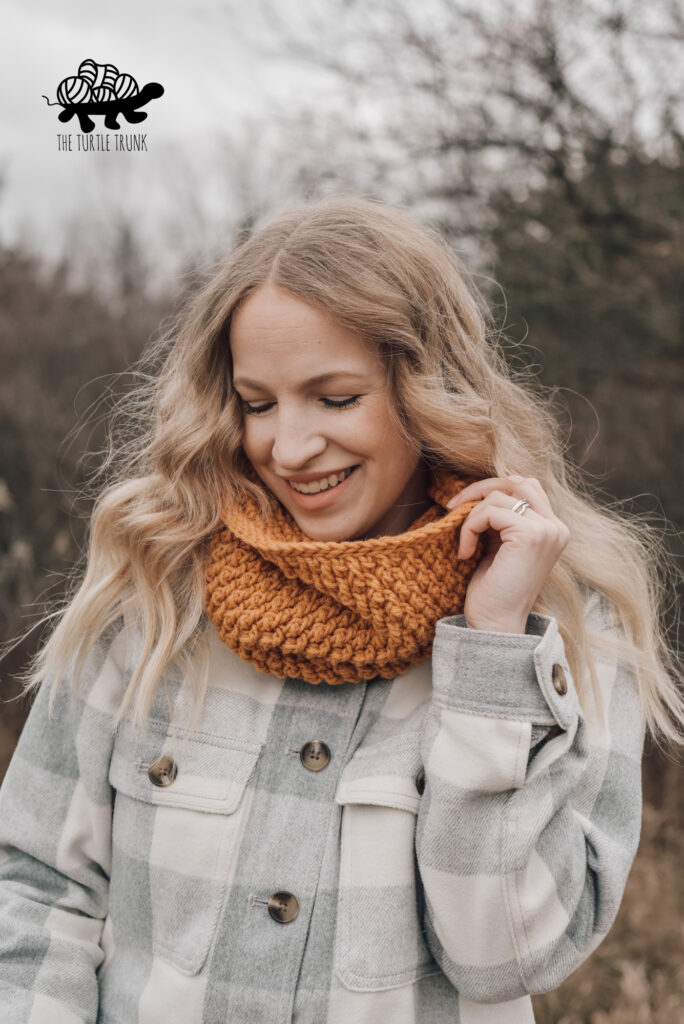
If you enjoy this pattern, then check out these other crochet patterns in the Country Cottage Collection: Country Cottage Beanie, Country Cottage Mittens, Country Cottage Stocking, Country Cottage Headband, Country Cottage Cozy, Country Cottage Cowl, and more!

Below you’ll find the free written pattern for the Country Cottage Socks or you can follow along with the video tutorial on YouTube! The video tutorial follows the instructions for the Women’s 7-9.5/Men’s 6-8.5 size. If you are making any of the other sizes you can use the video as a reference for how to work any of the stitches or how to create the toe, heel, or cuff.
Follow along with the video tutorial on YouTube!
The video tutorial follows along with the size Women’s 7-9.5/Men’s 6-8.5
Not ready to make just yet? Save this pin for later!
Inspiration
In 2020, I designed the Country Cottage Stocking. It was the first of the collection and I loved the stitches, texture, and design so much I decided to make more patterns with the same stitch combination!
The idea for socks came after a few people had mistaken the stocking pattern for wearable socks! Since it was evident that people wanted a wearable version, I got to work on designing these! The best part is that it’s a gender neutral design so these socks can be worn by anyone! I’ve included all sizes so you can make a pair for anyone and everyone!
I now have over 10 Country Cottage patterns and plan to make many, many more! Let me know if there is something specific you’d like to be added to the Country Cottage Collection!
Yarn
The Country Cottage Socks crochet pattern uses medium (4) weight yarn. I used I Love This Yarn which is a 100% acrylic yarn. You can substitute for any medium (4) weight yarn that you’d like though!
Some other yarns I think would work great for this pattern are Red Heart Soft and Yarn Bee Soft and Sleek.

Sizes
This pattern includes 8 sizes ranging from baby to men’s 12-14. Below you’ll find the size chart and the measurements of each size. The pattern is split up between the smaller baby/child sizes and the adult sizes for easier readability.
Round/Row numbers and the stitch count at the end, are in order of smallest size to largest. If you have a hard time following the pattern below, check out the ad-free, pdf version of this pattern HERE as each size is color coded and easier to follow along with.
| US Sizes | Foot Length | Foot Circumference | Sock Length | Sock Circumference | Sock Height | Yardage (for 2 socks) |
| Baby 0-4 | 3-4.5” | 4.5” | 3.5” | 5” | 3.5” | Color A- 24 yards Color B- 38 yards |
| Toddler 5-9 | 4.75-6” | 5.5” | 4.45” | 6” | 4” | Color A- 36 yards Color B- 102 yards |
| Child 10-13 | 6.5-7.5” | 6” | 6” | 6” | 5” | Color A- 36 yards Color B- 145 yards |
| Youth 1-3 | 7.75-8.5” | 6.5” | 7.35” | 7” | 6” | Color A- 52 yards Color B- 174 yards |
| Youth 4-6 / Women’s 4-6.5 | 8-9.5” | 7” | 7.6” | 7” | 7” | Color A- 52 yards Color B- 188 yards |
| Women’s 7-9.5 / Men’s 6-8.5 | 9.25-10” | 8” | 8.65” | 8” | 7” | Color A- 60 yards Color B- 204 yards |
| Women’s 10-12.5 / Men’s 9-11.5 | 10.25-11” | 9” | 9.95” | 9” | 8” | Color A- 68 yards Color B- 234 yards |
| Men’s 12-14 | 11.25-12” | 10” | 10.7” | 10” | 9” | Color A- 74 yards Color B- 278 yards |
Instructions are for a two-toned sock, Color A is the toe, heel, and cuff, and Color B is the foot and leg. Feel free to use only one color for a solid sock or use multiple colors!
Difficulty
Advanced Beginner
Gauge Swatch
14 STs x 10 Rows = 4” x 4”
CH 14, without twisting your chain, SL ST into the 1st CH to create a loop. CH 2.
Round 1: DC in each CH around. Join & CH 2. (14)
Round 2: DC in the 1st ST, FPDC in the next. *DC, FPDC* around. Join & CH 2. (14)
Round 3: FPDC in the 1st ST, DC in the next. *FPDC, DC* around. Join & CH 2. (14)
Repeat Rounds 2 & 3 until the end of Round 10
Your swatch should be 2” across, a 4” circumference, and 4” tall.
Adjust hook size up or down to reach gauge.
Notes
- Socks are made to be fitted and will stretch for a more relaxed fit as they’re worn.
- Sock length and height can be adjusted by repeating the Foot and Leg rounds as many times as necessary to reach your desired measurements.
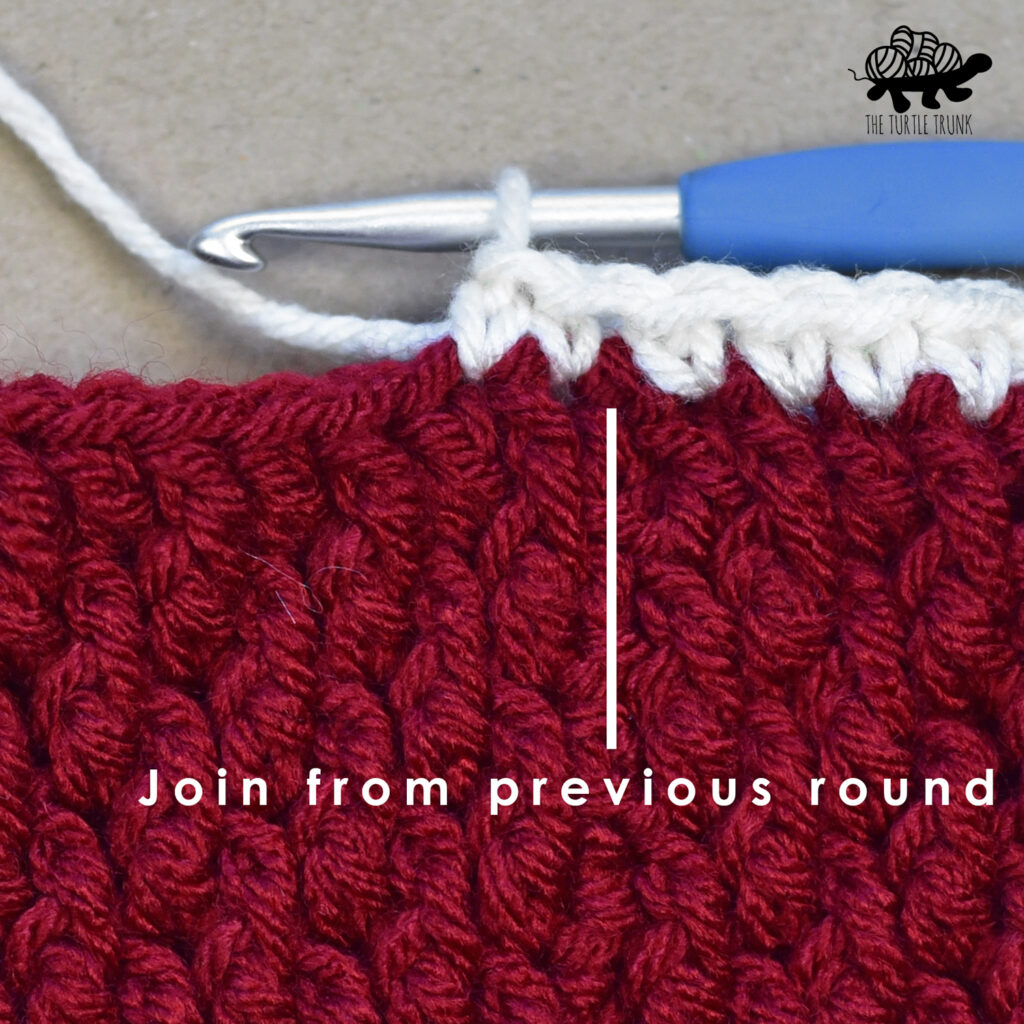
- The toe, foot, and leg will be worked in the round. The heel and cuff are worked in rows. Beginning chains do not count as stitches. At the end of the round, join with a slip stitch to the top of the 1st ST from the previous round. Chain and work the first ST into the same ST as the chain.
- The numbers in parenthesis at the end of the row/round represent the total stitch count at the end of that row/round, starting with the smallest size first.
- Stitches between *asterisks* are to be repeated until the end of the row/round.
- Pattern is split up by Child Sizes and Adult Sizes.
- After your socks are made feel free to sew leather or suede to the bottoms to keep them from wearing away and to make them nonslip!
Supplies
- Medium (4) Weight Yarn (I used I Love This Yarn)
- 5.00mm (H) Crochet Hook
- Yarn Needle
- Scissors
Abbreviations (US Terms)
ST(s) – Stitch(es)
CH – Chain
SL ST – Slip Stitch
SC – Single Crochet
SC2TOG – Single Crochet Two Together
SC BLO – Single Crochet in the Back Loop Only
DC – Double Crochet
FPDC – Front Post Double Crochet
Reference Photos
Photos show the Women’s 7-9.5/Men’s 6-8.5 size.
Front Post Double Crochet (FPDC)
Yarn over, insert your hook from the front, around the back, and to the front again, around the post of the next ST, yarn over and pull up a loop, yarn over and pull through 2 loops, yarn over and pull through last 2 loops.
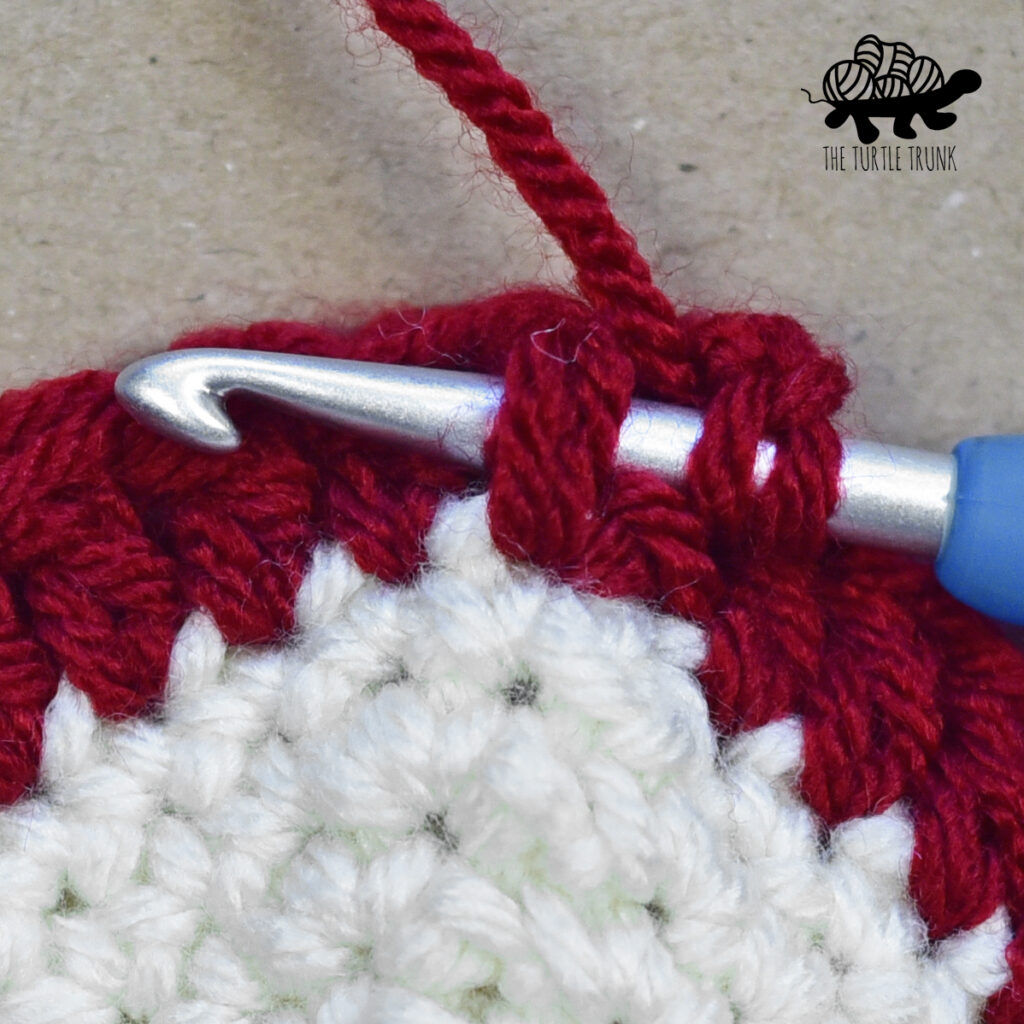
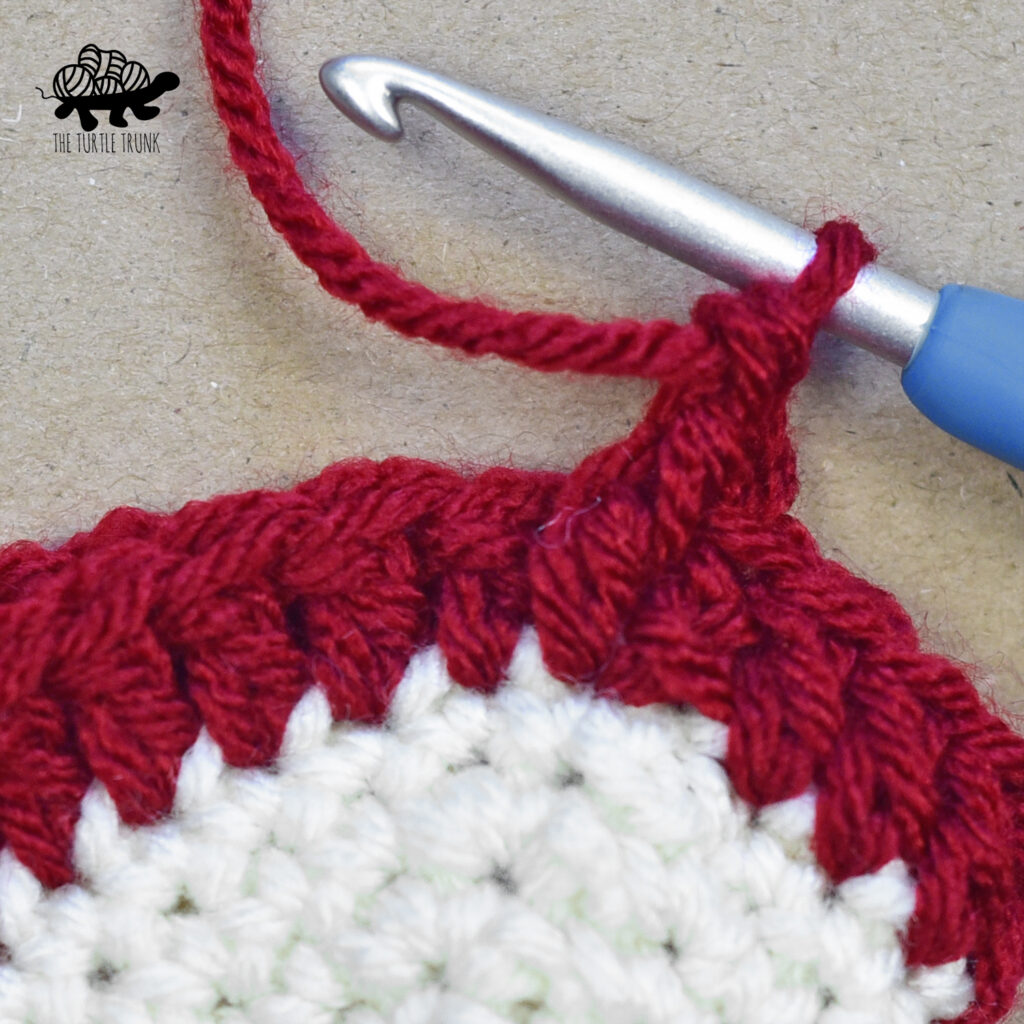
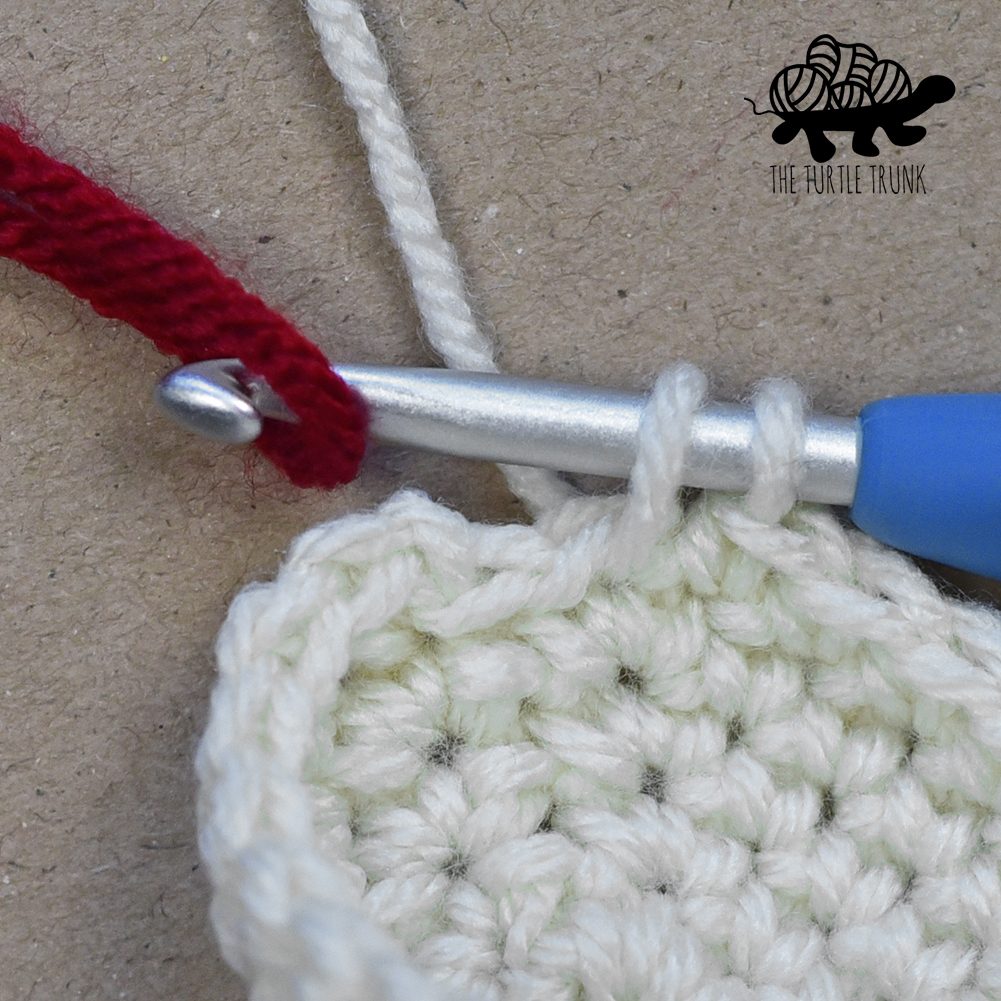
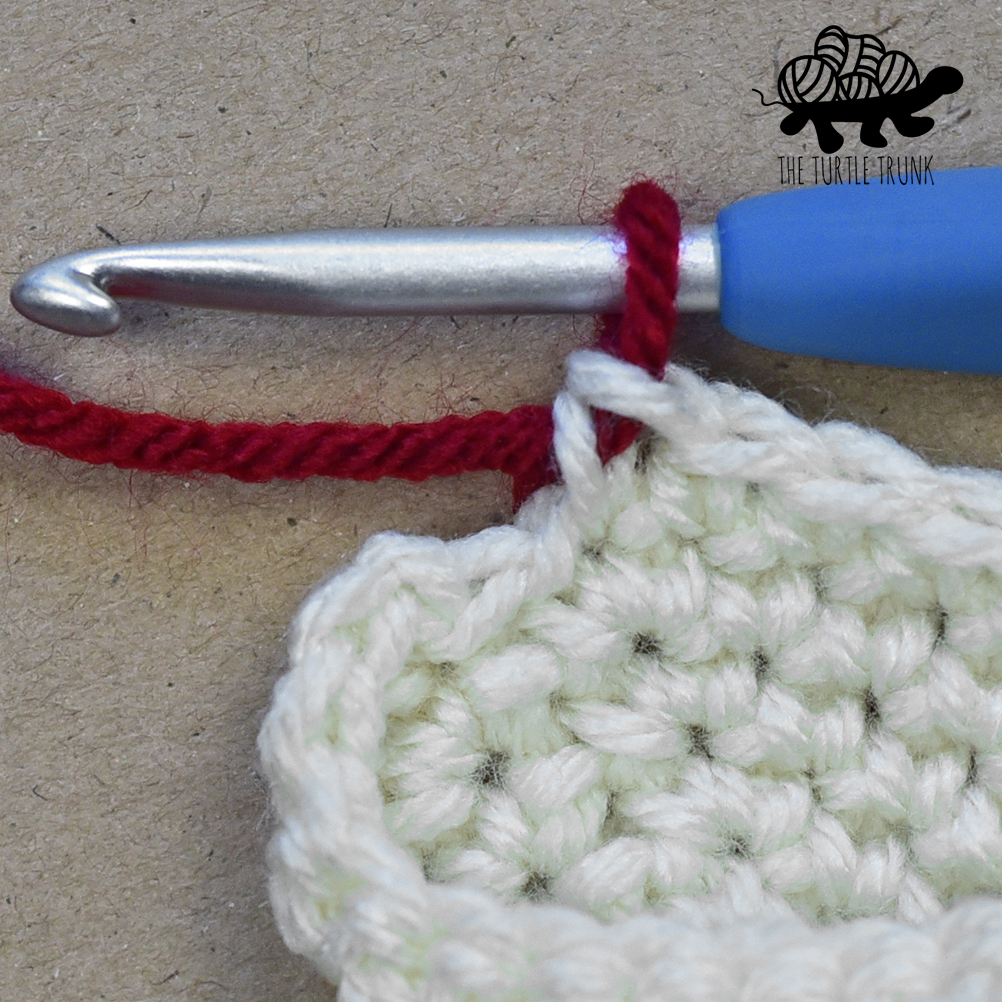
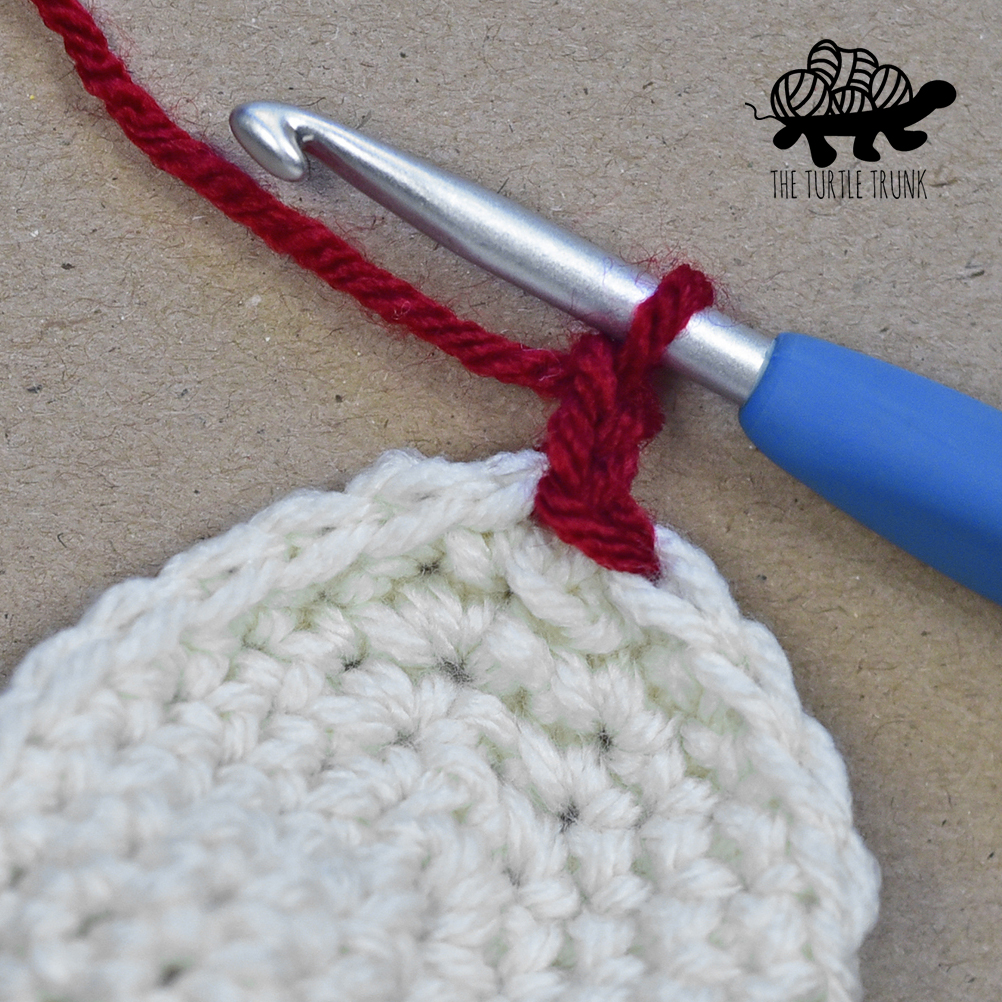
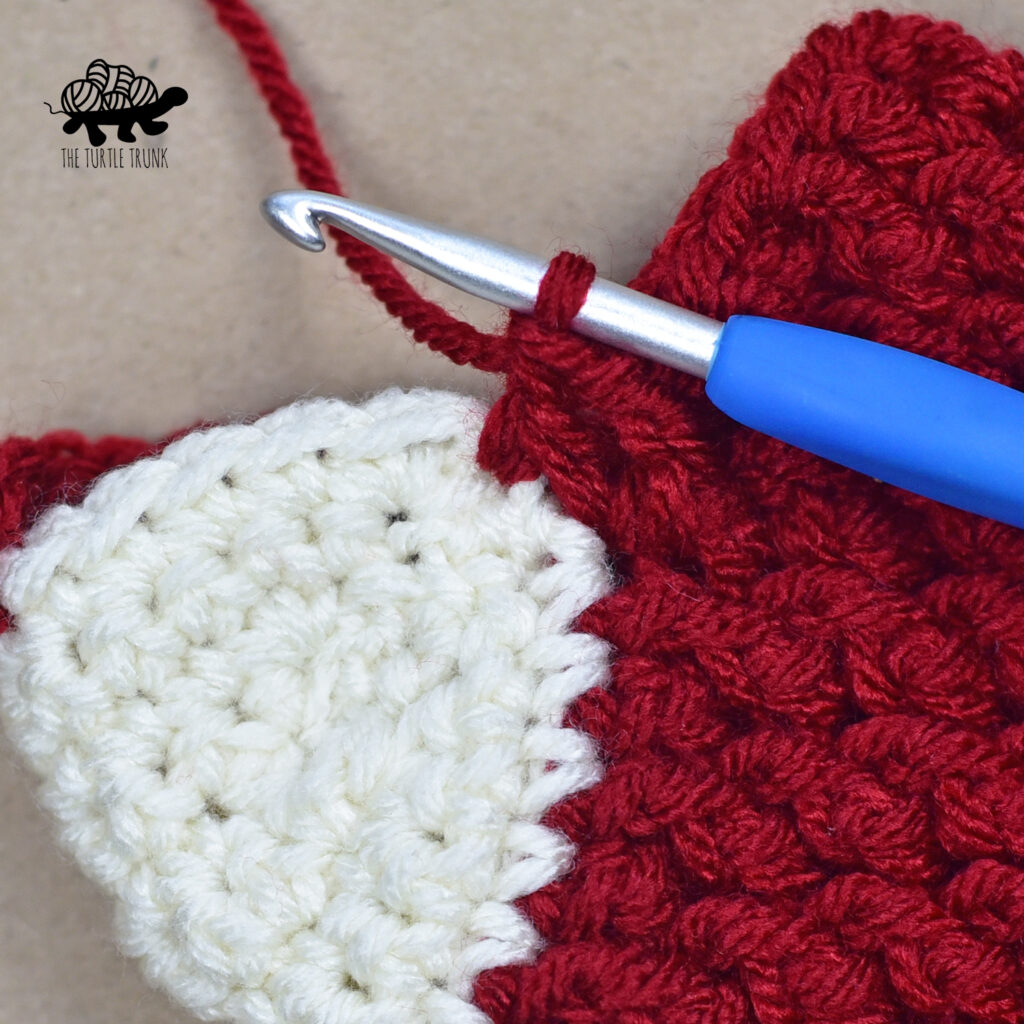
Changing Color
On the last ST of the round before the new color starts, on the final pull through of the last ST, drop the current color yarn and pull through with the new color. Join & CH and continue with the new color. For two-toned socks, cut the old color and weave in end. For striped socks you can keep the old color attached and drop and pick up the color as you need.
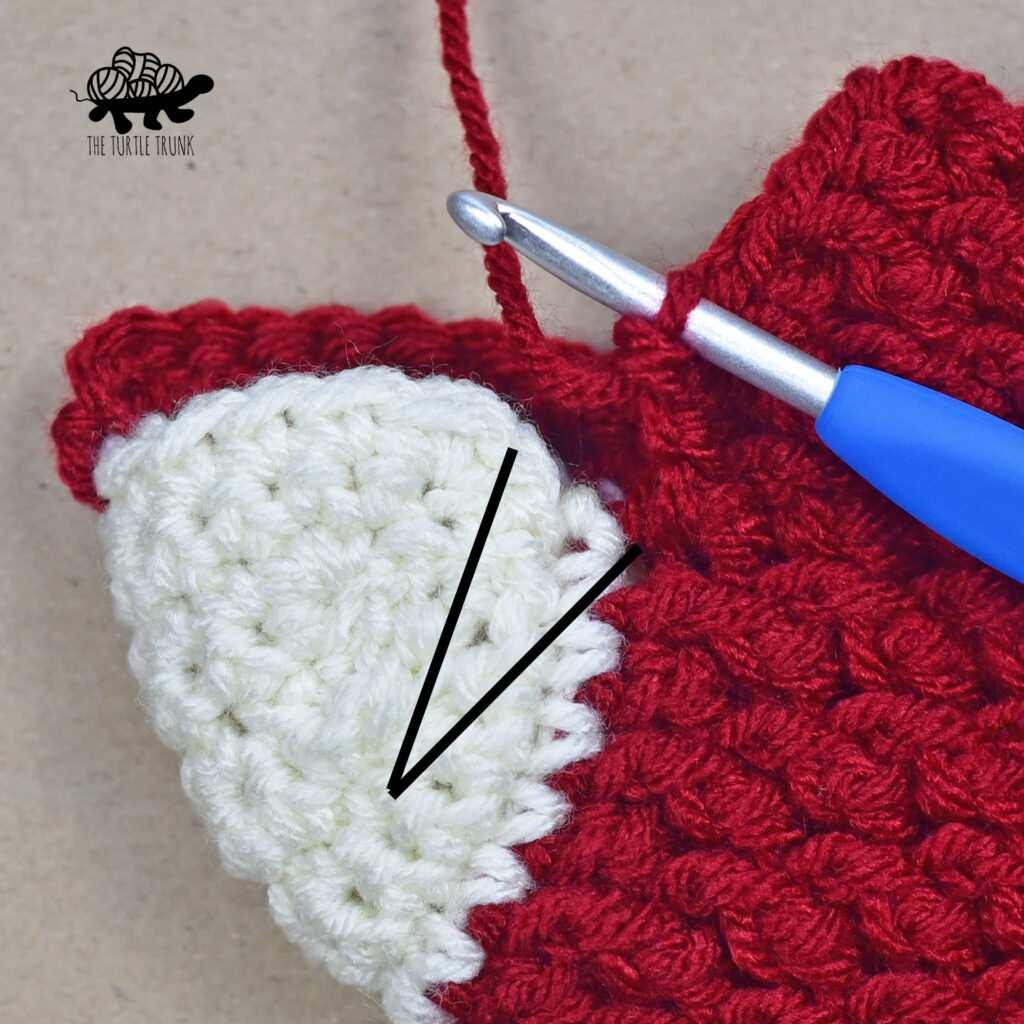
The Heel

To prevent a gap between the Leg and the Heel:
Yarn over, insert hook into the last ST of the heel, and pull up a loop. Insert your hook into the last occupied ST from the last round of the foot, pull up a loop, yarn over and pull through the 1st 3 loops on your hook, yarn over and pull through the last 2 loops on your hook.
Preventing a gap on the other side of the heel:
Yarn over, insert hook into the next occupied ST from the last round of the foot, and pull up a loop. Insert your hook into the 1st ST of the heel, pull up a loop, yarn over and pull through the 1st 3 loops on your hook, yarn over and pull through the last 2 loops on your hook.
Country Cottage Socks Pattern
Baby, Toddler, Child, & Youth 1-3
Toe – Color A
CH 7
Round 1: 2 SC in the 2nd CH from the hook. SC in the next 4 CHs, 4 SC in the last CH, (now working on the other side of the CH) SC in the next 4 CHs, 2 SC in the last CH. Join & CH 1. (16)
Baby only: SC in each ST around. Join & CH 2. (16) Move onto Foot.
Round 2: 2 SC in the 1st ST, SC in the next 6 STs, 2 SC in the next 2 STs, SC in the next 6 STs, 2 SC in the last ST. Join & CH 1. (20)
Toddler & Child only: SC in each ST around. Join & CH 2. (20, 20) Move onto Foot.
Round 3: 2 SC in the 1st ST, SC in the next 8 STs, 2 SC in the next 2 STs, SC in the next 8 STs, 2 SC in the last ST. Join & CH 1. (24)
Youth 1-3 only: SC in each ST around. Join & CH 2. (24) Move onto Foot.
Foot – Color B
Round 3, 4, 4, 5: DC in each ST around. Join & CH 2. (16, 20, 20, 24)
Round 4, 5, 5, 6: *FPDC in the 1st ST, DC in the next* repeat ** around. Join & CH 2. (16, 20, 20, 24)
Round 5, 6, 6, 7: *DC in the 1st ST, FPDC in the next* repeat ** around. Join & CH 2. (16, 20, 20, 24)
Round 6, 7, 7, 8: *FPDC in the 1st ST, DC in the next* repeat ** around. Join & CH 2. (16, 20, 20, 24)
Repeat the last 2 rounds until the end of Round 8, 11, 15, 18. Tie off yarn. Move onto Heel.
Heel – Color A
Attach yarn to the 10th, 12th, 12th, 14th ST of the previous round. CH 1.
Row 1: SC in the same ST you attached to, SC in the next 7, 9, 9, 11 STs. CH 1 & turn. (8, 10, 10, 12)
- You will be working the last ST for Row 1 over your join from the previous round. The last ST for Row 1 should be worked into the 1st ST from the last round of the Foot.
Row 2: SC2TOG, SC across until 2 STs remain, SC2TOG. CH 1 & turn. (6, 8, 8, 10)
Repeat Round 2 until there are 4 STs left.
Row 4, 5, 5, 6: 2 SC in the 1st ST, SC across until 1 ST remains, 2 SC in the last ST. CH 1 & turn.
Repeat the last Row until you have 8, 10, 10, 12 STs again.
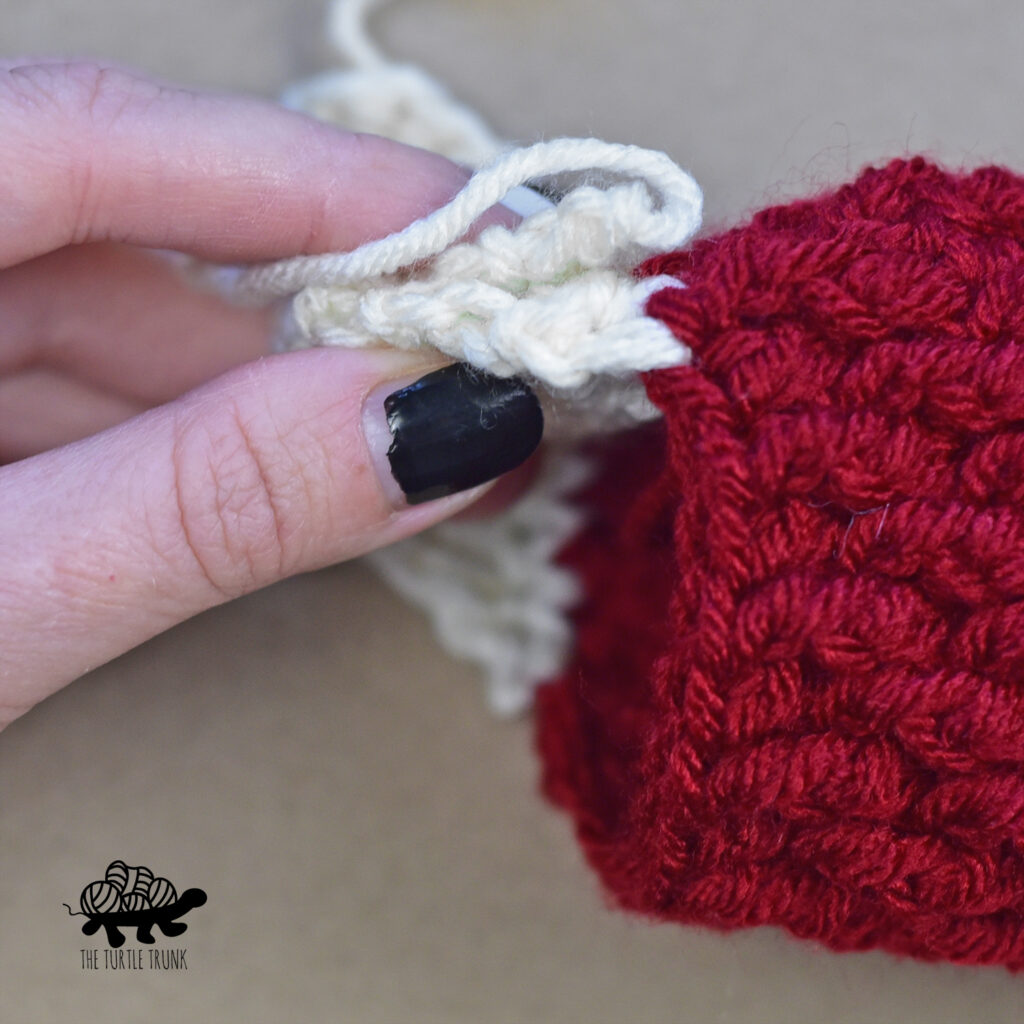
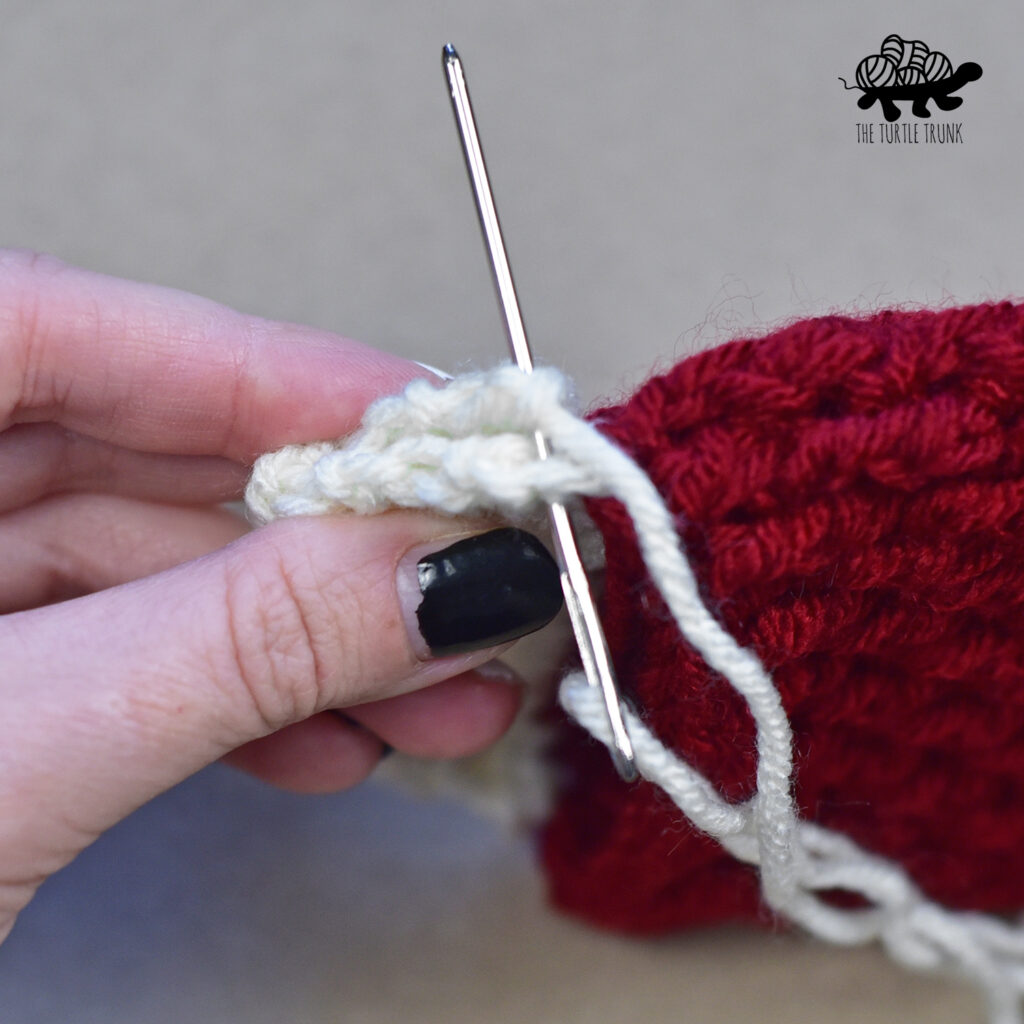
Tie off yarn leaving a 6” long tail. Fold heel in half, backwards. Using the tail end, whip stitch the edges of the heel together. Attach new 6” strand on the other side of the heel and repeat. Flip heel right side out.
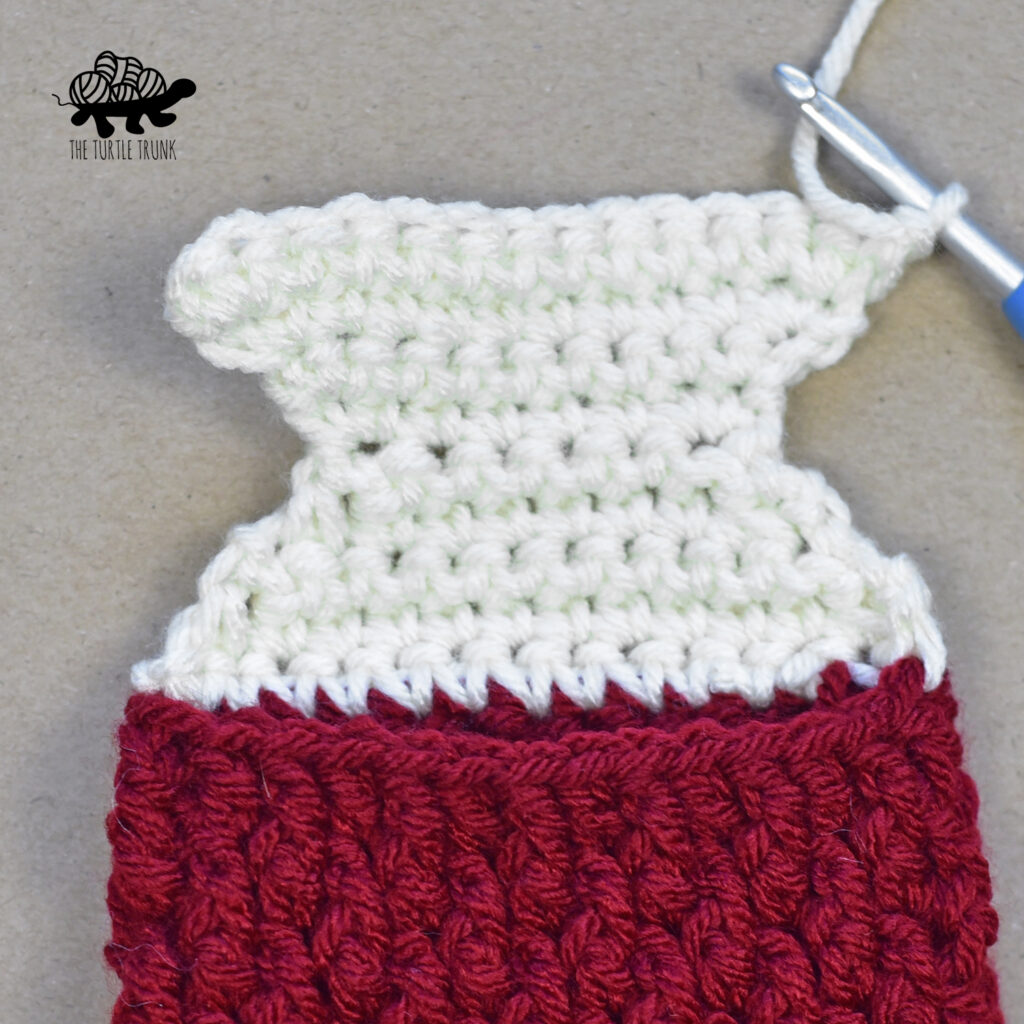
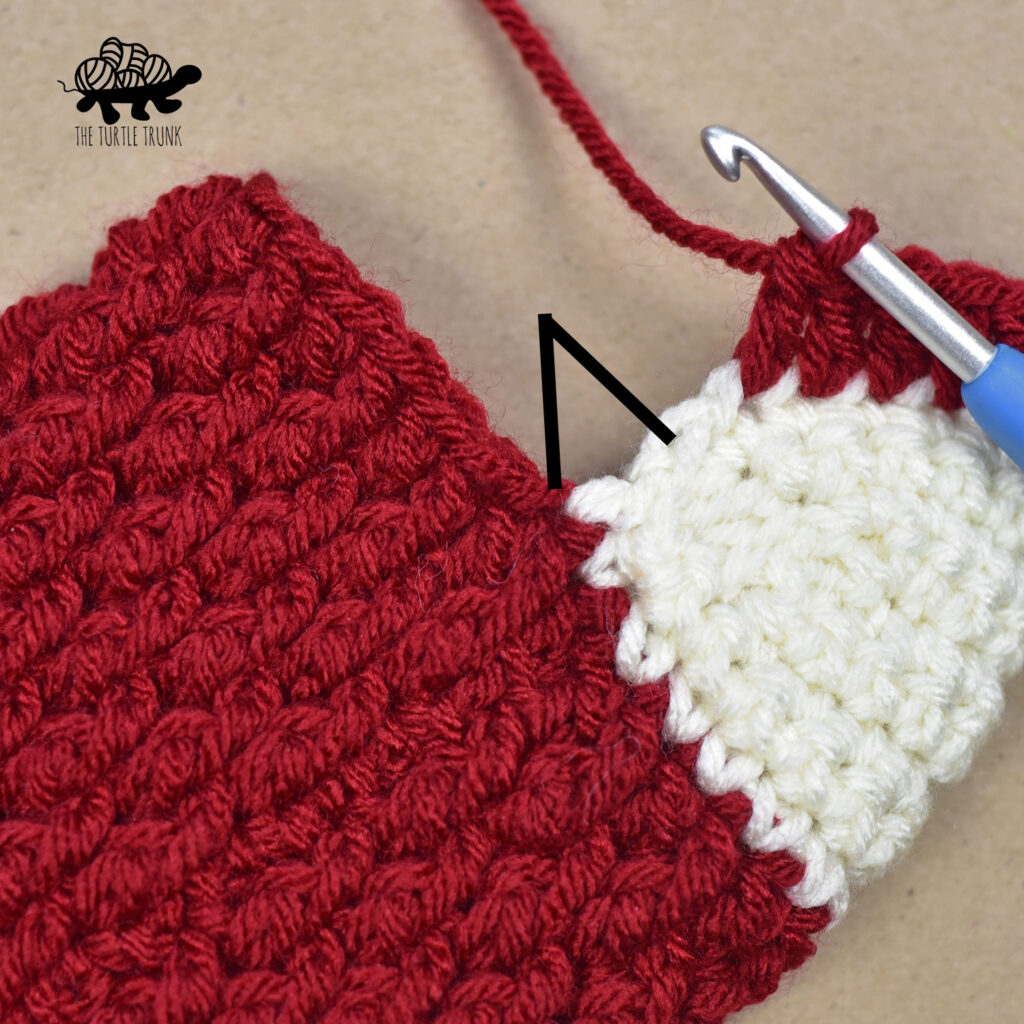
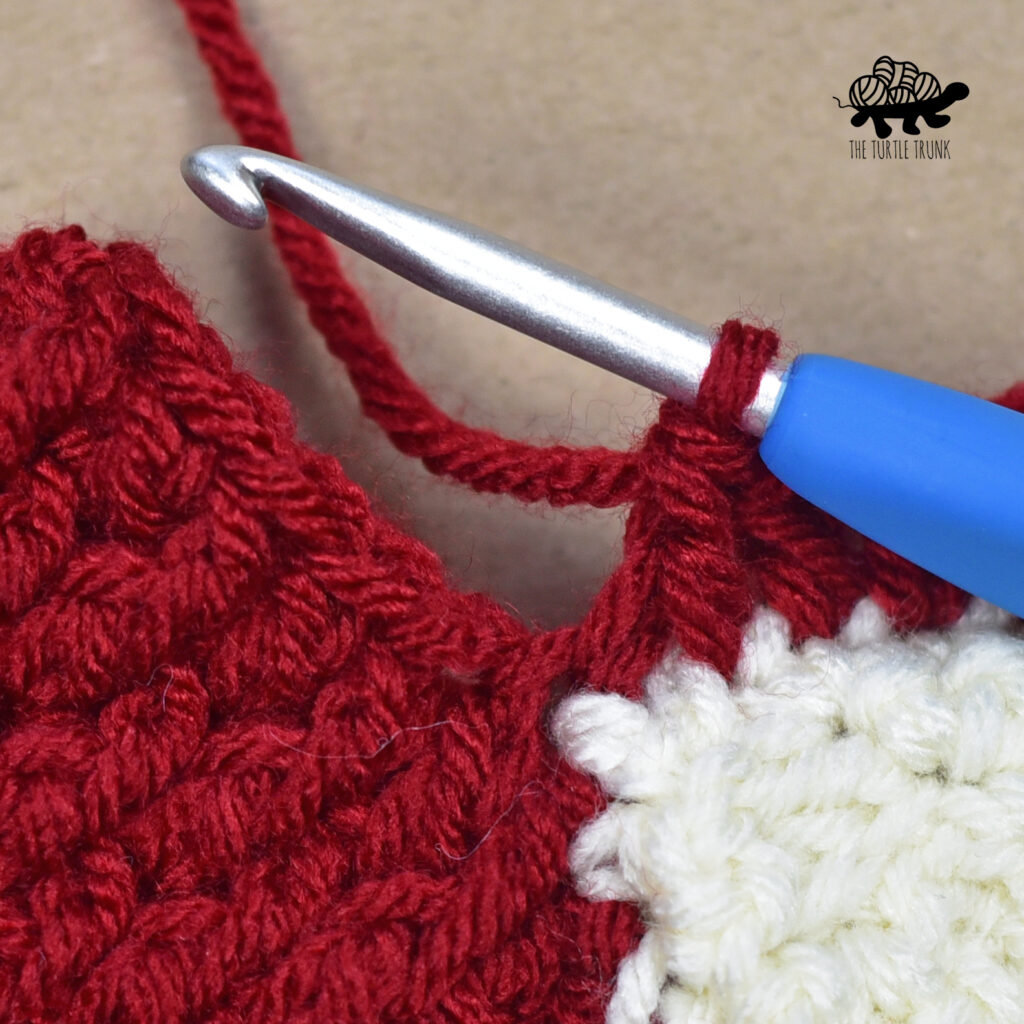
Leg – Color B
Attach yarn to the (4th, 4th, 4th, 6th) ST across the back of the heel and CH 2.
Round 9, 12, 16, 19: DC in the 1st (4, 6, 6, 6) STs. (The next ST is to prevent a gap between the Leg and the Heel) Yarn over, insert hook into the last ST of the heel, and pull up a loop. Insert your hook into the last occupied ST from the last round of the foot, pull up a loop, yarn over and pull through the 1st 3 loops on your hook, yarn over and pull through the last 2 loops on your hook. *FPDC, DC* repeat ** (3, 4, 4, 5 more times). Yarn over, insert hook into the next occupied ST from the last round of the foot, and pull up a loop. Insert your hook into the 1st ST of the heel, pull up a loop, yarn over and pull through the 1st 3 loops on your hook, yarn over and pull through the last 2 loops on your hook. DC in each of the remaining STs across the heel. Join & CH 2. (16, 20, 20, 24)
Round 10, 13, 17, 20: *FPDC in the 1st ST, DC in the next* repeat ** around. Join & CH 2. (16, 20, 20, 24)
Round 11, 14, 18, 21: *DC in the 1st ST, FPDC in the next* repeat ** around. Join & CH 2. (16, 20, 20, 24)
Round 12, 15, 19, 22: *FPDC in the 1st ST, DC in the next* repeat ** around. Join & CH 2. (16, 20, 20, 24)
Baby stop here and move onto the Cuff.
Toddler, Child, & Youth 1-3 Repeat the last 2 rounds until the end of Round 17, 23, 28 then move onto the Cuff.
Feel free to repeat the last 2 rounds as many times as you’d like to reach your desired leg height.
Cuff – Color A
The following instructions will create ribbing that is approximately 2” tall, making the fold over cuff 1” tall. Feel free to chain more or less to get a taller or shorter cuff.
CH 9
Row 1: SC in the 2nd CH from the hook, SC in each CH across. (8) SL ST in the top of the next 2 STs from the last round of the leg. Turn.
Row 2: Now working back up the cuff, SC BLO in each ST across. CH 1 & turn. (8)
Row 3: SC BLO in each ST across. (8) SL ST in the top of the next 2 STs from the last round of the leg. Turn.
Repeat Rows 2 & 3 until the end of Row 15, 19, 19, 23.
SL ST into the last ST from the previous round of the leg. Turn. Working into the starting chain and the last row of the cuff, SL ST in each CH & the back loop only of each ST across. Tie off yarn and weave in ends.
To make your socks nonslip and to protect the bottoms, try sewing suede or leather to the bottoms!
Youth 4-6/Women’s 4-6.5, Women’s 7-9.5/Men’s 6-8.5, Women’s 10-12.5/Men’s 9-11.5, Men’s 12-14
Toe – Color A
CH 7
Round 1: 2 SC in the 2nd CH from the hook. SC in the next 4 CHs, 4 SC in the last CH, (now working on the other side of the CH) SC in the next 4 CHs, 2 SC in the last CH. Join & CH 1. (16)
Round 2: 2 SC in the 1st ST, SC in the next 6 STs, 2 SC in the next 2 STs, SC in the next 6 STs, 2 SC in the last ST. Join & CH 1. (20)
Round 3: 2 SC in the 1st ST, SC in the next 8 STs, 2 SC in the next 2 STs, SC in the next 8 STs, 2 SC in the last ST. Join & CH 1. (24)
Youth 4-6 / Women’s 4-6.5 only: SC in each ST around. Join & CH 2. (24) Move onto Foot.
Round 4: 2 SC in the 1st ST, SC in the next 10 STs, 2 SC in the next 2 STs, SC in the next 10 STs, 2 SC in the last ST. Join & CH 1. (28)
Women’s 7-9.5 /Men’s 6-8.5 only: SC in each ST around. Join & CH 2. (28) Move onto Foot.
Round 5: 2 SC in the 1st ST, SC in the next 12 STs, 2 SC in the next 2 STs, SC in the next 12 STs, 2 SC in the last ST. Join & CH 2. (32)
Women’s 10-12.5 / Men’s 9-11.5 only: SC in each ST around. Join & CH 2. (32) Move onto Foot.
Round 6: 2 SC in the 1st ST, SC in the next 14 STs, 2 SC in the next 2 STs, SC in the next 14 STs, 2 SC in the last ST. Join & CH 2. (36)
Men’s 12-14 only: SC in each ST around. Join & CH 2. (36) Move onto Foot.
Foot – Color B
Round 5, 6, 7, 8: DC in each ST around. Join & CH 2. (24, 28, 32, 36)
Round 6, 7, 8, 9: *FPDC in the 1st ST, DC in the next* repeat ** around. Join & CH 2. (24, 28, 32, 36)
Round 7, 8, 9, 10: *DC in the 1st ST, FPDC in the next* repeat ** around. Join & CH 2. (24, 28, 32, 36)
Round 8, 9, 10, 11: *FPDC in the 1st ST, DC in the next* repeat ** around. Join & CH 2. (24, 28, 32, 36)
Repeat the last 2 rounds until the end of Round 16, 21, 24, 25. Tie off yarn. Move onto Heel.
Heel – Color A
Attach yarn to the 15th, 17th, 19th, 21st ST of the previous round. CH 1.
Row 1: SC in the same ST you attached to, SC in the next 11, 13, 15, 17 STs. CH 1 & turn. (12, 14, 16, 18)
*You will be working the last 2 STs for Row 1 over your join from the previous round. The last 2 STs for Row 1 should be worked into the 1st and 2nd ST from the last round of the Foot.
Row 2: SC2TOG, SC across until 2 STs remain, SC2TOG. CH 1 & turn. (10, 12, 14, 16)
Repeat Round 2 until there are 6 STs left.
Row 5, 6, 7, 8: 2 SC in the 1st ST, SC across until 1 ST remains, 2 SC in the last ST. CH 1 & turn.
Repeat the last Row until you have 12, 14, 16, 18 STs again.
Tie off yarn leaving an 8” long tail. Fold heel in half, backwards. Using the tail end, whip stitch the edges of the heel together. Attach new 8” strand on the other side of the heel and repeat. Flip heel right side out.
Leg – Color B
Attach yarn to the (5th, 7th, 9th, 9th) ST across the back of the heel and CH 2.
Round 17, 22, 25, 26: DC in the 1st (7, 7, 7, 9) STs. (The next ST is to prevent a gap between the Leg and the Heel) Yarn over, insert hook into the last ST of the heel, and pull up a loop. Insert your hook into the last occupied ST from the last round of the foot, pull up a loop, yarn over and pull through the 1st 3 loops on your hook, yarn over and pull through the last 2 loops on your hook. *DC, FPDC* repeat ** (5, 6, 7, 8 more times). Yarn over, insert hook into the next occupied ST from the last round of the foot, and pull up a loop. Insert your hook into the 1st ST of the heel, pull up a loop, yarn over and pull through the 1st 3 loops on your hook, yarn over and pull through the last 2 loops on your hook. DC in each of the remaining STs across the heel. Join & CH 2. (24, 28, 32, 36)
Round 18, 23, 26, 27: *FPDC in the 1st ST, DC in the next* repeat ** around. Join & CH 2. (24, 28, 32, 36)
Round 19, 24, 27, 28: *DC in the 1st ST, FPDC in the next* repeat ** around. Join & CH 2. (24, 28, 32, 36)
Round 20, 25, 28, 29: *FPDC in the 1st ST, DC in the next* repeat ** around. Join & CH 2. (24, 28, 32, 36)
Repeat the last 2 rounds until the end of Round 28, 33, 38, 41 then move onto the Cuff.
Feel free to repeat the last 2 rounds as many times as you’d like to reach your desired leg height.
Cuff – Color A
The following instructions will create ribbing that is approximately 2” tall, making the fold over cuff 1” tall. Feel free to chain more or less to get a taller or shorter cuff.
CH 9
Row 1: SC in the 2nd CH from the hook, SC in each CH across. (8) SL ST in the top of the next 2 STs from the last round of the leg. Turn.
Row 2: Now working back up the cuff, SC BLO in each ST across. CH 1 & turn. (8)
Row 3: SC BLO in each ST across. (8) SL ST in the top of the next 2 STs from the last round of the leg. Turn.
Repeat Rows 2 & 3 until the end of Row 23, 27, 31, 35. SL ST into the last ST from the previous round of the leg. Turn. Working into the starting chain and the last row of the cuff, SL ST in each CH & the back loop only of each ST across. Tie off yarn and weave in ends.
To make your socks nonslip and to protect the bottoms, try sewing suede or leather to the bottoms!
And you’re all done! Thank you for following along with the Country Cottage Socks pattern! Be sure to tag me on Instagram so I can see your finished socks!
You are free to sell the items you make with this pattern, and I’d love if you could please link back to this page. You do not have permission to republish or distribute this pattern in any way or claim it as your own. Do not use my photos in your sale listings or for any other purposes. Thank you
This page includes affiliate links. If you make a purchase from these links, I may make a small commission at no cost to you! Thank you for your support!