
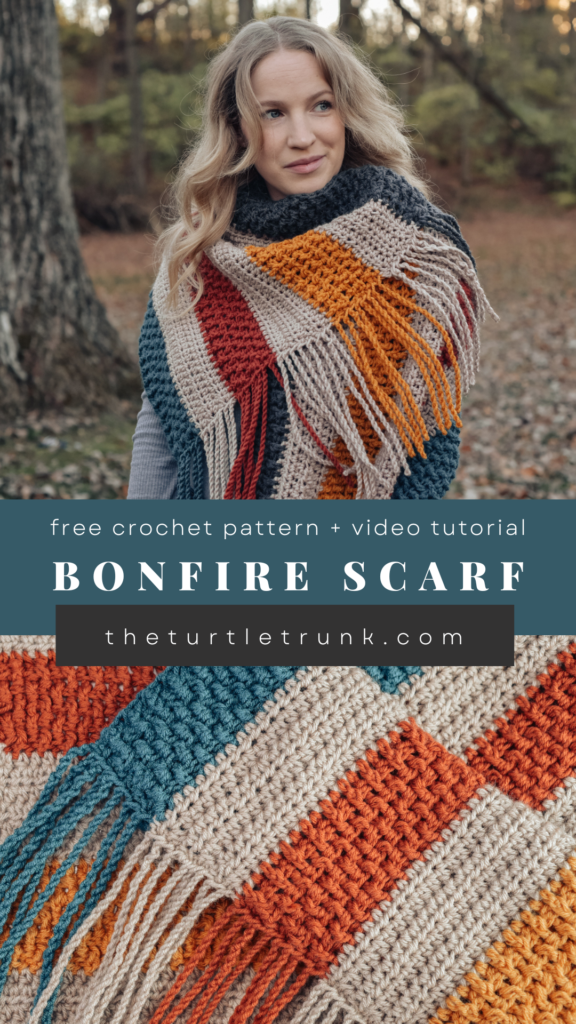
Bonfire Scarf Crochet Pattern
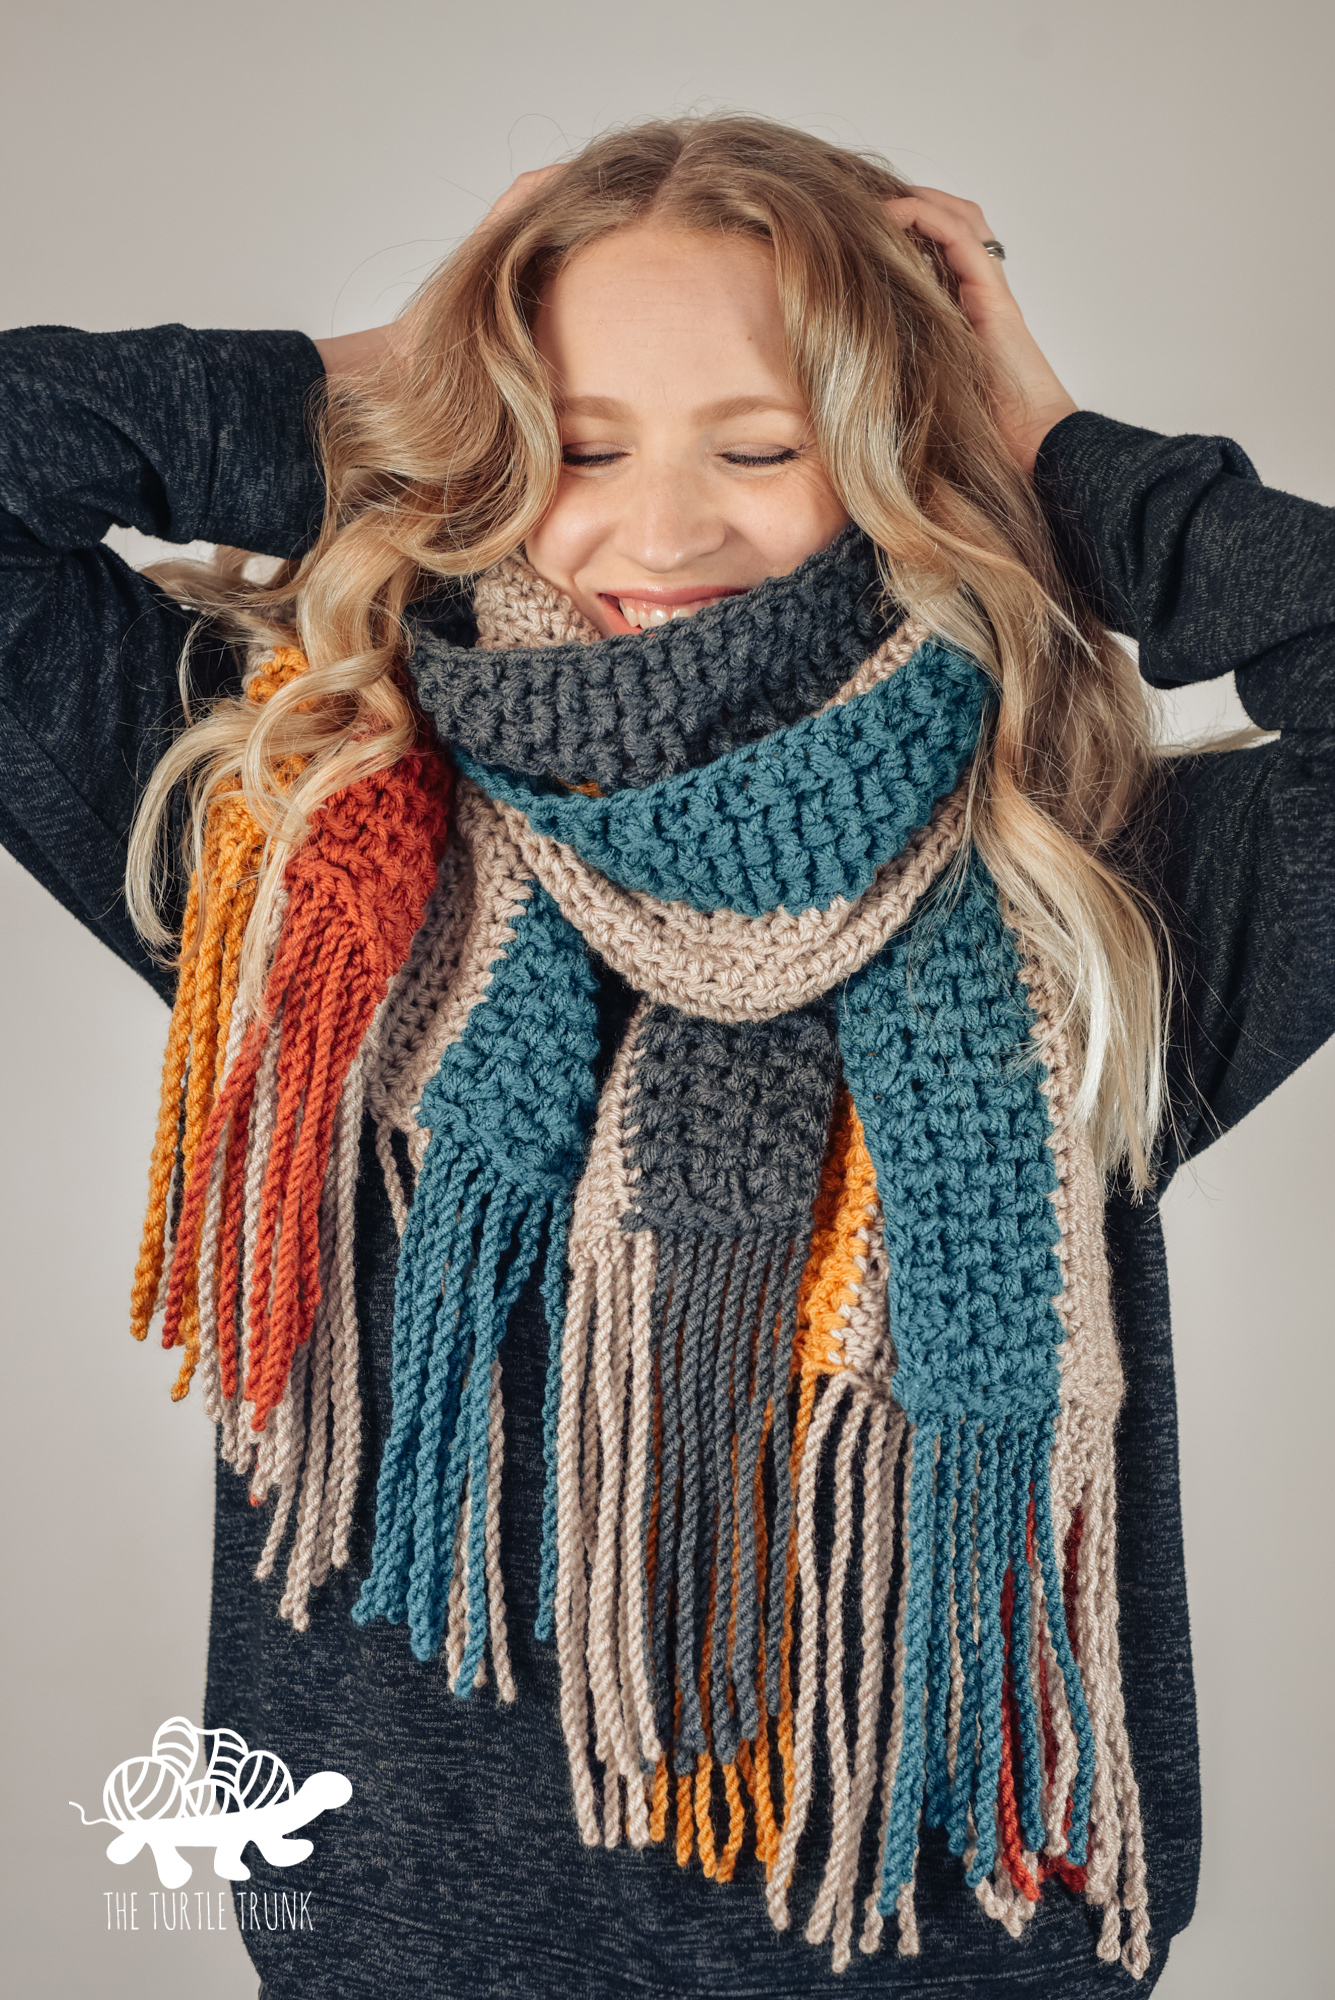
The Bonfire Scarf is a cozy crochet scarf that’s full of beautiful texture! The design alternates between 2 different styled stripes and features twisted fringe ends. The pattern includes 4 sizes but you can easily adjust the length and width to be any size! The Bonfire Scarf is the perfect Fall accessory!
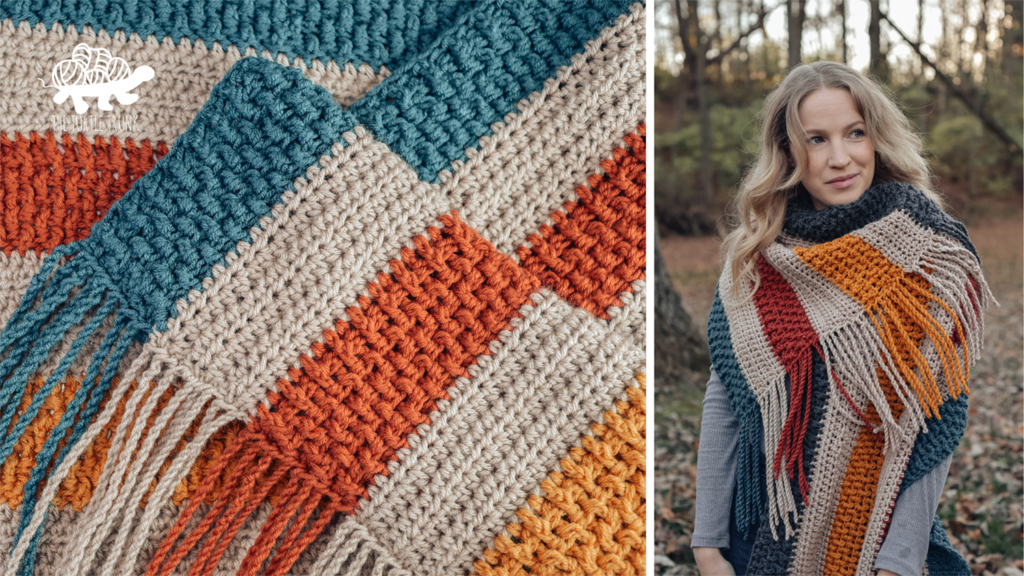
The Bonfire Scarf crochet pattern uses a simple 2 stripe repeat, that’s easy enough to remember, but interesting enough so you won’t get bored! The instructions include 4 sizes for kids and adults, but you can easily adjust the length and width to be any size! I’ll show you how to add twisted fringe to the ends for some extra fun, but feel free to leave the ends bare, or add regular fringe if you’d prefer!
I hope you enjoy this pattern for the Bonfire Scarf! Continue reading to hear my inspiration for this pattern and to learn more about the yarn I used, then scroll down for the written pattern!
YOU CAN FIND THE AD-FREE AND PRINTABLE PDF VERSION OF THIS PATTERN ON ETSY AND ALSO RAVELRY!
If you’d like more crochet scarf patterns, then check out my Picot Scarf & Cowl, Country Cottage Cowl, and Easy Breezy Scarf patterns!
Not ready to make just yet? Pin this pattern for later!
Follow along with the video tutorial for the Bonfire Scarf on YouTube!
Inspiration
In 2021 I released the Bonfire Blanket crochet pattern. It was design I had come up with because I thought of the name “Bonfire Blanket’ and I wanted to create a blanket pattern with the cozy feel of sitting around a fire on a chilly Autumn evening.
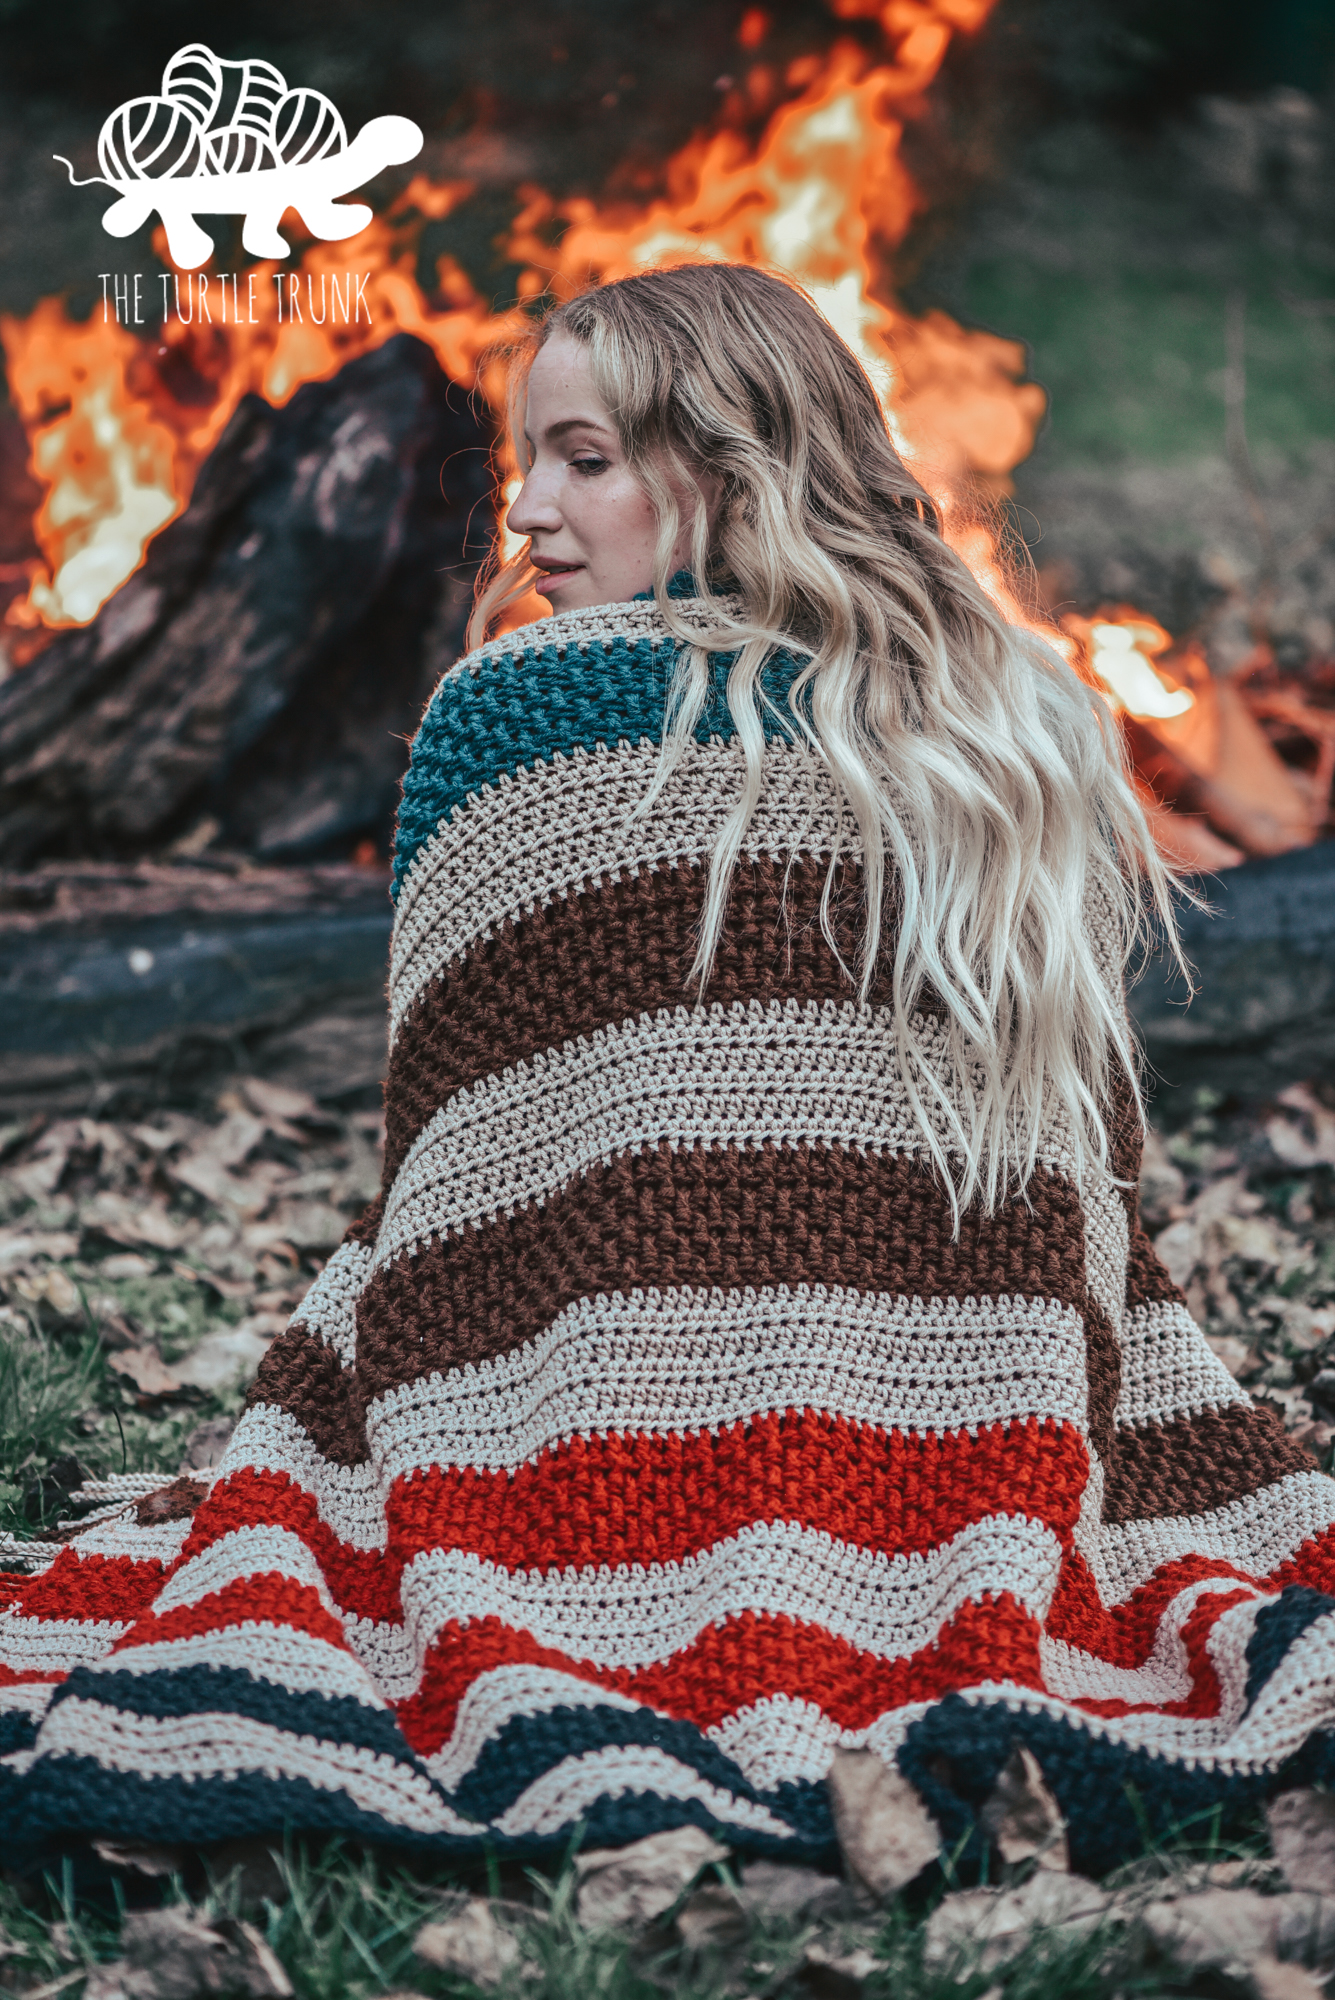
The Bonfire Blanket is perfect for cuddling up with while you’re staying in, but I wanted something with that same cozy feeling for on the go! So here’s the Bonfire Scarf! Just as cozy and warm, and it features the same beautiful textures and twisted fringe ends, but it’s the perfect size for carrying around.

Details
There’s so many beautiful and eye catching features to the Bonfire Scarf!
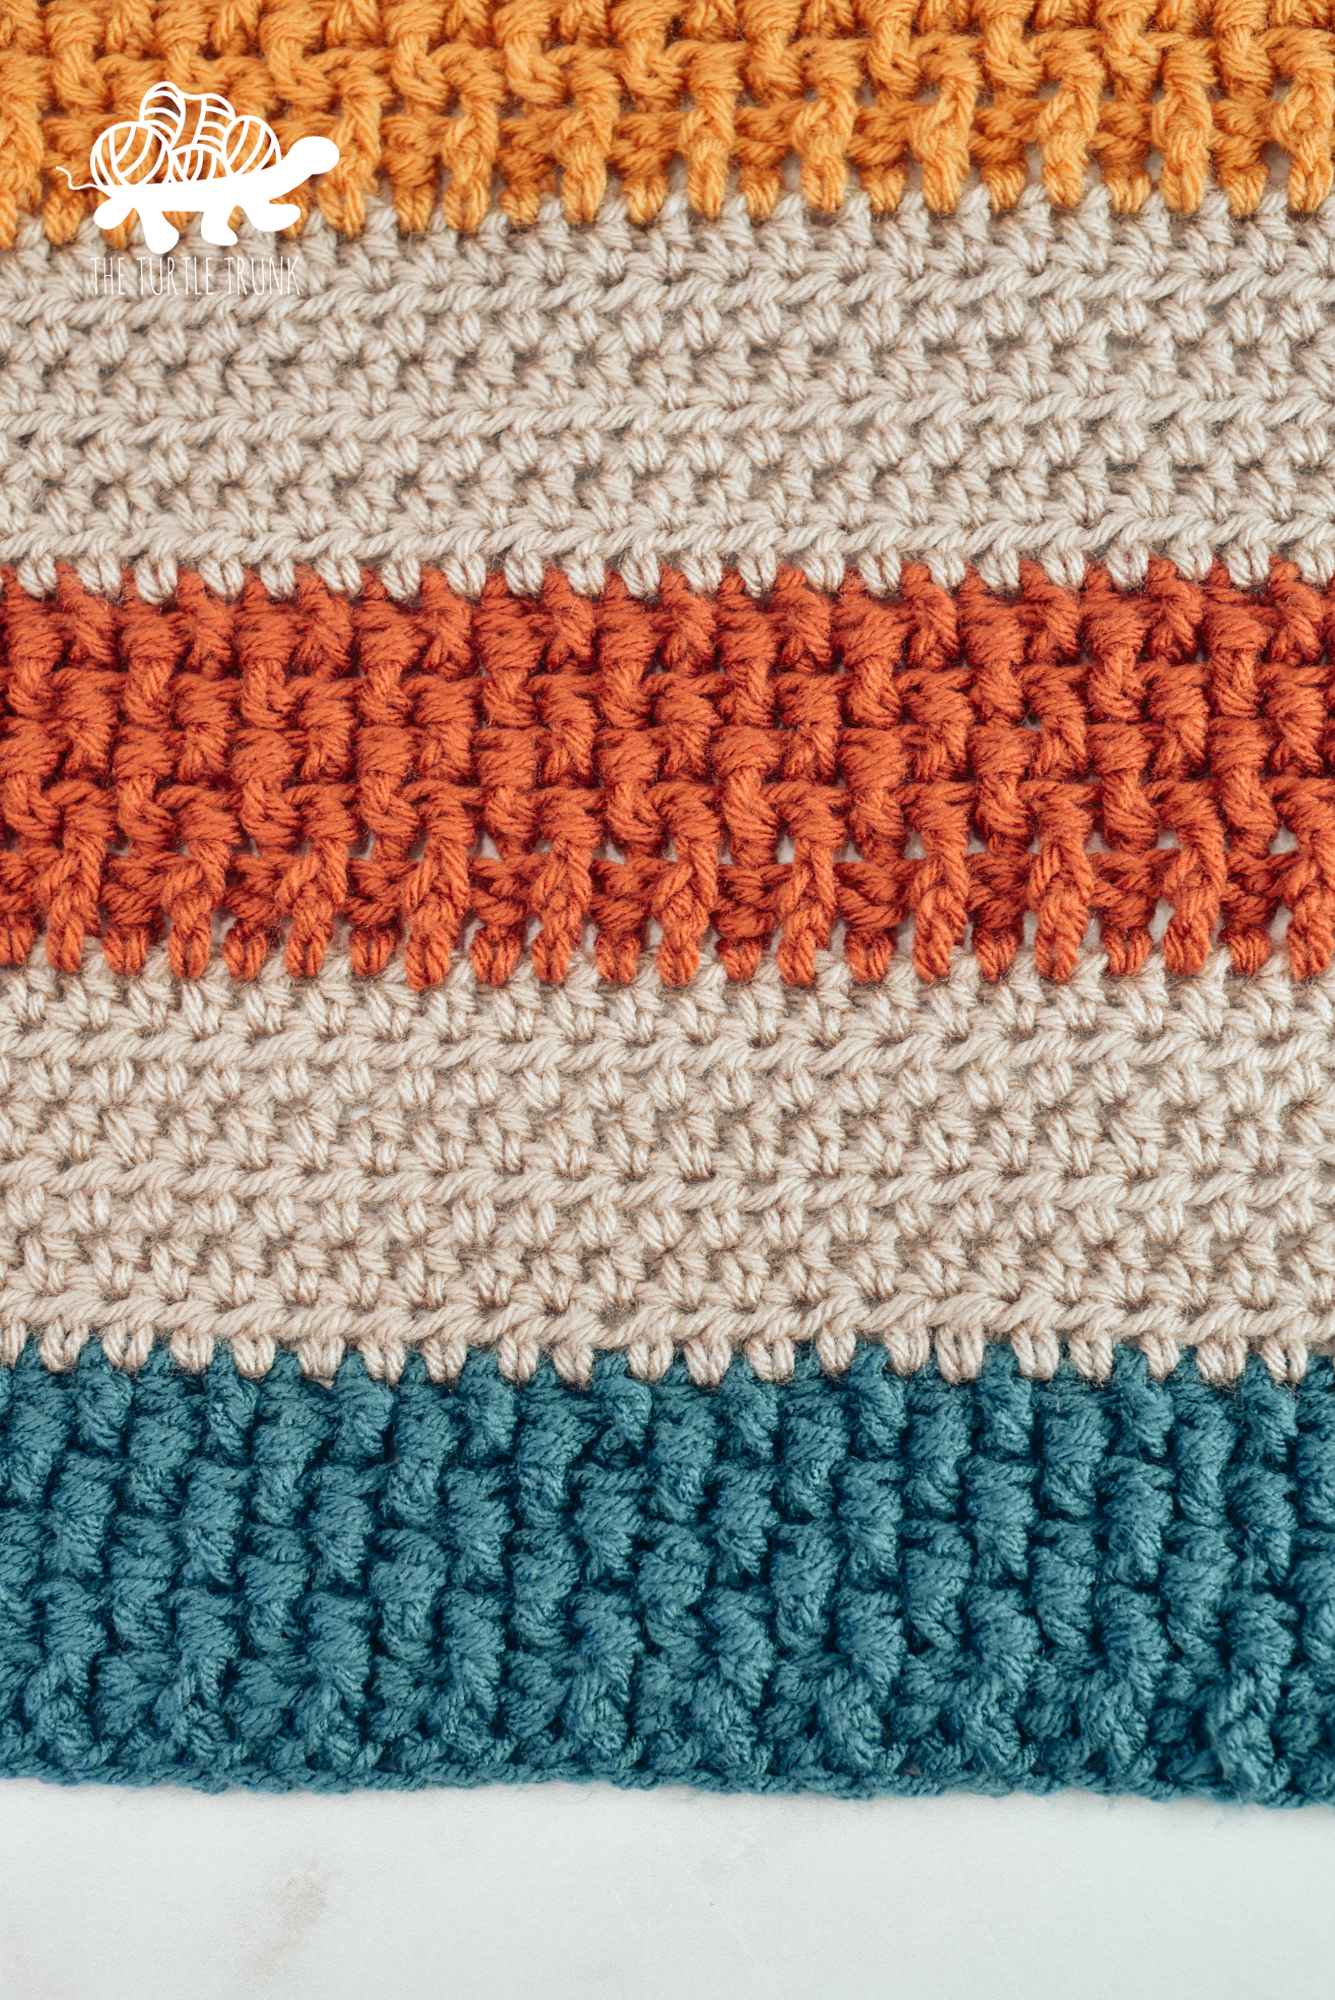
First, the textures! The Bonfire Scarf alternates between 2 different stripe styles. The odd numbered stripes all use the Rice Stitch. The Rice Stitch uses front post and back post double crochet stitches to create a bumpy texture. The even numbered stripes use the half double crochet stitch. This stitch is very simple but it still creates a beautiful fabric with a ridge that shows horizontally across the scarf.
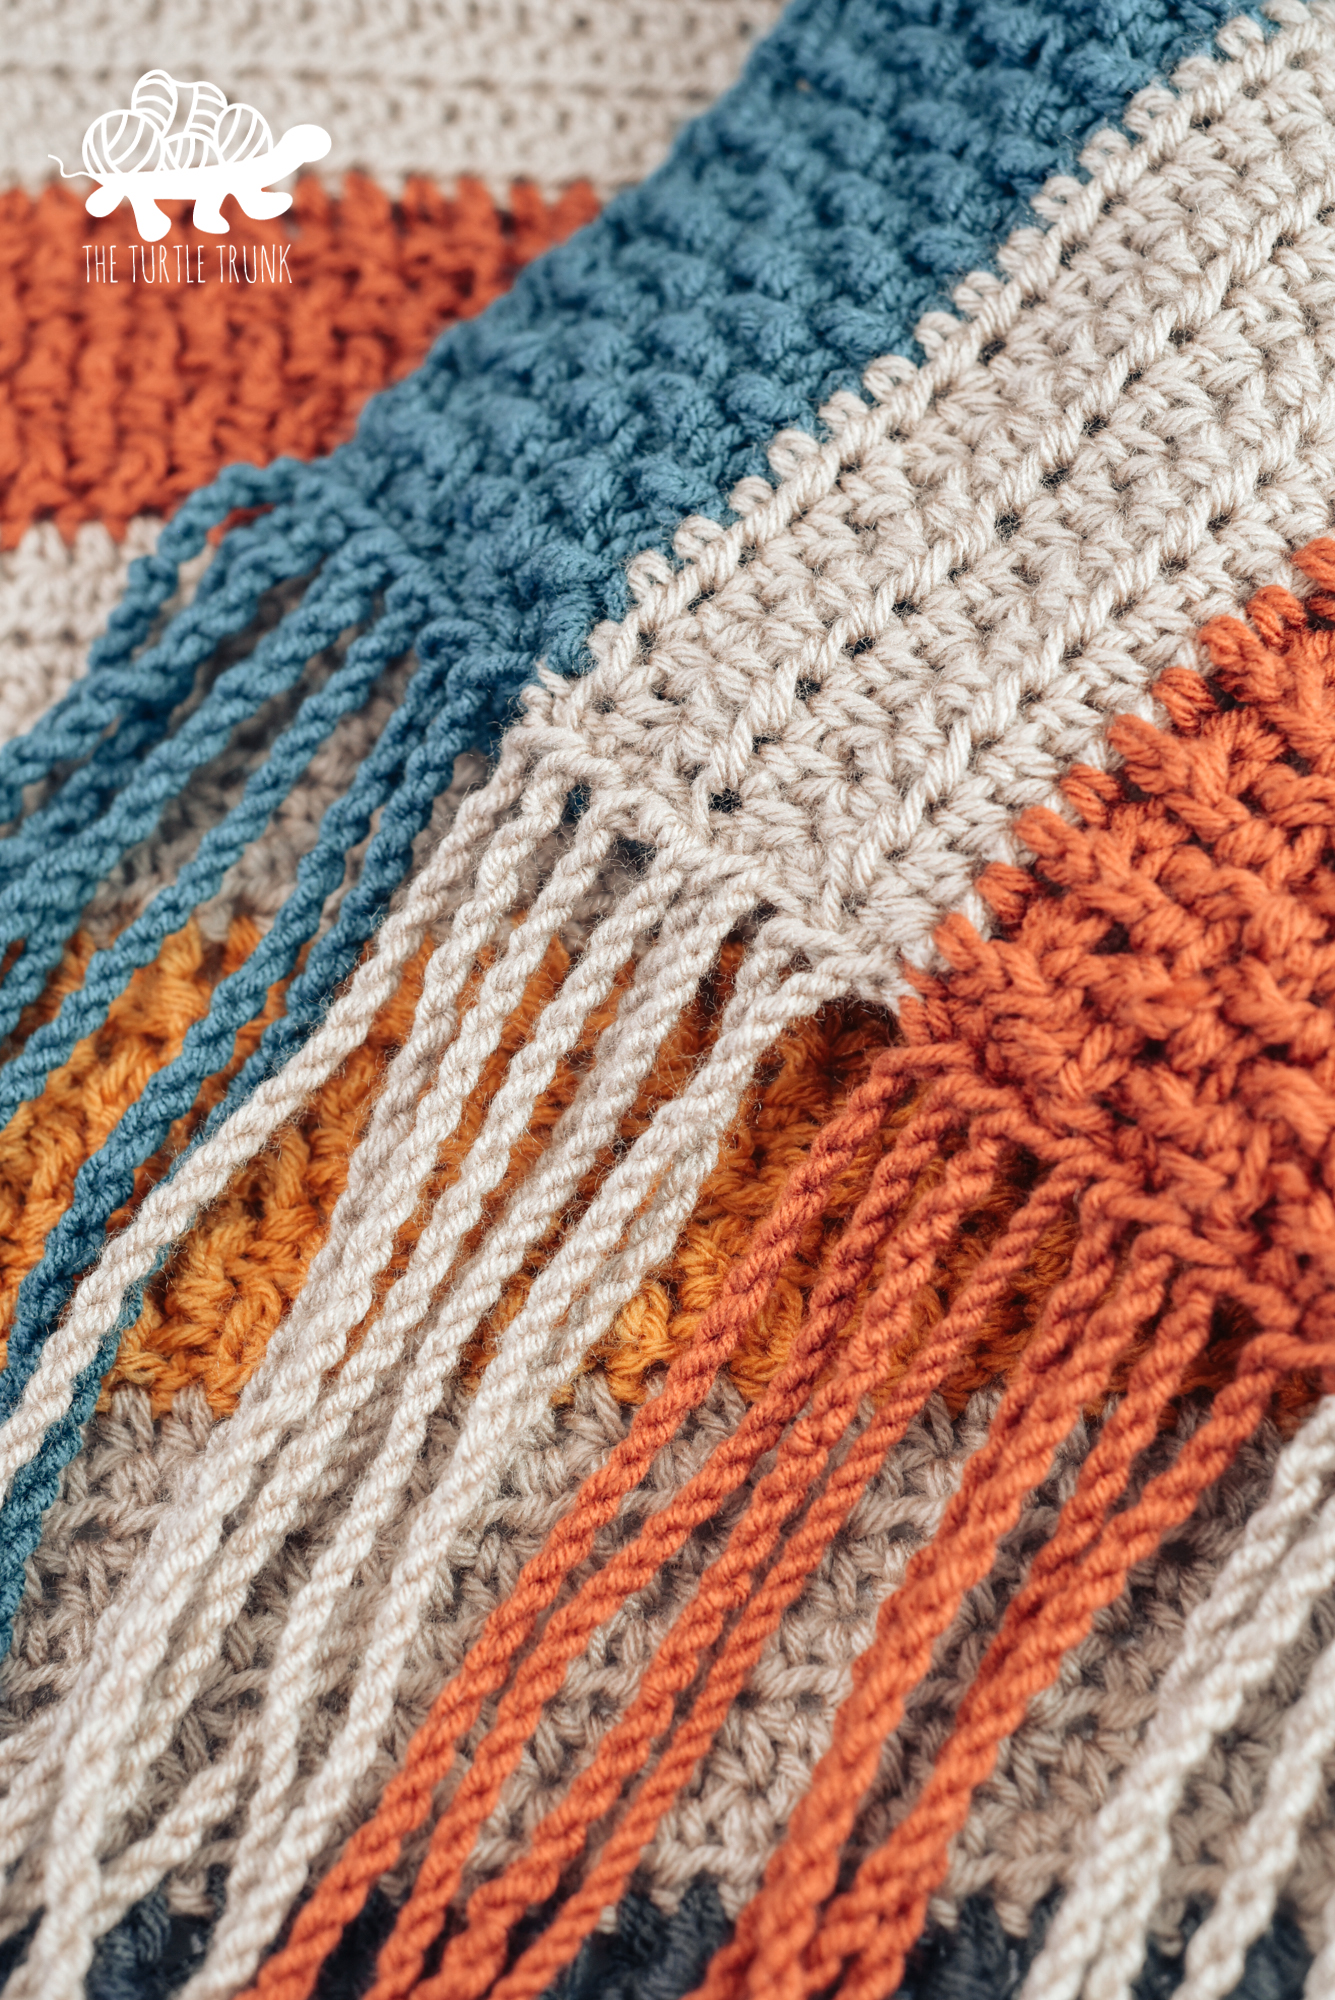
Secondly, the fringe! While the twisted fringe ends are optional, I highly recommend them! Twisted fringe is a fun addition over regular fringe. Unlike regular fringe, twisted fringe won’t fray after use and being washed. The only downside to twisted fringe, is it takes more time and effort to create, but I do have a VERY helpful hack to making it quick and easy! I used a power screwdriver! Check out the video tutorial for the Bonfire Scarf to see the full instructions on this hack.
And lastly, the color palette! There are so many options you can choose for your color palette! Contrasting, monochromatic, two toned, each stripe a different color, or even just keep it simple with one color for the entire scarf! The options are endless and you can create a scarf that best suits you!
Yarn
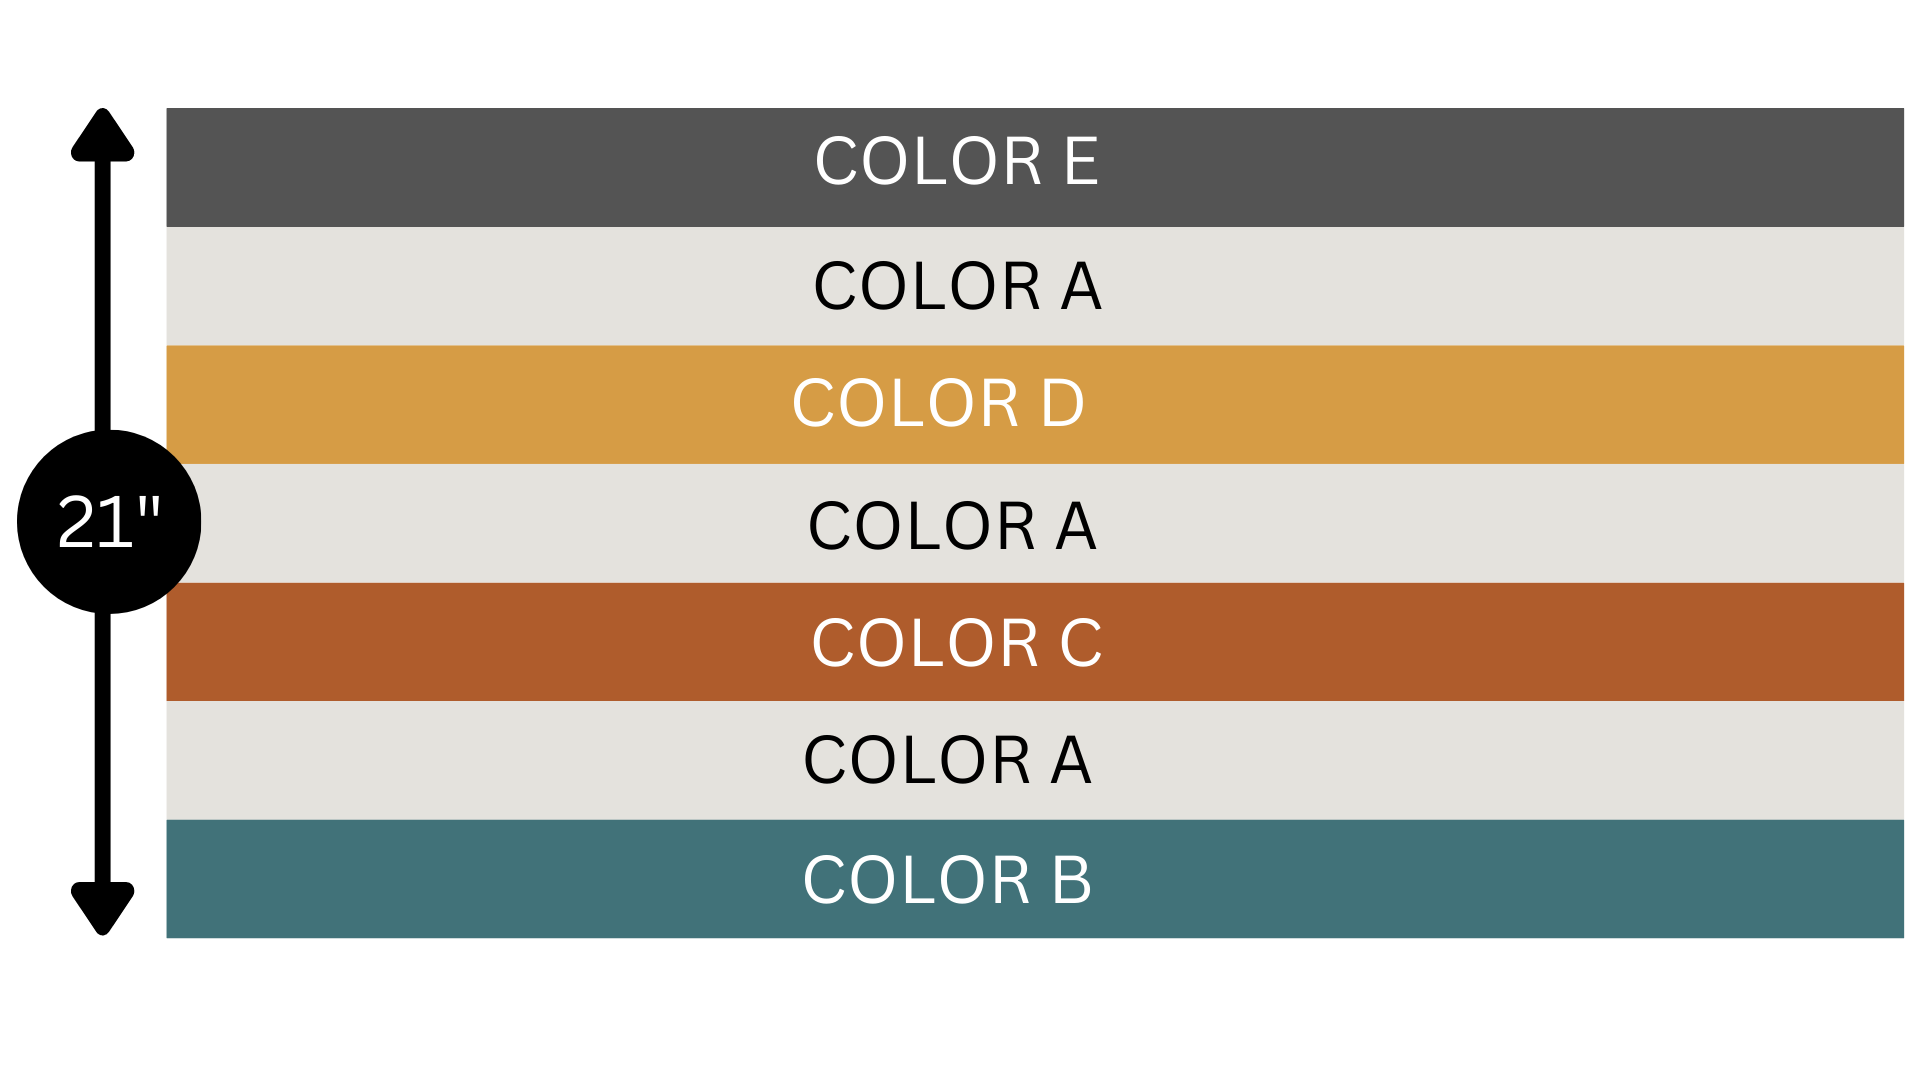
I used 5 colors for my Bonfire Scarf, but you can use as many (or few) colors that you’d like! The large sizes have a total of 7 stripes and the standard sizes have 3 stripes. The instructions use one color for all the half double crochet stripes and different colors for each of the rice stitch stripes. You have full creative control here though and you can use any colors for any stripes!
Need some color palette inspiration? Check out THIS Pinterest board I created that’s full of beautiful color combinations! Below I’ve included how I set up the colors so you can plan out your scarf.
For my scarf I used 5 different colors from 3 different yarn brands. I had a very specific color palette I was trying to use and couldn’t find the colors I wanted within the same brand so I mixed! I used Red Heart Super Saver in Oatmeal (Color A) and Charcoal (Color E), I Love This Yarn in Antique Teal (Color B), and Big Twist Value in Rust (Color C) and Mustard (Color D).
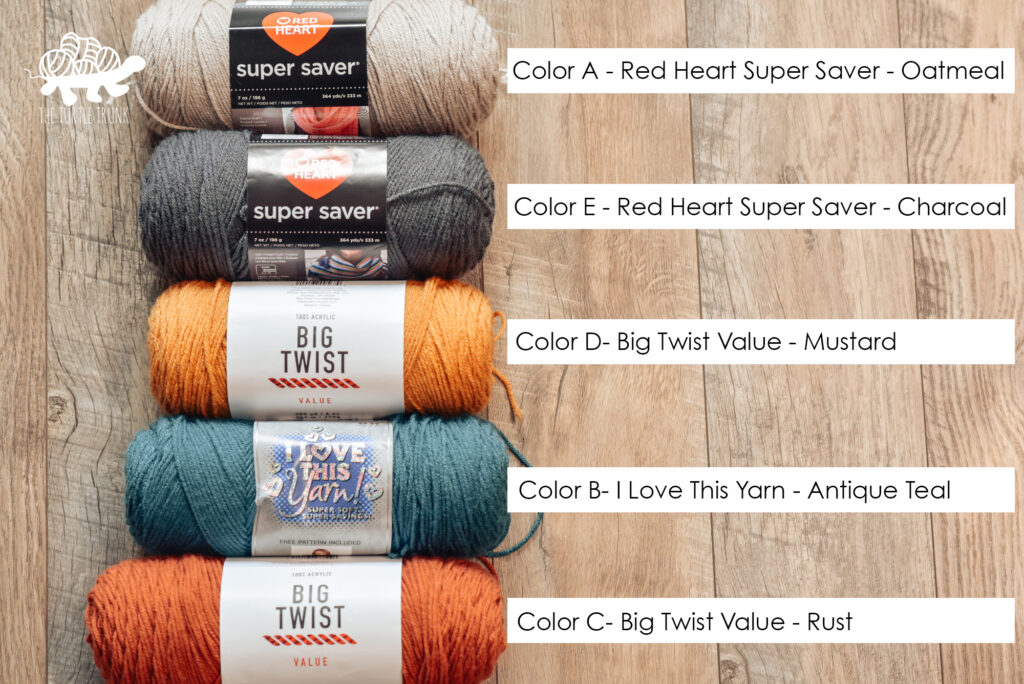
I didn’t find much of a difference in the sizes of these yarns, I Love This Yarn was the slightest but thicker but that didn’t effect the outcome of the scarf. I Love This Yarn was also the softest of them all, but I still enjoyed using all of these brands. You can substitute for your favorite medium (4) weight yarn, just be sure to check out gauge below to ensure your sizing will be correct!
Sizes
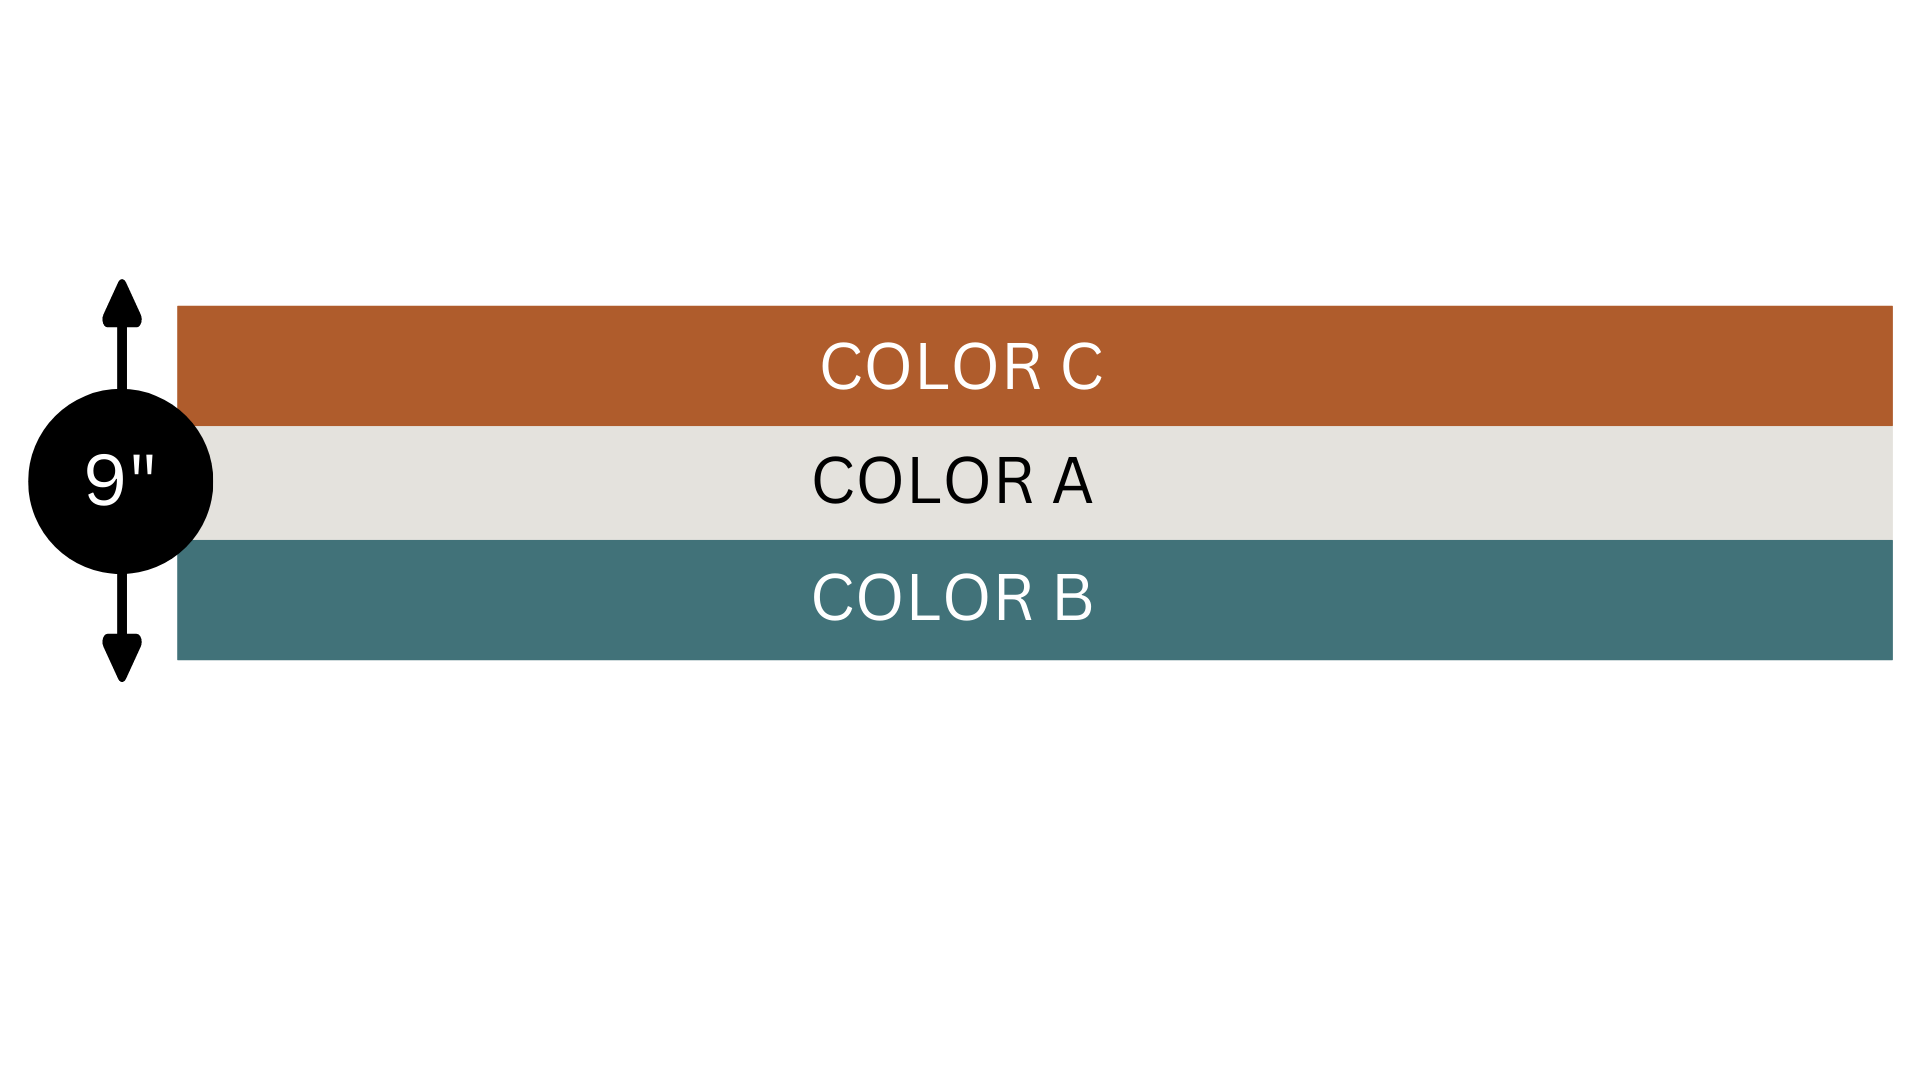
The instructions for the Bonfire Scarf include 4 sizes: Kids Standard, Kids Large, Adult Standard, and Adult Large. The photos included in this post are of an Adult Large. See the chart below for the measurements and yardage for each size. Please note that the measurements do not include the twisted fringe ends. The twisted fringe can be made any length you’d like, I made mine 8″ long, so keep that in mind when choosing your size.
| Size | Rows / Stripes | Yardage |
| Kids Standard (48” x 9”) | 18 total rows 3 stripes | Color A – 95 yards Colors B + C – 144 yards |
| Kids Large (48” x 21”) | 42 total rows 7 stripes | Color A – 285 yards Colors B,C,D,E – 144 yards |
| Adult Standard (60” x 9”) | 18 total rows 3 stripes | Color A – 117 yards Colors B,C,D,E – 180 yards |
| Adult Large (60” x 21”) | 42 total rows 7 stripes | Color A – 350 yards Colors B,C,D,E – 180 yards |
This pattern is also very easy to adjust so you can customize the size to be perfect for you!
To adjust the length: work any odd number of stitches across for Row 1.
To adjust the width: repeat the HDC stripes and textured stripes as many times until your desired width is reached.
DIFFICULTY
Advanced Beginner/ Easy
GAUGE
7 STs x 6 Rows = 3” x 3” in HDC
Adjust hook size up or down to reach gauge.
NOTES
- Beginning chains don’t count as stitches. At the end of each row, CH 1 or 2 & turn. Work your first stitch into the last stitch of the previous row.
- Stitches between *asterisks* are to be repeated until the end of the row.
- The instructions are for the smallest size first followed by the next size up (kids standard, kids large, adult standard, adult large).
- Numbers in (parentheses) at the end of the row, represent the number of stitches to be worked in that row. Numbers are in order from the smallest size to the largest size (kids standard, kids large, adult standard, adult large).
SUPPLIES
- Medium (4) Weight Yarn – see size chart above for yardage
- 6.50 mm (K) Hook
- Yarn Needle
- Scissors
- Tape Measure
ABBREVIATIONS (US TERMS)
ST(s) – Stitch(es)
SL ST – Slip Stitch
CH – Chain
FDC – Foundation Double Crochet
DC – Double Crochet
FPDC – Front Post Double Crochet
BPDC – Back Post Double Crochet
HDC – Half Double Crochet
SPECIAL STITCHES
See the video tutorial if extra assistance is needed for the special stitches.
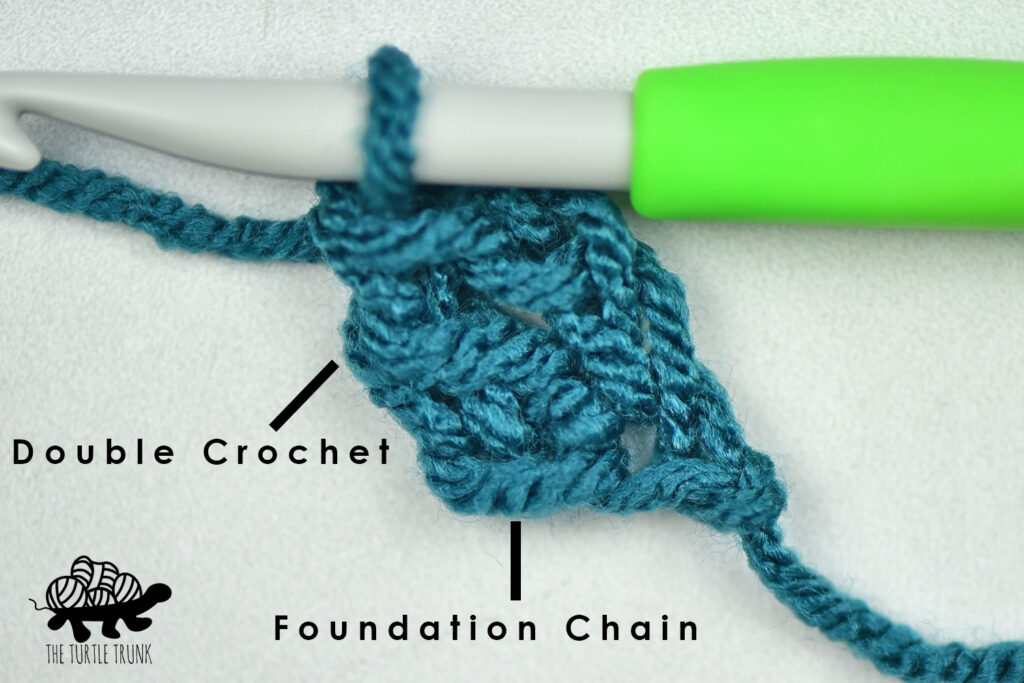
FDC – FOUNDATION DOUBLE CROCHET
A FDC is working your foundation chain and first row of DC’s together in one.
CH 3, yarn over and insert hook into 3rd CH from hook. Yarn over, pull up a loop, yarn over and pull through the 1st loop on the hook (that is the CH you will work into for the next stitch), yarn over and pull through the 1st 2 loops on your hook. Yarn over and pull through the last 2 loops on your hook. That is the first FDC. Now working into the CH you created at the bottom of the ST, work your next FDC. *Yarn over, insert hook into the bottom CH, pull up a loop, yarn over and pull through 1st loop on the hook, yarn over and pull through the 1st 2 loops on your hook yarn over, and pull through the last 2 loops on your hook.* Repeat ** until you reach the specified length.
If needed, try using a stitch marker to mark where your first stitch was made and/or where you created the CH to help know to work your next stitch.
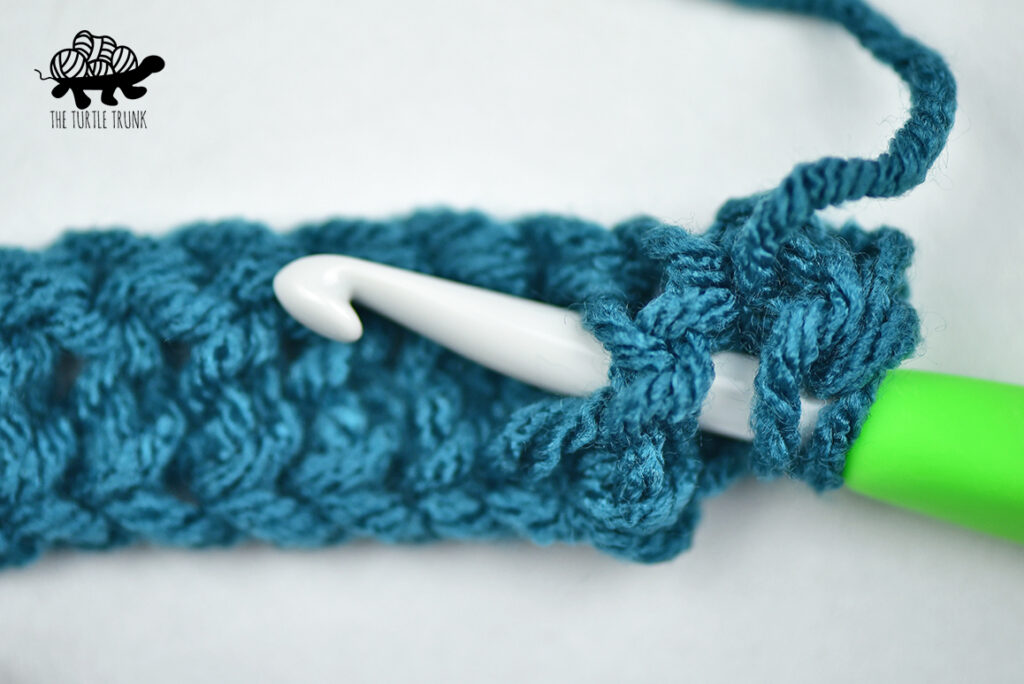
TEXTURED STRIPES
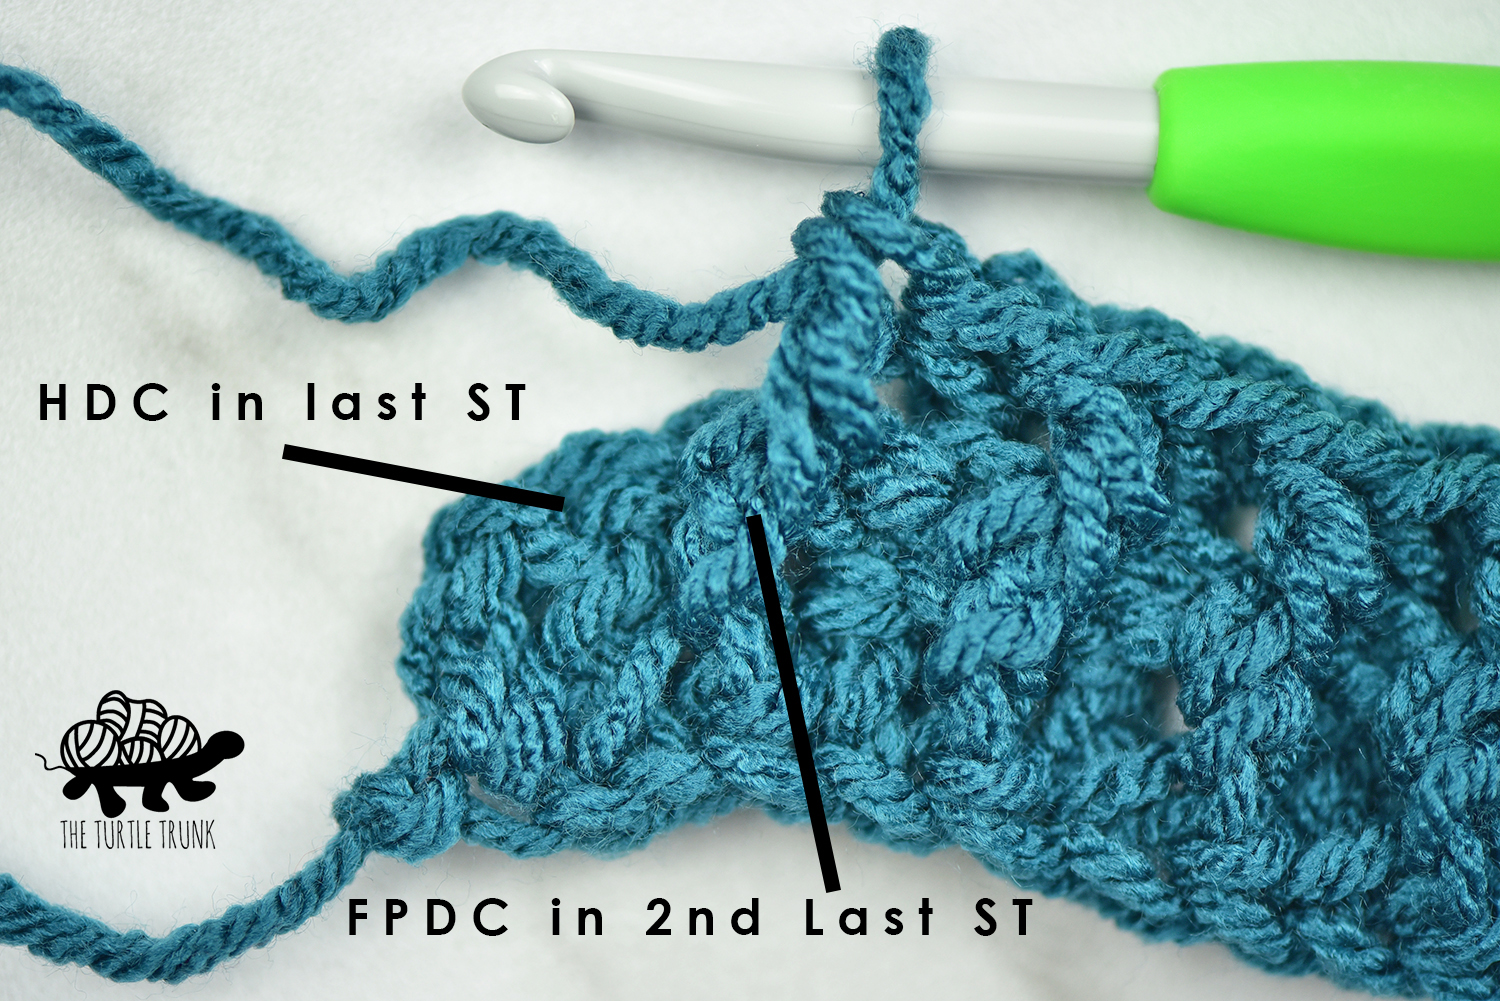
The textured stripes use the Rice Stitch which uses FPDC and BPDC stitches. The first row of those stripes is all DC. For the next 5 rows, each row will begin with a HDC then a *FPDC, BPDC* repeat. The 2nd last ST will always be a FPDC and the last ST will always be a HDC.

FPDC – FRONT POST DOUBLE CROCHET
Yarn over, insert your hook from the front, around the back, and to the front again, around the post of the next ST, yarn over and pull up a loop, yarn over and pull through 2 loops, yarn over and pull through last 2 loops.
BPDC – BACK POST DOUBLE CROCHET
Yarn over, insert your hook from the back, around the front, and to the back again around the post of the next ST, yarn over and pull up a loop, yarn over and pull through 2 loops, yarn over and pull through last 2 loops.
CHANGING COLOR
On the last ST of the row, before the new colored stripe begins, start your last ST as normal, on the final pull through, drop your current color and pick up the new color. Do the final pull through with the new color, then tie off old color and continue with new color.
Bonfire Scarf Pattern
Starting with Color B
Row 1: FDC (113, 113, 141, 141). CH 1 & turn. (113, 113, 141, 141)
Rows 2-6: HDC in 1st ST, *FPDC in next, BPDC in next*. Repeat ** until 2 STs remain. FPDC in the 2nd last ST. HDC in the last ST. CH 1 & turn. (113, 113, 141, 141)
Change to Color A
Rows 7-11: HDC in each ST across. CH 1 & turn. (113, 113, 141, 141)
Row 12: HDC in each ST across. CH 2 & turn. (113, 113, 141, 141)
Change to Color C
Row 13: DC in each ST across. CH 1 & turn. (113, 113, 141, 141)
Rows 14-18: HDC in 1st ST, *FPDC in next, BPDC in next*. Repeat ** until 2 STs remain. FPDC in the 2nd last ST. HDC in the last ST. CH 1 & turn. (113, 113, 141, 141)
Standard Sizes stop here and move onto the Twisted Fringe. Large Sizes continue onto Row 19.
Change to Color A
Rows 19-23: HDC in each ST across. CH 1 & turn. (113, 141)
Row 24: HDC in each ST across. CH 2 & turn. (113, 141)
Change to Color D
Row 25: DC in each ST across. CH 1 & turn. (113, 141)
Rows 26-30: HDC in 1st ST, *FPDC in next, BPDC in next*. Repeat ** until 2 STs remain. FPDC in the 2nd last ST. HDC in the last ST. CH 1 & turn. (113, 141)
Change to Color A
Rows 31-35: HDC in each ST across. CH 1 & turn. (113, 141)
Row 36: HDC in each ST across. CH 2 & turn. (113, 141)
Change to Color E
Row 37: DC in each ST across. CH 1 & turn. (113, 141)
Rows 38-42: HDC in 1st ST, *FPDC in next, BPDC in next*. Repeat ** until 2 STs remain. FPDC in the 2nd last ST. HDC in the last ST. CH 1 & turn. (113, 141)
Move onto Twisted Fringe.
If you are wanting to add twisted fringe ends do not tie off your yarn and weave in all other tail ends. If you are going to add normal fringe or want to leave your scarf as is, tie off your yarn and weave in your ends.
Twisted Fringe
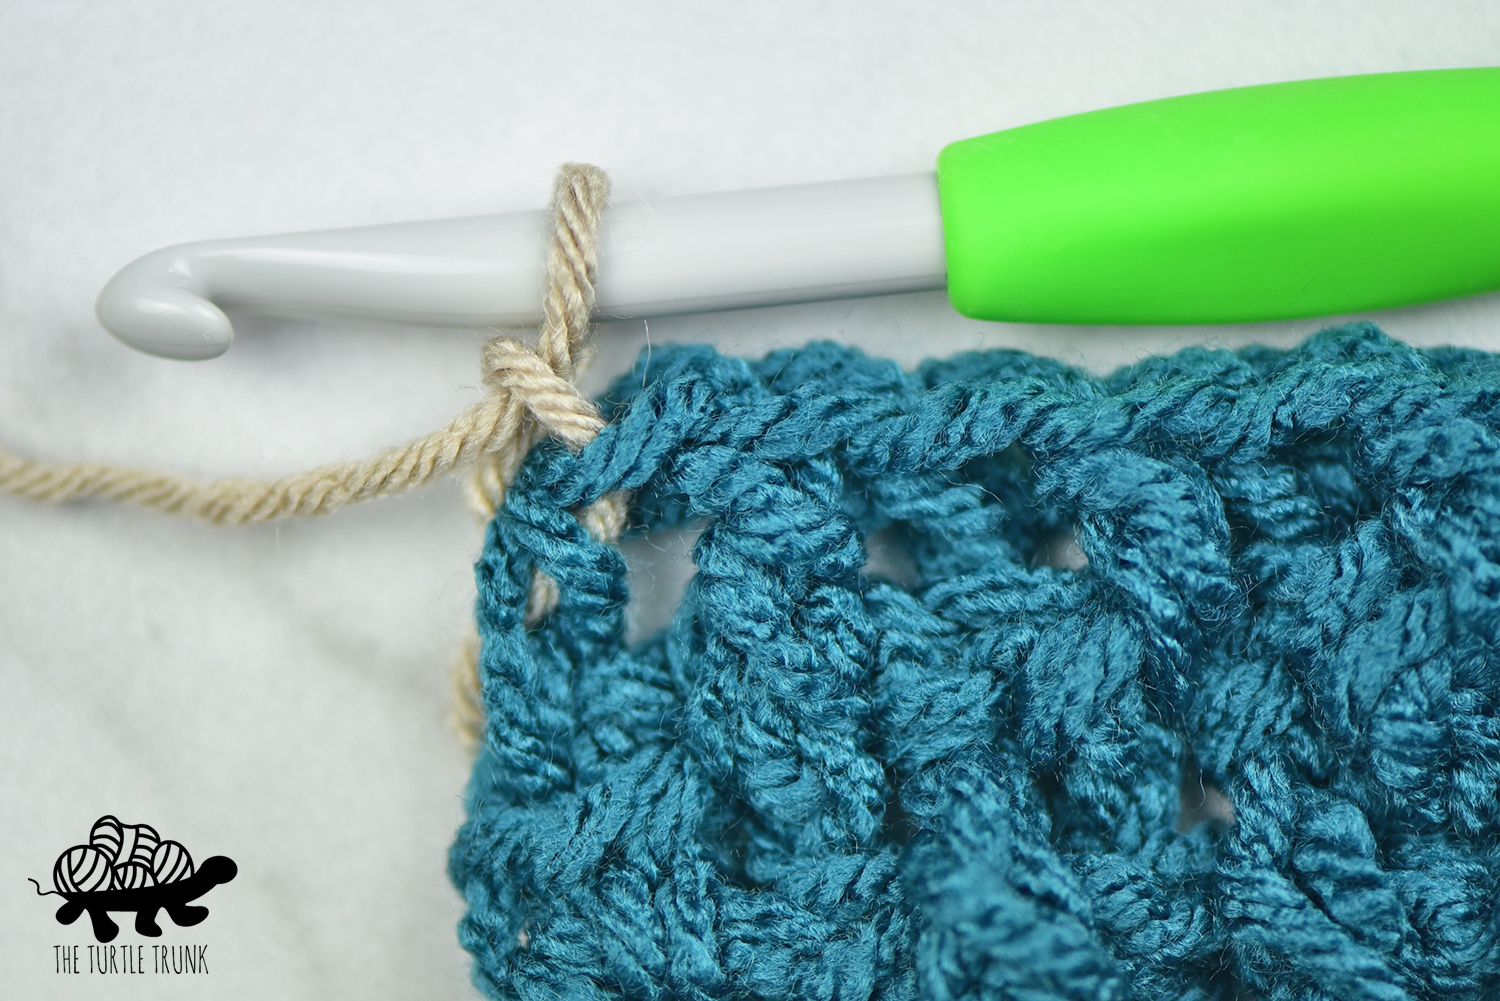
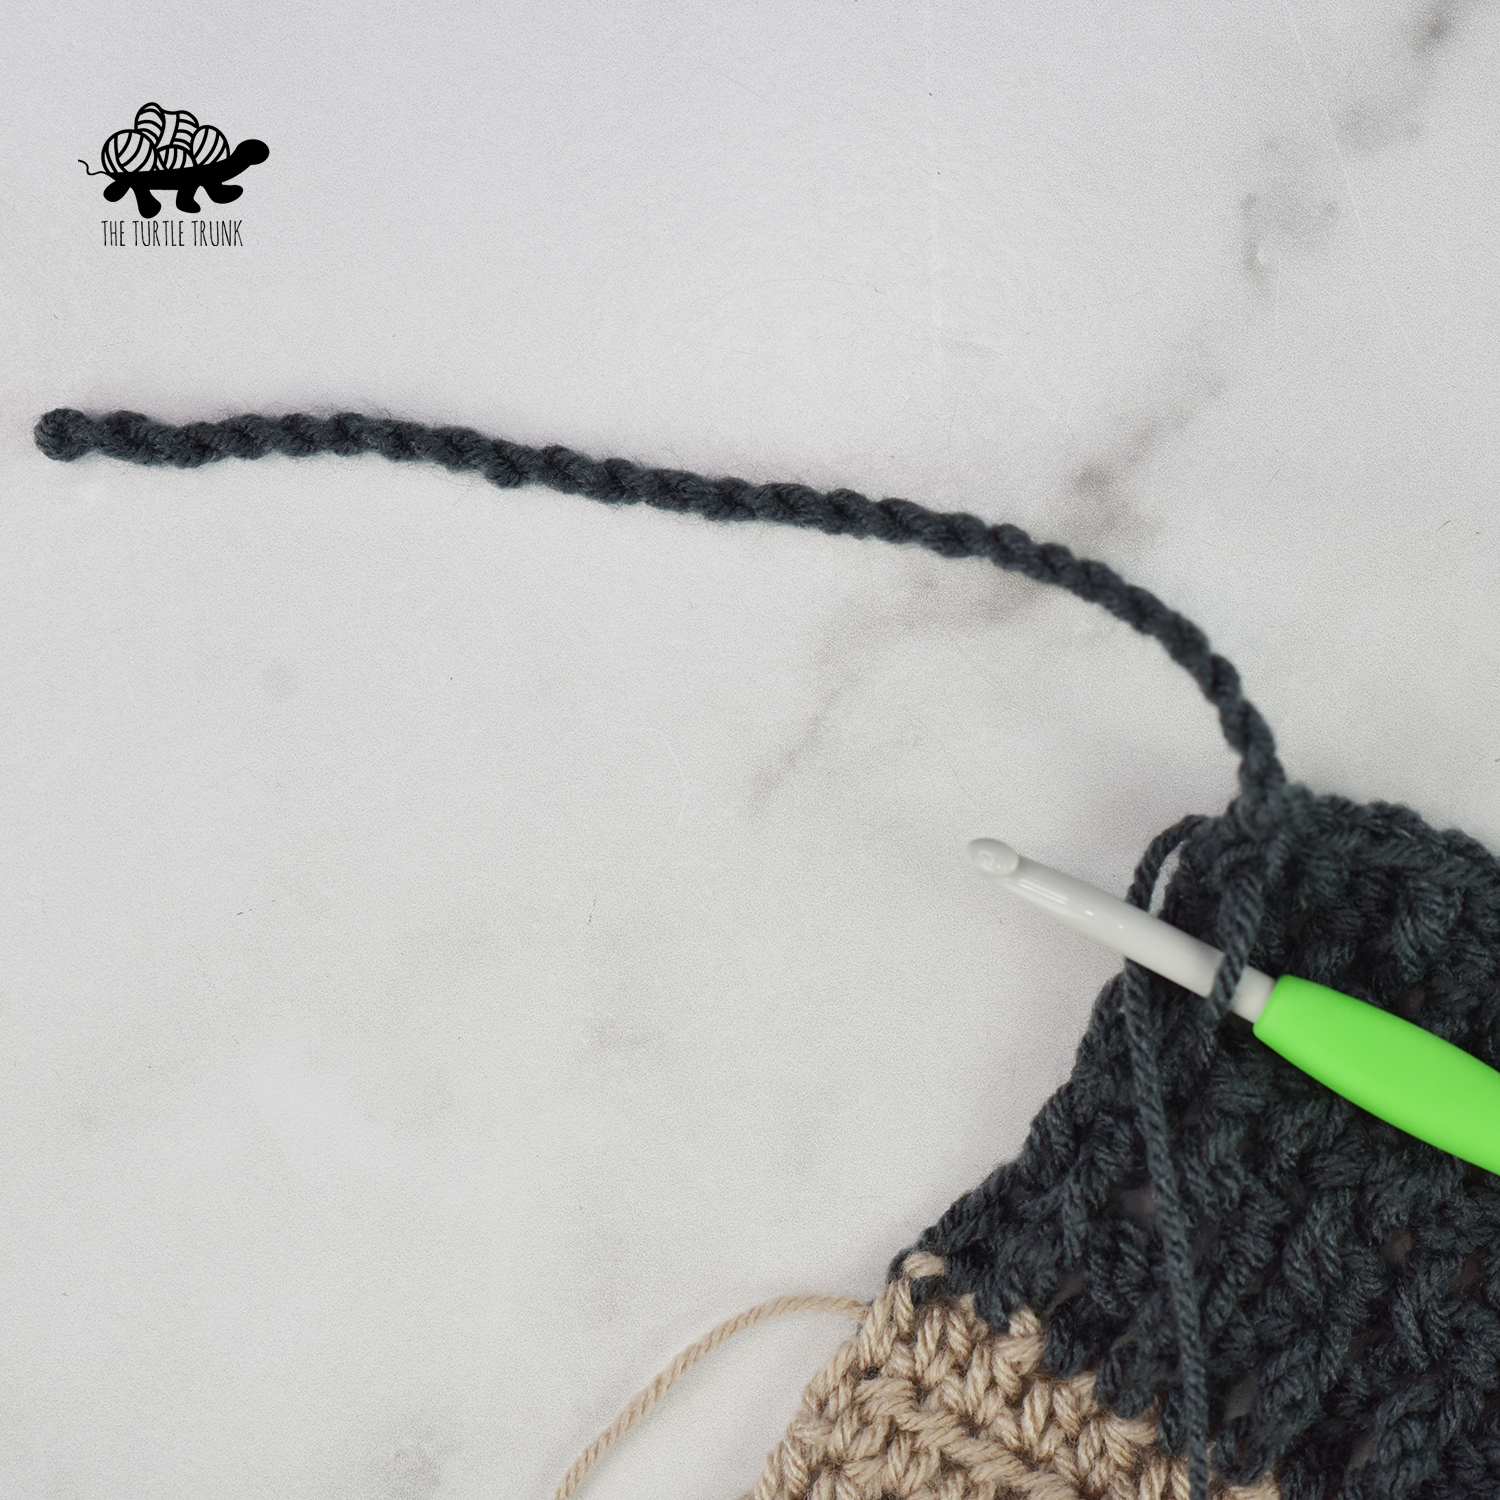
Note: We will start the twisted fringe where our yarn is still attached at the end of Row 18 or 42, and we will work down the left side of the scarf. When you attach the yarn to do the opposte side of the scarf, be sure to attach to the bottom right hand corner and work up the scarf. The slip stitch join we will use for the twisted fringe will create a ridge on the opposite side of the scarf, so you want it to look the same on the front and back.
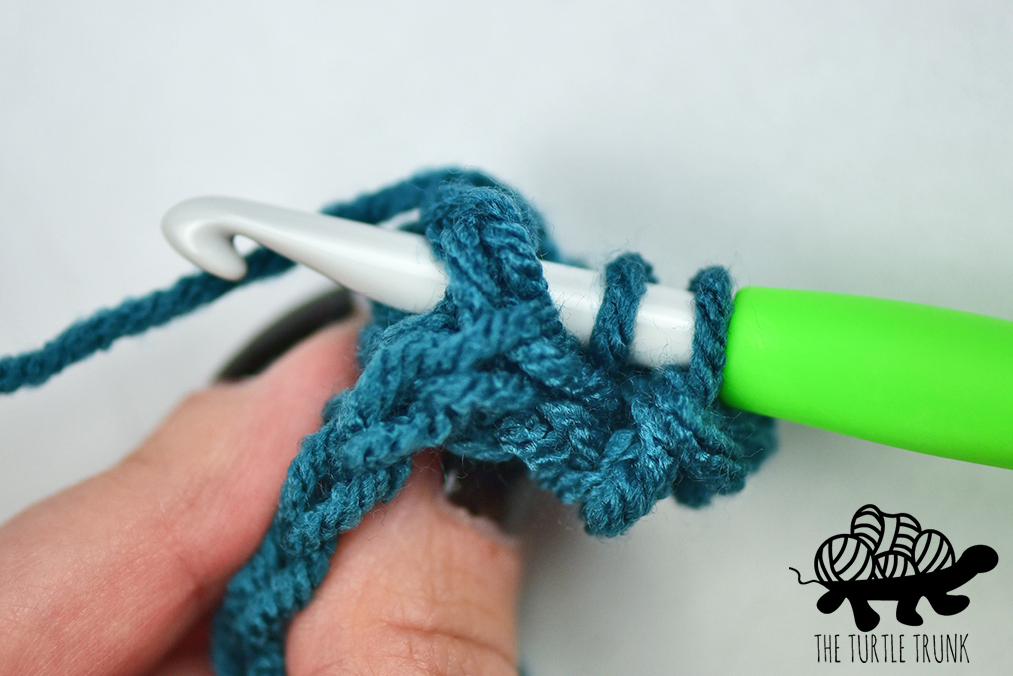
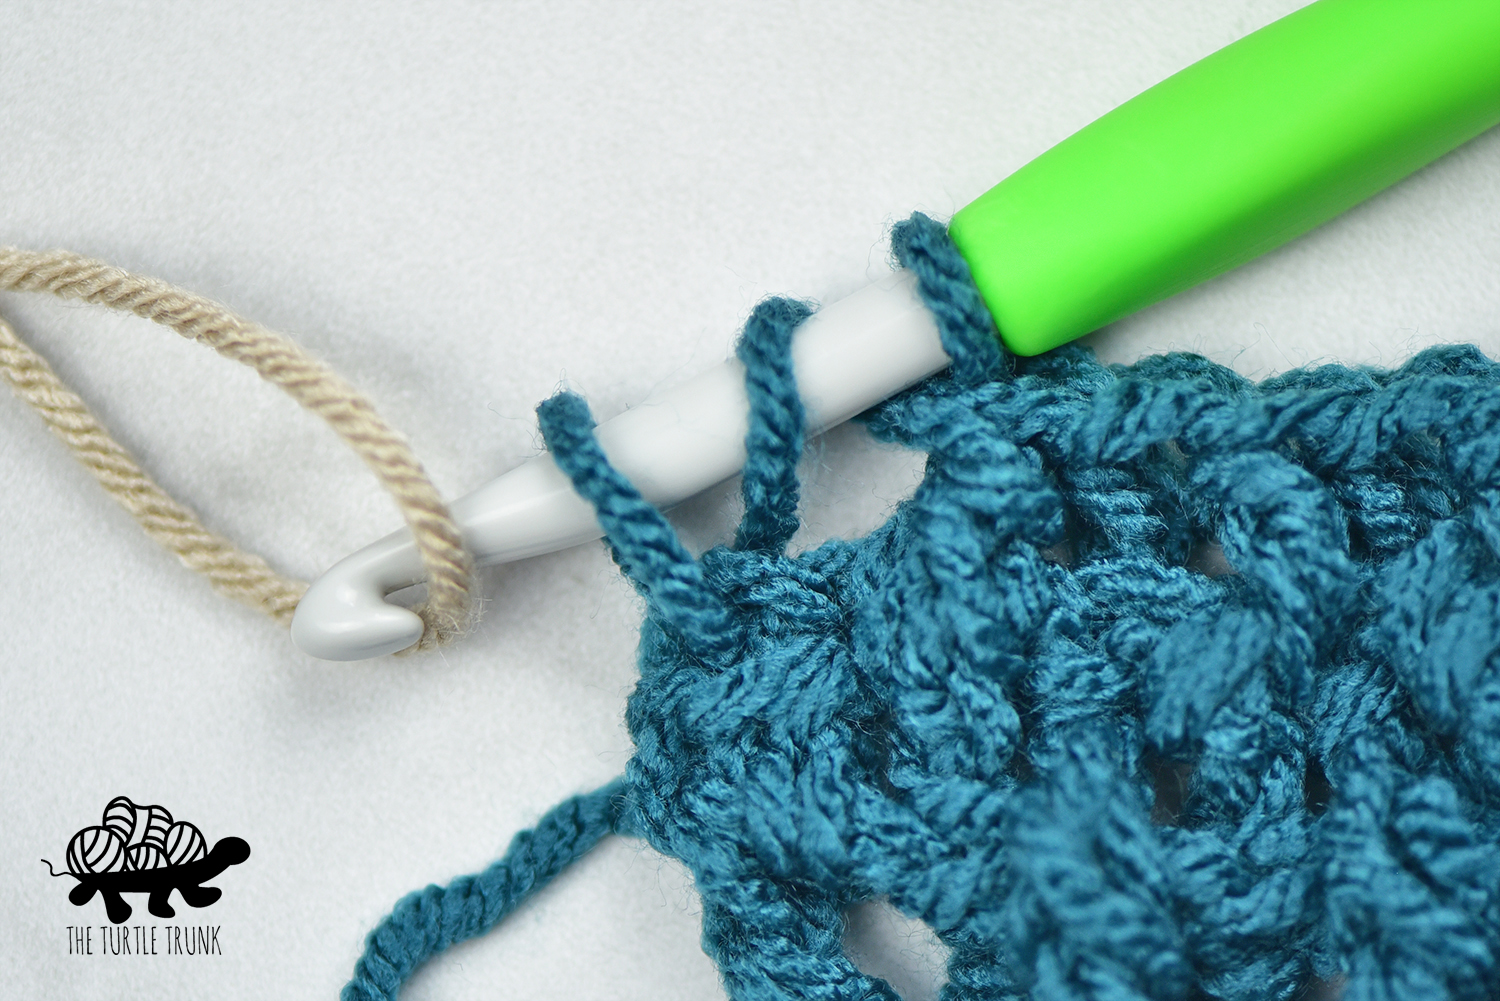
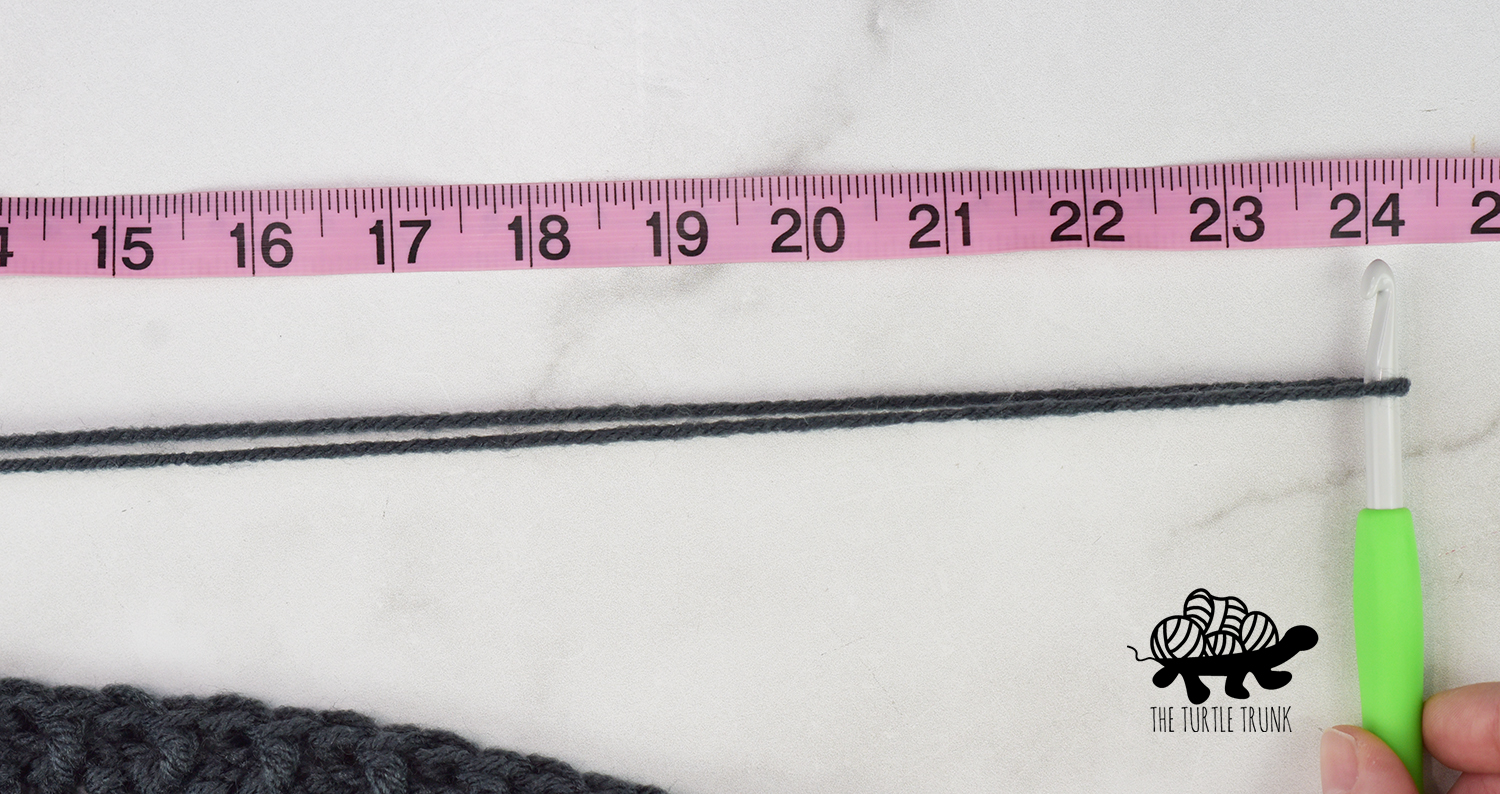
With your yarn still attached, pull your yarn with your hook to create a long loop that is 3x longer than the length you want your fringe to be. I pulled mine 24” which created an 8” long piece of fringe. Feel free to make yours longer or shorter.
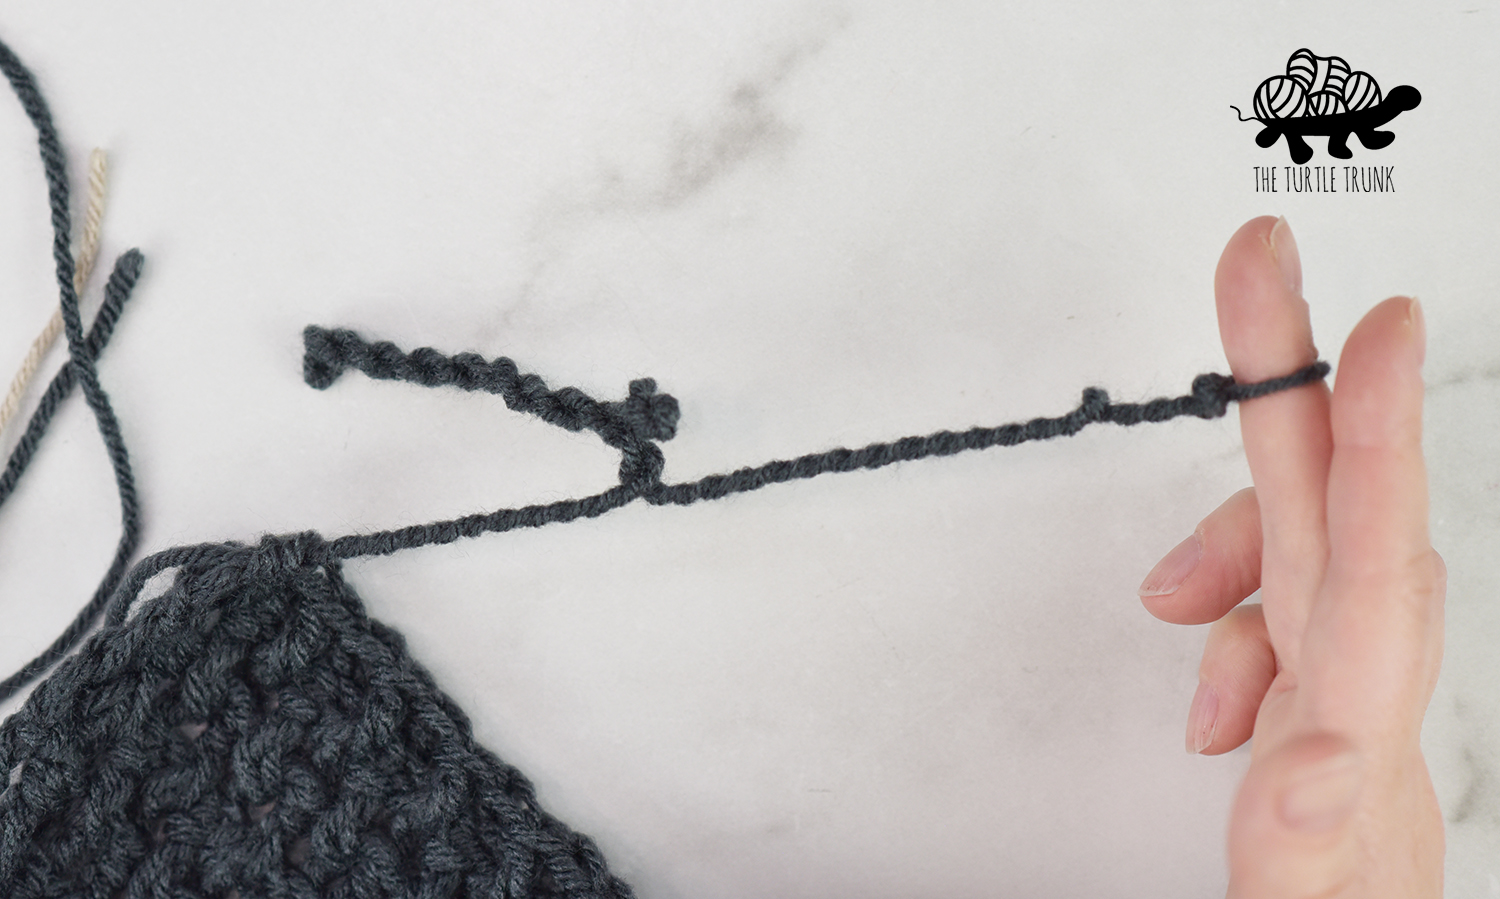
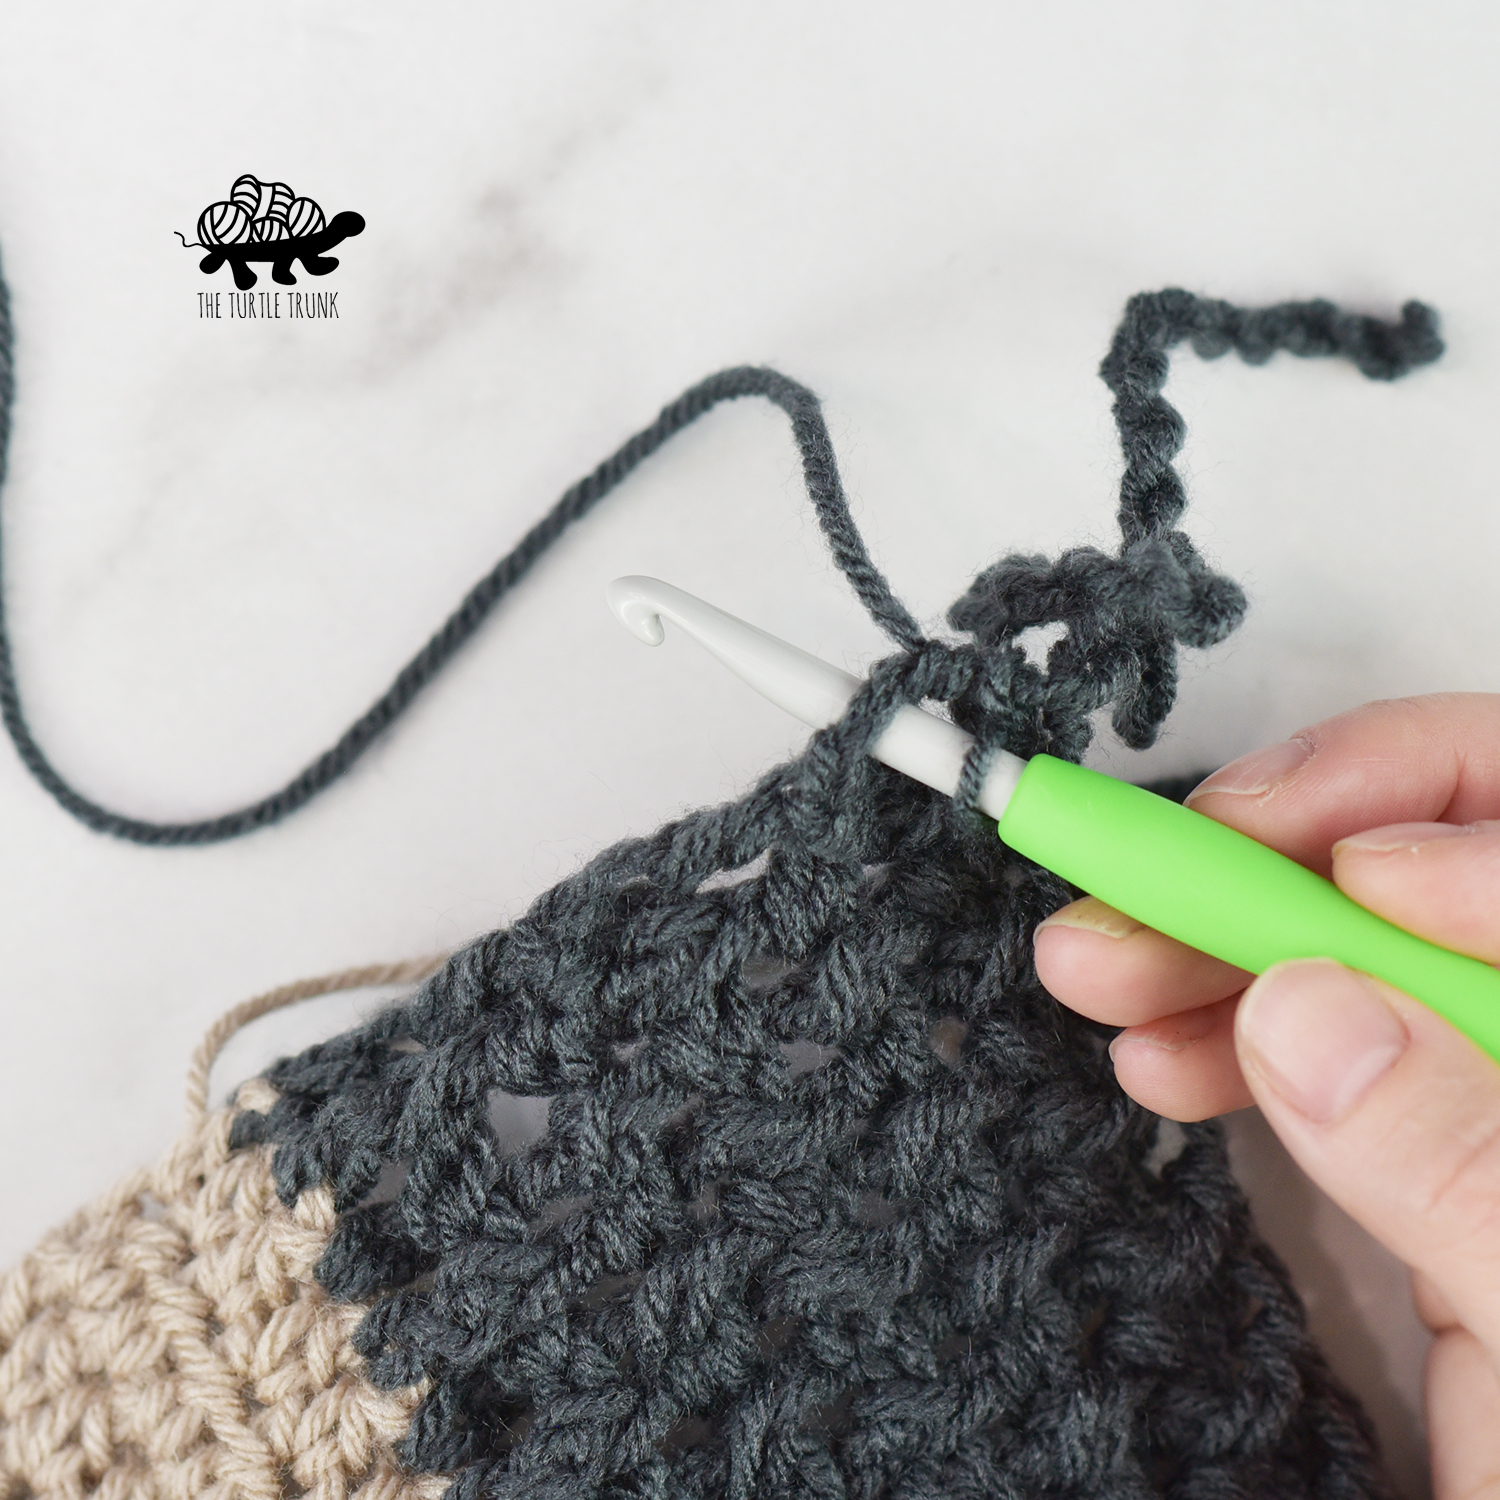
Replace your finger with your hook again, and slip stitch into the the next row. The fringe will now twist on itself, to clean it up, twist it counterclockwise until a nice, clean twist is created.
Repeat from the beginning.
You can work as many pieces of fringe as you’d like across. I worked 8 per stripe and changed colors for the fringe to match the stripes. Keep consistant with how many you work per stripe and the length of each piece. When your done the left side of your scarf, tie off and attach yarn to the bottom right corner of the scarf and repeat the fringe on the right side.
And you’re all done! I hope you enjoyed this pattern for the Bonfire Scarf! I’d love to see your finished Turtle Trunk creation so be sure to tag me, @theturtletrunk on Instagram so I can see your photos!
You are free to sell the items you make with this pattern, and I’d love if you could please link back to this page. You do not have permission to republish or distribute this pattern in any way or claim it as your own. Do not use my photos in your sale listings or for any other purposes. Thank you.
This page includes affiliate links. If you make a purchase from these links, I may make a small commission at no cost to you! Thank you for your support!
