Bonfire Blanket Crochet Pattern
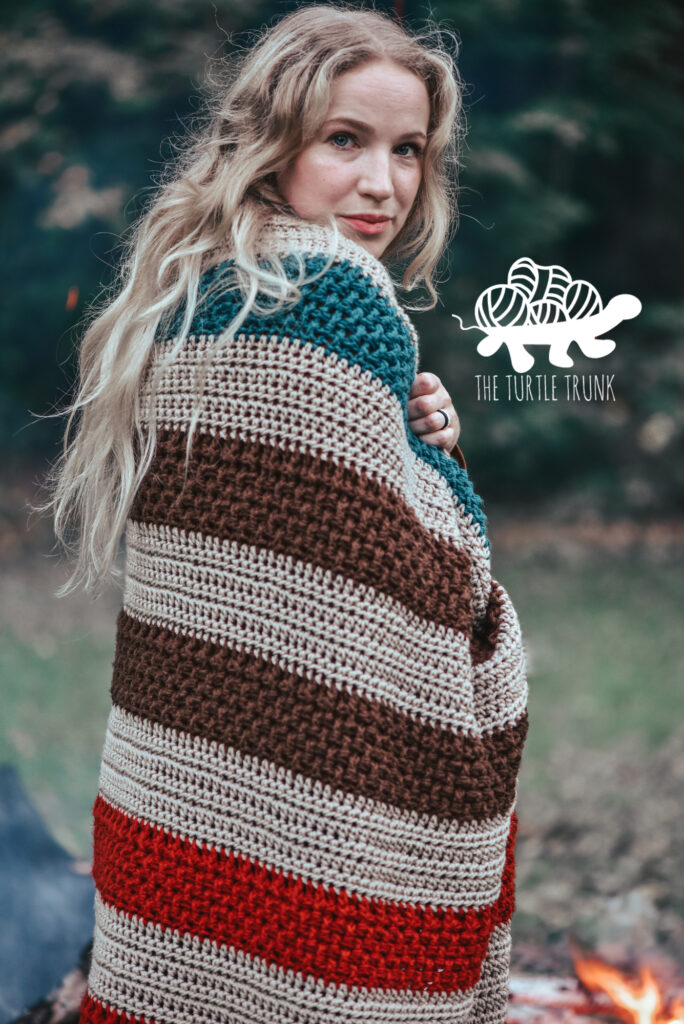
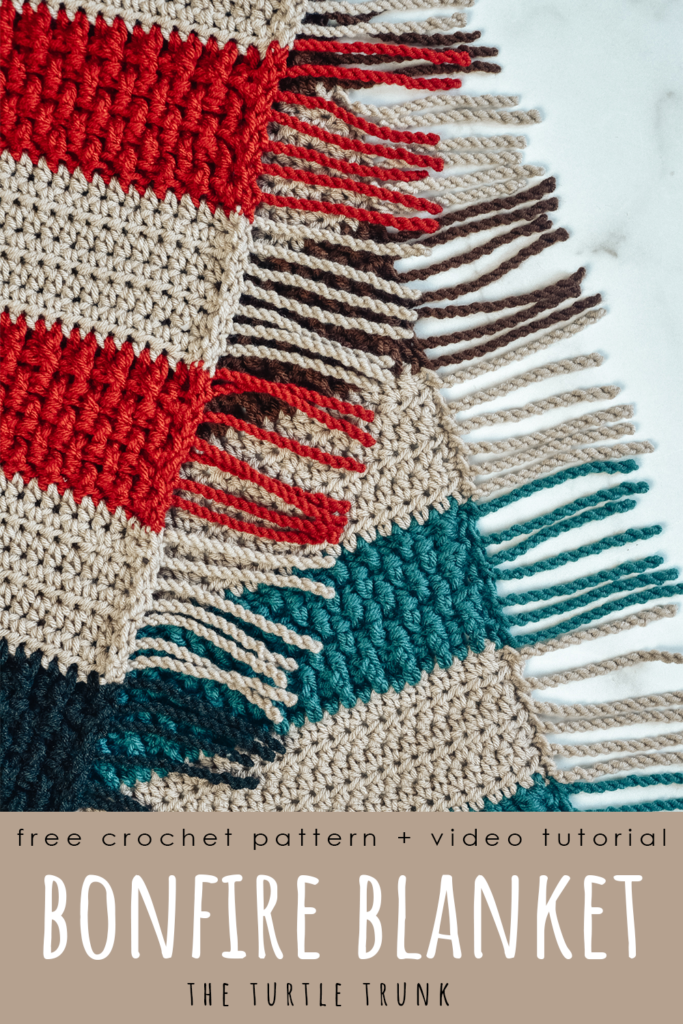
The Bonfire Blanket is a modern, crochet throw blanket featuring beautiful textures and colors, as well as twisted fringe! It’s perfect for cuddling up beside the fire especially on chilly Autumn evenings. This project is large but it’s something you can mindlessly make while sitting on the couch while enjoying your favorite show! The changes in colors and textures keep it interesting but they’re easy enough to remember.
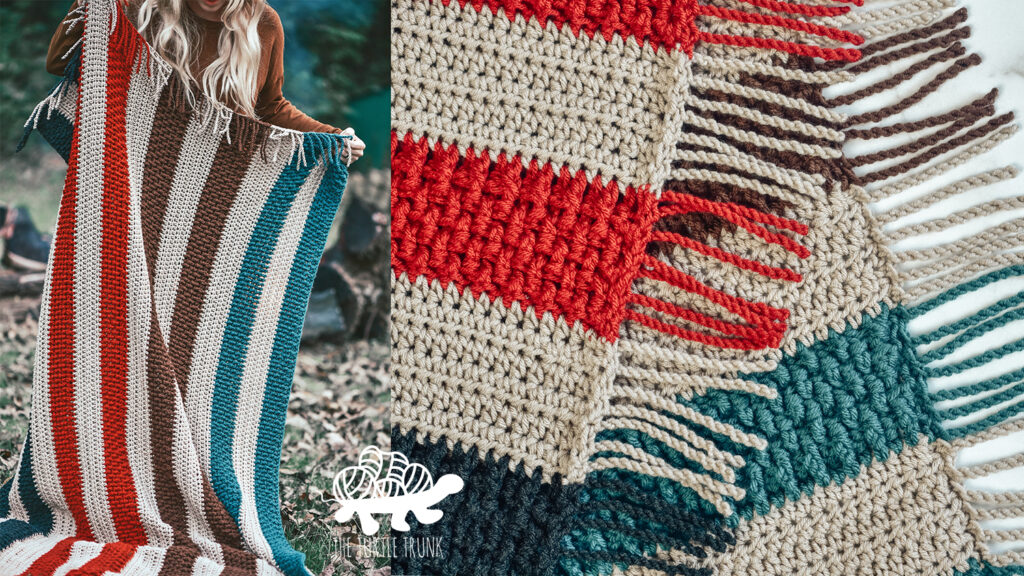
The Bonfire Blanket crochet pattern uses a simple 2 stripe repeat, that’s easy enough to remember, but interesting enough so you won’t get bored! The finished blanket measures approximately 60″ x 45″ but you can adjust the length and width to be perfect for you! I’ll show you how to add twisted fringe to the ends for some extra fun, but feel free to leave the ends bare, or add regular fringe if you’d prefer!
I hope you enjoy making this pattern and also love your new, Bonfire Blanket! Continue reading to hear my inspiration for this pattern and to learn more about the yarn I used, then scroll down for the written pattern!
You can find the ad-free and printable pdf version of this pattern on
Etsy and also Ravelry!
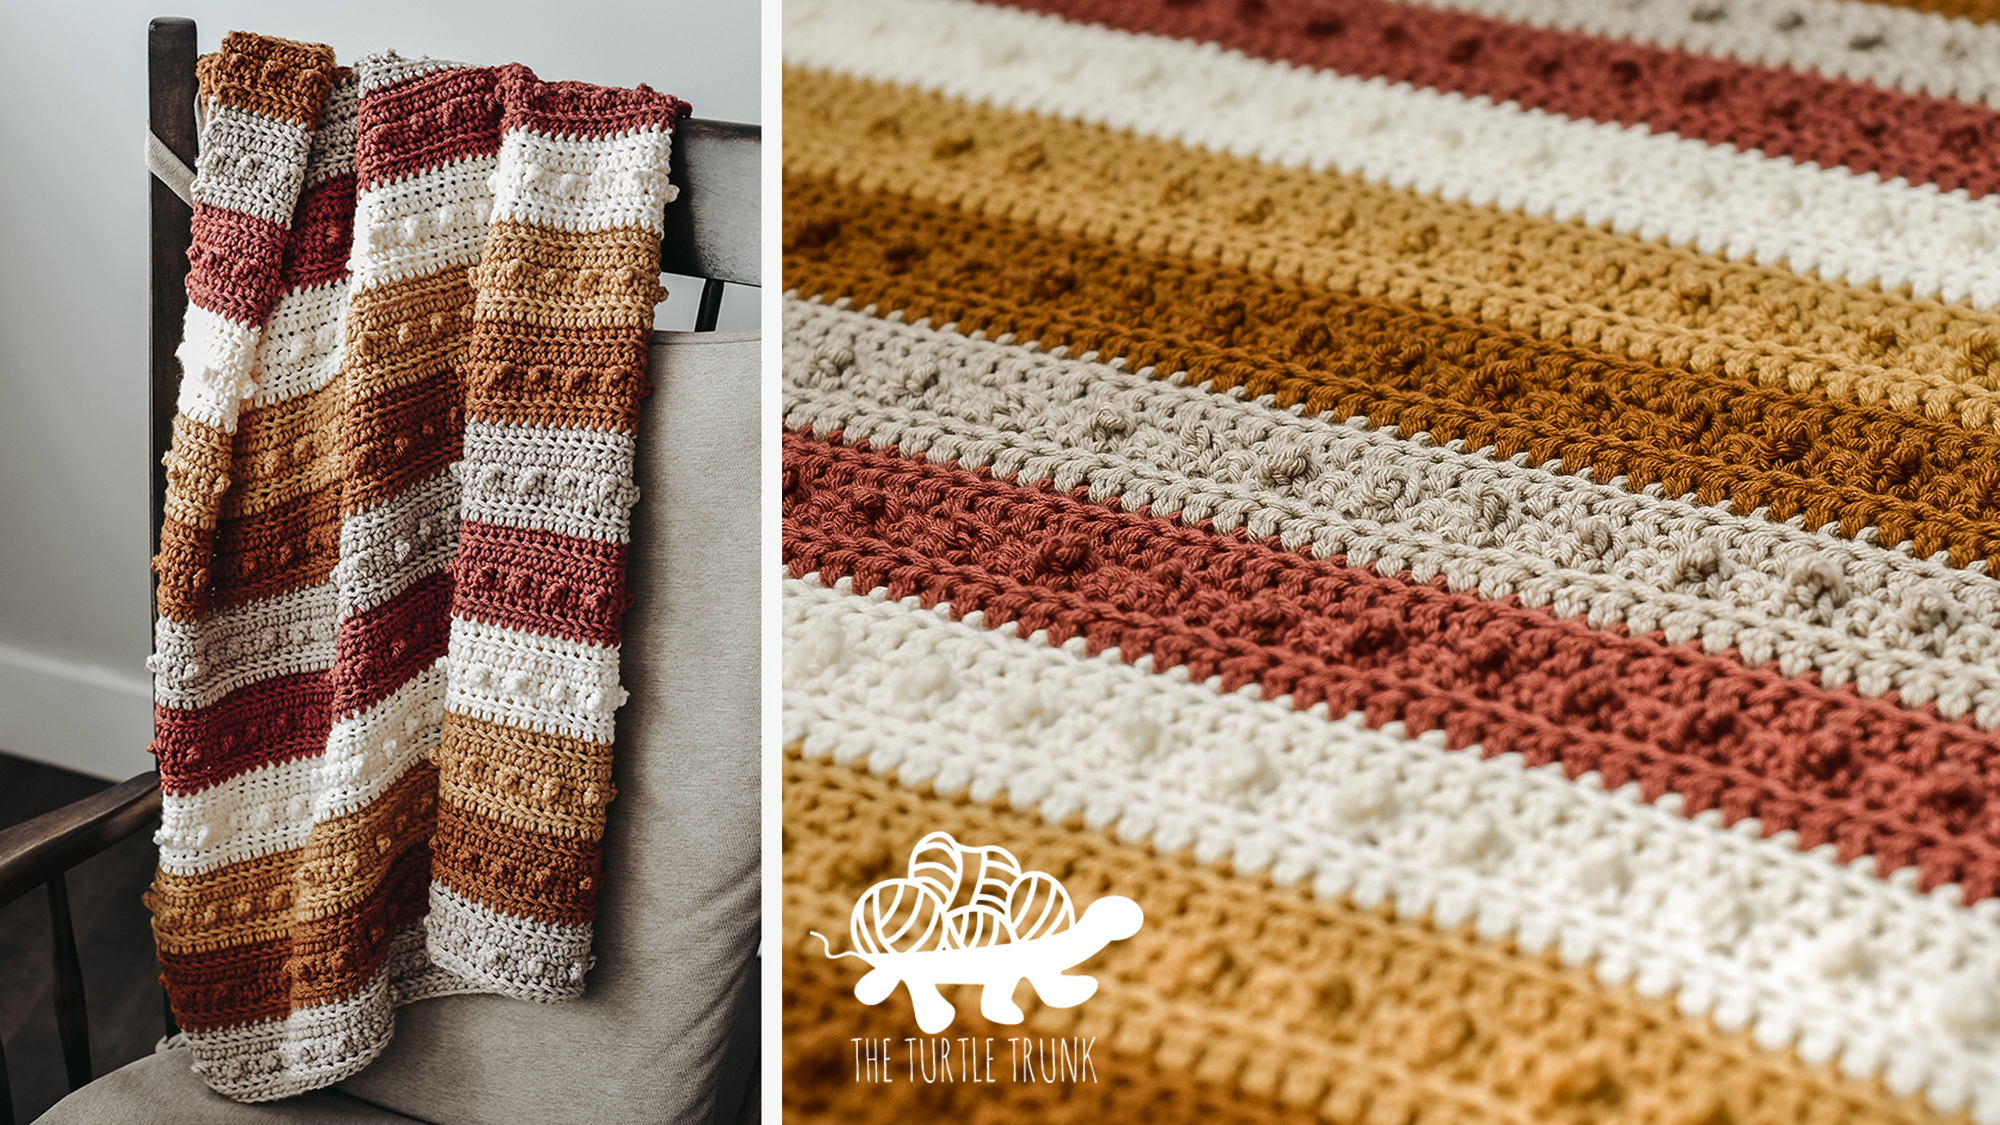
If you’d like more crochet blanket patterns, then check out my Bebe Baby Blanket, Picot Blanket, and American Flag Blanket.
inspiration
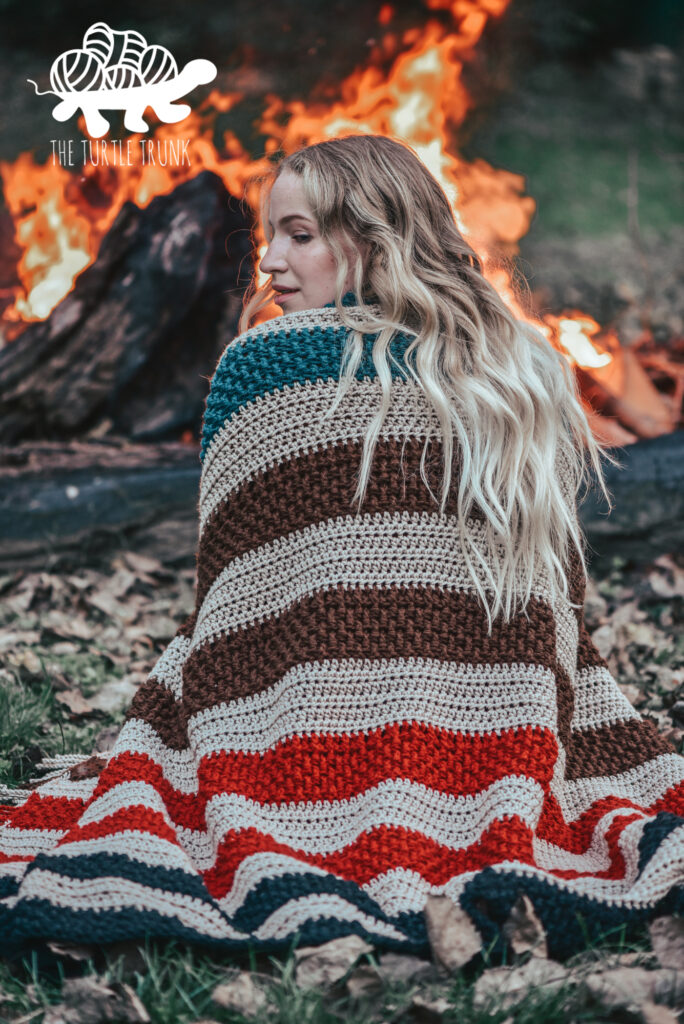
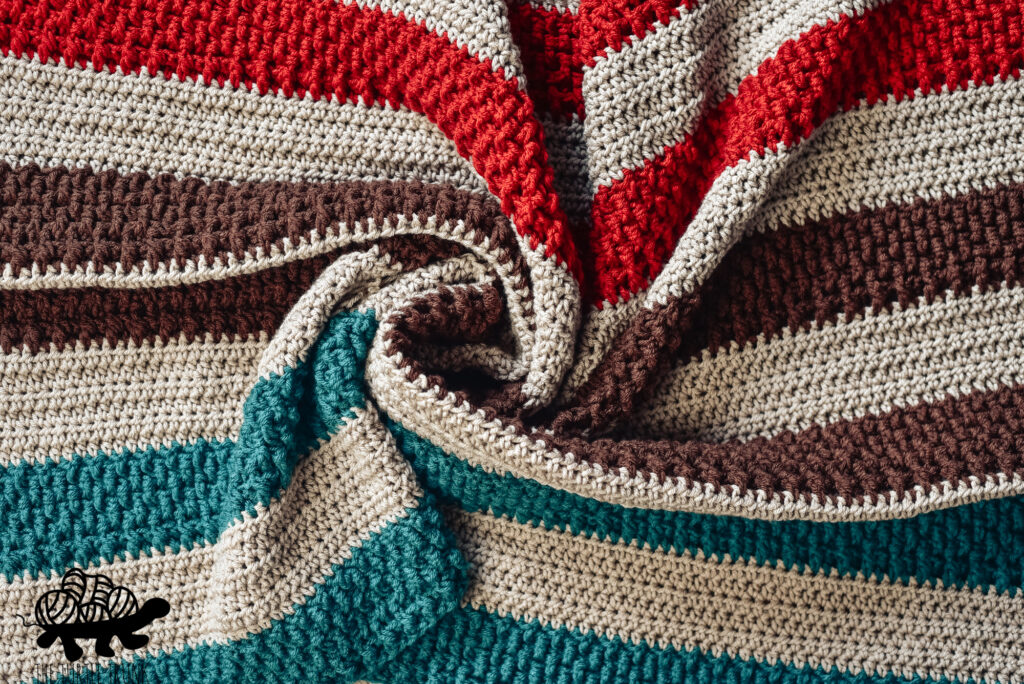
I’ve actually had the name “Bonfire Blanket” written down in my design notebook for years, but I didn’t really know what I wanted to do with it! I had tried multiple times to come up with a blanket design that seemed appropriate for the chilly, Autumn evening, sitting by a bonfire feel I was going for but nothing seemed to fit just right. It wasn’t until I was scrolling through Pinterest that inspiration struck! I found a beautiful color palette swatch that included dark brown, beige, red/orange, and teal and without a doubt I knew I had to use those colors for the Bonfire Blanket!
Once I had my colors chosen I needed to figure out what stitches to use! Since I was going to use so many colors, I wanted to keep the stitches simple enough so that the design elements weren’t combating each other. On the other hand, I didn’t want to use too basic of stitches because with such a large project, I find that without some more challanging or “fun” stitches, I would probably get bored of making the blanket halfway through and would never finish it. So I met in the middle! I decided to do contrasting stripes, so one uses simple half double crochet stitches, which work up quickly and have a nice flat look. Then the other is a more textured stripe that uses alternating front post and back post double crochet stitches (the rice stitch) which offers more of a challenge but is still easy to create.
So that’s how the Bonfire Blanket came to be and I am so happy with how it turned out! With the colors I chose, I think the chilly, Autumn evening, sitting by a bonfire feel I was going for really came to life, but with a different color palette you could create any feel you’d like!
Yarn
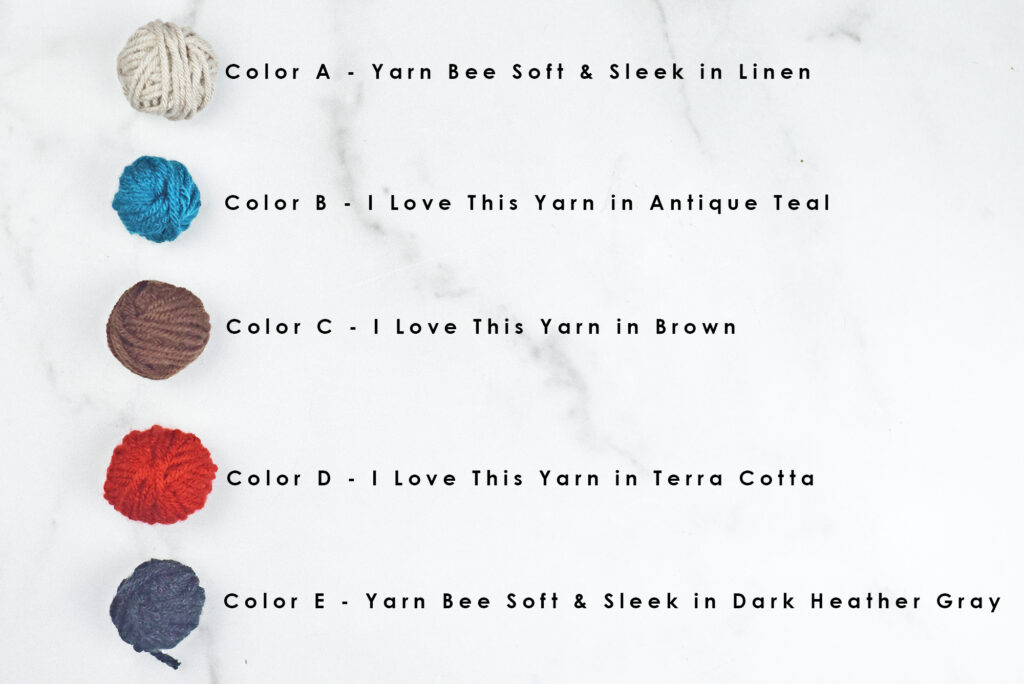
For my Bonfire Blanket I used 5 different colors, but by all means use as many (or few) colors as you’d like! Since I had such a specific color palette chosen, I had to used 2 different yarn brands because I couldn’t find all the right colors just from one. So I used Yarn Bee Soft & Sleek in the colors Linen and Dark Heather Gray, and I Love This Yarn int he colors Antique Teal, Terra Cotta, and Brown. Don’t be afraid to mix different yarn brands if it means getting the perfect colors, but just be sure they are the same size! Even if 2 different yarns say they’re the same weight, they can still vary in thickness so double check before starting.
For all the HDC stripes I used Linen, then I used all the other colors for the textured, Rice Stitch stripes, which I used each color for 2 stripes each (see photos below). Like I said above, feel free to use as many and whatever colors as you’d like though! The color combination possibilities are endless, but if you need some inspiration or ideas, I’ve made this Pinterest board to help you out!

Size
The Bonfire Blanket measures approximately 60″ wide x 45″ in height not including the fringe and then 68″ wide x 45″ in height with the fringe. But you can adjust the length and width to be any size and even adjust the length of the fringe too! So to adjust the length of the blanket, work any odd number of stitches across for Row 1, then to adjust the width, repeat the HDC and Rice Stitch stripes as many times as needed to reach your desired width.
Not ready to make just yet? PIN this pattern for later!
Follow along with the video tutorial for the Bonfire Blanket on YouTube!
Difficulty
Advanced Beginner/ Easy
Finished Size
60″ x 45″ (without the fringe) +8″ for fringe
Gauge
7 STs x 6 Rows = 3” x 3” in HDC
Adjust hook size up or down to reach gauge.
Notes
- Beginning chains don’t count as stitches. At the end of each row, CH 1 & turn. Work your first stitch into the last stitch of the previous row.
- Stitches between *asterisks* are to be repeated until the end of the row.
Supplies
- Medium (4) Weight Yarn
- Color A – 917 yards / 19.5 oz
- Colors B, C, D, E – 356 yards / 7.6 oz per color
- 6.50 mm (K) Hook
- Yarn Needle
- Scissors
- Tape Measure
Abbreviations (US Terms)
ST(s) – Stitch(es)
SL ST – Slip Stitch
CH – Chain
FDC – Foundation Double Crochet
DC – Double Crochet
FPDC – Front Post Double Crochet
BPDC – Back Post Double Crochet
HDC – Half Double Crochet
Special Stitches
See the video tutorial if extra assistance is needed for the special stitches.
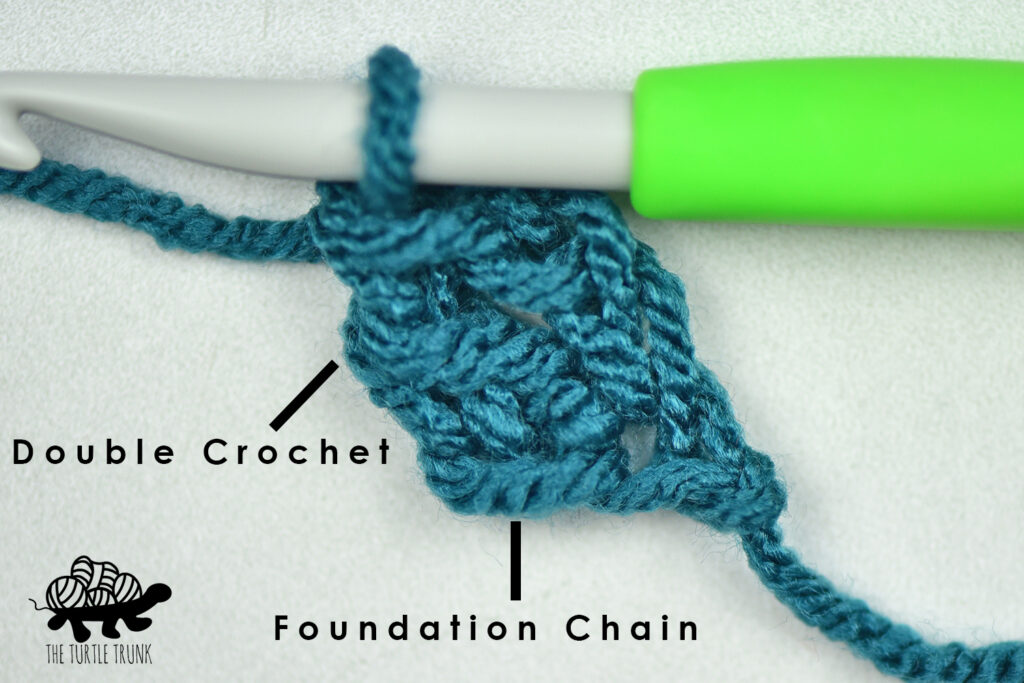
FDC – Foundation Double Crochet
A FDC is working your foundation chain and first row of DC’s together in one.
CH 3, yarn over and insert hook into 3rd CH from hook. Yarn over, pull up a loop, yarn over and pull through the 1st loop on the hook (that is the CH you will work into for the next stitch), yarn over and pull through the 1st 2 loops on your hook. Yarn over and pull through the last 2 loops on your hook. That is the first FDC. Now working into the CH you created at the bottom of the ST, work your next FDC. *Yarn over, insert hook into the bottom CH, pull up a loop, yarn over and pull through 1st loop on the hook, yarn over and pull through the 1st 2 loops on your hook yarn over, and pull through the last 2 loops on your hook.* Repeat ** until you reach the specified length.
If needed, try using a stitch marker to mark where your first stitch was made and/or where you created the CH to help know to work your next stitch.
Textured Stripes
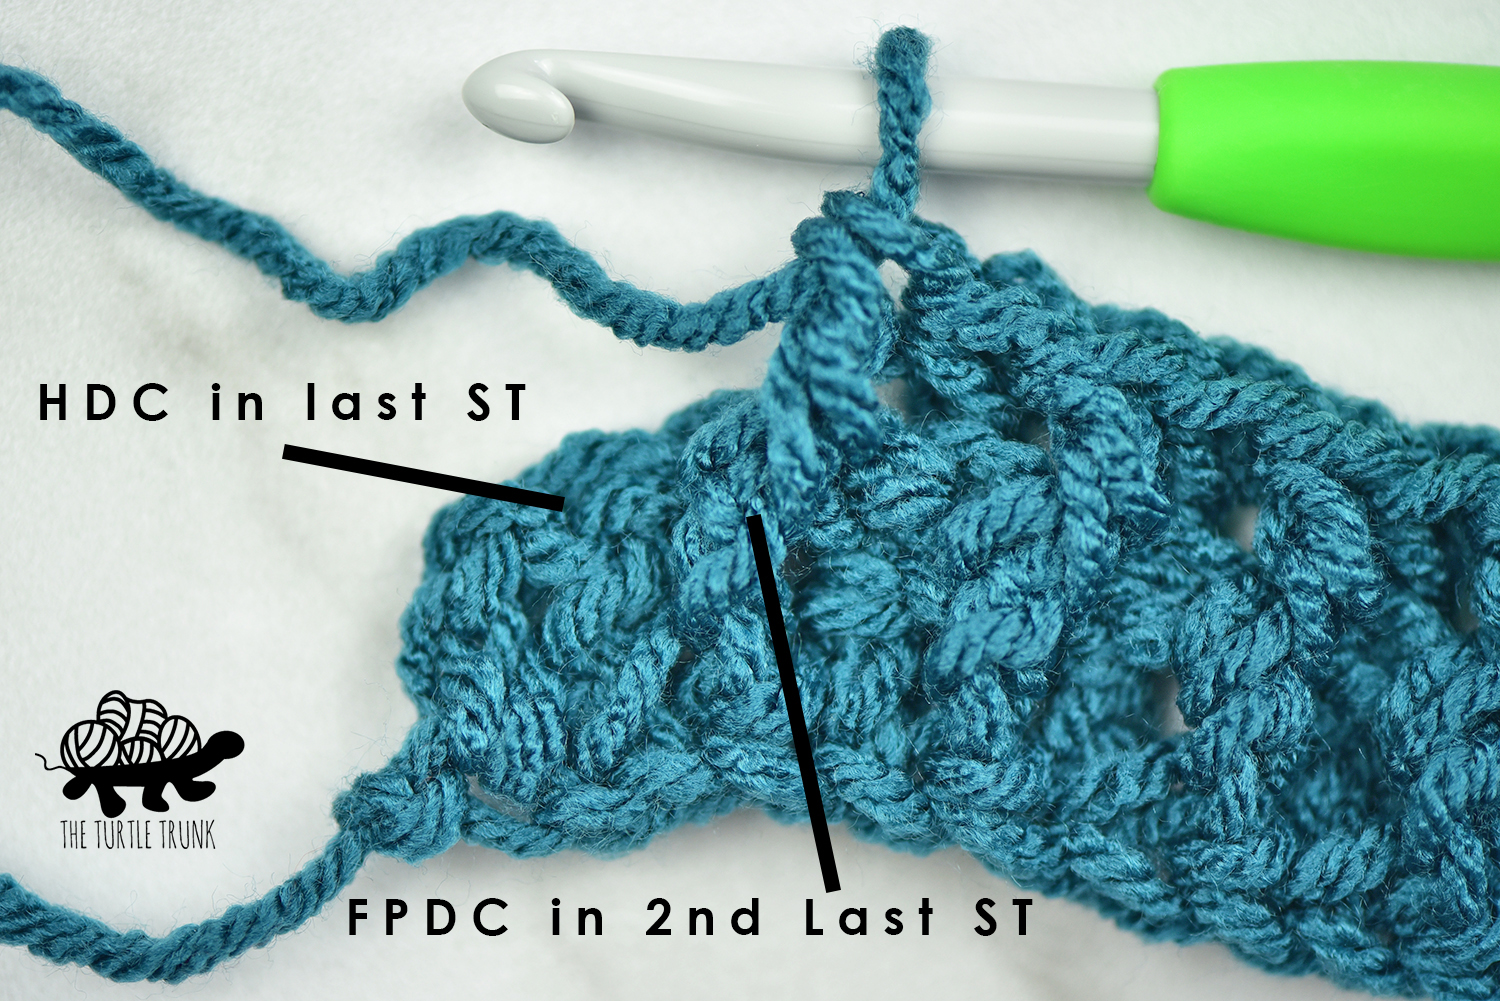
The textured stripes use the Rice Stitch which uses FPDC and BPDC stitches. The first row of those stripes is all DC. For the next 5 rows, each row will begin with a HDC then a *FPDC, BPDC* repeat. The 2nd last ST will always be a FPDC and the last ST will always be a HDC.
FPDC – Front Post Double Crochet
Yarn over, insert your hook from the front, around the back, and to the front again, around the post of the next ST, yarn over and pull up a loop, yarn over and pull through 2 loops, yarn over and pull through last 2 loops.
BPDC – Back Post Double Crochet
Yarn over, insert your hook from the back, around the front, and to the back again around the post of the next ST, yarn over and pull up a loop, yarn over and pull through 2 loops, yarn over and pull through last 2 loops.
Changing Color
On the last ST of the row, before the new colored stripe begins, start your last ST as normal, on the final pull through, drop your current color and pick up the new color. Do the final pull through with the new color, then tie off old color and continue with new color.
Bonfire Blanket Pattern
Starting with Color B
Row 1: FDC 141. CH 1 & turn. (141)
Rows 2-6: HDC in 1st ST, *FPDC in next, BPDC in next*
repeat ** until 2 STs remain. FPDC in the 2nd last ST. HDC in the last ST. CH 1 & turn. (141)
Change to Color A
Rows 7-11: HDC in each ST across. CH 1 & turn. (141)
Row 12: HDC in each ST across. CH 2 & turn. (141)
Change to Color B
Row 13: DC in each ST across. CH 1 & turn. (141)
Rows 14-18: HDC in 1st ST, *FPDC in next, BPDC in next*
repeat ** until 2 STs remain. FPDC in the 2nd last ST. HDC in the last ST. CH 1 & turn. (141)
Change to Color A
Rows 19-23: HDC in each ST across. CH 1 & turn. (141)
Row 24: HDC in each ST across. CH 2 & turn. (141)
Change to Color C
Row 25: DC in each ST across. CH 1 & turn. (141)
Rows 26-30: HDC in 1st ST, *FPDC in next, BPDC in next*
repeat ** until 2 STs remain. FPDC in the 2nd last ST. HDC in the last ST. CH 1 & turn. (141)
Change to Color A
Rows 31-35: HDC in each ST across. CH 1 & turn. (141)
Row 36: HDC in each ST across. CH 2 & turn. (141)
Change to Color C
Row 37: DC in each ST across. CH 1 & turn. (141)
Rows 38-42: HDC in 1st ST, *FPDC in next, BPDC in next*
repeat ** until 2 STs remain. FPDC in the 2nd last ST. HDC in the last ST. CH 1 & turn. (141)
Change to Color A
Rows 43-47: HDC in each ST across. CH 1 & turn. (141)
Row 48: HDC in each ST across. CH 2 & turn. (141)
Change to Color D
Row 49: DC in each ST across. CH 1 & turn. (141)
Rows 50-54: HDC in 1st ST, *FPDC in next, BPDC in next*
repeat ** until 2 STs remain. FPDC in the 2nd last ST. HDC in the last ST. CH 1 & turn. (141)
Change to Color A
Rows 55-59: HDC in each ST across. CH 1 & turn. (141)
Row 60: HDC in each ST across. CH 2 & turn. (141)
Change to Color D
Row 61: DC in each ST across. CH 1 & turn. (141)
Rows 62-66: HDC in 1st ST, *FPDC in next, BPDC in next*
repeat ** until 2 STs remain. FPDC in the 2nd last ST. HDC in the last ST. CH 1 & turn. (141)
Change to Color A
Rows 67-71: HDC in each ST across. CH 1 & turn. (141)
Row 72: HDC in each ST across. CH 2 & turn. (141)
Change to Color E
Row 73: DC in each ST across. CH 1 & turn. (141)
Rows 74-78: HDC in 1st ST, *FPDC in next, BPDC in next*
repeat ** until 2 STs remain. FPDC in the 2nd last ST. HDC in the last ST. CH 1 & turn. (141)
Change to Color A
Rows 79-83: HDC in each ST across. CH 1 & turn. (141)
Row 84: HDC in each ST across. CH 2 & turn. (141)
Change to Color E
Row 85: DC in each ST across. CH 1 & turn. (141)
Rows 86-90: HDC in 1st ST, *FPDC in next, BPDC in next*
repeat ** until 2 STs remain. FPDC in the 2nd last ST. HDC in the last ST. CH 1 & turn. (141)
Tie off yarn and weave in all ends. You can now leave your blanket as is, add a boarder, or add fringe!
Twisted Fringe
Lastly let’s try adding twisted fringe to the ends! Twisted fringe is easy to create and unlike regular fringe, it wont get frayed after being washed and used!
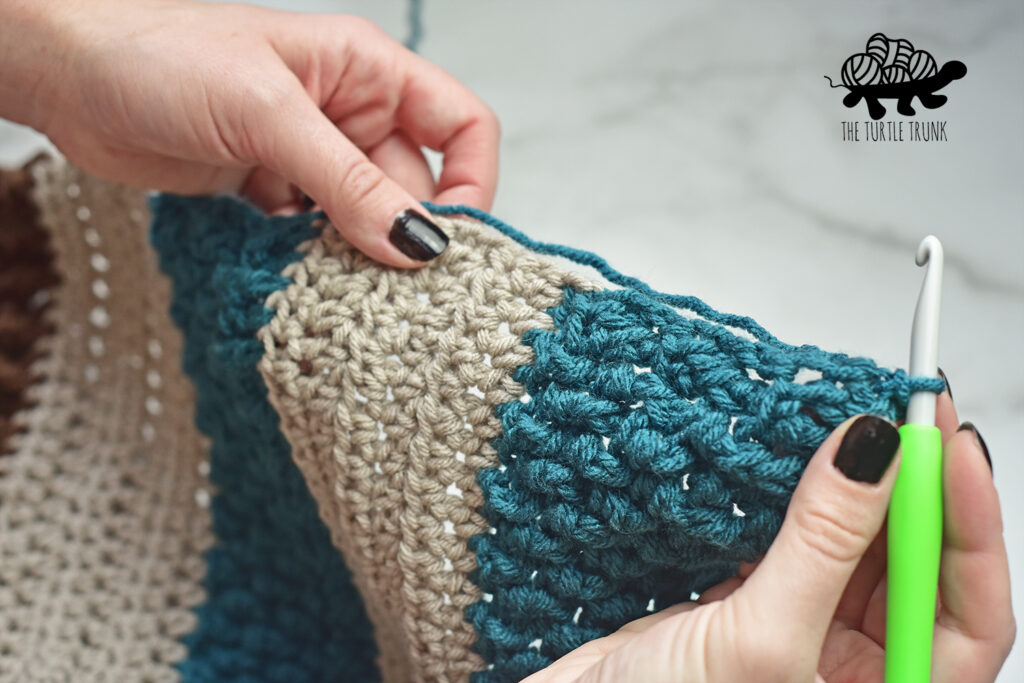
The right side of the fringe will be flat and the wrong side, will have a ridge from the slip stitches we work for the fringe. It is up to you to decide which side you’d like to be the “front and back”, just be sure to have your blanket facing the same way when working on both the left and right side for the fringe so that they match.
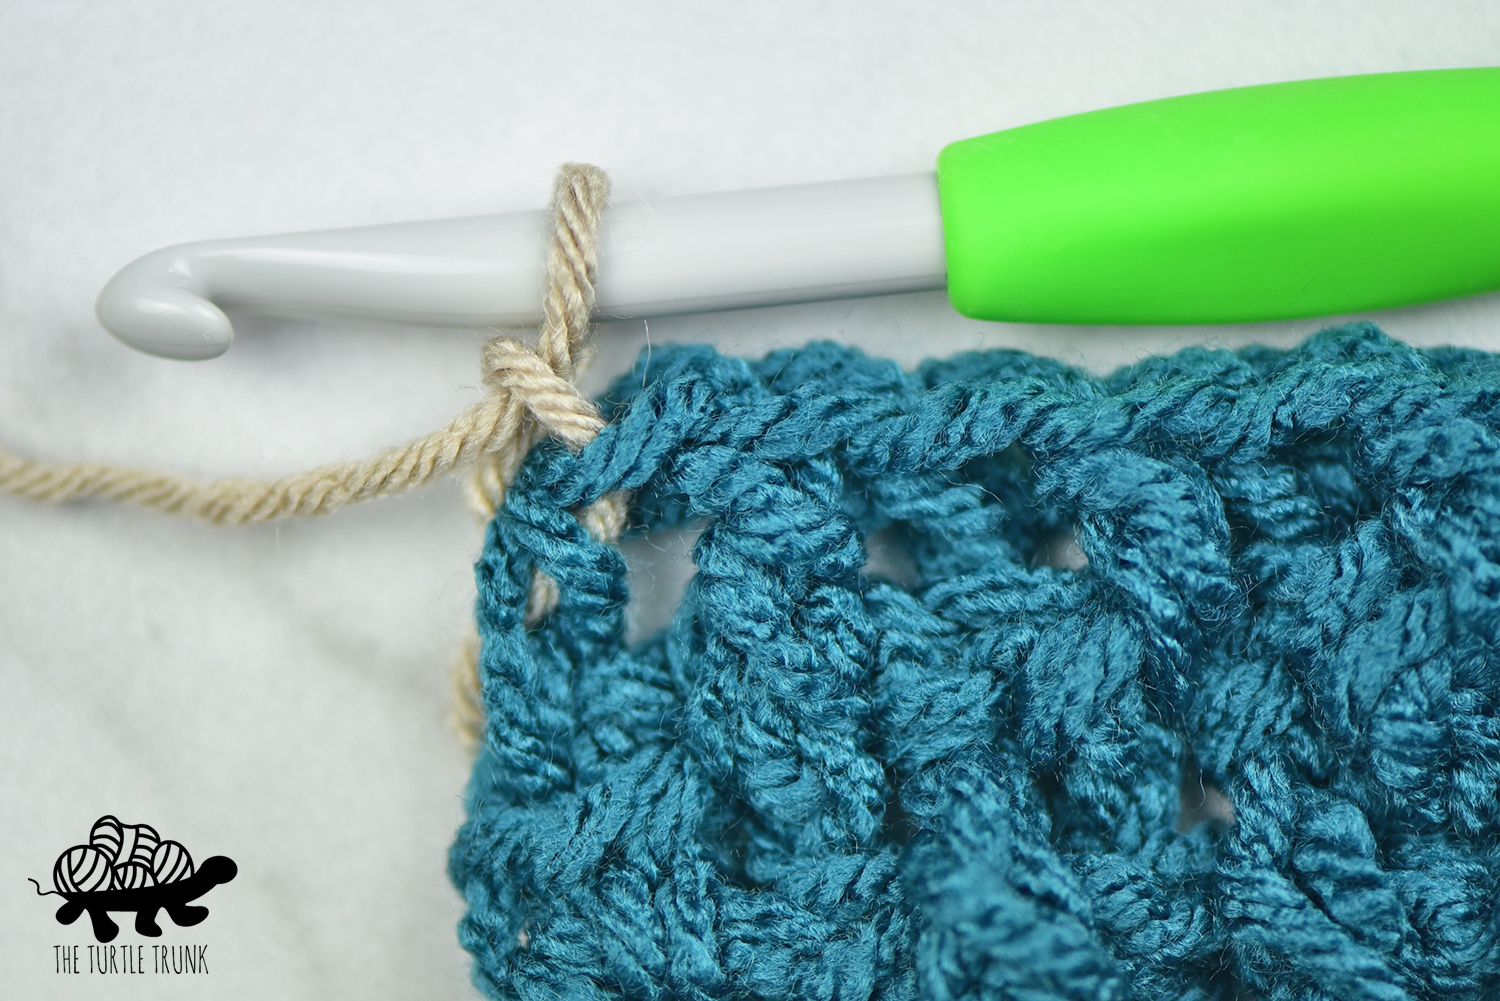
Starting at the corner and working across the side: attach yarn with a slip stitch.
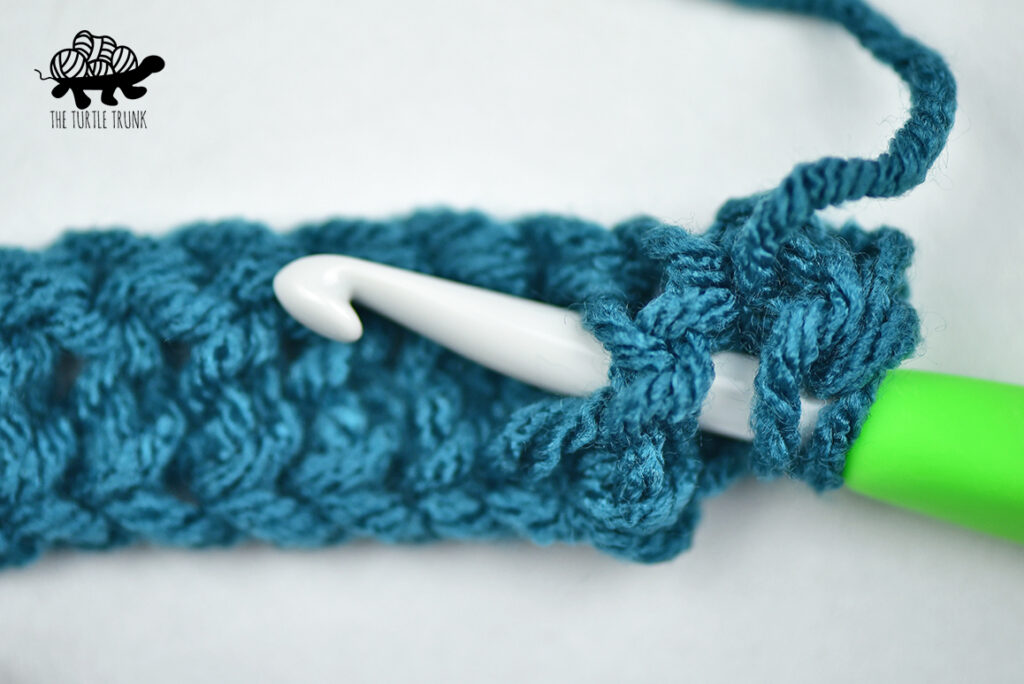
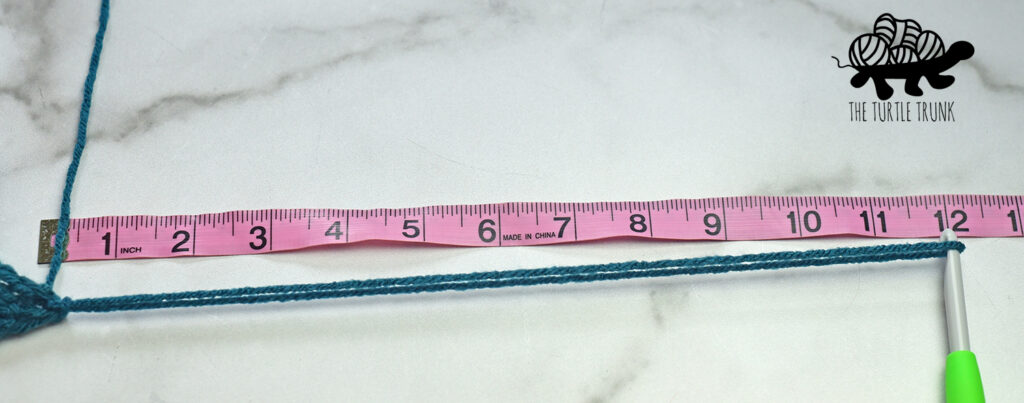
Pull your yarn with your hook to create a long loop. I pulled mine to be 12” which created a 4” long piece of fringe. Feel free to make yours longer or shorter.
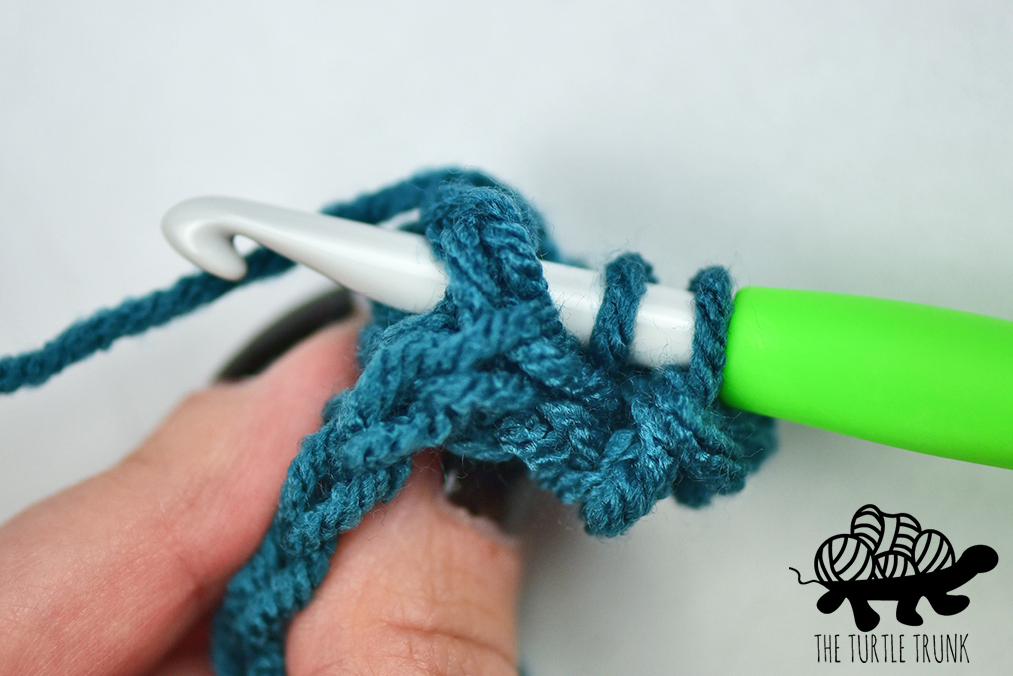
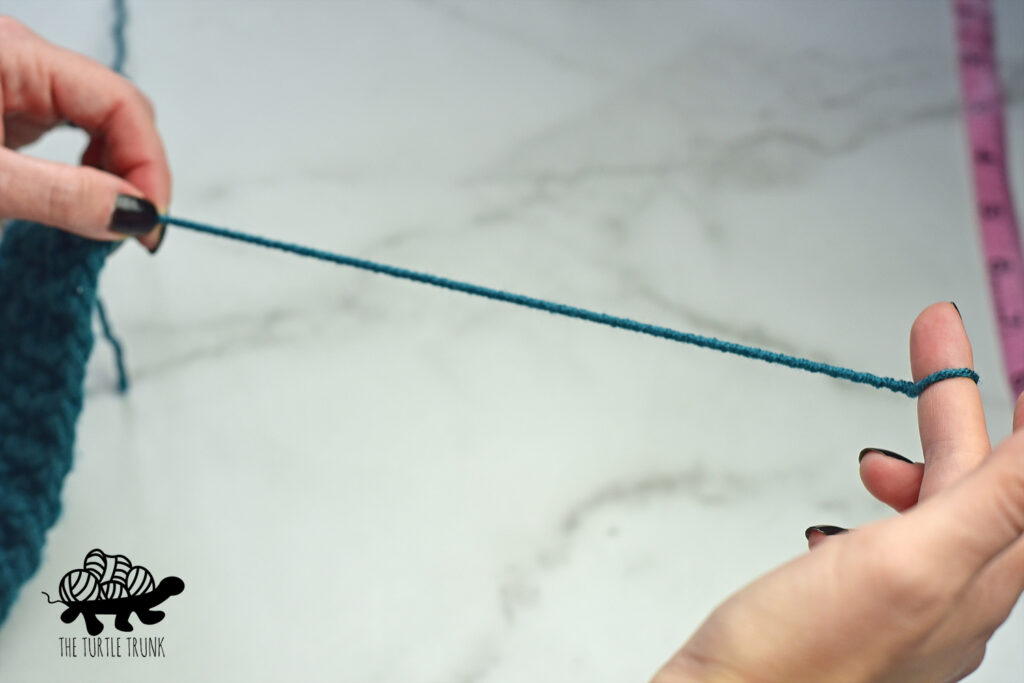
Remove your hook and replace it with your finger. Keeping the yarn snug, twist your yarn loop 40x clockwise (if you’re making yours longer or shorter you will need to adjust this number). You know you’ve twisted it enough, when you move your fingers closer together, the yarn twists on itself.
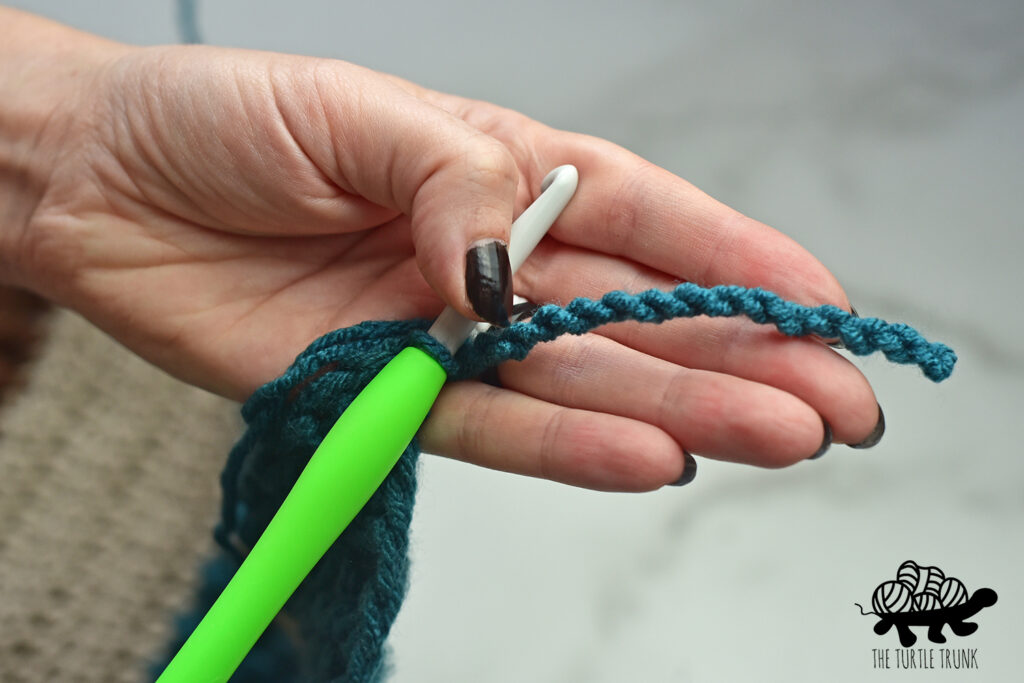
Replace your finger with your hook again, and slip stitch into the same spot you attached your yarn to. The fringe will now twist on itself, to clean it up, twist it counterclockwise until a nice, clean twist is created.
Slip stitch in the next row and repeat from the beginning.
You can work as many pieces of fringe as you’d like across. I worked 7 per stripe. Feel free to add more or less to get your desired look. Keep consistent though with how many you work per stripe and the length of each piece.
And you’re all done! I hope you enjoyed this pattern for the Bonfire Blanket! I’d love to see your finished Turtle Trunk creation so be sure to tag me, @theturtletrunk on Instagram so I can see your photos!
You are free to sell the items you make with this pattern, and I’d love if you could please link back to this page. You do not have permission to republish or distribute this pattern in any way or claim it as your own. Do not use my photos in your sale listings or for any other purposes. Thank you.
This page includes affiliate links. If you make a purchase from these links, I may make a small commission at no cost to you! Thank you for your support!