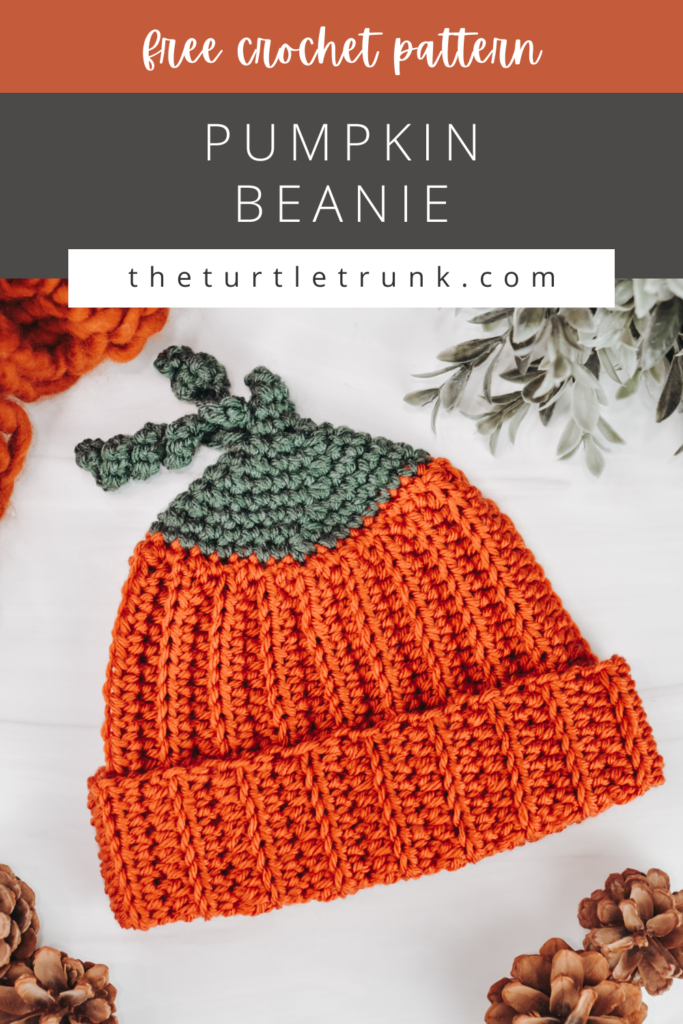
Pumpkin Beanie Crochet Pattern
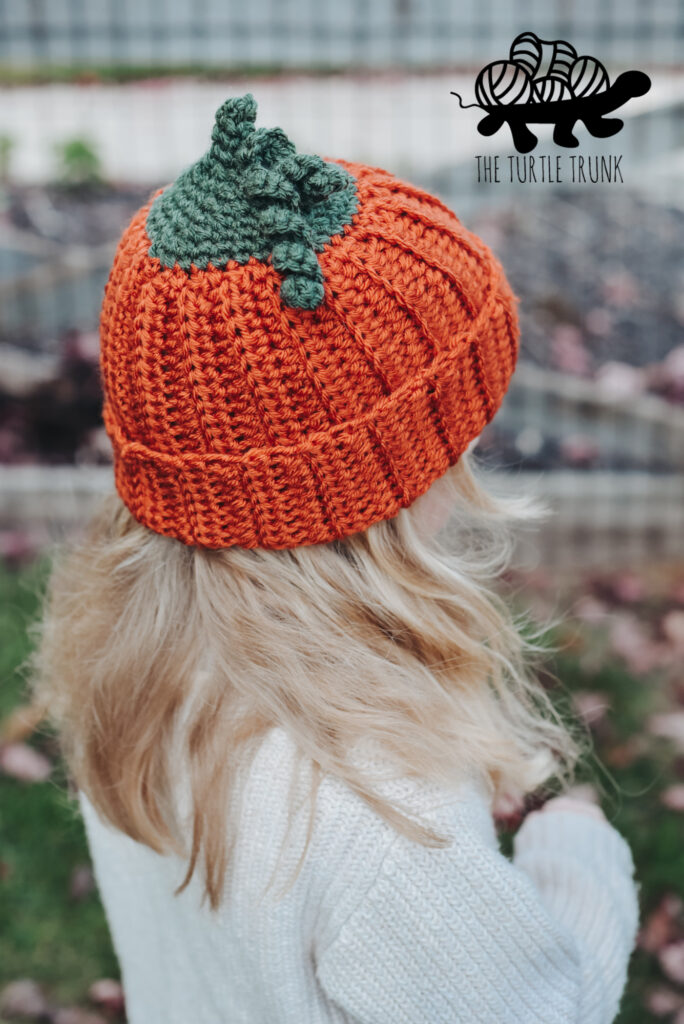
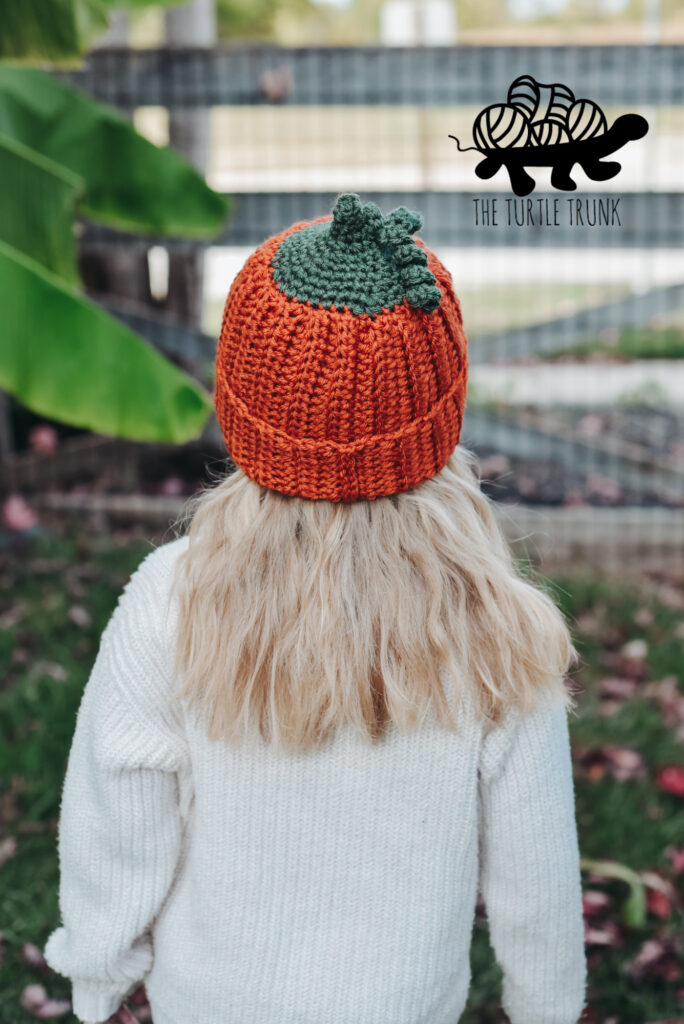
This easy, crochet Pumpkin Beanie includes 6 sizes ranging from newborn to adult! It’s perfect for Fall family photos, when you take your kids to the pumpkin patch, or for newborn photos for October babies!

I love pumpkin season! I am so excited to share this adorable, Pumpkin Beanie crochet pattern with you!
This pattern works up quickly and is easy to create! There’s multiple size options so you can make one for anyone and everyone!
This Pumpkin Beanie will be perfect for Fall family photos, trips to the pumpkin patch, or for newborn photos for October babies!
I hope you enjoy this pattern for the Pumpkin Beanie! Continue reading to hear my inspiration for this pattern and to learn more about the yarn I used, then scroll down for the written pattern!
YOU CAN FIND THE AD-FREE AND PRINTABLE PDF VERSION OF THIS PATTERN ON
ETSY AND RAVELRY!
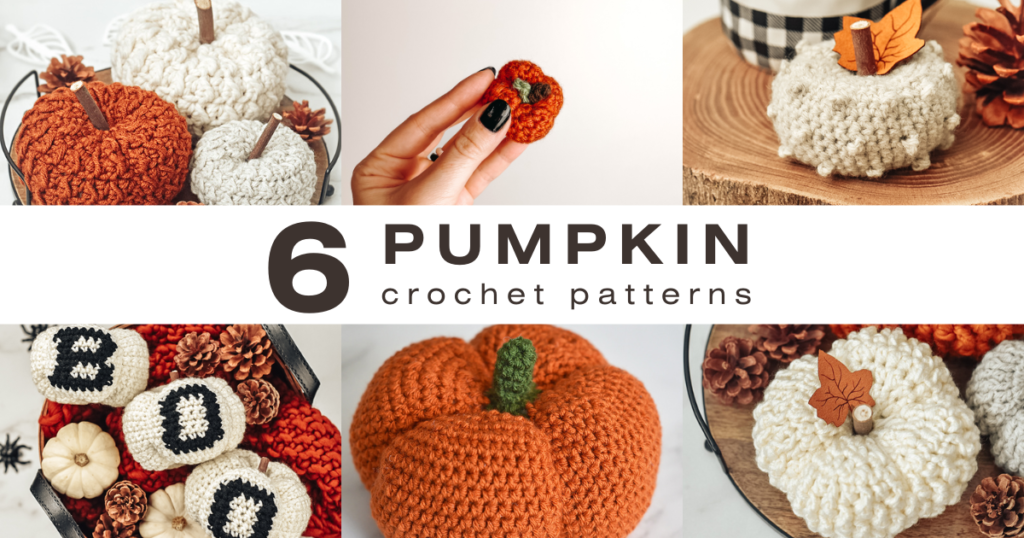
If you’re looking for some crochet pumpkin patterns,
then check out all 6 of my pumpkin crochet patterns HERE!
Not ready to make just yet? Pin this pattern for later!
Follow along with the video tutorial on YouTube!
Inspiration
Years ago I design my Easy Breezy Ribbed Beanie crochet pattern. It is a simple, ribbed beanie, with very basic construction. It’s an easy and beginner friendly crochet pattern and has been one of my most popular patterns.
Check out my whole Easy Breezy Collection HERE!
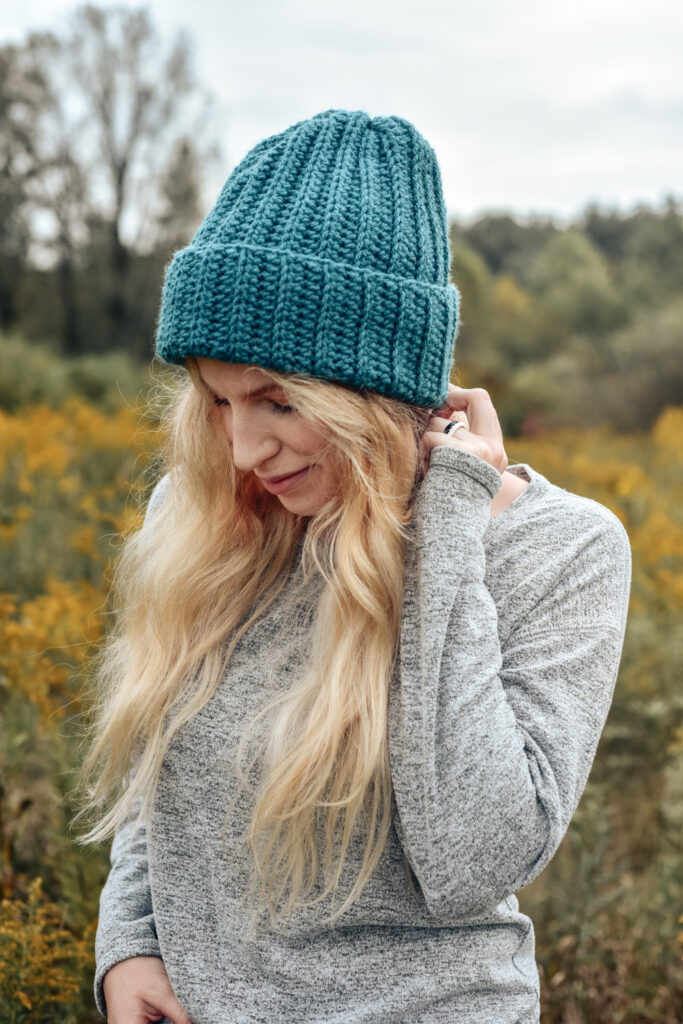
A few months ago, my baby nephew was visiting from out of town and I decided I wanted to crochet him a hat for the upcoming Fall season. I took the base of my Easy Breezy Ribbed Beanie pattern and modified it to add the topper, stem, and vines, to look like a pumpkin beanie!
It was adorable! I asked on Instagram in you would all like me write up a pattern, and you said yes!
So here it is! I hope you enjoy this pattern!
Yarn
For yarn, I used Lion Brand Yarn Basic Stitch. It is a super soft, 100% acrylic yarn. When I was searching yarn to use for this project I was looking for yarn that was soft and in the perfect pumpkin colors. Lion Brand Yarn Basic Stitch had both of those features!
For the main body of the beanie, I used the color Pumpkin. It’s a deep, orange color that’s not too vibrant.
For the topper, stem, and vines, I used the color Pine Heather. Pine Heather is a dark, forest green color.
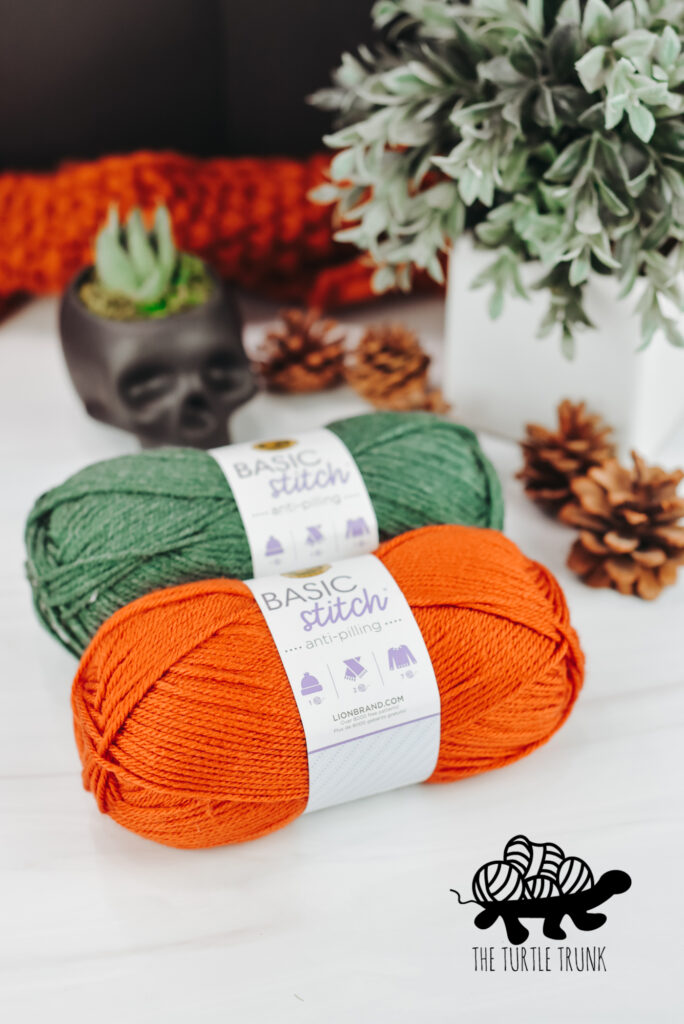
Some other yarn options I think would work great are Vanna’s Choice in Terracotta and Dusty Green, Red Heart Super Saver in Carrot and Medium Thyme, Caron Simply Soft in Pumpkin and Dark Sage, and Yarn Bee Soft & Sleek Pumpkin in Spice and Kale.
Sizing
The Pumpkin Beanie crochet pattern includes 6 sizes: Baby Small (0-3 months), Baby Medium (3-6 months), Baby Large (6-12 months), Toddler (1-3 years), Child (3-10 years), and Adult.
Be sure to review the size chart down below to find the perfect size for you. It’s always best to measure the head of the person you’re making the beanie for, as they may have a smaller or larger head than the average for that age. If you are between sizes, go up a size.
To ensure proper sizing, please check your gauge! When my testers tested this pattern, they used a range of hooks between 5mm-6mm to reach proper gauge. Make a gauge swatch, following the gauge instructions below in the notes, and adjust hook size if needed.
Size Chart
| Head Size (circumference x height) | Hat Circumference | Hat Height (includes 1-2” folded brim) | Yardage |
| Baby Small 0-3 Months 12-14” x 4.5-6” | 12” | 5.5” | Orange – 60 yardsGreen – 15 yards |
| Baby Medium 3-6 Months 14-15” x 6-6.25” | 14” | 6” | Orange – 72 yards Green – 20 yards |
| Baby Large 6-12 Months 16-17” x 6.25-6.5” | 16” | 6.5” | Orange – 85 yards Green – 25 yards |
| Toddler 1-3 years 17-18” x 7.25-7.5” | 16” | 7.5” | Orange – 93 yards Green – 25 yards |
| Child 3-10 years 19-20” x 7.5-8” | 18” | 8” | Orange – 112 yards Green – 30 yards |
| Adult 20-23” x 8-9.5” | 18” | 8.5” | Orange – 120 yards Green – 30 yards |
The hat circumference is made to be smaller than the head circumference since the hat will stretch 1-2” (for the smaller sizes) and 2-4” (for the larger sizes). If between sizes, go up a size.
Difficulty
Easy
Gauge
15 STs x 8 Rows = 4 x 4 in HDC BLO
Adjust hook size up or down to meet gauge
Notes
- The CH 1 at the beginning of each row/round does NOT count as a stitch.
- The topper is worked in the round. At the end of each round, join with a slip stitch to the first ST of the round and CH 1. Work the 1st ST of the next round into the same stitch you’re joined to.
- Pattern is in order by size, starting with the smallest size first. Check out the pdf version of this pattern HERE for color coded sizes.
- The row/round numbers will be in order of size from smallest to largest. When there is only one number, all sizes are the same.
- The number in parentheses at the end of each row/round represents the total number of stitches to be worked in that row/round. Numbers will be in order of size from smallest to largest.
- Stitches between *asterisk* are to be repeated until the end of that row/round.
- You can adjust the hat height by working any number of stitches across for the main body. To adjust the circumference of the hat, you must work a multiple of 4 rows.
Supplies
- Medium (4) Weight Yarn (I used Lion Brand Yarn Basic Stitch)
- 5.50mm (I) Crochet Hook
- Yarn Needle
- Scissors
Abbreviations (us terms)
ST(s) – Stitch(es)
SL ST – Slip Stitch
CH – Chain
SC – Single Crochet
SC2TOG – Single Crochet 2 Together
HDC – Half Double Crochet
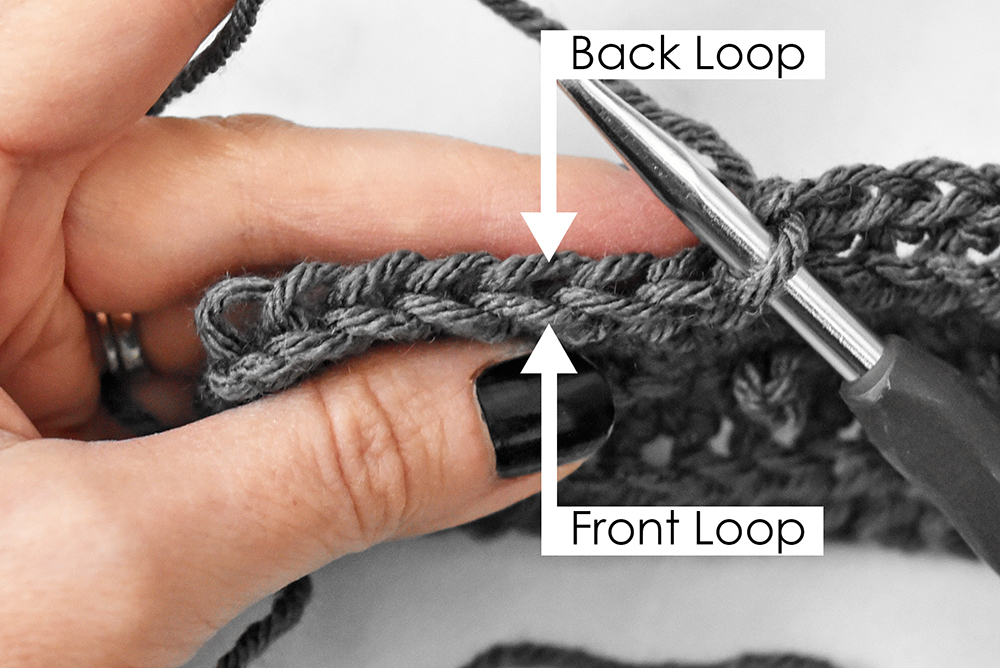
HDC BLO – Half Double Crochet in the Back Loop Only
Special Stitches
Please reference the video tutorial if extra assistance is needed.
HDC BLO – Half Double Crochet in the Back Loop Only
A finished stitch has two loops when looking at it from above. The loop closest to you is the Front Loop and the one furthest away from you is the Back Loop. To work a HDC BLO, work a HDC as normal but work it in the back loop only.
Changing Colors
On the last stitch of round 1 for the topper, change color from orange to green. Start the last SC as normal, insert your hook into last stitch and pull up a loop, then drop the orange yarn and finish the final pull through with green yarn. Join to the 1st SC of round 1 with a SL ST and continue using the green yarn for the remainder of the pattern.
Pumpkin Beanie Pattern
Main Body
Starting with orange yarn
CH (23, 25, 27, 29, 31, 33)
Row 1: HDC in the 2nd CH from the hook. HDC in each CH across. CH 1 & turn. (22, 24, 26, 28, 30, 32)
Rows 2- (24, 28, 32, 32, 36, 36): HDC BLO in each ST across. CH 1 & turn. (22, 24, 26, 28, 30, 32)
Bring both short sides of the beanie together. SL ST the ends together, working 1 SL ST into the foundation chain from the beginning and the corresponding ST from the last row.
CH 1 and flip beanie inside out so the seam is on the inside. Keep orange yarn attached and move onto the Topper.
Topper
Continuing with orange yarn
(All Sizes)
Round 1: SC in each row around the top of the beanie, on the last ST change to green yarn. Join & CH 1. (24, 28, 32, 32, 36, 36)
(Child & Adult Sizes Only)
Round (2, 2): *SC x7, SC2TOG* repeat around. Join & CH 1. (32)
(Baby Large, Toddler, Child, & Adult Sizes Only)
Round (2, 2, 3, 3): *SC x 6, SC2TOG* repeat around.
Join & CH 1. (28)
(Baby Medium, Baby Large, Toddler, Child, & Adult Sizes Only)
Round (2, 3, 3, 4, 4): *SC x 5, SC2TOG* repeat around.
Join & CH 1. (24)
(All Sizes – Baby Small start here)
Round (2, 3, 4, 4, 5, 5): *SC x 4, SC2TOG* repeat around.
Join & CH 1. (20)
Round (3, 4, 5, 5, 6, 6): *SC x 3, SC2TOG* repeat around.
Join & CH 1. (16)
Round (4, 5, 6, 6, 7, 7): *SC x 2, SC2TOG* repeat around.
Join & CH 1. (12)
Round (5, 6, 7, 7, 8, 8): SC2TOG around. Join & CH 1. (6)
Rounds (6, 7, 8, 8, 9, 9) – (8, 9, 10, 10, 11, 11): SC in each ST around. Join & CH 1. (6)
Tie off yarn, leaving a 6” long tail. Weave tail end through the last 6 STs, pull tight to close the hole on the top. Secure with a few knots and weave in end on the inside of the hat. Move onto the vines.
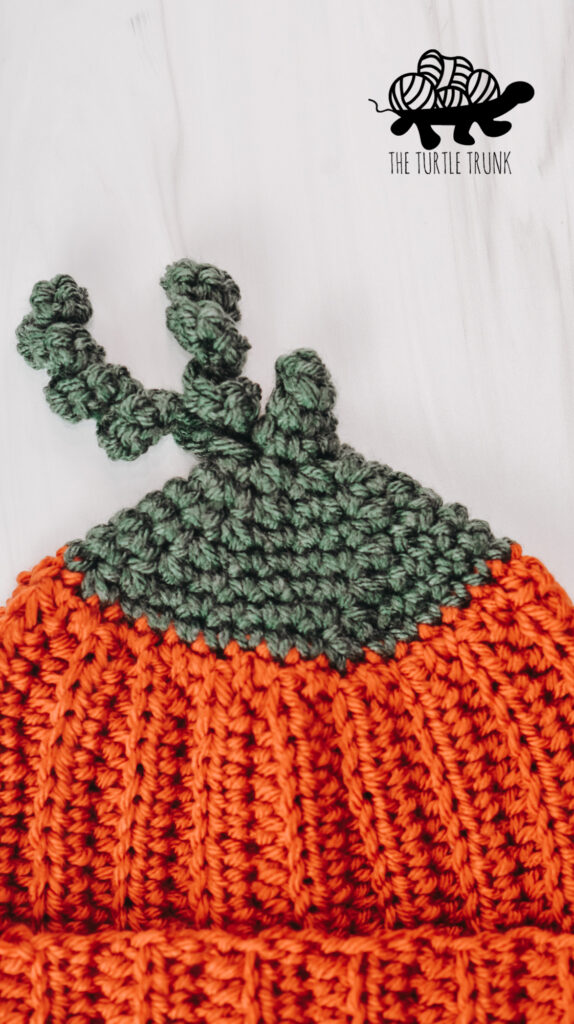
Vines
Vines can be made any length by chaining any number. The instructions below make vines that are approximately 2” & 3”.
Attach green yarn to the base of the stem (round 5, 6, 7, 7, 8, 8).
Vine 1: CH 11
2 SC in the 2nd CH from hook. 2 SC in each CH across. (20) Join to the base of the vine. Keep yarn attached and move onto the 2ndvine.
Vine 2: CH 16
2 SC in the 2nd CH from hook. 2 SC in each CH across. (30) Join to the base of the vine.
Tie off yarn, leaving a 6” long tail. Weave tail in on the inside of the beanie.
And you’re all done!
I hope you enjoyed the Pumpkin Beanie crochet pattern! Be sure to tag me, @theturtletrunk in your photos on Instagram so I can see your finished creations!
You are free to sell the items you make with this pattern, but please credit The Turtle Trunk as the designer. You do not have permission to republish or distribute this pattern in any way or claim it as your own. Do not use my photos in your sale listings or for any other purposes. Thank you.
This page includes affiliate links. If you make a purchase from these links, I may make a small commission at no cost to you! Thank you for your support!