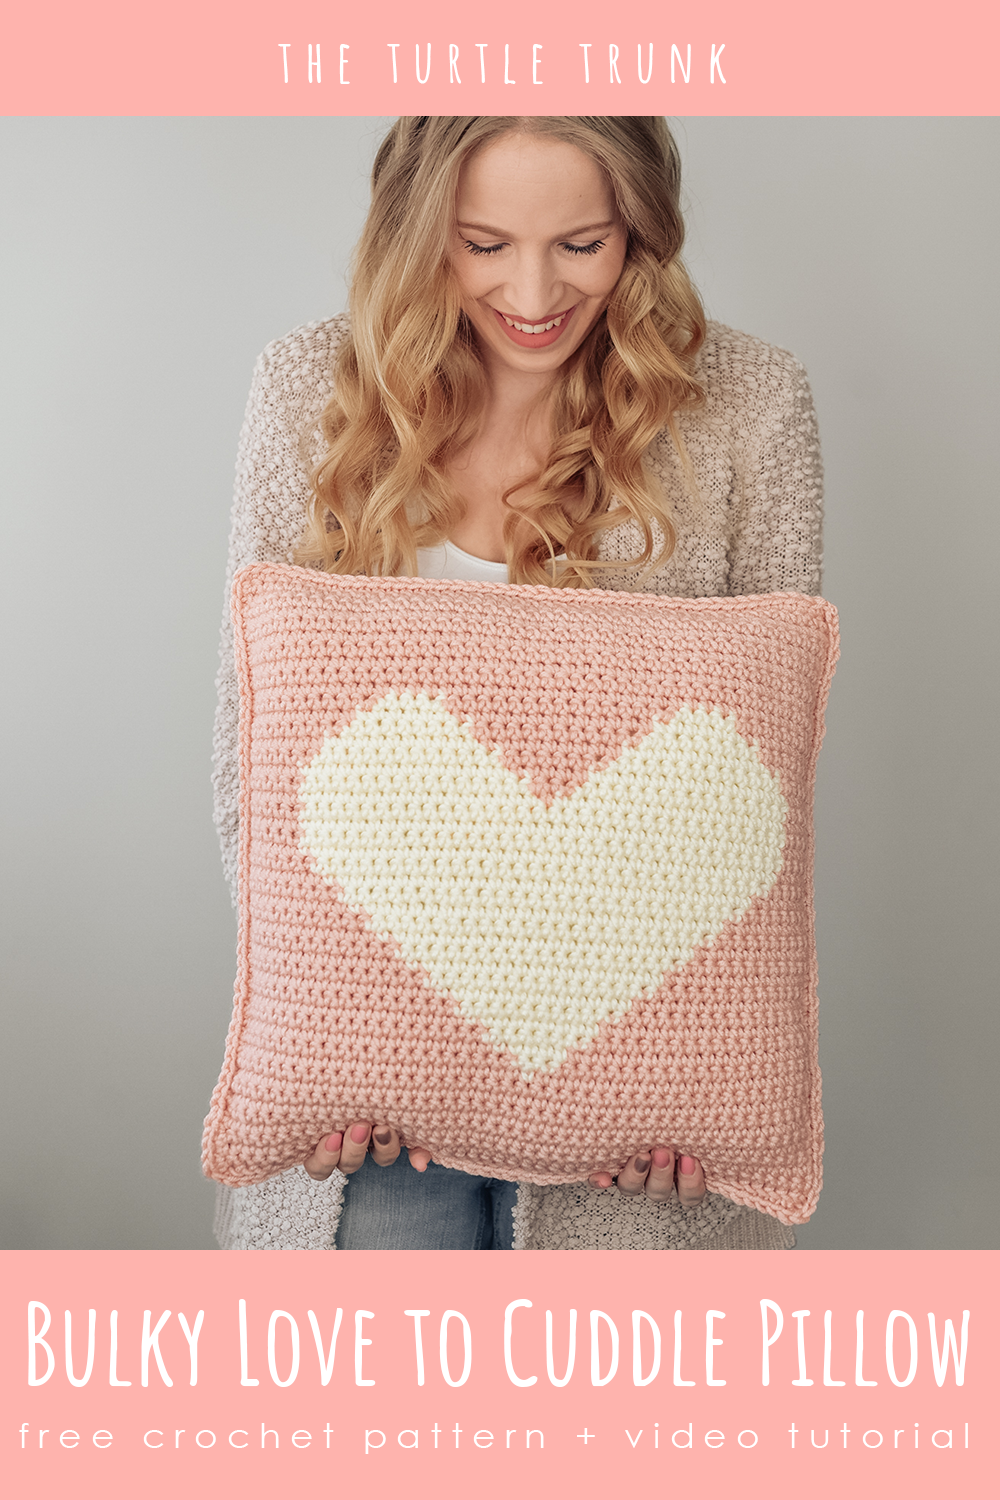
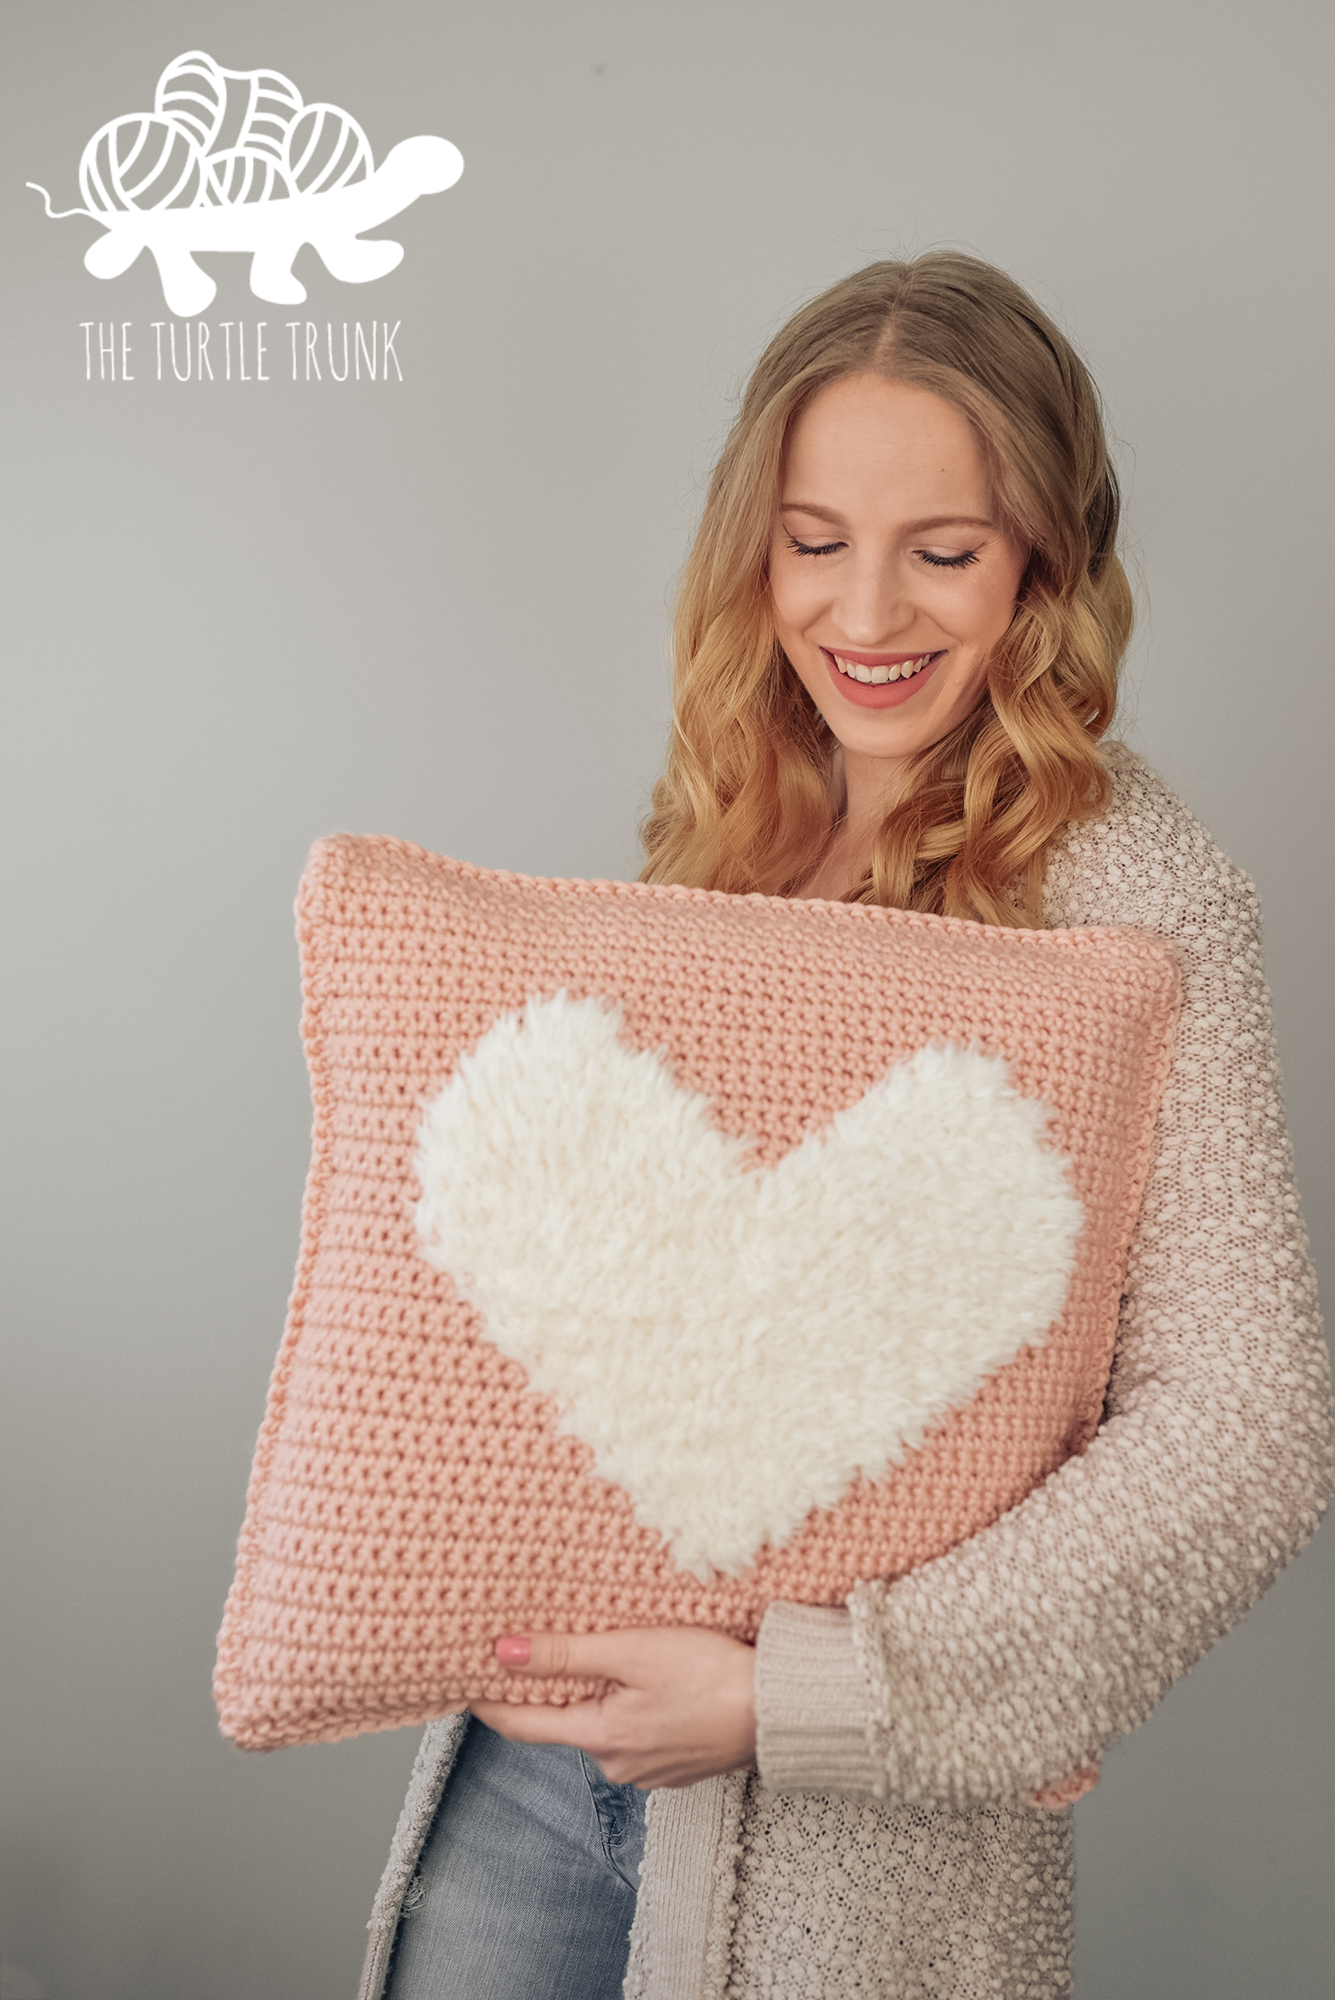
Bulky Love to Cuddle Pillow Crochet Pattern
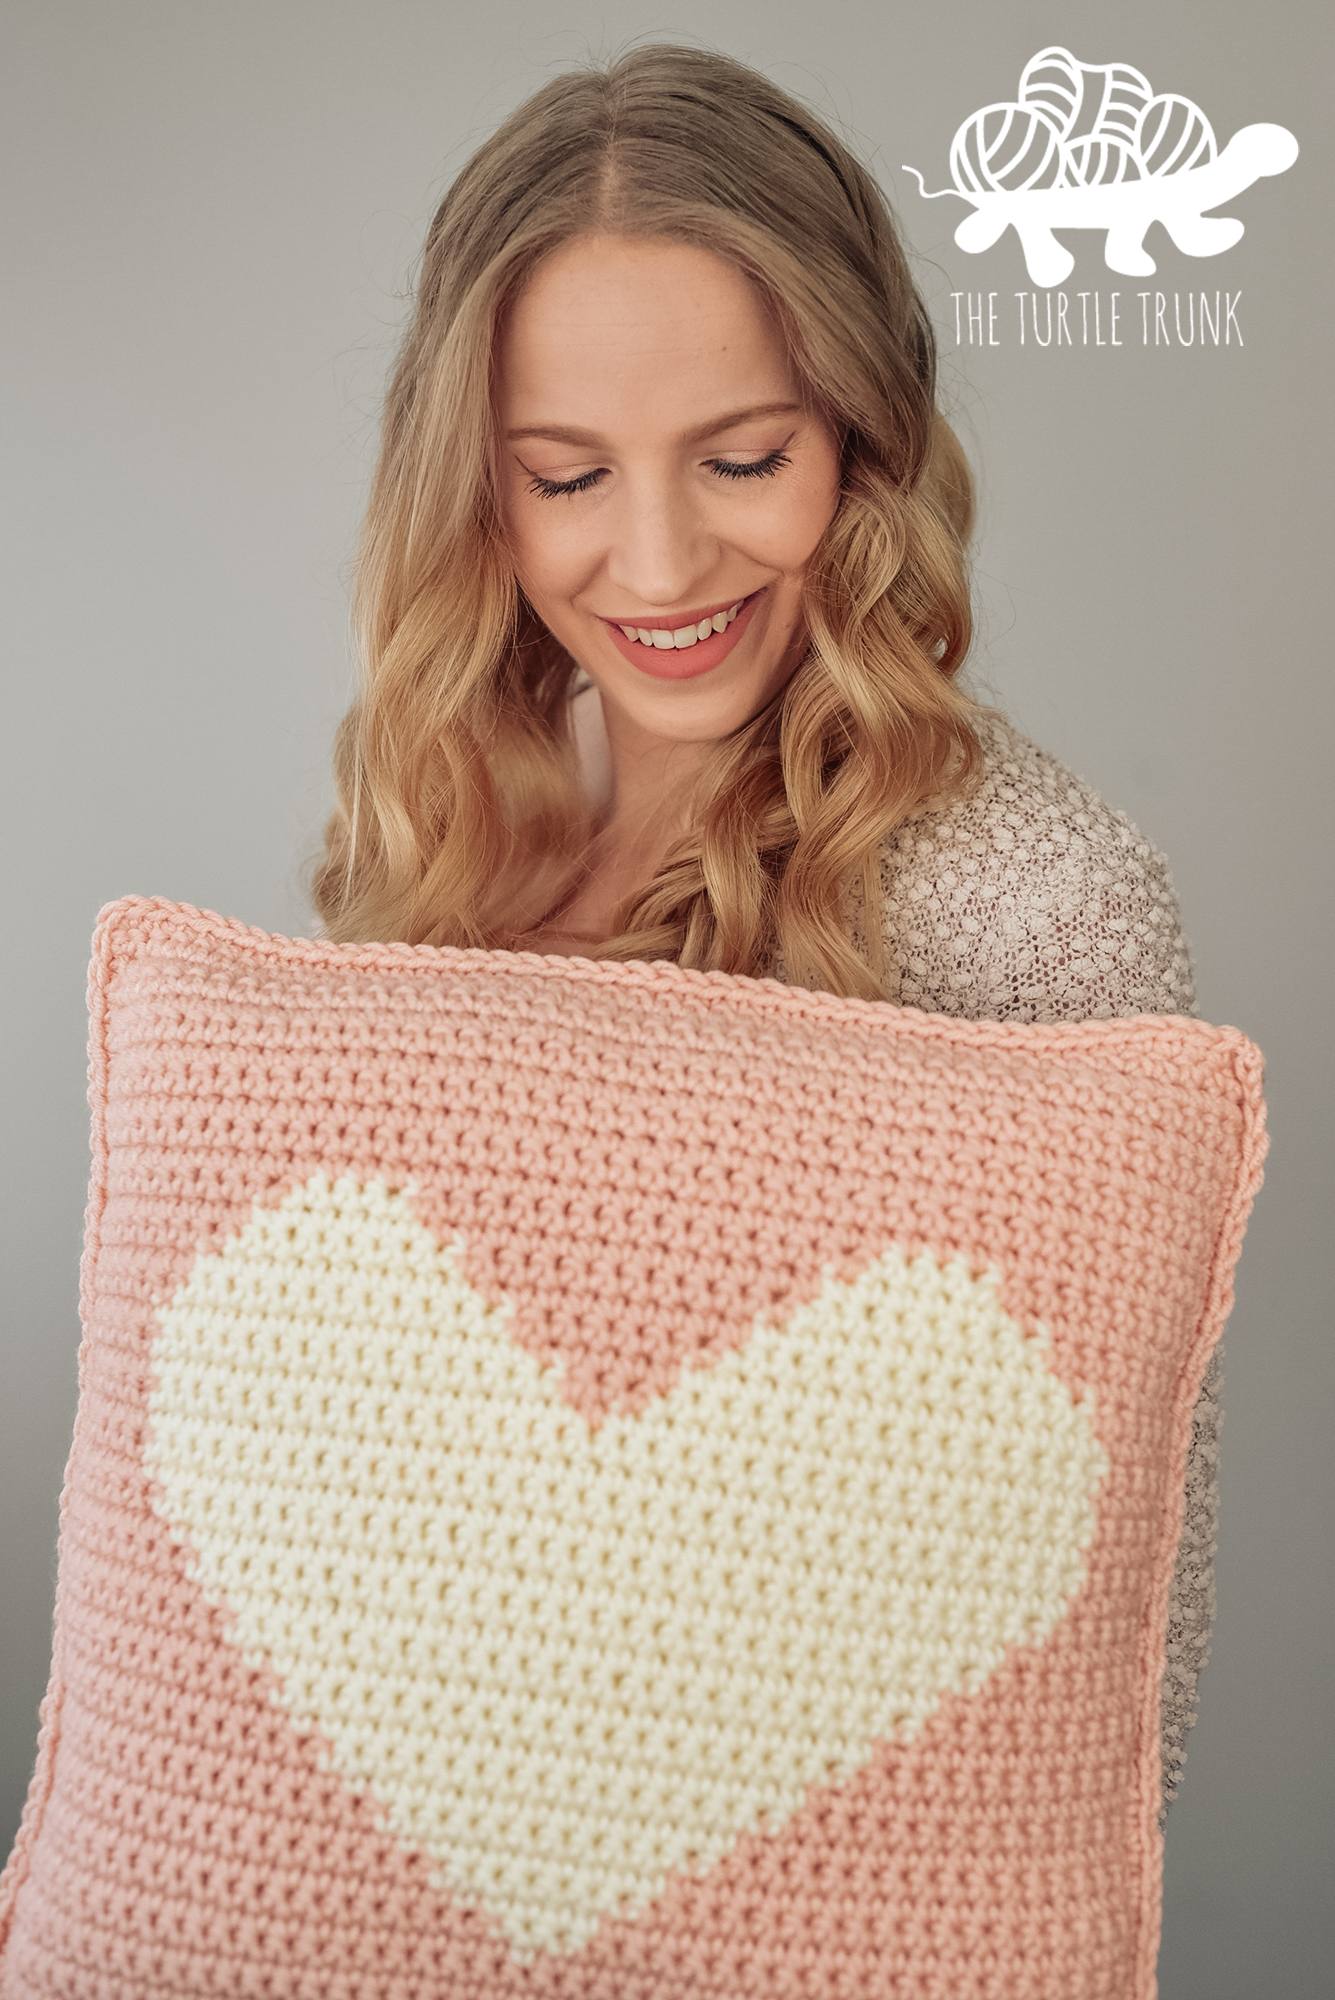
The Bulky Love to Cuddle Pillow is a square pillow with a faux fur heart in the center. This cuddly, soft pillow is so fun and cozy! Make for a gift or for the kids or for Valentine’s Day! The Bulky Love to Cuddle Pillow uses bulky weight yarn so a comfortable pillow!
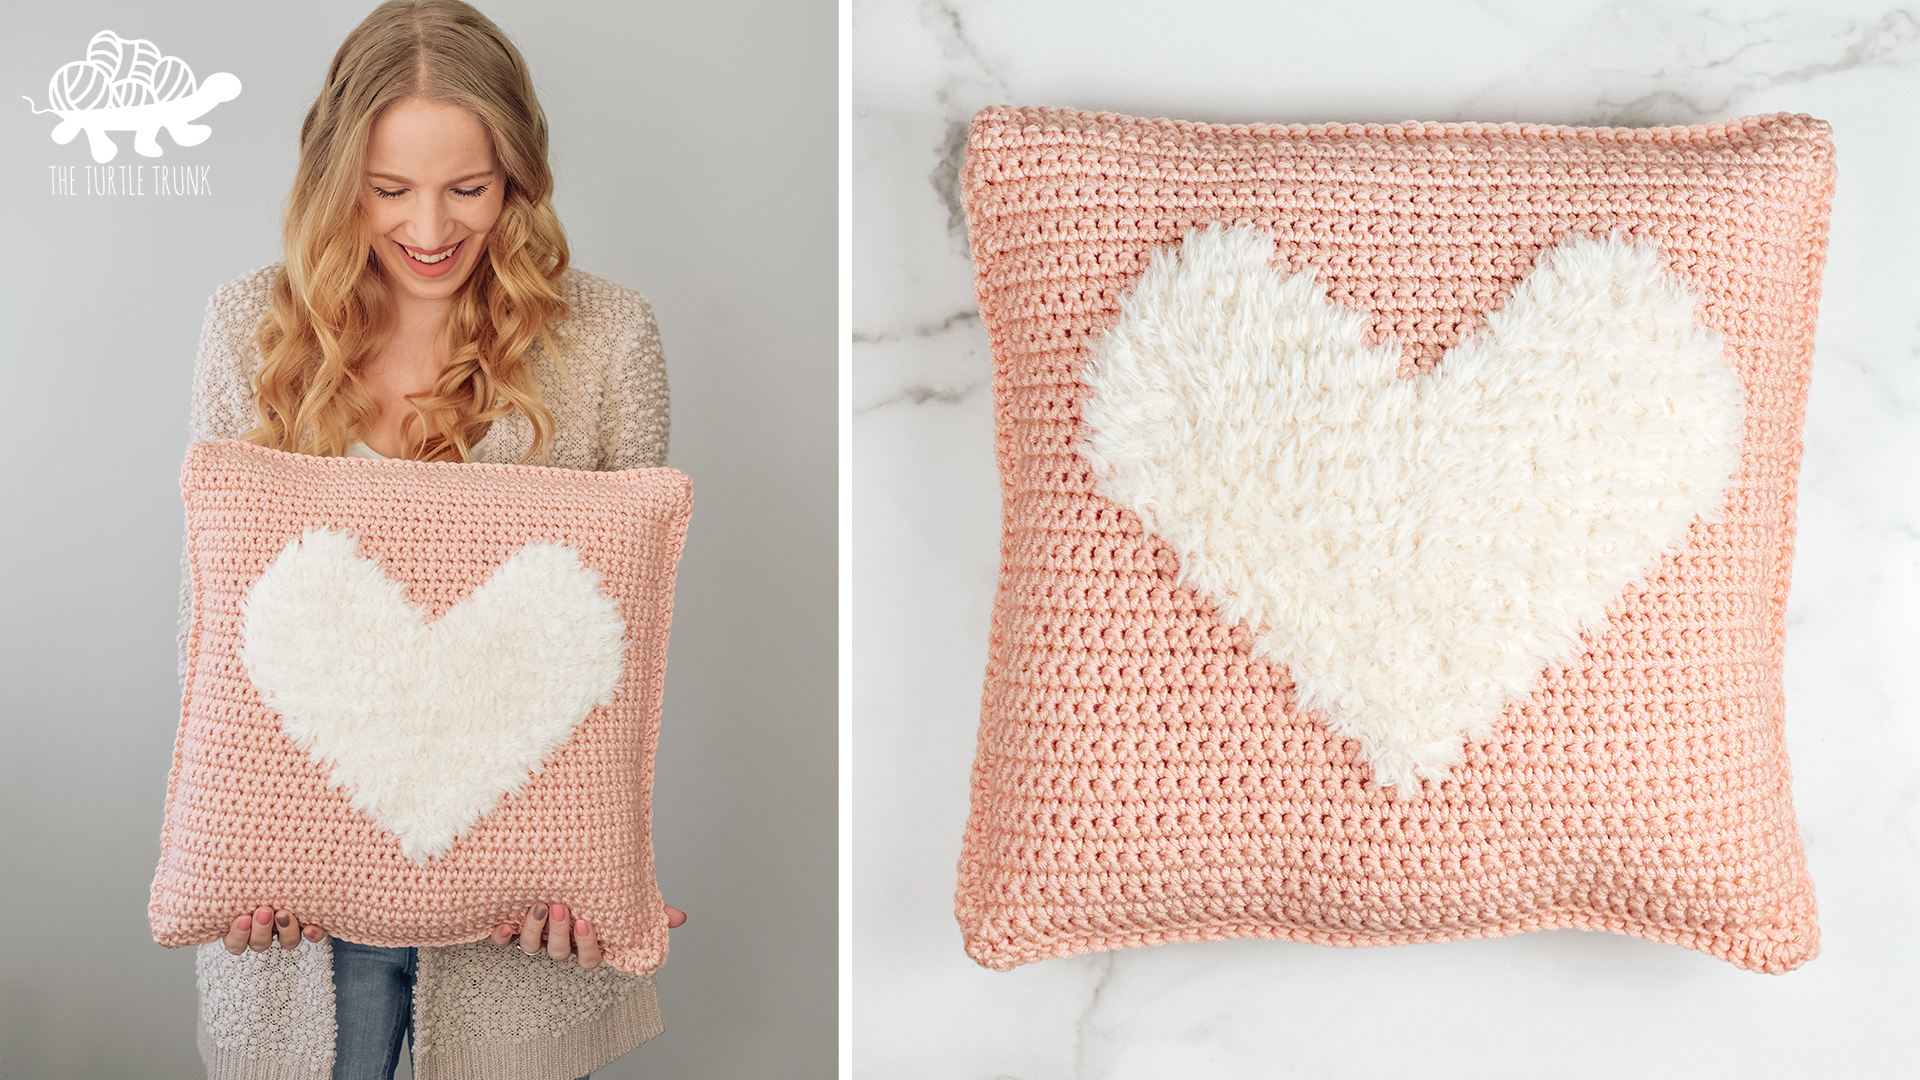
The Bulky Love to Cuddle Pillow, is a new, bulky weight version of my original Love to Cuddle Pillow! The original Love to Cuddle pillow uses medium (4) weight yarn for the background color, where as this bulky version uses bulky (5) weight yarn! This works up faster than the original version and is easier to make since the bulkier yarn is closer in thickness to the faux fur yarn used for the heart.
This cuddly pillow is the perfect project to make for a loved one or your own home for Valentine’s Day! I designed the original Love to Cuddle Pillow in 2019, as a Valentine’s Day gift for my step daughter! It has been well loved over the years and I’m happy to be making a new one for my toddler for this Valentine’s Day!
This design is a 16″ x 16″ pillow cover that features a large heart in the center with a contrasting background. We’ll use the intarsia crochet technique by picking up and dropping bobbins to create the heart.
Looking for some more heart themed crochet patterns? Check out my Mini Heart, Heart Coaster, and Heart Pot Holder patterns!
You can find the ad-free, easy to print pdf for this pattern in my Etsy shop and on Ravelry! The pdf includes a graph to follow along with as well as the written instructions!
Intarsia Crochet
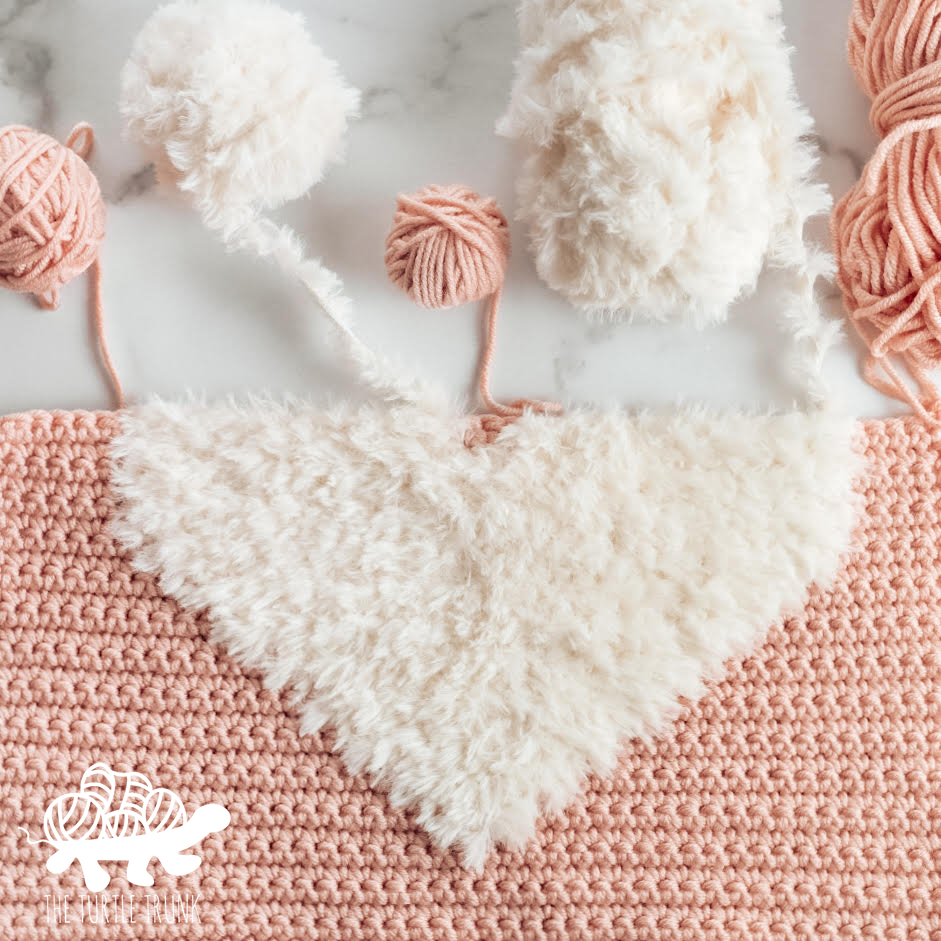
Intarsia crochet allows for multiple color changes without carrying your yarn behind your through your piece. If you’re unfamiliar with this technique, this is a great first project as there are minimal bobbins used and only 2 colors! Check out the video tutorial for this pattern to see when to add new bobbins and how to add them!
Follow along with the Bulky Love to Cuddle Pillow video tutorial on YouTube!
Yarn
Unfortunately the pink yarn I used (Lion Brand Yarn Color Made Easy) for this pillow is now discontinued, but have no fear, you can use any bulky (5) weight yarn for this design! Hue + Me yarn would be a great alternative, as well as Soft and Sleek Chunky or I Love This Yarn Chunky.
Other yarns you could use for the background are Yarn Bee Soft and Sleek Chunky, or sub for any other bulky (5) weight yarn!
I love using Faux Fur Yarn for the heart but you can use regular yarn too! If you’re wanting to use faux fur yarn, I love Lion Brand Yarn’s Go For Faux! I use it for all of my faux fur pillows (like the Snuggly Snowflake Pillow and the Cozy Holiday Pillow). It makes for such a soft and cuddly pillow! If you find it hard to find your stitches with this yarn, try using your fingers to find each stitch. I also find it helpful to count my stitches very carefully for each row to make sure no stitches were missed.
Not ready to make just yet?! PIN this pattern for later!
Difficulty
Advanced Beginner / Intermediate
Gauge
11 stitches by 12 rows in SC = 4”by 4” square
Adjust hook size up or down to meet gauge
Notes
- The final size of each panel is 16” x 16”
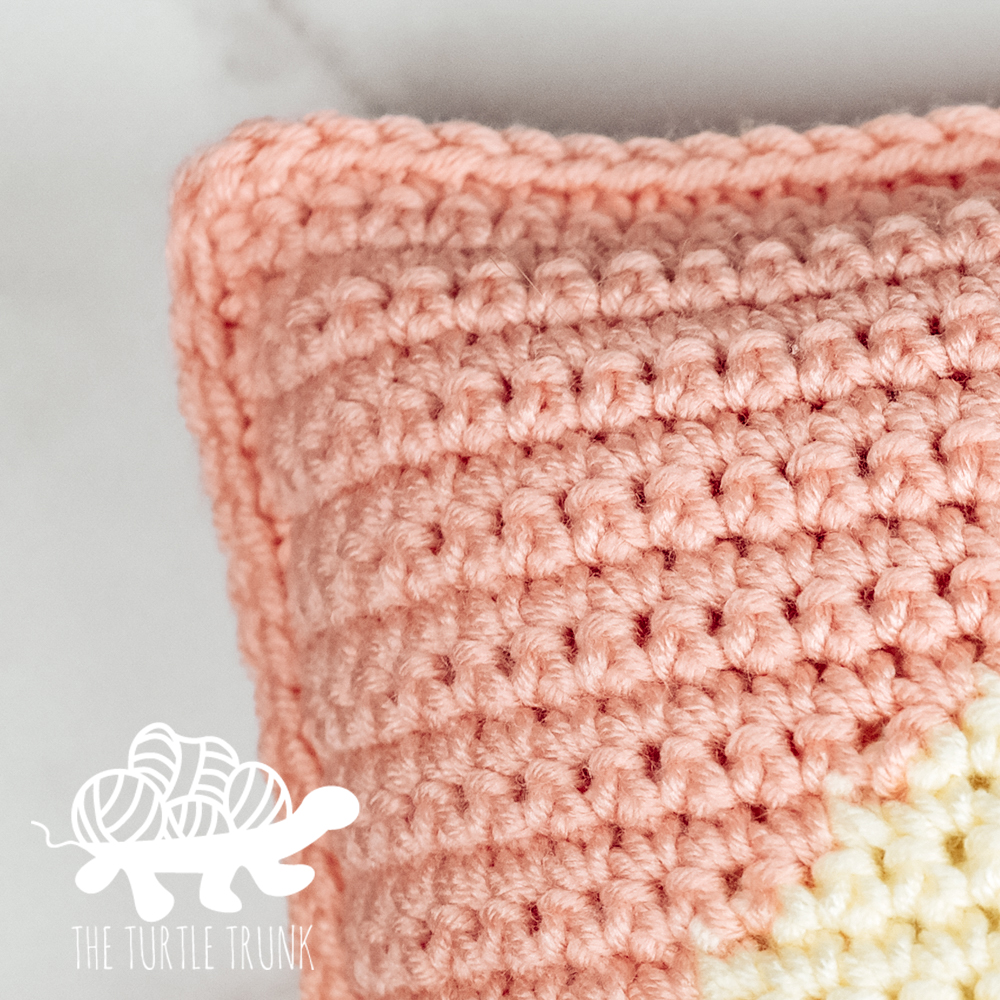
- Pillow consists of two panels. Only SC stitches are used throughout. We will use a FSC for row 1 and regular SC for each row after that.
- Each row will have 44 stitches across. At the end of each row you will CH 1 and turn. The CH 1 does not count as a stitch.
- This pattern uses the Intarsia Crochet technique. For this technique you will start a new ball (or bobbin) of yarn for each color change and drop and pick-up bobbins as needed. Here is the suggested yardage and placement for each bobbin:
Color A – Split into 4 bobbins
A1 – 96 yards – back panel
A2 – 68 yards – starts row 1 front panel
A3 – 30 yards – starts row 11
A4 – 8 yards – starts row 31
Color B – Split into 2 bobbins
B1 – 30 yards – starts row 11
B2 – 11 yards – starts row 31
- Each row will have an arrow beside it telling you which direction that row will be worked. When working on the RS you will see ‘<’. Make sure all ends are on the opposite side. When working on the WS you will see ‘>’. Make sure all ends are on this side.
- Changing Color: Start a SC as usual, before the final pull through you will drop your current color and pick up the new color. Finish the stitch by pulling through the 2 loops on your hook with the new color. The next SC you work will be the first of the new color. Be sure your tail ends are all on the WS of your project and continue on with the new color until the next color change.
Supplies
- 202 yards of Lion Brand Yarn Hue + Me in 1 color (A) and 71 yards of Go For Faux or Lion Brand Yarn Hue + Me in 1 color (B). Yardage is approximate. See Notes section for bobbin suggestions.
- 6.50 mm (K) Hook
- 16” x 16” Pillow Insert
- Yarn Needle
- Scissors
Abbreviations (US Terms)
ST – Stitch
FSC – Foundation Single Crochet (see video tutorial is assistance is needed with this stitch)
CH – Chain
SL ST – Slip Stitch
SC – Single Crochet
WS – Wrong Side
RS – Right Side

Bulky Love to Cuddle Pillow Pattern
Back Panel (make one)
< Row 1 [RS]: FSC A44
> Row 2 [WS]: SC A44
< Row 3 [RS]: SC A44
Repeat Rows 2 & 3 until the end of Row 48
Tie off yarn and weave in ends on the wrong side. Set aside and move onto the front panel.
Front Panel (make one)
< Row 1 [RS]: FSC A44
> Row 2 [WS]: SC A44
< Row 3 [RS]: SC A44
> Row 4 [WS]: SC A44
< Row 5 [RS]: SC A44
> Row 6 [WS]: SC A44
< Row 7 [RS]: SC A44
> Row 8 [WS]: SC A44
< Row 9 [RS]: SC A44
> Row 10 [WS]: SC A44
< Row 11 [RS]: SC A21, B1, A22
> Row 12 [WS]: SC A21, B3, A20
< Row 13 [RS]: SC A19, B5, A20
> Row 14 [WS]: SC A19, B7, A18
< Row 15 [RS]: SC A17, B9, A18
> Row 16 [WS]: SC A17, B11, A16
< Row 17 [RS]: SC A15, B13, A16
> Row 18 [WS]: SC A15, B15, A14
< Row 19 [RS]: SC A13, B17, A14
> Row 20 [WS]: SC A13, B19, A12
< Row 21 [RS]: SC A11, B21, A12
> Row 22 [WS]: SC A11, B23, A10
< Row 23 [RS]: SC A9, B25, A10
> Row 24 [WS]: SC A9, B27, A8
< Row 25 [RS]: SC A7, B29, A8
> Row 26 [WS]: SC A7, B31, A6
< Row 27 [RS]: SC A5, B33, A6
> Row 28 [WS]: SC A6, B33, A5
< Row 29 [RS]: SC A5, B33, A6
> Row 30 [WS]: SC A6, B33, A5
< Row 31 [RS]: SC A5, B16, A1, B16, A6
> Row 32 [WS]: SC A6, B15, A3, B15, A5
< Row 33 [RS]: SC A5, B14, A5, B14, A6
> Row 34 [WS]: SC A7, B12, A7, B12, A6
< Row 35 [RS]: SC A7, B10, A9, B10, A8
> Row 36 [WS]: SC A9, B8, A11, B8, A8
< Row 37 [RS]: SC A9, B6, A13, B6, A10
> Row 38 [WS]: SC A11, B4, A15, B4, A10
< Row 39 [RS]: SC A44
> Row 40 [WS]: SC A44
< Row 41 [RS]: SC A44
> Row 42 [WS]: SC A44
< Row 43 [RS]: SC A44
> Row 44 [WS]: SC A44
< Row 45 [RS]: SC A44
> Row 46 [WS]: SC A44
< Row 47 [RS]: SC A44
> Row 48 [WS]: SC A44
Do not tie off yarn. Move onto Closing & Finishing
Closing & Finishing
Place back panel down with the right side facing down and the wrong side facing up. Lay the front panel on top with the wrong side facing down and the right side facing up. Working in both panels, SC in each stitch across the top of the pillow, 2 SC in the last stitch, 1 SC in each row down the left side of the pillow, 2 SC in the corner, SC in each ST across the bottom of the pillow, 2 SC in the last ST, put the pillow insert in, SC in each row up the pillow, 2 SC in the corner, finish with a SL ST in the 1st SC of the boarder. Tie off yarn leaving a 4-6” long tail. Weave in end.
And you’re all done!
I hope you enjoyed the Bulky Love to Cuddle Pillow crochet pattern! I can’t wait to see your finished creations, so be sure to tag @theturtletrunk on Instagram!
You are free to sell the items you make with this pattern, and I’d love if you could please link back to this page. You do not have permission to republish or distribute this pattern in any way or claim it as your own. Do not use my photos in your sale listings or for any other purposes. Thank you.
This page includes affiliate links. If you make a purchase from these links, I may make a small commission at no cost to you! Thank you for your support!