
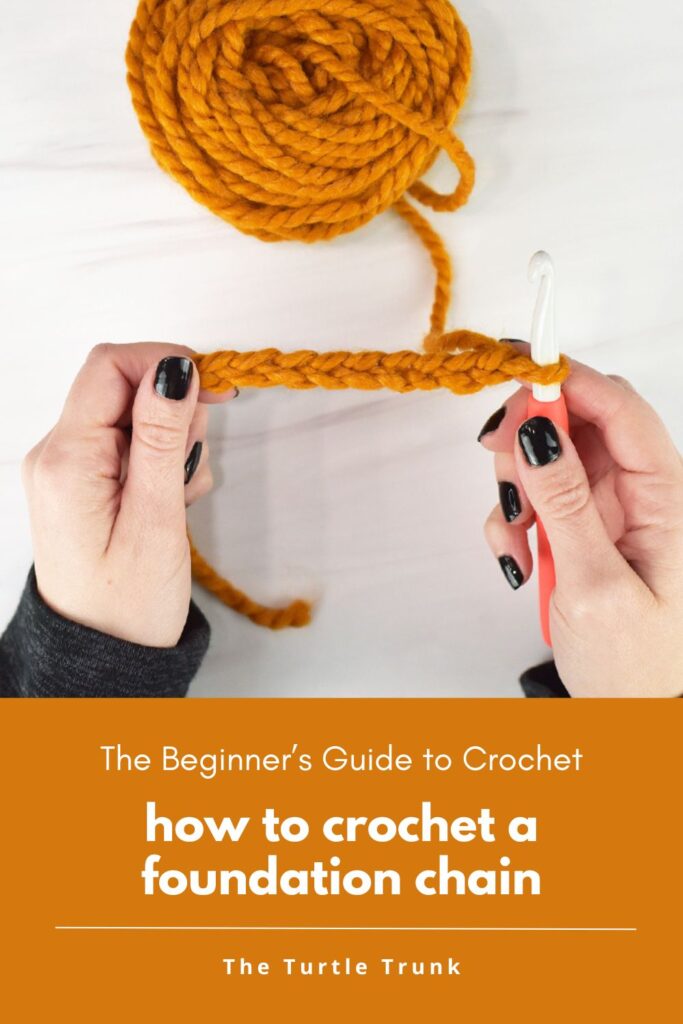
Lesson 3: How to Crochet a Foundation Chain – The Beginner’s Guide to Crochet
Want to learn how to crochet? The Beginner’s Guide to Crochet is an in-depth course for beginners to learn everything you need to know about crochet. In Lesson 3 I’ll teach you how to crochet a foundation chain. A foundation chain is the most common way to start a crochet project!
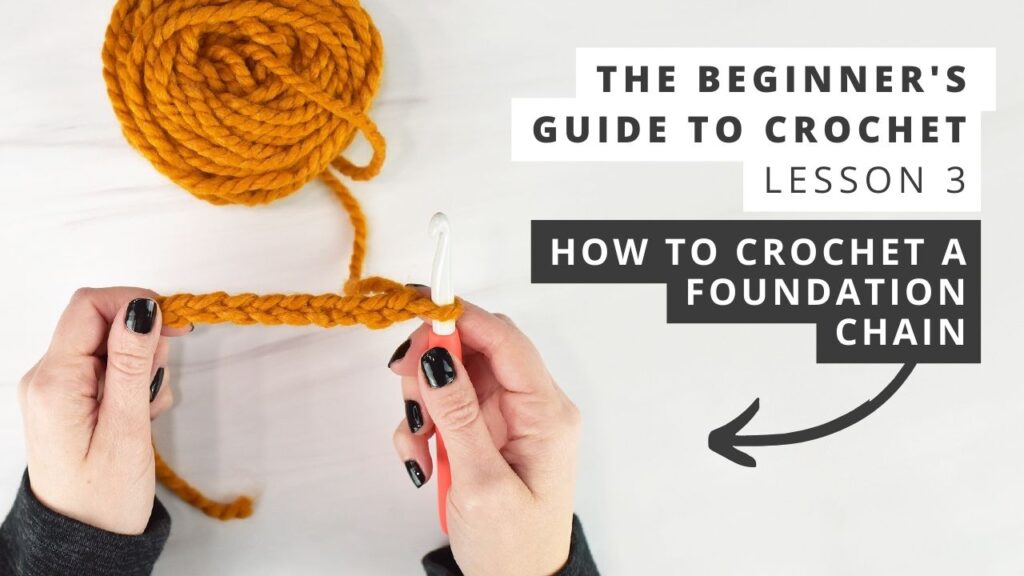
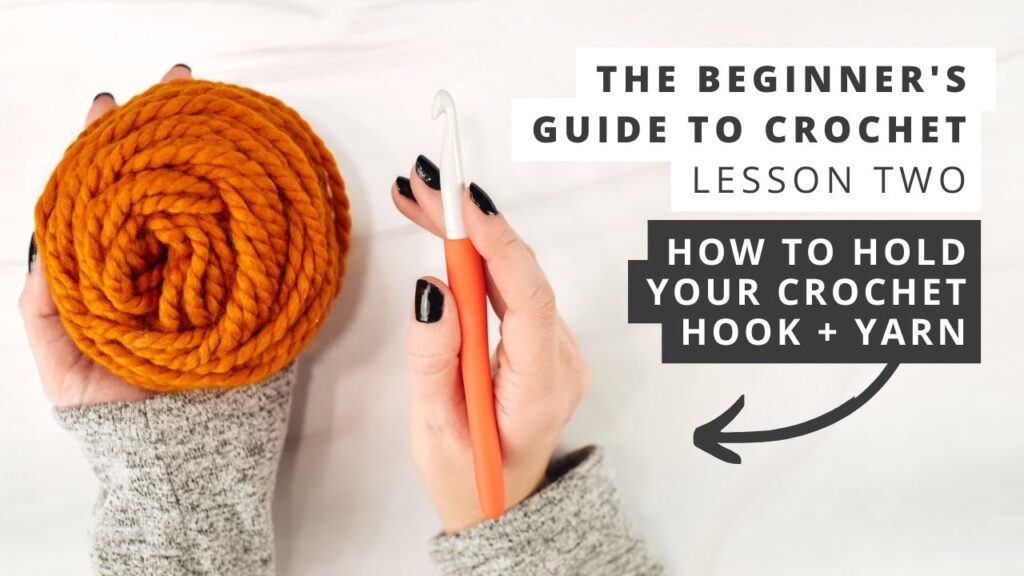
Welcome to Lesson 3 of The Beginner’s Guide to Crochet! In Lesson 3 I’ll teach you how to crochet a foundation chain.
A foundation chain is the most common way to start a crochet project! It’s a series of chain stitches that create the base or the foundation of your project.
With all my crochet stitch tutorials I want to provide you with an easy and free pattern that you can use to proactive the stitch we just learned. With this foundation chain tutorial, I’ll be sharing a super quick and easy crochet chain stitch bracelet pattern! You can find the free crochet pattern at the end of this post!
If you missed the other lessons of The Beginner’s Guide to Crochet, you can find them here:
If you’re a visual learner, check out the video tutorial for this lesson on my YouTube channel!
FOLLOW ALONG WITH THE VIDEO TUTORIAL ON YOUTUBE!
Not ready to make just yet or
want to save this post to reference later?
Pin it to Pinterest!
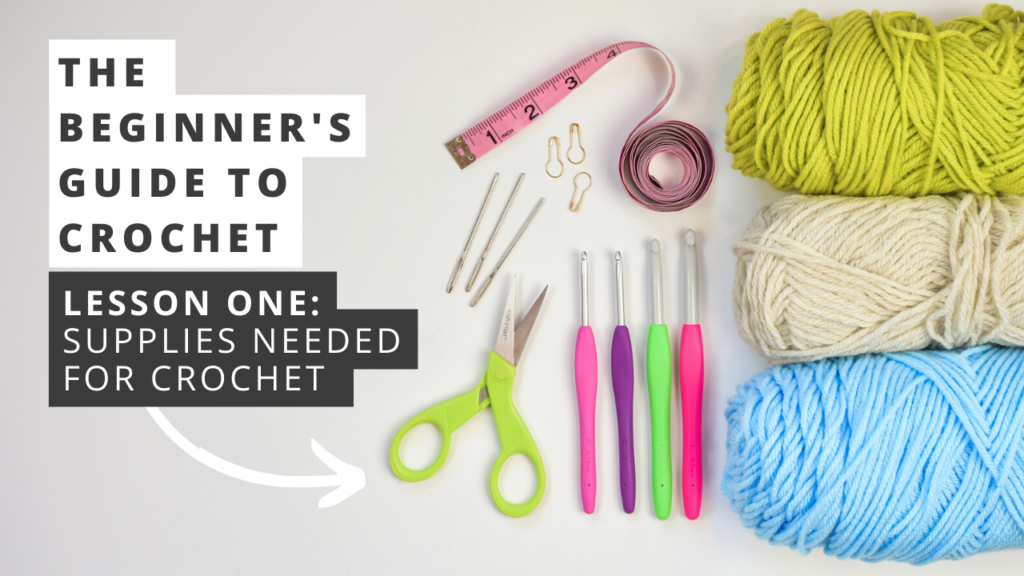
SUPPLIES NEEDED
When you’re first learning to crochet it’s helpful to use a larger crochet hook and thicker yarn. This makes it easier to hold and see your stitches.
Yarn
I recommend using Lion Brand Yarn’s Wool Ease Thick and Quick, which is a super bulky (6) weight yarn.
Crochet Hook
My favorite crochet hooks are the Clover Amour. The Clover Amour size M/N 9.00mm is the hook I use for the photos and video for this lesson.
What is a Foundation Chain
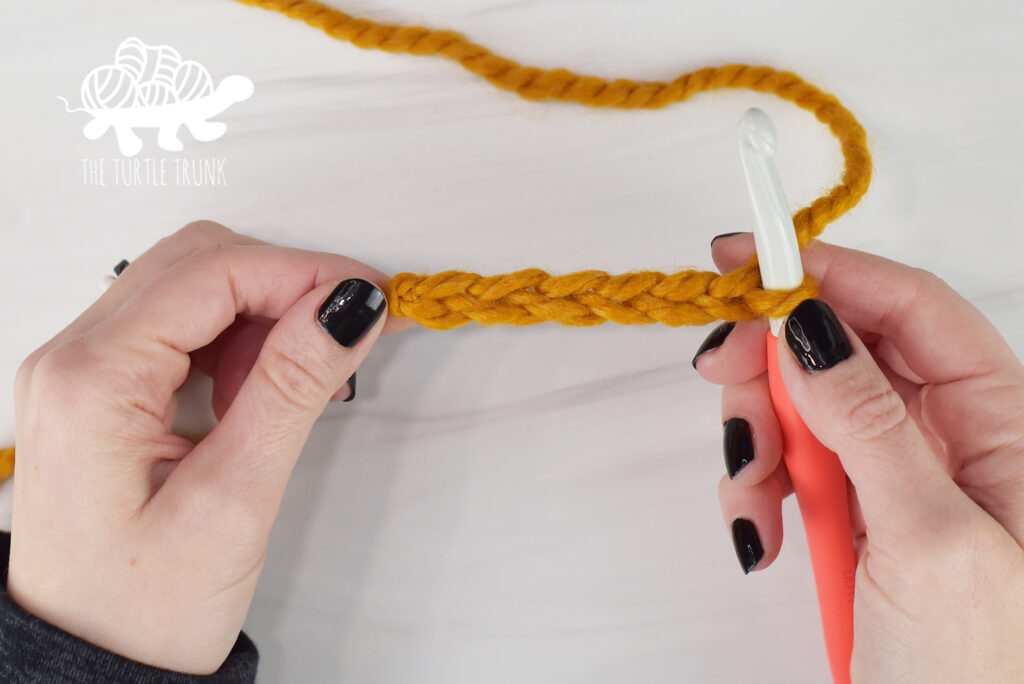
A foundation chain is a series of chain stitches that make up the base or foundation of a project. It is the most common way to start a crochet pattern, especially one worked in back and forth rows.
Foundation chains can also be called a base chain or starting chain.
The abbreviation used for a chain stitch is CH, Ch, or ch.
Start with a slip knot
To start our foundation chain, we need to attach our yarn to our hook with a slip knot.
To make a slip knot: lay your yarn flat. Take the tail end of the yarn and wrap it over itself to make a loop. Then take the working yarn, that’s the yarn coming from the skein, and pull it through the loop. You can then insert your hook into the loop and tighten the knot by pulling on the working yarn, and there we have a slip knot.
Be sure your knot isn’t too tight or it’s going to be difficult to make your stitches and get your hook through. You also don’t want it to be too loose either, or your stitches are going to be very loose, and your hook will easily slip out. So tighten the slip knot just enough that it hugs the hook but you can still easily slide it through.
How to Crochet a Foundation Chain
With a slip knot on your hook, we can make our first chain stitch.
Step 1: Yarn over. To yarn over you will put your working yarn over top your hook.
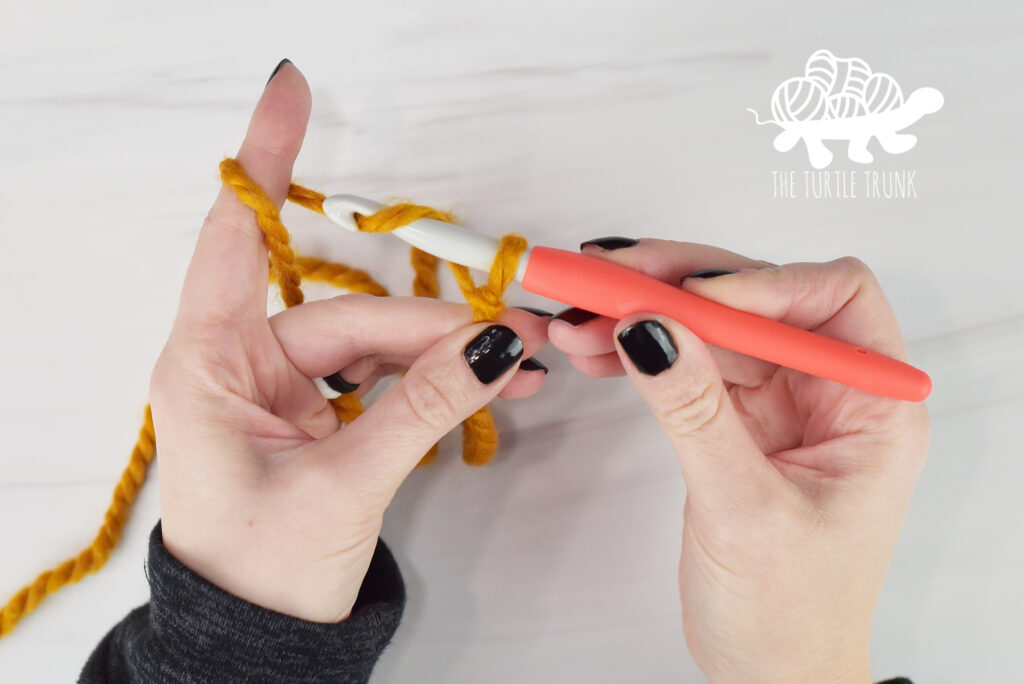
Step 2: Grab your yarn with the hook and pull it through the loop on your hook.

You’ve completed one chain stitch.
If you’re following a pattern, you will work as many chain stitches as your pattern says or if you’re just practicing you can make as many as you need until you’re comfortable with the stitch.
Be CONSISTENT
You want to make sure you are not working your chains too loose or too tight. You want the loops on your hook to be snug, but it be easy for your hook to slide through. If your stitches are too tight, then it’s going to be difficult to slide your hook through and work back into those stitches. If it’s too loose, then it will be hard to keep your stitches consistent and it will be hard to keep the yarn on your hook. When first learning to crochet, really practice keeping your stitches and tension consistent, as that will make for beautiful, finished pieces.
Easy Chain Bracelet – Free Crochet Pattern
Now let’s use what we learned to make a bracelet. This is a quick and easy project if you want to continue practicing the foundation chain but want to have a finished project to show for it.
We’re just going to make a foundation chain that’s the size of our wrist.
Start with a slip knot on your hook, then make a foundation chain long enough to wrap around your wrist. I’m going to chain 15 for mine but you can make any number of chains until you have a foundation chain long enough to wrap around your wrist.
Once your foundation chain is long enough, take some scissors and cut your working yarn, leaving about a 4” long tail for tying. Then take your hook and pull that loop out, and that’s going to secure that end into a knot, so it won’t unravel. You can then take the 2 ends and tie them together then cut off any excess yarn if you’d like.
And there we have a super easy crochet foundation chain bracelet!
You can make these chain bracelets with any size yarn and hook, and they’re a great way to practice your skills! Give them as gifts or use this pattern to teach others how to crochet!
That’s all for Lesson 3 for The Beginners Guide to Crochet! Thank you so much for following this tutorial and be sure to check back for the next lesson soon. Please share these posts with anyone you know who wants to learn how to crochet!
This page includes affiliate links. If you make a purchase from these links, I may make a small commission at no cost to you! Thank you for your support!
